Does A Cedar Fence Need To Be Stained? Honest Answer Here
A cedar fence does not strictly need to be stained to function. However, staining offers significant protection against UV rays, moisture, and insects. This can greatly extend the fence’s lifespan and maintain its attractive appearance, preventing graying and rot. For longevity and beauty, staining is highly recommended.
Understanding Cedar and Its Natural Qualities
Cedar wood is special. It is known for its natural beauty. It also has good traits for outdoor use.
Cedar trees have oils inside them. These oils act like a natural shield. They help fight off insects.
They also help resist decay. This is why cedar fences look good for a while even without help.
The color of fresh cedar is lovely. It’s often a warm reddish-brown. Sunlight, however, is tough on wood.
The sun’s ultraviolet (UV) rays break down the wood’s lignin. Lignin is like the glue that holds wood fibers together. When it breaks, the wood starts to change.
This change makes the wood look gray. It also makes it weaker. Moisture is another enemy.
Rain and dew soak into the wood. If it doesn’t dry out well, mold and mildew can grow. This leads to rot.
Insects like termites also find unprotected wood easy to eat. So, while cedar is tough, it’s not invincible.
Why Staining Your Cedar Fence Is A Good Idea
Staining acts like sunscreen for your fence. It adds a protective layer. This layer does a few important things.
First, it keeps the color. Good stains have pigments. These pigments block the sun’s UV rays.
This stops the wood from turning that dull gray color. It keeps your fence looking rich and warm.
Second, stains help with water. Many outdoor wood stains are water-repellent. They stop rain and dew from sinking deep into the wood.
This helps prevent the wood from swelling. It also stops it from shrinking too much. Keeping moisture out is key to avoiding rot and mold.
Mold can make your fence look bad. It can also weaken the wood over time.
Third, some stains offer insect protection. While cedar is naturally resistant, adding a stain with specific wood preservatives can boost this. It gives another layer of defense against termites and other wood-boring insects.
This is especially useful in areas where these pests are common. It adds peace of mind.
Finally, a stain can enhance the wood’s natural beauty. Stains come in many forms. Some are clear.
They just add protection but let the wood’s grain show through. Others have a tint. This tint can deepen the natural cedar color.
It can also make it look richer. It gives your fence a finished look that many people admire.
The Main Jobs of a Cedar Fence Stain
UV Protection: Stops sun damage and fading.
Water Repellency: Keeps moisture out, preventing rot.
Color Enhancement: Keeps wood looking vibrant.
Insect Defense: Adds a layer of protection against pests.
Appearance Boost: Gives a finished, attractive look.
My Own Cedar Fence Story: A Lesson Learned
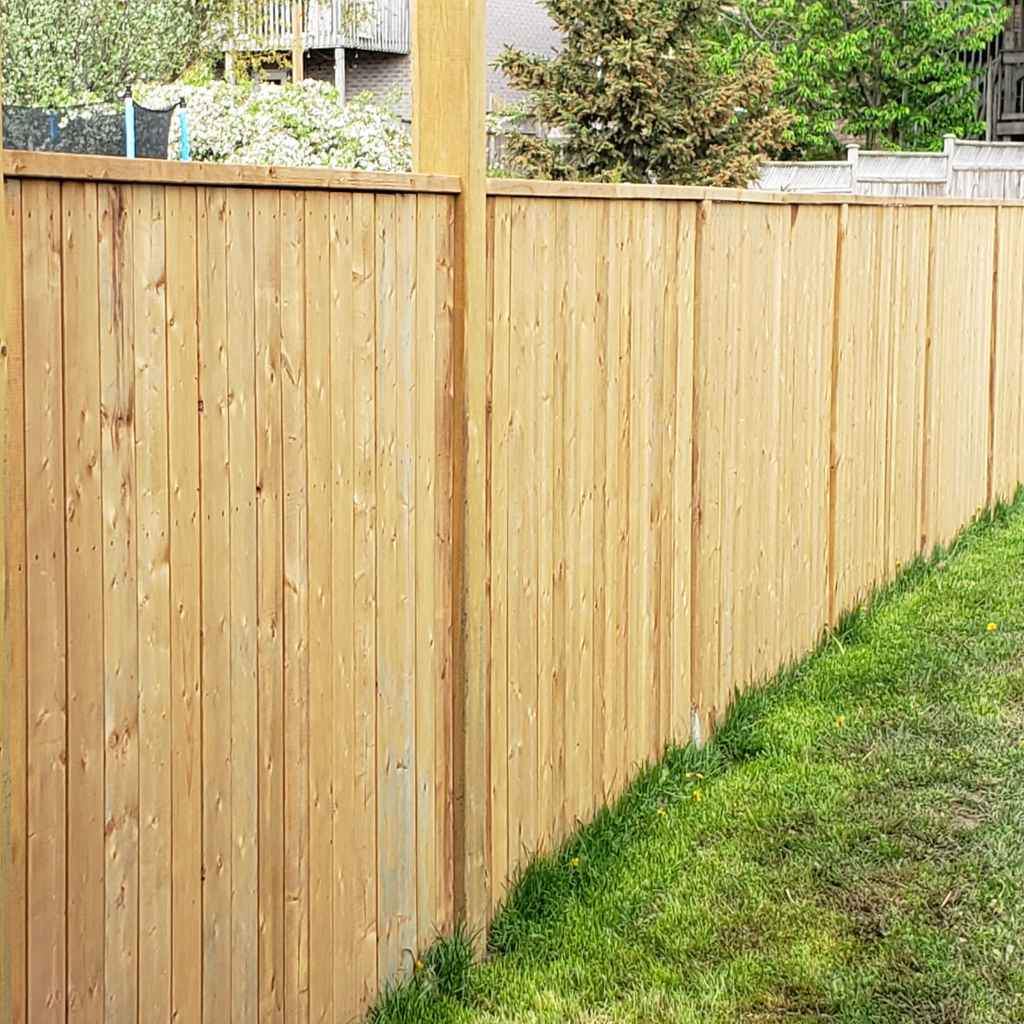
I remember building my first cedar fence. I was so proud of the warm, reddish-pink color. It looked amazing against my green lawn.
I had read that cedar was naturally tough. So, I thought, why waste money on stain? I wanted to save time and cash.
“It’s fine,” I told myself. “It’ll look good for years.”
The first year was great. The fence was beautiful. Neighbors even asked about it.
Then came the second year. I started to notice a change. The parts of the fence that got direct sun all day looked pale.
They had a dusty, grayish film. It wasn’t dramatic, but it was there. I ignored it, thinking it was just “weathering.”
By the third year, the difference was clear. The shaded parts still looked okay. But the sunny sides looked tired and dull.
Some spots near the ground, where puddles sometimes formed, started to look a bit dark. I was starting to get worried. That beautiful wood was starting to look old and neglected.
And I had only owned it for three years!
That’s when I called a fence guy. He took one look and said, “You should have stained this.” He explained how the sun had already started breaking down the surface. He said the moisture was making some areas soft.
He told me I’d likely need to replace boards sooner than I thought if I didn’t protect it. That was a wake-up call. I learned that “natural” doesn’t mean “indestructible.” It really pays off to give that cedar a little help.
When You Might Skip Staining (And What to Expect)
It’s true, you can leave a cedar fence unstained. If you do, your fence will still stand up. It will still keep people and pets in your yard.
But you have to accept some changes. The most obvious change is the color. Over time, the wood will turn a silvery gray.
This gray color is a result of UV damage. It’s not necessarily a sign of rot. Many people actually like this look.
They call it a “natural patina.” It gives the fence a rustic feel. If you like that natural, weathered look, then not staining might be perfect for you.
However, this graying is just the surface. Underneath that gray layer, the wood is still exposed. It’s still vulnerable to moisture.
If you live in a very wet climate, this is a bigger concern. Without protection, the wood can absorb a lot of water. This can lead to warping.
It can also lead to rot over time. Especially at the bottom of the fence posts or where the boards meet the ground.
Another thing to consider is the lifespan. An unstained cedar fence might last 15 to 20 years. This sounds like a lot.
But a well-maintained, stained fence can last 25 to 30 years or even longer. So, skipping the stain might mean replacing your fence sooner. It also means you won’t have that rich, warm color you might have loved initially.
Also, think about insects. While cedar is resistant, the oils can fade over many years. If you have a history of termite problems in your area, unstained cedar might be an easier target eventually.
For most people, the benefits of staining outweigh the desire for a purely “natural” look. It’s a trade-off you need to decide on.
Unstained Cedar: What to Watch For
- Color: Expect silver-gray weathering over 1-2 years.
- Moisture: Wood absorbs more water. Look for warping or softness.
- Lifespan: May be shorter than a stained fence.
- Pests: Natural oils fade; wood can become more attractive to insects over time.
- Maintenance: Still needs cleaning to remove mold or mildew.
Types of Stains for Your Cedar Fence
There are many types of stains out there. They all do a slightly different job. Knowing the difference helps you pick the best one.
The main types are often based on how much pigment they have.
1. Clear Sealers: These offer the least amount of UV protection. They mostly focus on water repellency.
They won’t change the color of the wood much. They let the natural look shine through. But they do need to be reapplied more often, usually every year.
They are good if you really want the natural graying effect to happen but still want water protection.
2. Toners: Toners add a little bit of color. They have a light tint.
This tint can enhance the cedar’s natural color. It adds some UV protection. But it’s not as much as darker stains.
They let a lot of the wood grain show. They look more natural than solid colors. You might reapply these every 1-2 years.
3. Semi-Transparent Stains: These are very popular for cedar fences. They have more pigment than toners.
This means better UV protection. They add a noticeable color but still allow some of the wood grain to show through. You can pick shades that complement your home or landscape.
These usually last 2-3 years before needing reapplication.
4. Semi-Solid Stains: These have even more pigment. They hide more of the wood grain.
They offer excellent UV protection. They look more like a thin paint. They can cover up minor imperfections in the wood.
These can last 3-4 years. But they can also start to peel if not applied correctly.
5. Solid Color Stains: These are like paint. They have the most pigment.
They completely cover the wood grain. They offer the best UV protection. They can make an old fence look like new.
They need to be reapplied less often, perhaps every 4-5 years. The downside is they hide the natural beauty of cedar. They can also chip or peel like paint if the surface isn’t prepped well.
When choosing, think about what you want your fence to look like. Do you love the natural wood look? Go for clear or toner.
Want a hint of color? Try semi-transparent. Need to cover up some wear?
Semi-solid or solid might be best. Also, look for stains made for decks and fences. They are designed to handle outdoor elements.
Quick Stain Type Guide
| Stain Type | Pigment Level | Wood Grain Visibility | UV Protection | Reapplication Frequency |
|---|---|---|---|---|
| Clear Sealer | None | Complete | Low | 1 Year |
| Toner | Low | High | Moderate | 1-2 Years |
| Semi-Transparent | Medium | Partial | Good | 2-3 Years |
| Semi-Solid | High | Low | Very Good | 3-4 Years |
| Solid Color | Highest | None | Excellent | 4-5 Years |
How to Apply Stain to Your Cedar Fence
Applying stain isn’t hard, but doing it right makes a big difference. The most important step comes before you stain. This is cleaning and prepping the wood.
Step 1: Clean the Fence. You need to remove dirt, mold, mildew, and any old, peeling stain. You can use a stiff brush and a bucket of water with a little detergent. For tougher spots, a cleaner made for decks and fences works well.
Some cleaners can even help lift grayed wood. Always follow the product instructions. Rinse the fence very thoroughly.
You don’t want any cleaner residue left behind.
Step 2: Let it Dry. This is crucial. The wood must be completely dry before staining. Moisture trapped under the stain can cause problems later.
This might take 24 to 48 hours, depending on the weather. Don’t rush this step.
Step 3: Sand (Optional but Recommended). Lightly sanding the fence can open up the wood pores. This helps the stain soak in better. It also makes the surface smoother.
Use a medium-grit sandpaper. Don’t go too rough. If you have an older fence with peeling stain, you’ll need to sand more to get to bare wood.
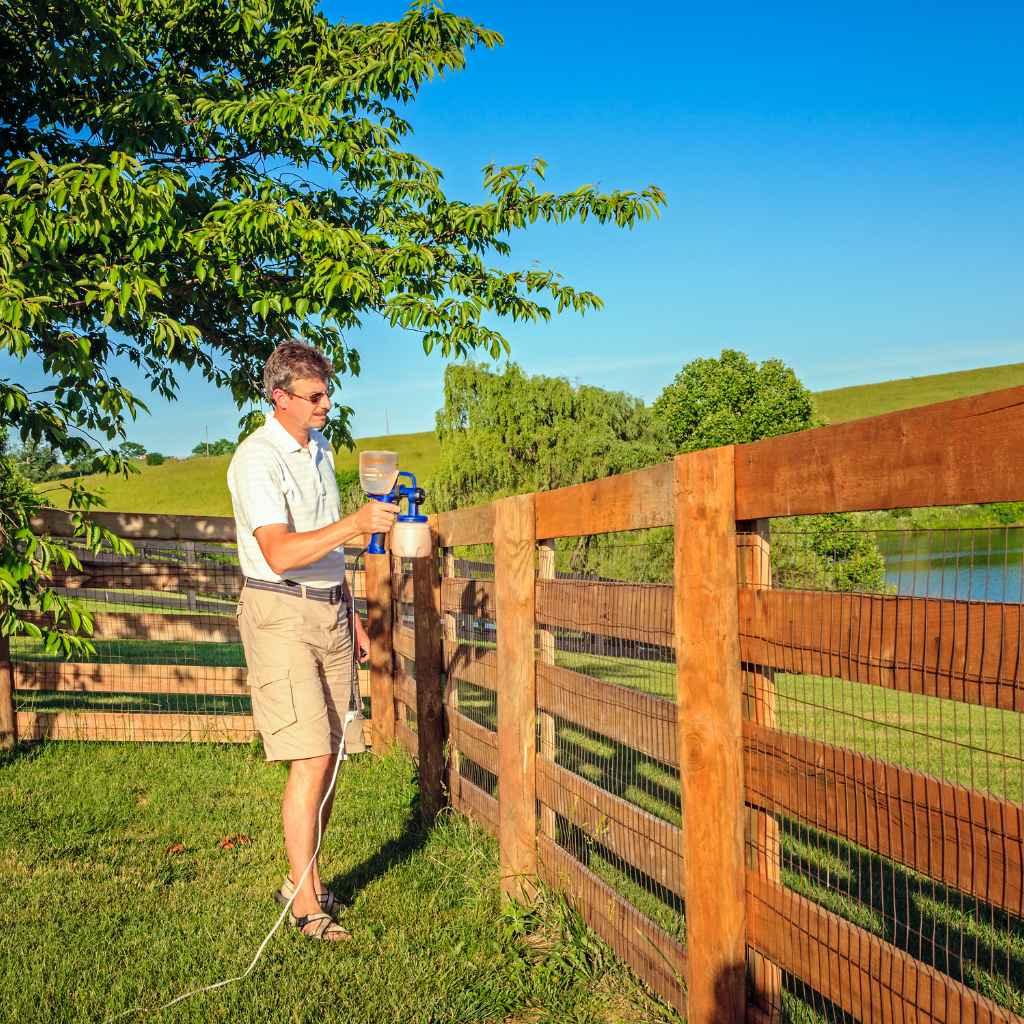
Step 4: Apply the Stain. You can use a brush, a roller, or a sprayer. For most DIYers, a brush or roller is best. A sprayer can be fast but requires careful masking to protect plants and your house.
Work in small sections. Apply the stain evenly. Don’t let it drip or pool.
Brush strokes should generally follow the direction of the wood grain.
Step 5: Wipe Off Excess. This is very important, especially with oil-based stains. After a few minutes (check the product label), use a clean cloth or rag to wipe off any stain that hasn’t soaked in. This prevents a sticky, uneven finish.
It ensures the stain penetrates the wood properly.
Step 6: Let it Dry and Cure. The fence will look dry to the touch fairly quickly. But the stain needs time to fully cure. This can take several days to a week.
During this time, try to avoid heavy contact or pressure on the fence. Follow the manufacturer’s instructions for drying and curing times.
Timing is Key: Try to stain when the weather is mild. Avoid direct, hot sun. The best temperatures are usually between 50°F and 80°F (10°C to 27°C).
Avoid staining if rain is expected within 24-48 hours. Check the weather forecast!
DIY Stain Application Checklist
- Clean: Remove all dirt and grime.
- Dry: Ensure wood is completely dry.
- Sand: Lightly sand for better adhesion.
- Apply: Use brush, roller, or sprayer. Work in sections.
- Wipe: Remove excess stain promptly.
- Dry: Allow full curing time.
- Weather: Pick mild, dry days.
When Is It Time to Re-Stain Your Cedar Fence?
Knowing when to re-stain is as important as knowing if you should stain. It’s not just about how long ago you last stained it. It’s about checking the fence itself.
Signs that it’s time for another coat are pretty clear once you know what to look for.
The Water Test: This is one of the easiest checks. Sprinkle some water on a few different parts of your fence. If the water beads up and stays on the surface, the sealant is still working.
If the water soaks into the wood quickly and darkens it, it’s time to re-stain. The water should roll off like it would off a waxed car.
Visible Fading or Graying: If you notice that the color is fading significantly. Or if you see that patchy gray look returning. Especially on the side that gets more sun.
This means the UV protection has worn off. The wood is starting to be damaged by the sun again.
Mold or Mildew Growth: Small patches of green or black mold are a sign. It means moisture is getting into the wood. And it’s not drying out fast enough.
A good cleaning might help temporarily. But if it keeps coming back, the stain layer isn’t protecting it well enough anymore.
Peeling or Chipping: If you used a solid color stain. You might start to see areas where the stain is peeling or chipping away. This means the stain is no longer bonded well to the wood.
You’ll need to scrape or sand off the loose bits before reapplying. This is less common with semi-transparent or toner stains.
General Wear and Tear: Look closely at the wood. Does it feel rougher than before? Are there any areas that seem softer or spongier?
This can be a sign of moisture damage or the start of rot. These are signs that the protection has failed.
How often you need to re-stain depends on many things. This includes the type of stain used, the quality of the application, and your local climate. Heavy rain, intense sun, and extreme temperature changes can all wear down the stain faster.
Generally, clear sealers need yearly reapplication. Toners and semi-transparent stains might last 1-3 years. Semi-solid and solid stains can last 3-5 years.
It’s always better to re-stain a bit early than too late. Catching it early means less prep work.
Signs It’s Time to Re-Stain:
- Water test: Water soaks in, doesn’t bead up.
- Color loss: Fading or noticeable graying.
- Mold/Mildew: Green or black spots appearing.
- Surface damage: Peeling, chipping, or roughness.
- Age: Past the recommended lifespan for your stain type.
Common Mistakes When Staining Cedar Fences
Even with the best intentions, people make mistakes. These errors can lead to a finish that doesn’t last. Or worse, it can damage the wood.
Being aware of these common pitfalls can help you avoid them.
Mistake 1: Not Cleaning Properly. This is a big one. Trying to stain over dirt, mildew, or old, flaking stain is asking for trouble. The new stain won’t stick well.
It will start peeling or looking blotchy very quickly. Always clean thoroughly and let the wood dry fully.
Mistake 2: Staining in Direct Sun or Extreme Heat. Stain can dry too fast in hot sun. This can lead to lap marks and an uneven finish. It also prevents the stain from soaking in properly.
It just sits on the surface. Work on cooler days or in the shade. If you can’t avoid the sun, do small sections at a time.
Mistake 3: Not Stirring the Stain Enough. Stains, especially those with pigments, have ingredients that can settle at the bottom of the can. If you don’t stir them well, you’ll get an uneven color. You might end up with areas that have too much pigment and others that have too little.
Stir often as you work.
Mistake 4: Applying Stain Too Thickly. More stain doesn’t always mean better protection. Applying it too thick can create a film on the surface. This film can trap moisture.
It can also become sticky. It may peel or chip later. Use thin, even coats.
Remember, you can always add another coat if needed.
Mistake 5: Not Wiping Off Excess Stain. This is critical for oil-based stains. If you leave excess stain on the surface, it won’t dry properly. It will become tacky and attract dirt.
It can create a shiny, uneven finish. Always follow the manufacturer’s recommendation for how long to leave the stain on before wiping.
Mistake 6: Skipping the Prep Work on Old Fences. If your fence already has old stain or paint on it, you can’t just go over it. You need to remove as much of the old finish as possible. This might involve sanding, stripping, or using a deck cleaner.
If you don’t, the new stain won’t adhere. It will likely fail prematurely.
Mistake 7: Using the Wrong Type of Stain. Not all stains are made for outdoor wood. Make sure you’re using a product specifically designed for fences or decks. Also, consider the wood type.
While most exterior stains work on cedar, some formulas are better than others.
Avoiding these simple mistakes will save you a lot of frustration. It will also help your stain job look great and last much longer.
Real-World Context: Cedar Fences in Different Climates
The weather where you live plays a huge role in how your cedar fence behaves. What works in one part of the country might need adjustment in another.
Humid Climates (e.g., Southeast U.S.): In places with lots of rain and high humidity, moisture is the biggest enemy. Mold and mildew love these conditions. Stains with good mildewcides are essential.
You’ll also want excellent water repellency. Regular cleaning might be needed more often to prevent mold from taking hold. Staining more frequently might be necessary.
Dry, Sunny Climates (e.g., Southwest U.S.): Intense sun and dry heat are the main concerns here. UV rays are very strong. Wood can dry out and become brittle.
Stains with high UV protection are a must. Look for stains that also add some moisture back into the wood or prevent it from drying out too fast. Reapplication might be needed as the sun bakes the finish.
Cold Climates with Freeze-Thaw Cycles (e.g., Northeast U.S.): In areas with harsh winters, the freeze-thaw cycle can be damaging. Water gets into the wood. It freezes and expands.
Then it thaws. This process can push wood fibers apart. It can lead to cracking and splitting.
A good water-repellent stain is key. It needs to be flexible enough to handle temperature changes without cracking itself.
Coastal Areas: Salt air near the coast can be harsh on wood. It can accelerate weathering and degradation. Stains that offer good protection against general environmental damage are important.
Regular cleaning to wash off salt residue is also a good idea.
In all climates, proper preparation is key. But the type of stain and how often you reapply it will change. For example, in the Pacific Northwest, rain is constant, so water repellency is paramount.
In Arizona, the sun’s intensity means UV protection is king. Always consider your local environment when choosing a stain and planning your maintenance schedule.
Climate Impact on Cedar Fences:
- Humid: Focus on mold/mildew prevention and water repellency.
- Dry/Sunny: Prioritize UV protection to prevent brittleness.
- Cold: Need flexible, water-repellent stains to combat freeze-thaw.
- Coastal: Protect against salt air and clean regularly.
What This Means for You: Normal vs. Concerning Signs
It’s helpful to know what’s just normal wear and tear for cedar. And what might be a sign of a bigger problem.
Normal Signs:
- Silver-Gray Color: As we’ve discussed, this is the most common change. It’s the wood reacting to UV light. If the wood still feels solid and water beads up, it’s usually just cosmetic.
- Slight Fading: A slight loss of the original rich color over time is normal, especially if it’s unstained or lightly stained.
- Minor Surface Texture Changes: The wood might feel a bit rougher over the years due to natural weathering.
Concerning Signs:
- Soft or Spongy Wood: If you can easily poke a hole in the wood with a screwdriver, or if it feels soft and spongy, this is rot. It means moisture has caused significant damage. This board likely needs to be replaced.
- Warping or Cupping: Wood that bends or twists significantly is usually due to uneven moisture. While some minor warping can happen naturally, severe warping can weaken the fence structure. It often indicates a moisture problem that wasn’t managed.
- Cracks and Splits: Small, superficial checks (cracks) can occur. But large cracks that go deep into the wood are concerning. They often mean the wood is drying out too much or is being damaged by moisture.
- Widespread Mold or Mildew: While small spots can be cleaned, if mold is covering large areas and seems hard to get rid of, it’s a sign of persistent moisture.
- Insect Damage: Look for small holes in the wood, sawdust-like material, or actual insects. This indicates a pest problem that needs professional attention.
If you see concerning signs, don’t ignore them. The sooner you address them, the less expensive the repairs will be. Sometimes, a simple reseal can prevent further damage.
Other times, a board might need replacement. For serious pest issues, consult a pest control expert.
Quick Tips for Cedar Fence Longevity
Want to make your cedar fence last and look great? Here are some simple things you can do:
- Keep it Clean: Regularly sweep or blow off leaves and debris. These trap moisture and can encourage mold.
- Trim Overhanging Branches: Tree branches can shade the fence too much. This keeps it damp. They can also drop sap or leaves.
- Ensure Good Drainage: Make sure water doesn’t pool around the base of your fence posts. Good drainage helps prevent rot.
- Wash Annually: Give your fence a gentle wash once a year with mild soap and water. This removes surface dirt and grime.
- Check for Damage: Periodically walk along your fence line. Look for any loose boards, popped nails, or signs of rot. Address small issues before they become big ones.
- Reapply Stain as Needed: Don’t wait until the fence looks terrible. Follow the signs we talked about earlier for re-staining.
Frequent Questions About Staining Cedar Fences
Do I need to stain a new cedar fence right away?
It’s often recommended to let a new cedar fence weather for a few weeks to a month before staining. This allows the wood pores to open up. It also lets any mill glaze (a shiny surface from milling) wear off.
This helps the stain penetrate better. However, some installers prefer to stain immediately. Check the stain manufacturer’s recommendations.
If you’re unsure, letting it weather slightly is usually a safe bet.
Can I paint my cedar fence instead of staining it?
Yes, you can paint a cedar fence. However, painting hides the natural beauty of the cedar grain completely. It also creates a film that can trap moisture.
If paint starts to peel or chip, it’s much harder to fix than with stain. Staining is generally preferred to maintain the wood’s natural look and allow it to breathe.
How do I get rid of green mold on my cedar fence?
For light mold, a solution of 1 cup of laundry detergent and 1 gallon of water can work. Use a soft-bristled brush to scrub the affected areas. Rinse thoroughly with a garden hose.
For tougher mold or mildew, use a commercial deck cleaner specifically designed for wood. Always test on an inconspicuous area first and follow product directions carefully.
What is the best time of year to stain a cedar fence?
The best time is usually spring or fall. Aim for mild temperatures, ideally between 50°F (10°C) and 80°F (27°C). Avoid staining in direct, hot sun, or when rain is expected within 24-48 hours.
The wood needs time to dry properly after washing and before the stain cures.
Will staining my cedar fence make it last forever?
Staining significantly extends the life and beauty of a cedar fence. It provides crucial protection against the elements. However, no wood product is truly eternal.
Regular maintenance, including cleaning and re-staining, is still necessary. It helps your fence achieve its maximum potential lifespan, which can be 25-30 years or more.
Can I stain my fence if it’s already gray and weathered?
Yes, absolutely! In fact, it’s a great time to stain a gray, weathered fence. You’ll want to clean it thoroughly first.
A good deck cleaner can often help lift some of that graying. Sanding might also be needed to remove loose fibers. Staining will then restore color and protect the wood from further damage.
You’ll be amazed at the difference.
Conclusion: Protecting Your Investment
So, does a cedar fence need staining? No, not to stand up. But to truly last and keep its charm, staining is a wise choice.
It’s an investment in protection. It shields your fence from sun and rain. It keeps it looking beautiful for years.
By understanding the options and taking care of your fence, you ensure it’s a source of pride, not worry.