How to Install Wood Fence Posts: Depth, Concrete vs Gravel
Wood fence posts need to be buried at least one-third of their total length underground — a minimum of 24 inches for most residential fences. Skipping this rule or skipping proper drainage is the single most common reason fence posts rot or lean within 5 years. This guide covers post depth by fence height, how to choose between concrete and gravel, how to keep posts plumb, and how to protect pressure-treated posts from rot at the ground line.
Quick Answer
Bury fence posts at least 1/3 of their total length underground — minimum 24 inches. Use 3/4-inch crushed gravel (not concrete) for most wood posts. Gate posts and corner posts should be set in concrete for extra rigidity. Check local frost line depth before digging.
Why Proper Fence Post Installation Matters
The longevity and stability of your entire fence system depends on how well the posts are installed. A properly set post handles wind load, seasonal ground movement, and moisture without shifting — a poorly set one fails within a few years. Common results of improper installation include:
- Leaning posts: Compromise the fence’s structural integrity and are costly to reset.
- Rotting posts: Poor drainage causes moisture buildup at the ground line — the most vulnerable zone on any post.
- Frost heave: In cold climates, posts not buried below the frost line shift upward each freeze-thaw cycle.
- Fence failure: Strong winds or heavy snow load can snap or uproot a post that wasn’t set deep enough.
How Deep Should Wood Fence Posts Be Set?
The standard rule is to bury at least one-third of the total post length underground. For a 6-foot fence using 8-foot posts, that means 2 feet minimum underground — but 2.5 to 3 feet is better in areas with frost or soft soil. Gate posts and corner posts bear the highest load and should go deeper: half the post length is the professional standard for those.
| Fence Height | Post Length | Minimum Depth | Recommended Depth |
|---|---|---|---|
| 4 ft | 6 ft | 2 ft | 2 ft |
| 6 ft | 8 ft | 2 ft | 2.5–3 ft |
| 8 ft | 10–12 ft | 2.5 ft | 3–3.5 ft |
| Gate/corner post | Any | Half post length | Half post length + 6″ |
Frost line rule: In climates where the ground freezes, posts must reach at least 6 inches below the local frost line. Frost lines range from 0 inches (southern US) to 48+ inches (Minnesota, Wisconsin, northern New England). Contact your local building department for the required depth in your area.
Hole diameter: Dig the hole 3 times the post width — a 12-inch diameter for a standard 4×4 post. This gives room to pack material tightly around the post without bridging.
Concrete vs. Gravel for Setting Wood Fence Posts
This is the most contested decision in fence post installation — and the answer depends on the post’s role. Gravel is generally the better choice for standard wood fence posts because it allows water to drain away from the post. Concrete, despite its reputation for strength, can trap moisture against the wood and degrade it faster over time. Use concrete for gate posts, corner posts, and any post carrying extra load.
| Factor | Compacted Gravel | Concrete |
|---|---|---|
| Drainage | ✅ Excellent — water drains through | ❌ Poor — traps moisture at post base |
| Rot risk | Low | Higher — moisture collects at wood/concrete seam |
| Rigidity | Good for standard posts | ✅ Best — required for gate posts |
| Post replacement | ✅ Easy — just dig out gravel | Difficult — must break out concrete |
| Best for | Standard wood fence posts | Gate posts, corner posts, high-wind areas |
Use 3/4-inch clean crushed gravel (also called drainage rock) — not pea gravel, which compacts poorly. Pack it in 4–6 inch layers, tamping each layer firmly before adding the next. For the concrete option, dome the top surface slightly so rainwater sheds away from the post base.
★ Recommended Tool
Manual Post Hole Digger / Clamshell Digger
A clamshell post hole digger is the most reliable tool for digging clean, straight-sided holes for fence posts. Essential for any DIY fence installation.
Check price on Amazon →As an Amazon Associate we earn from qualifying purchases.
Essential Tools and Materials
Tools You’ll Need:
- Post Hole Digger or Power Auger: A clamshell digger works for 1–3 posts; a power auger attachment saves hours on larger projects.
- Shovel: For moving dirt and tamping.
- Measuring Tape: For accurate post spacing and depth.
- 4-foot Level: Crucial for ensuring posts are plumb — use on two adjacent sides, not opposite sides.
- String Line and Stakes: Marks the fence line and aligns each post as you set it.
- Post Level (optional but helpful): Hands-free bubble level that clamps to the post so you can check plumb while filling the hole.
- Wheelbarrow: For mixing concrete and moving gravel.
- Tamping bar or 4×4 scrap: For compacting gravel layers.
- Safety glasses and work gloves.
Materials You’ll Need:
- Fence Posts: Pressure-treated lumber rated for ground contact (UC4B). For a 6-foot fence, use 8-foot posts. Cedar and redwood provide natural rot resistance above ground but still need to be rated for ground contact at the buried section.
- 3/4-inch Crushed Gravel: 4–6 inches at the base of every hole for drainage.
- Concrete Mix (for gate/corner posts): Fast-setting bags like Quikrete or Sakrete.
- String Line: Mason’s line works best — it’s taut and doesn’t sag.
- Wood Scraps for Bracing: 2×4 or furring strips to temporarily brace each post while it sets.
Step-by-Step: The Best Way to Install Wood Fence Posts
Step 1: Plan Your Fence Line
Before you dig, map it out. Drive stakes at each end post location and pull a taut string line (mason’s line) between them. This is your alignment reference for every post. Measure post spacing along the string — standard is 6 to 8 feet on center, depending on the type of fence panels you’re using. Mark each post location with a stake, and check local building codes for required setbacks from property lines.
Step 2: Mark and Dig Your Post Holes
Dig holes at each marked location. Target depth: 1/3 of total post length, minimum 24 inches, below frost line if applicable. Keep hole sides as straight as possible — avoid bell-shaped holes that collapse under load. Diameter should be 3× the post width (12 inches for a 4×4 post). Remove loose soil from the bottom — the base needs to be firm.
Step 3: Add Drainage to the Bottom of the Hole
Add 4–6 inches of 3/4-inch crushed gravel to the bottom of each hole. Compact it firmly with a tamping bar or the end of a 4×4 scrap. This drainage layer is essential — even ground-contact treated posts rot faster when they sit in standing water at the base. The gravel lets water drain rather than pool.
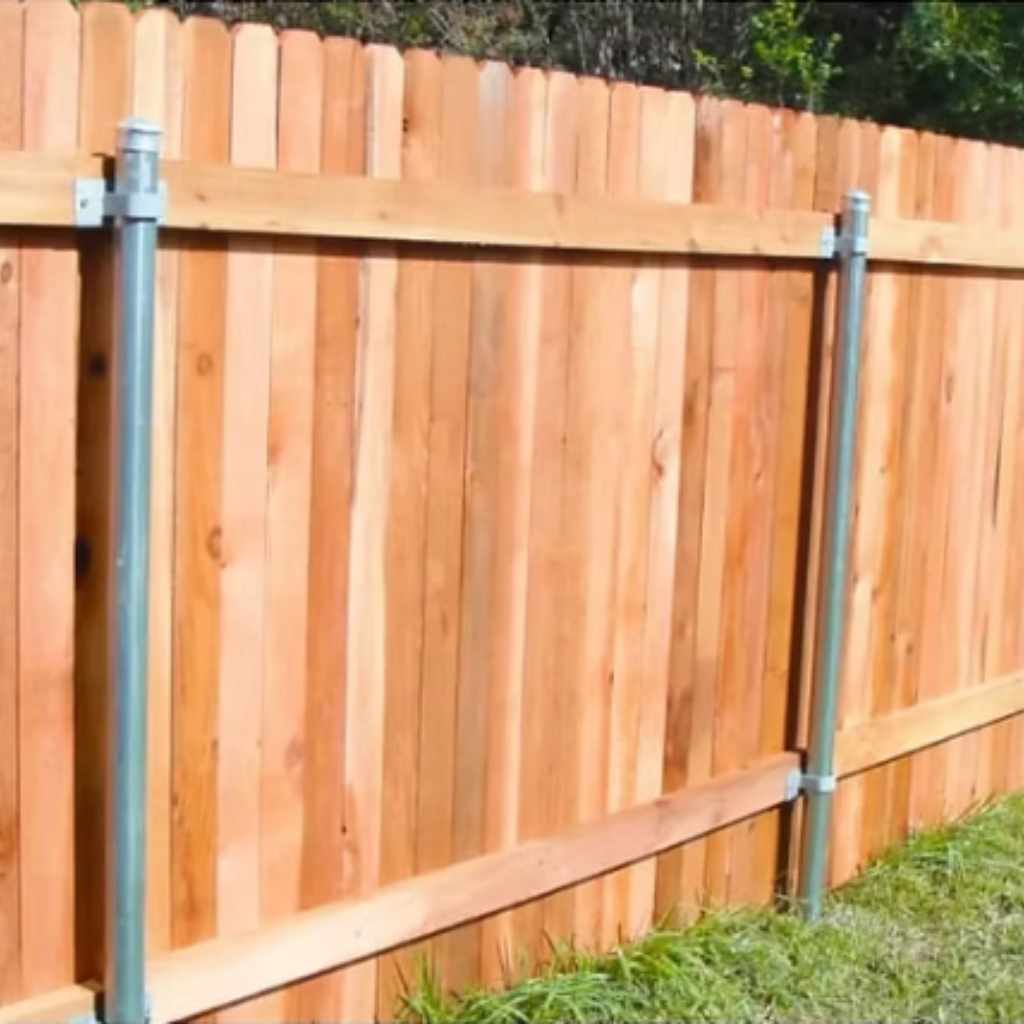
Step 4: Position the First Post and Brace It
Set the post onto the gravel base. Check plumb with a 4-foot level on two adjacent sides of the post — not opposite sides, which can give a false reading. Once plumb, brace it: nail a diagonal 2×4 or furring strip to the post a few feet up, and stake the other end firmly into the ground. Two braces at roughly 90° to each other give the best stability. Align the post face with your string line — the post should just kiss the string without pushing it.
Step 5: Fill the Hole — Choose Your Method
For standard wood fence posts, use compacted gravel. For gate posts and corner posts, use concrete. See the comparison table above for full details on when to use each.
Option A: Setting Posts with Compacted Gravel (Recommended for Wood Posts)
- Add gravel in 4–6 inch layers. Pour in the first layer of crushed gravel around the post base.
- Tamp each layer firmly. Use a tamping bar or the handle end of a post hole digger to compact the gravel before adding the next layer. Eliminate air pockets.
- Check plumb after every layer. The post will try to shift as you tamp. Re-check the level on both adjacent sides each time.
- Fill to 2 inches below grade. Top off with native soil and slope it slightly away from the post for surface drainage.
Option B: Setting Posts in Concrete (Gate and Corner Posts)
- Mix concrete to thick oatmeal consistency. Follow the bag instructions — too wet weakens the set, too dry leaves air voids.
- Pour around the post, filling to 2–3 inches from grade. Periodically probe with a shovel handle to release air pockets.
- Slope the top surface. Dome the wet concrete slightly away from the post — this sheds water rather than channeling it toward the wood.
- Check plumb immediately. Concrete sets fast; recheck and adjust within the first few minutes. Leave braces in place for 24–48 hours.
- Allow full cure before attaching panels. Fast-setting concrete reaches working strength in 4 hours but needs 24–48 hours before load is applied. See our full guide on how long concrete needs to cure before drilling or loading.
Step 6: Install Remaining Posts
Repeat Steps 4 and 5 for every post. Use your string line as the alignment reference for every post — bring each one just to the face of the line without pushing it off. Keep spacing consistent with your original layout marks. Check plumb before and after filling each hole.
Step 7: Let It Set Before Attaching Panels
If you used gravel, let the fill settle overnight before attaching panels. If you used concrete, wait 24–48 hours. Do not put lateral load on a fresh post — attaching rails or panels before the setting material has cured is a common mistake that pulls posts out of plumb.
How to Keep Fence Posts Perfectly Plumb
A post that looks straight to the eye is often a few degrees off plumb. Use these techniques to eliminate error:
- Check two adjacent sides: Place the level on the front face, then the side face. Never check opposite sides — a curved post can appear plumb on opposite faces while being off on adjacent ones.
- Use a post level: A post level clamps around the post and shows both planes simultaneously. It frees up both hands for tamping or pouring, so you can monitor plumb continuously.
- String line alignment: Pull mason’s line tight between your two end posts. Each intermediate post should just touch the string without deflecting it. This controls horizontal alignment in addition to plumb.
- Brace before filling: Never try to hold a post plumb by hand while filling the hole. Brace it first, check plumb, then fill. A diagonal 2×4 staked 4–6 feet from the post base holds it securely.
- Recheck while tamping: Every layer of gravel or concrete you add creates force against the post. Check plumb after each layer — adjust the braces if needed before the material sets.
How to Install Pressure-Treated Wood Fence Posts
Pressure-treated fence posts are lumber infused under pressure with copper-based preservatives that resist rot and insect damage underground. Since 2004, ACQ (Alkaline Copper Quaternary) and CA (Copper Azole) have replaced the older CCA formula. For fence posts set in ground, you need lumber rated UC4B — the specific ground-contact designation for posts and poles.
- Always buy UC4B rated posts for any part that will be in soil. UC3B (above-ground) is not sufficient for buried sections even if the wood is “pressure treated.”
- Seal all cut ends. When you cut a PT post to length, the interior wood is exposed and untreated. Apply copper naphthenate wood preservative (available at most hardware stores) to every cut end before installation.
- Use hot-dipped galvanized or stainless steel hardware with ACQ and CA treated lumber. The copper in modern PT wood is corrosive to standard zinc-plated fasteners and will cause premature failure. Check out our guide to 4×4 pressure-treated posts for more on hardware compatibility.
- Don’t skip the gravel base. Even UC4B posts rot faster when they sit in standing water. The wood preservative slows rot — it does not prevent it when conditions are wet enough.
Considerations for Different Soil Types
Soil type directly affects which setting method to use and how deep to dig:
- Sandy or loose soil: Poor load support. Use concrete for all posts, not just gate posts. Add 2–3 extra inches of depth beyond the standard rule.
- Clay soil: Holds water — drainage is critical. Use compacted gravel rather than concrete, which will trap water in a clay environment. Dig below the frost line even in moderate climates.
- Rocky soil: May limit hole depth. Use a wider hole and pack gravel tightly. Consider surface-mount post anchors driven into bedrock if depth is impossible.
- Soft or waterlogged soil: Consider metal post anchors or a concrete collar that extends 2–3 inches above grade to lift the post base out of persistent wet zones.
Tips for Extra Durability and Longevity
- Orient the post’s worst-cut face down. The bottom cut end is most vulnerable — point it downward into the gravel where it has the best drainage, not against a soil wall.
- Never set post ends in concrete below grade. Concrete against wood below grade traps water in the wood-concrete seam. Use gravel below grade and pour concrete only above the frost line if needed for rigidity.
- Apply post base flashing or a post sleeve at the ground line — this is the highest-rot-risk zone. Products like Fence Armor protect the 6 inches above and below grade.
- Caulk the post-to-concrete seam if using concrete. The seam between the post and the concrete collar is where water migrates. Polyurethane caulk applied annually seals it.
- Keep soil from contacting the post above grade. Mulch and landscaping piled against fence posts accelerates rot. Keep a 2-inch clearance between the post and any mulch, soil, or plant material above grade.
★ Recommended Product
Quikrete Fast-Setting Concrete Mix
Fast-setting concrete for gate posts and corner posts. Sets in 20–40 minutes; can pour directly in the hole without mixing. No wheelbarrow needed for small batches.
- Sets in 20–40 minutes at 70°F
- Pour dry into hole, then add water on top
- Achieves 4,000 PSI at 28 days
As an Amazon Associate we earn from qualifying purchases.
Frequently Asked Questions
How deep should I dig my fence post holes?
Bury at least one-third of the total post length underground — a minimum of 24 inches for most residential fences. For a 6-foot fence using 8-foot posts, dig 2 to 2.5 feet deep. In climates with frost, posts must reach at least 6 inches below the local frost line. Gate posts and corner posts should go deeper: half the post length is the standard for high-load positions.
Should I put gravel in the bottom of my fence post holes?
Yes — always. Add 4 to 6 inches of 3/4-inch crushed gravel at the bottom of every hole before setting the post. This drainage layer prevents water from pooling under the post base, which is the primary cause of rot at the ground line. Compact the gravel before placing the post. Do not use pea gravel — it doesn’t compact enough to support the post.
Concrete or gravel for setting fence posts — which is better?
For standard wood fence posts, compacted gravel is generally better. Gravel provides excellent drainage, reduces rot risk, and makes future post replacement easy. Concrete is stronger and is the right choice for gate posts, corner posts, and high-wind areas — but it traps moisture at the wood-concrete seam over time. If you use concrete, dome the top surface to shed water and leave the bottom 12 inches of the hole as compacted gravel only.
How do I make sure my fence posts are straight?
Use a carpenter’s level on two adjacent sides of the post — not opposite sides. Check plumb before filling and after every 4–6 inches of fill material. Brace the post with diagonal 2×4s staked into the ground before filling so your hands are free. Pull a string line between your two end posts and use it as an alignment reference for every post in between — the post face should just touch the string without deflecting it.
How long does concrete need to cure before I can attach fence panels?
Fast-setting concrete (such as Quikrete Fast-Setting) is strong enough to support light work in 4 hours at 70°F, but wait 24 to 48 hours before attaching fence panels and applying full lateral load. Standard concrete mix needs 3 to 7 days to reach working strength. Cold weather (below 50°F) significantly slows curing — add 24 hours for every 10°F below 70°F.
How wide should my fence post holes be?
Dig holes three times the width of the post — a 12-inch diameter for a standard 4×4 post. This gives enough room to pack gravel or concrete firmly around all four sides without bridging. A hole that’s too narrow causes the fill material to bridge across the post without making full contact with the hole walls, which weakens the set.
Can I reuse old fence posts?
Only if the post is in genuinely excellent condition. Inspect it for soft spots, discoloration, insect damage, and structural cracks — especially at the old ground line where rot typically starts. Press a screwdriver firmly into the wood: if it sinks in more than 1/4 inch, the post is compromised. When in doubt, replace it. A failed reused post means resetting the entire section of fence.
Conclusion
Getting fence posts right means following the 1/3 depth rule, using compacted 3/4-inch gravel for drainage on standard posts, and checking plumb on two adjacent sides before the fill sets. Use concrete only for gate and corner posts. Seal cut ends on pressure-treated lumber and keep soil and mulch away from the post above grade. Do these things and a properly installed wood fence post will last 20 or more years without resetting.