How Do You Finish Cedar Wood
Figuring out how do you finish cedar wood can seem a little tricky at first. Cedar is a beautiful wood, but it can be a bit different from other types of wood. Some folks worry about making it look blotchy or not protecting it well enough.
Don’t let that worry you! We’re going to walk through it step-by-step, and you’ll see it’s much simpler than you might think. Get ready to learn easy ways to make your cedar projects look amazing and last a long time.
Understanding Cedar Wood Properties
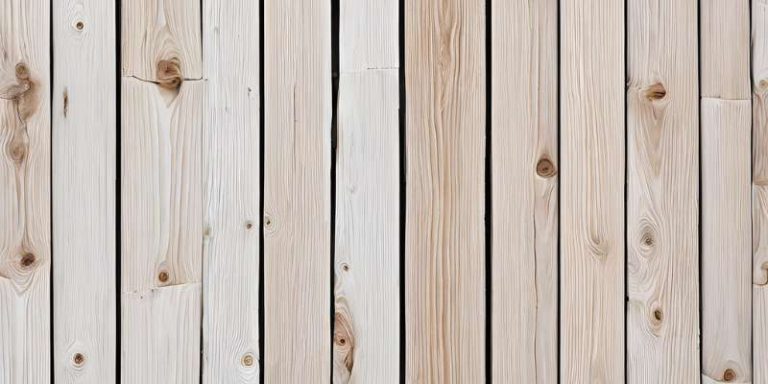
Cedar wood is known for its natural beauty and wonderful scent. It’s also naturally resistant to rot and insects, which makes it a popular choice for outdoor projects like decks, fences, and outdoor furniture. However, this natural character also means it can behave a bit differently when you try to finish it compared to softer woods.
Cedar has natural oils and resins that can sometimes interfere with finishes, leading to uneven absorption or poor adhesion if not prepared properly. This is a key reason why knowing how do you finish cedar wood correctly is so important for achieving a great result. Ignoring these properties can lead to a finish that flakes off or looks splotchy, which is the opposite of what we want.
The Natural Oils and Resins
Cedar contains natural compounds called extractives, which include oils and resins. These extractives are what give cedar its distinctive aroma and contribute to its natural resistance to decay and insect damage. While these are beneficial properties for the wood’s longevity, they can pose a challenge when applying finishes.
These oils can prevent stains and sealers from penetrating the wood evenly. They can also act as a barrier, making it harder for some finishes, like paint or certain varnishes, to bond properly to the wood surface. Understanding the role of these extractives is a foundational step in figuring out how do you finish cedar wood effectively.
Without this awareness, you might encounter problems like a finish that won’t dry, peels, or looks patchy.
Over time, these oils can also “bleed” through certain finishes, causing discoloration. This is particularly noticeable with lighter-colored paints or stains. It’s not that the wood is dirty; it’s just these natural compounds coming to the surface.
For instance, if you try to paint a cedar fence with a bright white paint without proper preparation, you might notice yellowish or reddish streaks appearing through the paint after a while. This is the cedar’s natural color and oils showing through. A good finishing approach will account for this, either by sealing in these oils or choosing a finish that is less affected by them.
Density and Grain Structure
Cedar wood, depending on the species, can range in density. However, most cedar used in woodworking is relatively soft and has a distinct grain pattern. This grain can be quite open, meaning there are larger pores.
When you’re trying to achieve a smooth finish, this open grain can be a challenge. It can absorb finish unevenly, leading to a rough texture if not addressed. Also, the way the wood grows, its grain structure, can influence how a finish looks.
Straight, even grain will take a finish more uniformly than wood with knots or swirling patterns. Figuring out how do you finish cedar wood also means thinking about how the wood’s natural structure will interact with the products you choose.
The open grain means that a thin finish might not fill all the tiny spaces, leaving the surface feeling slightly textured. If you’re aiming for a glass-smooth finish, you might need to use a filler or a thicker coating that can level out these pores. For exterior applications, the grain structure also affects how well water can penetrate or run off.
A good finish will help to seal the grain and protect the wood from moisture, which is crucial for preventing rot and warping, even with cedar’s natural resistance.
Why Beginners Find Cedar Challenging
New woodworkers often find cedar a bit puzzling because it doesn’t always behave like the “standard” lumber they might have worked with before. The very things that make cedar great, like its natural oils and unique grain, can cause unexpected problems for beginners. They might apply a stain, and instead of a nice, even color, they get streaks or dark spots.
Or they might try to paint it, only to find the paint doesn’t stick well or starts to discolor later. This can be discouraging when you’re just starting out. The core question how do you finish cedar wood is common because the usual woodworking advice for other woods might not work perfectly here.
It requires a slightly different approach, one that respects the wood’s natural properties rather than fighting them. This guide is here to simplify that process and give you the confidence to tackle your cedar projects.
Preparing Cedar Wood for Finishing
Before you even think about applying a stain, oil, or paint, the most important step in knowing how do you finish cedar wood is proper preparation. This isn’t just about making it look good; it’s about making sure your finish actually sticks and protects the wood for a long time. Skipping preparation is like trying to build a house on sand; it’s not going to last.
We need to clean the surface, smooth it out, and sometimes even block those natural oils to get the best results. Think of this stage as laying a solid foundation for everything that follows. A little extra time spent here will save you a lot of headaches and make your final project look professionally done.
Cleaning the Surface
The first step is to make sure the cedar wood is clean. This might sound obvious, but it’s more than just wiping away dust. For new wood, you might just need to lightly sand it to remove any mill glaze—that smooth, compressed surface left by the sawmill.
If the wood has been outside, it might have dirt, mildew, or sap on it. For these situations, a good wash is in order. You can use a mild detergent and water, or a specific wood cleaner.
A gentle scrub brush will help lift any grime. After washing, it’s crucial to rinse the wood thoroughly with clean water and let it dry completely. Trying to finish damp wood is a recipe for disaster, as moisture can affect how the finish absorbs and dries, and can lead to mold growth under the finish.
For wood that has been exposed to the elements for a while and has turned that silvery gray color, you might need a wood brightener or a deck cleaner. These products are designed to remove the oxidized surface layer and restore some of the wood’s natural color. They often contain oxalic acid, which is effective at bleaching out stains and tannins from the wood.
Always follow the manufacturer’s instructions for these products, as they can be quite strong. After cleaning and rinsing, allow the wood to dry for at least 24-48 hours, especially in humid conditions. You can check for dryness by looking for any dark spots where moisture might still be trapped.
A dry surface is essential for good adhesion of any finish.
Sanding Techniques
Sanding is a critical part of preparing cedar. The goal is to create a smooth, uniform surface for your chosen finish. Start with a coarser grit sandpaper, typically 80 or 100 grit, to remove any imperfections, mill marks, or rough spots.
Always sand in the direction of the wood grain. Sanding against the grain will create scratches that are very difficult to remove later and will be visible under most finishes. After using the coarser grit, move to a finer grit, such as 150 grit, and then an even finer grit, like 220 grit.
This progression of grits removes the scratches left by the previous sandpaper, leading to a smoother and smoother surface. The final sanding should feel smooth to the touch.
For cedar, you don’t always need to sand to an extremely fine grit like you might for some hardwoods if you are staining or oiling. Very fine sanding can sometimes close up the pores too much, which can hinder stain penetration. A grit of 150 or 180 is often sufficient for staining applications.
However, if you plan to paint, you might want to go up to 220 grit to ensure a very smooth base. After sanding, it’s vital to remove all dust. A vacuum with a brush attachment is good for this, followed by a tack cloth.
A tack cloth is a sticky cloth that picks up fine dust particles that vacuuming might miss. This step is crucial because any dust left on the surface will get trapped in the finish, creating a rough or bumpy texture.
Dealing with Knots and Resins
Knots in cedar can be beautiful, but they are often a source of resin. These resin pockets can ooze out over time, even after the wood is finished, creating sticky spots or discoloration. To prevent this, especially if you plan to paint or use a clear finish, you need to seal the knots.
A good quality shellac-based or oil-based primer designed for stain blocking is effective. Apply it only to the knots. Let it dry completely, and then you can apply your main finish.
Sometimes, especially with very active knots, you might need to apply a second coat of stain blocker.
If you notice a lot of surface resin, you can try to carefully scrape it away with a putty knife. Some people also recommend using a solvent like mineral spirits to wipe down areas with heavy resin, but be sure to test this in an inconspicuous area first, as it can sometimes spread the resin or affect the wood. After cleaning off excess resin, sanding will help smooth the area.
If you’re using an oil finish, the natural oils in the cedar might blend better, but it’s still a good idea to address any obvious resin bleed. For paints and clear coats, knot sealing is almost always a necessary step to ensure a clean and lasting finish.
Choosing the Right Finish for Cedar
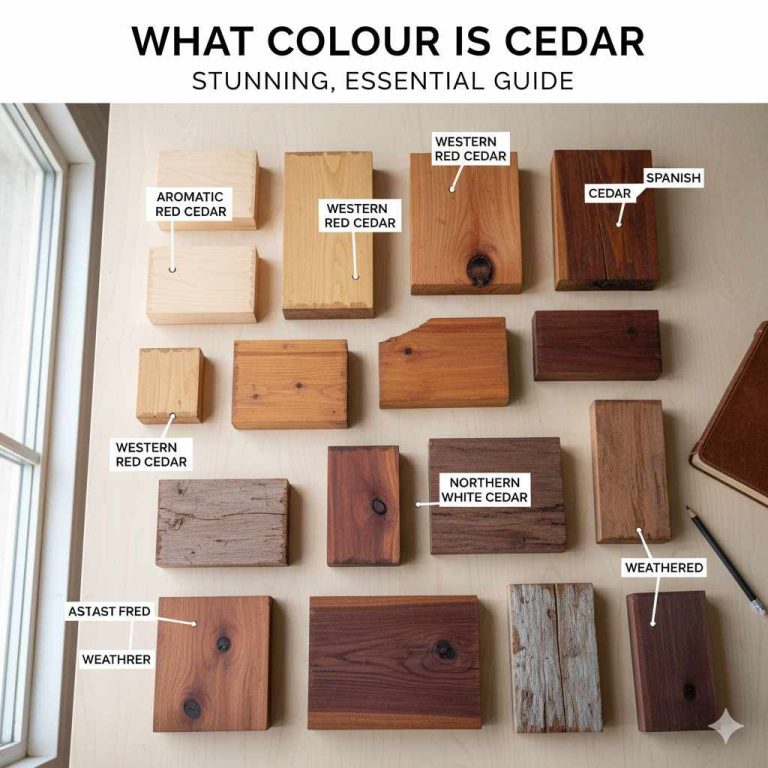
Deciding on the best way how do you finish cedar wood depends heavily on the look you want and where the wood will be used. Cedar is beautiful on its own, and many people prefer to enhance its natural color rather than cover it up. Others want a specific color or protection that only paint can provide.
The key is to select a finish that works with cedar’s natural oils and grain structure, providing protection without compromising its natural beauty or leading to premature failure. Each type of finish has its own set of pros and cons, and understanding them will help you make the best choice for your project.
Oil-Based Finishes
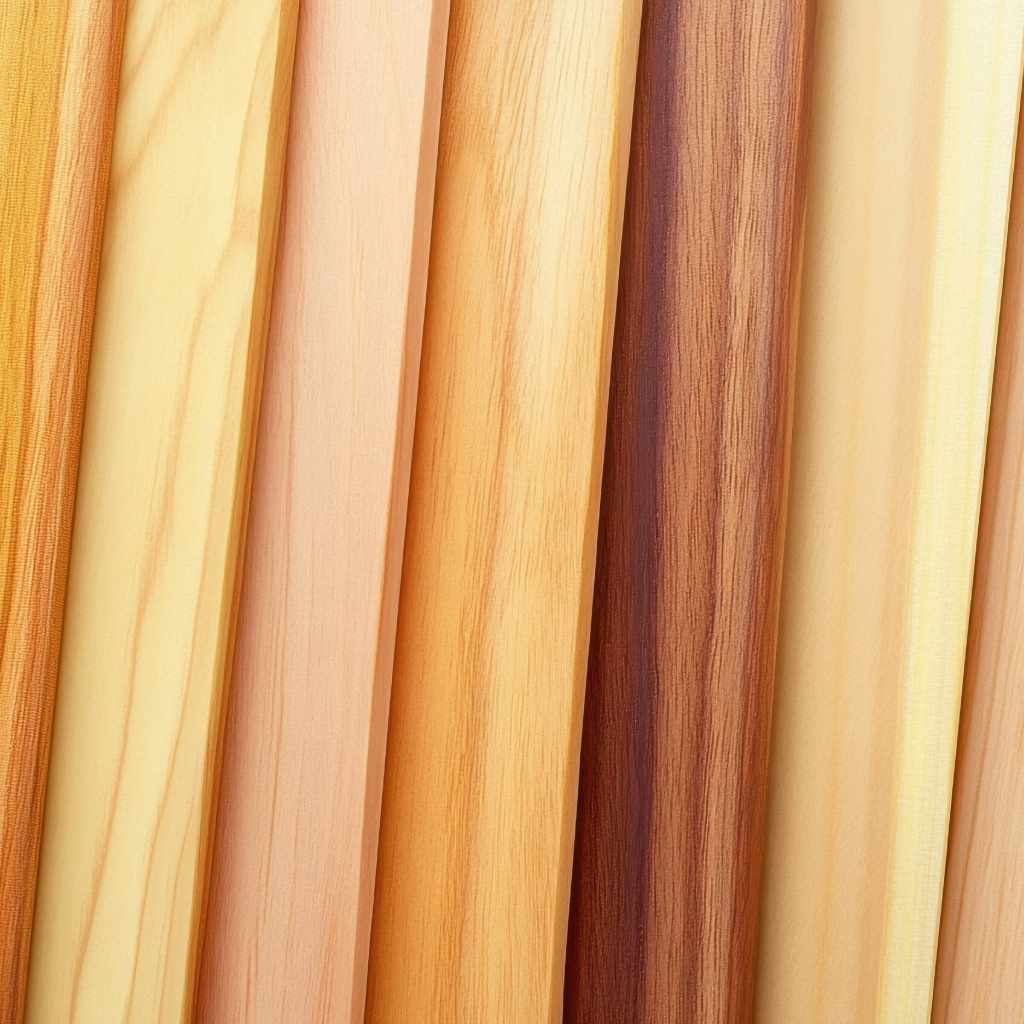
Oil-based finishes, such as tung oil, linseed oil, or specialized deck oils, are excellent choices for cedar, especially for outdoor applications. These finishes penetrate the wood, enhancing its natural color and grain patterns. They provide a warm, natural look and offer good protection against moisture and UV rays.
Because they penetrate, they tend to be more forgiving with cedar’s natural oils and don’t usually peel or flake like film-forming finishes can. They also tend to look more natural and allow the wood to “breathe.”
When using oil finishes, you often apply multiple thin coats, wiping off any excess after about 15-30 minutes. This prevents a sticky or gummy surface. The look you get is a rich, satiny sheen that feels very natural to the touch.
For decks and outdoor furniture, regular reapplication, perhaps once a year or every other year, is usually needed to maintain the best protection and appearance. These finishes can also help to slightly deepen the color of cedar, bringing out those lovely reddish-brown tones. They are relatively easy to reapply, often just requiring a cleaning and then another coat.
Water-Based Finishes
Water-based finishes, like acrylics or water-based polyurethanes, can also be used on cedar, but they require careful preparation. Because they form a film on the surface, they can sometimes have adhesion issues with the natural oils in cedar if the surface isn’t properly prepped and primed. If you’re using a water-based exterior stain or sealant, look for products specifically formulated for wood and consider using a primer designed for oily woods.
This will help block those extractives and ensure the finish bonds well.
The advantage of water-based finishes is that they are generally lower in VOCs (volatile organic compounds), dry faster, and are easier to clean up with soap and water. They also tend to dry to a clearer finish with less yellowing than oil-based products over time, which can be desirable if you want to maintain the cedar’s lighter color. For interior projects like cedar paneling or trim, a water-based polyurethane can offer durable protection while maintaining a more natural, less ambered look.
It’s essential to test any water-based finish on a scrap piece of cedar first to ensure compatibility and desired appearance.
Paints and Stains
When it comes to paint, good preparation is paramount for cedar. As mentioned, knot sealing is critical. You’ll also likely need a high-quality exterior primer that is specifically designed for blocking stains and resins.
This primer will create a uniform surface for the paint to adhere to and prevent the cedar’s natural colors from bleeding through. Once primed, most exterior-grade paints will provide good protection and color options. Darker colors can help hide any minor imperfections or potential future bleed-through better than very light colors.
Stains offer a middle ground, allowing some of the wood grain to show through while adding color. For cedar, you can use both oil-based and water-based stains. Oil-based stains tend to penetrate better and provide a richer look.
Water-based stains can offer more color options and quicker drying times. If you’re using a semi-transparent stain, it will highlight the grain, and the natural oils in the cedar might slightly affect the final color compared to how it looks on pine or fir. A solid stain is essentially a very thin paint and will cover the grain more, similar to a paint finish, but often with a more matte appearance.
Always choose stains and paints designed for exterior use if your project is exposed to the elements.
Film-Forming vs. Penetrating Finishes
It’s helpful to understand the difference between film-forming and penetrating finishes. Film-forming finishes, like varnishes, lacquers, and most paints, create a protective layer on the surface of the wood. This layer can be very durable and provide excellent protection against moisture and abrasion.
However, because they sit on top, they are more prone to cracking, peeling, or flaking over time, especially with the expansion and contraction of wood due to weather changes. If a film-forming finish fails on cedar, water can get underneath it, leading to rot. They also tend to obscure the natural feel of the wood.
Penetrating finishes, like oils and some sealers, soak into the wood fibers. They don’t form a hard surface film. Instead, they saturate the wood, hardening within the pores to provide protection from within.
This makes them more flexible and less likely to crack or peel. They allow the wood to retain more of its natural feel and appearance. For cedar, especially for outdoor use, penetrating finishes are often preferred because they work well with the wood’s natural oils and can prevent water saturation without creating a surface that can be compromised.
They also tend to age more gracefully, often fading rather than peeling.
Applying the Finish to Cedar
Once you’ve chosen your finish and thoroughly prepared the wood, it’s time for application. This stage is where the magic happens, turning your raw cedar into a beautiful and protected piece. Knowing how do you finish cedar wood correctly involves following the steps for your chosen product, paying attention to details like applying thin coats and allowing proper drying times.
Rushing this part can undo all your hard preparation work. We’ll go through the general process, but always remember to read and follow the specific instructions on the product you are using, as they can vary.
Application Methods
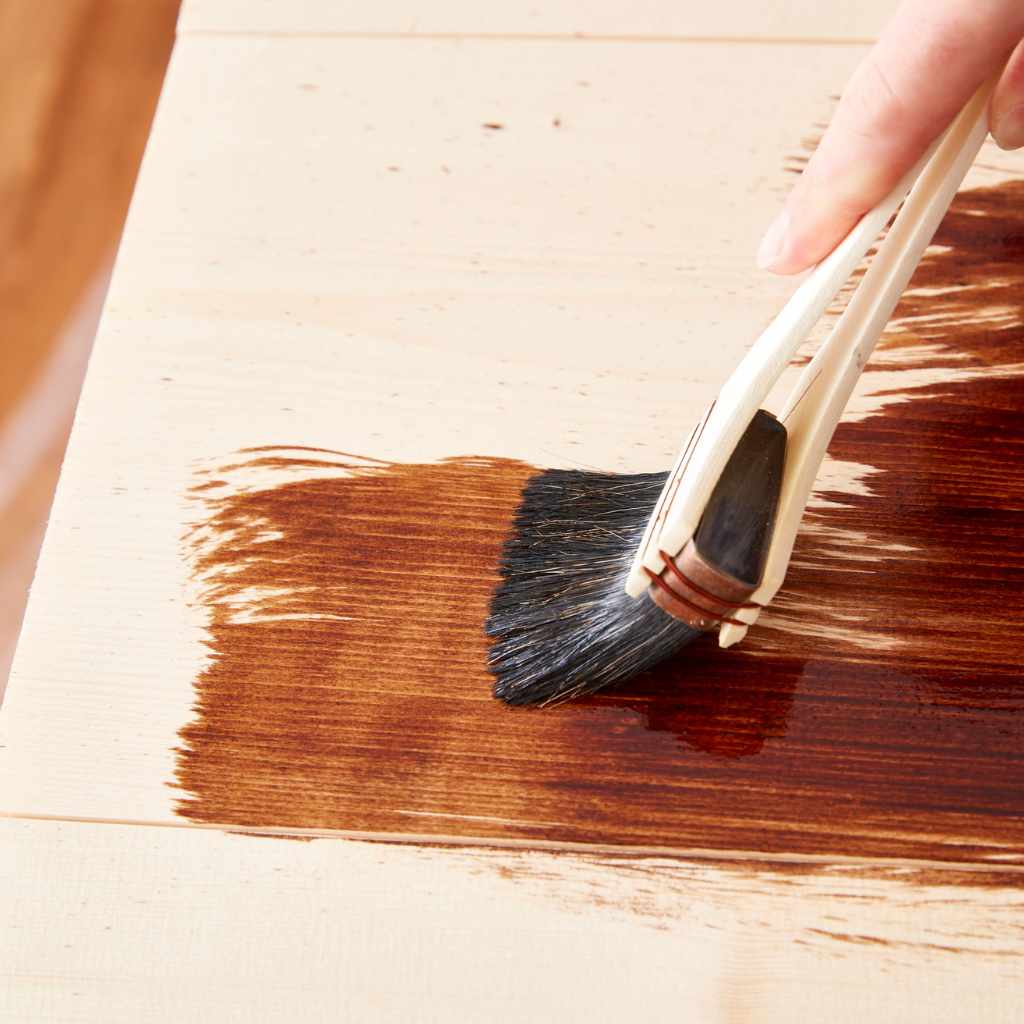
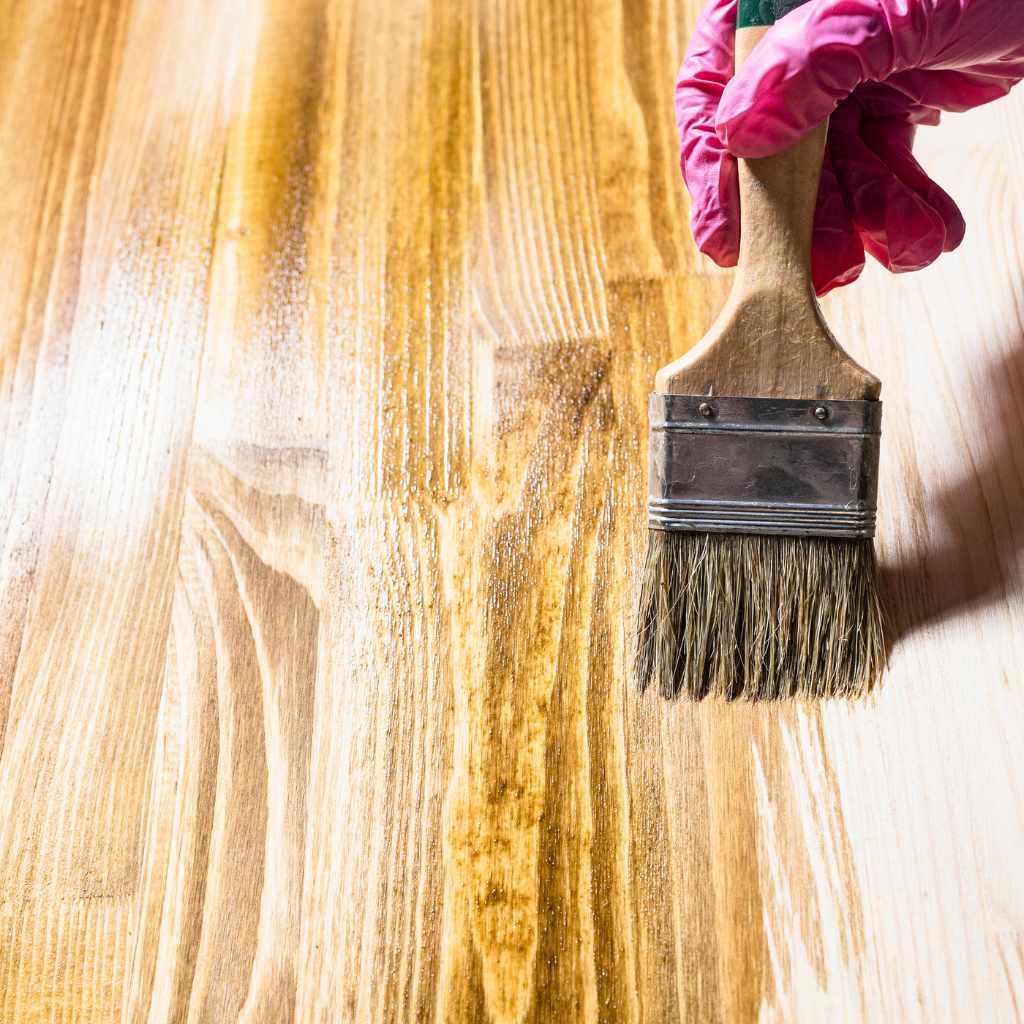
The method you use to apply your finish will depend on the type of finish and the size of your project. For oil-based finishes and some sealers, using a clean, lint-free cloth or a foam brush is a good way to apply them. You’ll want to apply the finish liberally and work it into the wood grain.
For larger areas like decks or fences, a roller or a sprayer might be more efficient, but always back-brush (use a brush to smooth out the applied finish) to ensure even coverage and to remove any excess product that the roller or sprayer might have left.
For stains and paints, brushes are common for smaller projects and detailed work, while rollers and sprayers are faster for larger surfaces. If you’re spraying, be sure to work in a well-ventilated area and wear appropriate protective gear, such as a respirator. For any finish, applying thin, even coats is generally better than one thick coat.
This allows for better drying and adhesion. With film-forming finishes, multiple thin coats build up a stronger, more durable layer. With penetrating finishes, multiple thin coats ensure good saturation without leaving excess product on the surface.
Working with Different Finishes
If you’re using an oil-based stain or finish, apply it in manageable sections. Work the product into the wood with the grain using a brush or rag. Allow it to penetrate for the time recommended by the manufacturer (usually 10-20 minutes).
Then, using a clean, dry rag, wipe off all the excess product. If you leave excess on the surface, it can become sticky and difficult to remove later, forming an uneven sheen. Repeat this process for the entire project.
For water-based finishes, like a water-based polyurethane or exterior sealant, apply thin, even coats using a good quality synthetic brush or a roller. Work with the grain. If you’re using a water-based stain, apply it similarly to an oil stain, but be aware that water-based stains can sometimes dry very quickly, so you may need to work in smaller areas and have rags ready to wipe off the excess promptly to avoid lap marks.
If you’re painting, ensure your primer is completely dry. Apply the paint in thin, even coats, again working with the grain. Two coats of paint are usually recommended for good coverage and durability.
Drying and Curing Times
Understanding drying and curing times is crucial for a successful finish. Drying time is the period until the surface is no longer wet or tacky to the touch. Curing time is the longer period it takes for the finish to harden completely and reach its maximum durability.
Many finishes will feel dry to the touch within a few hours, but they may not be fully cured for days or even weeks. It’s important to respect these times. For example, if you apply a second coat too soon, you might trap solvents or moisture, leading to a weak or uneven finish.
For oil-based products, especially on cedar, curing can take longer due to the wood’s natural oils. Be patient. For exterior projects, avoid applying finishes when rain is expected or when temperatures are too cold or too hot, as this can affect drying and curing.
Always check the product label for specific drying and curing times, as they vary widely. For example, some exterior stains might be ready for a second coat in 4-6 hours, while others might require 24 hours. Full cure for some oil finishes can take 30 days or more, during which the surface is still developing its full hardness and resistance.
Protecting Cedar Outdoors
When finishing cedar for outdoor use, the primary goal is protection from the elements: sun, rain, and temperature fluctuations. UV rays from the sun can break down the wood’s lignin, causing it to turn gray and eventually become brittle. Moisture is the enemy, leading to rot, mold, and swelling or shrinking.
Therefore, choosing a finish that offers good UV protection and water repellency is key. Oil-based finishes and specialized exterior wood sealers are often excellent for this. They penetrate the wood and repel water, while many also contain UV inhibitors.
Regular maintenance is also part of protecting outdoor cedar. Even the best finishes will degrade over time with constant exposure. Plan to inspect your finished cedar projects annually and reapply a coat of finish as needed.
This might mean cleaning the surface and then applying a fresh coat of oil or sealer. For painted cedar, you might need to touch up any areas where the paint has chipped or worn. A proactive approach to maintenance will significantly extend the life and beauty of your cedar projects.
For instance, a cedar deck might need a good cleaning and a fresh coat of sealer every 1-3 years, depending on the climate and the product used.
Maintenance and Longevity of Finished Cedar
Once you’ve put in the effort to properly finish your cedar wood, you’ll want to ensure that the finish lasts as long as possible. Knowing how do you finish cedar wood is only half the battle; the other half is understanding how to maintain that finish. Regular care will not only keep your project looking great but also extend its lifespan, protecting your investment of time and money.
This involves periodic cleaning and reapplication of finishes, tailored to the type of finish you used and the environment your cedar is in.
Regular Cleaning
A simple, regular cleaning routine is the most effective way to maintain the finish on cedar. For outdoor projects like decks or fences, sweep away leaves and debris regularly. This prevents moisture from being trapped against the wood, which can lead to mold and mildew growth.
Wash the surface with mild soap and water at least once a year, or more often if it gets particularly dirty. Use a soft brush or a cloth for cleaning and rinse thoroughly with clean water. Avoid using high-pressure washers, as they can strip away finishes and damage the wood fibers, especially softer cedar.
For indoor cedar projects, dust regularly with a soft cloth. If a spill occurs, wipe it up immediately. If a more thorough cleaning is needed, use a damp cloth with a mild, pH-neutral cleaner, and then dry the surface immediately.
For oiled finishes, sometimes a specific wood soap or cleaner designed for oiled wood can help maintain the protective layer without stripping it away. The goal of cleaning is to remove contaminants that can break down the finish or the wood itself, ensuring the protective layer remains intact and effective.
Reapplication of Finishes
Even the most durable finishes will eventually wear down, especially when exposed to harsh elements. Reapplying the finish is a key part of ensuring long-term protection. For oil-based finishes, this typically involves cleaning the surface and then applying another thin coat.
You might not need to do a full sanding if the previous coat is still mostly intact. If the finish has started to show significant wear, a light scuff sanding might be necessary before reapplying. Follow the product’s instructions for reapplication; often, it’s as simple as cleaning and then applying a new coat.
For water-based finishes and paints, reapplication might involve more preparation. If the film is peeling or cracking, you’ll likely need to scrape away the loose material, sand the area smooth, and then prime and repaint or reapply the finish. If the finish is still sound but just looks a bit dull, a light cleaning might be enough, or you could apply a maintenance coat of a clear water-based sealant.
The frequency of reapplication depends on the product, the exposure, and the desired appearance. For exterior decks, a recoat might be needed every 1-3 years, while interior furniture might go much longer without needing attention.
Dealing with Fading and Wear
Cedar wood, particularly its natural color, can fade over time when exposed to sunlight, even with a finish. This is a natural process. Oil finishes will often develop a more muted, silvery-gray patina, which many people find attractive.
If you want to restore the original color, especially with oil finishes, you can often use a wood brightener or a cleaner that contains oxalic acid. After brightening and allowing the wood to dry thoroughly, you can reapply your chosen finish to restore the color and protection. This process can effectively bring back the vibrancy of the cedar.
Wear and tear can also occur in high-traffic areas. For example, the surface of a cedar deck might become worn smooth from foot traffic, or a cedar tabletop might show water rings or scratches. If the damage is superficial, a light sanding and reapplication of the finish in that specific area might be enough.
For deeper scratches or gouges, repair might involve filling the damaged area with a wood filler that matches the wood tone, sanding it smooth once dry, and then refinishing. The goal is to address wear and tear promptly before it compromises the wood’s integrity or allows moisture to penetrate.
Frequently Asked Questions
Question: What is the best finish for cedar outdoor furniture
Answer: For outdoor cedar furniture, oil-based finishes like tung oil, linseed oil, or specialized exterior wood oils are often recommended. They penetrate the wood, enhancing its natural beauty and providing good protection against moisture and UV rays without peeling. If you prefer a more opaque look, exterior-grade paint with a stain-blocking primer is also a great option.
Question: Can I use polyurethane on cedar
Answer: Yes, you can use polyurethane on cedar, but preparation is key. For oil-based polyurethane, ensure the wood is clean and dry. For water-based polyurethane, it’s highly advisable to use a stain-blocking primer first to prevent the cedar’s natural oils from interfering with adhesion and causing yellowing.
Always test on a scrap piece first.
Question: How do I prevent cedar from turning gray
Answer: To prevent cedar from turning gray, you need to protect it from UV radiation. This is achieved by applying a finish that contains UV inhibitors, such as certain exterior stains, sealers, or paints. Regular reapplication of these finishes is necessary because the protective agents will eventually wear away with exposure to the sun.
Question: Do I need to seal cedar knots before painting
Answer: Absolutely. Cedar knots contain resins that can bleed through paint, causing discoloration and sticky spots over time. Sealing the knots with a shellac-based or oil-based stain-blocking primer specifically designed for this purpose is a crucial step before painting cedar to ensure a clean and lasting finish.
Question: How often should I reapply finish to a cedar deck
Answer: The frequency of reapplying finish to a cedar deck depends on the climate, the type of finish used, and the amount of foot traffic. Generally, for oil-based finishes or sealers, you might need to reapply a coat every 1-3 years. For painted decks, touch-ups might be needed sooner if you see chipping or wear.
Final Thoughts
Deciding how do you finish cedar wood is about respecting its natural qualities. By preparing the wood properly, you create a surface that can accept and hold a finish well. Choosing the right product, whether it’s an oil that deepens its tone, a stain that adds color while showing the grain, or paint that offers opaque protection, makes a big difference.
Application requires patience, with thin coats and adequate drying times being more important than speed. For outdoor projects, remember that ongoing maintenance, like regular cleaning and periodic reapplication of finishes, is the best way to keep your cedar looking good and protected for many years. Embrace the process, and you’ll be rewarded with beautiful, long-lasting cedar projects.