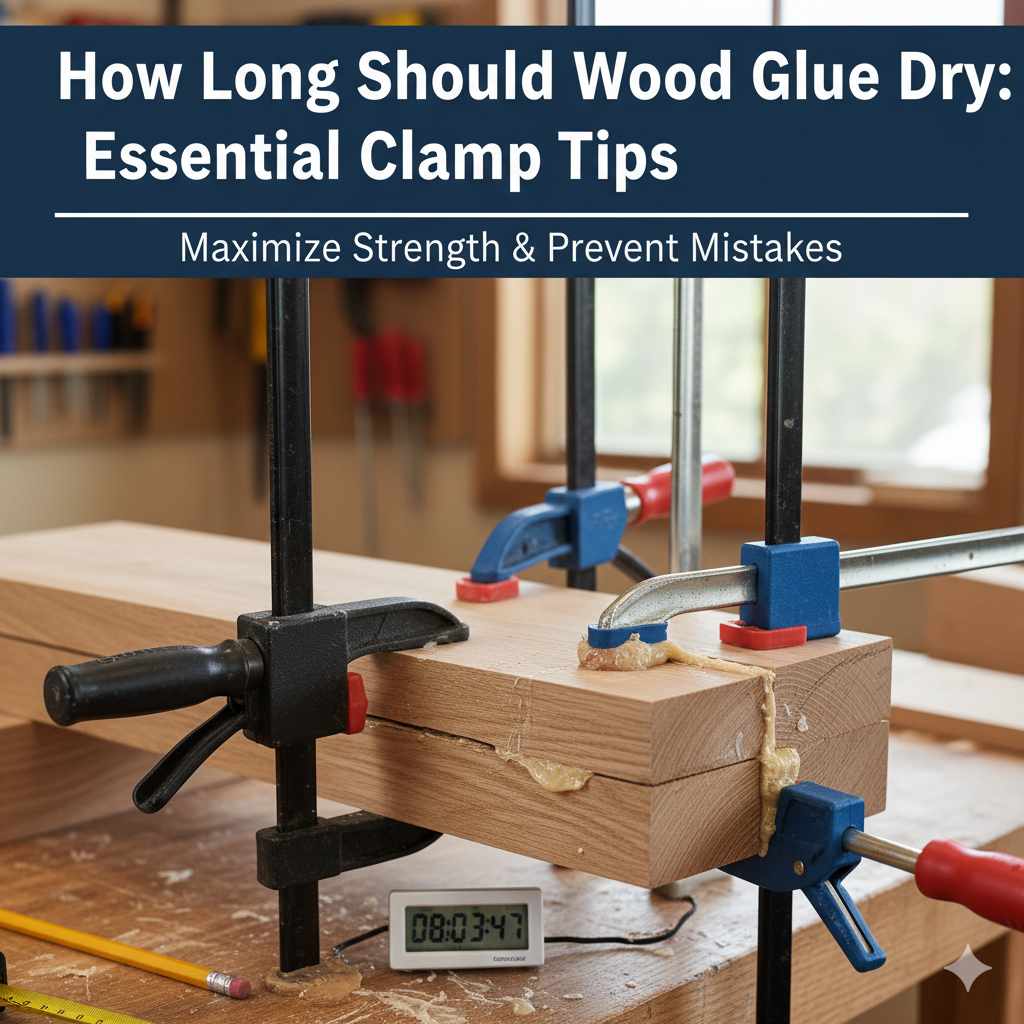
How Long Should Wood Glue Dry: Essential Clamp Tips
Have you ever found yourself eagerly waiting to see the results of your woodworking project, only to wonder when it’s safe to remove the clamps? The anticipation can be overwhelming.
You might be asking yourself, “How long should wood glue dry before I dare to remove those clamps? ” Getting this timing right is crucial to ensure that your hard work doesn’t go to waste. Imagine the relief of knowing exactly when your joint is strong enough to hold without the support of clamps.
We’ll uncover the factors that influence drying times and share expert tips to help you achieve flawless results every time. Stay with us, and you’ll never have to guess again!
Drying Time Factors
Wood glue types matter for drying time. PVA glue is common. It usually dries in 30 minutes. Polyurethane glue is stronger. It may need up to 2 hours to dry. Epoxy glue takes the longest. It can take up to 24 hours. Always check the glue label for exact drying times.
Temperature affects glue drying. Warm weather helps glue dry faster. Cold weather slows it down. Humidity also matters. High humidity can make glue take longer to dry. Low humidity can speed it up. Airflow is important too. Good airflow helps glue dry quicker.
Different woods affect drying time. Hardwoods like oak dry slowly. They absorb less glue. Softwoods like pine dry faster. They soak up more glue. Porous woods let glue dry quickly. Less porous woods take longer. Always consider your wood type when gluing.
Optimal Drying Duration
Wood glueneeds time to dry. The standard drying time is often 30 minutes to an hour. But leaving it longer is better. This ensures a strong bond. If you rush, it might break. Waiting longer is smart.
Most wood glues need 24 hoursto fully cure. Thicker joints may need more time. Always check the glue’s instructions. Some types need less time, others more. Temperature and humidity affect drying. Cooler air slows the process.
Some glues dry faster. Quick-drying wood glue is a choice. These glues dry in 15 to 30 minutes. They are great for small projects. Not ideal for heavy-duty tasks. Make sure to read labels for drying times. Always test a small area first.
Importance Of Clamping
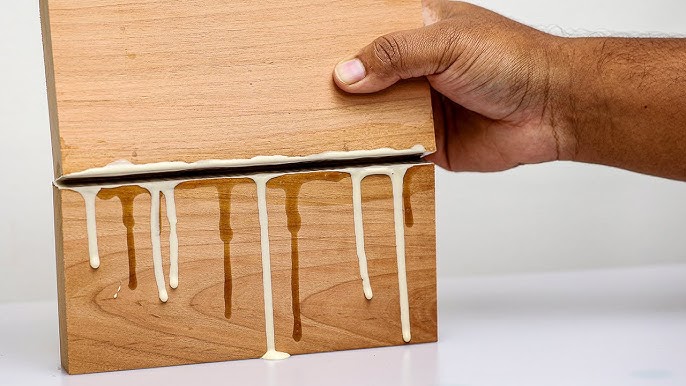
Clampingis essential for strong glue joints. It holds wood pieces together tightly. Pressurehelps the glue bond better. It also prevents wood from moving while drying. Clampsmake sure the pieces stay in place. This leads to a stronger final product.
Function Of Clamps
Clamps provide necessary pressure. They keep the wood aligned. This prevents gaps between pieces. They make sure glue spreads evenly. Without clamps, the wood may shift. This can weaken the joint. Proper clamping ensures durability.
Choosing The Right Clamp
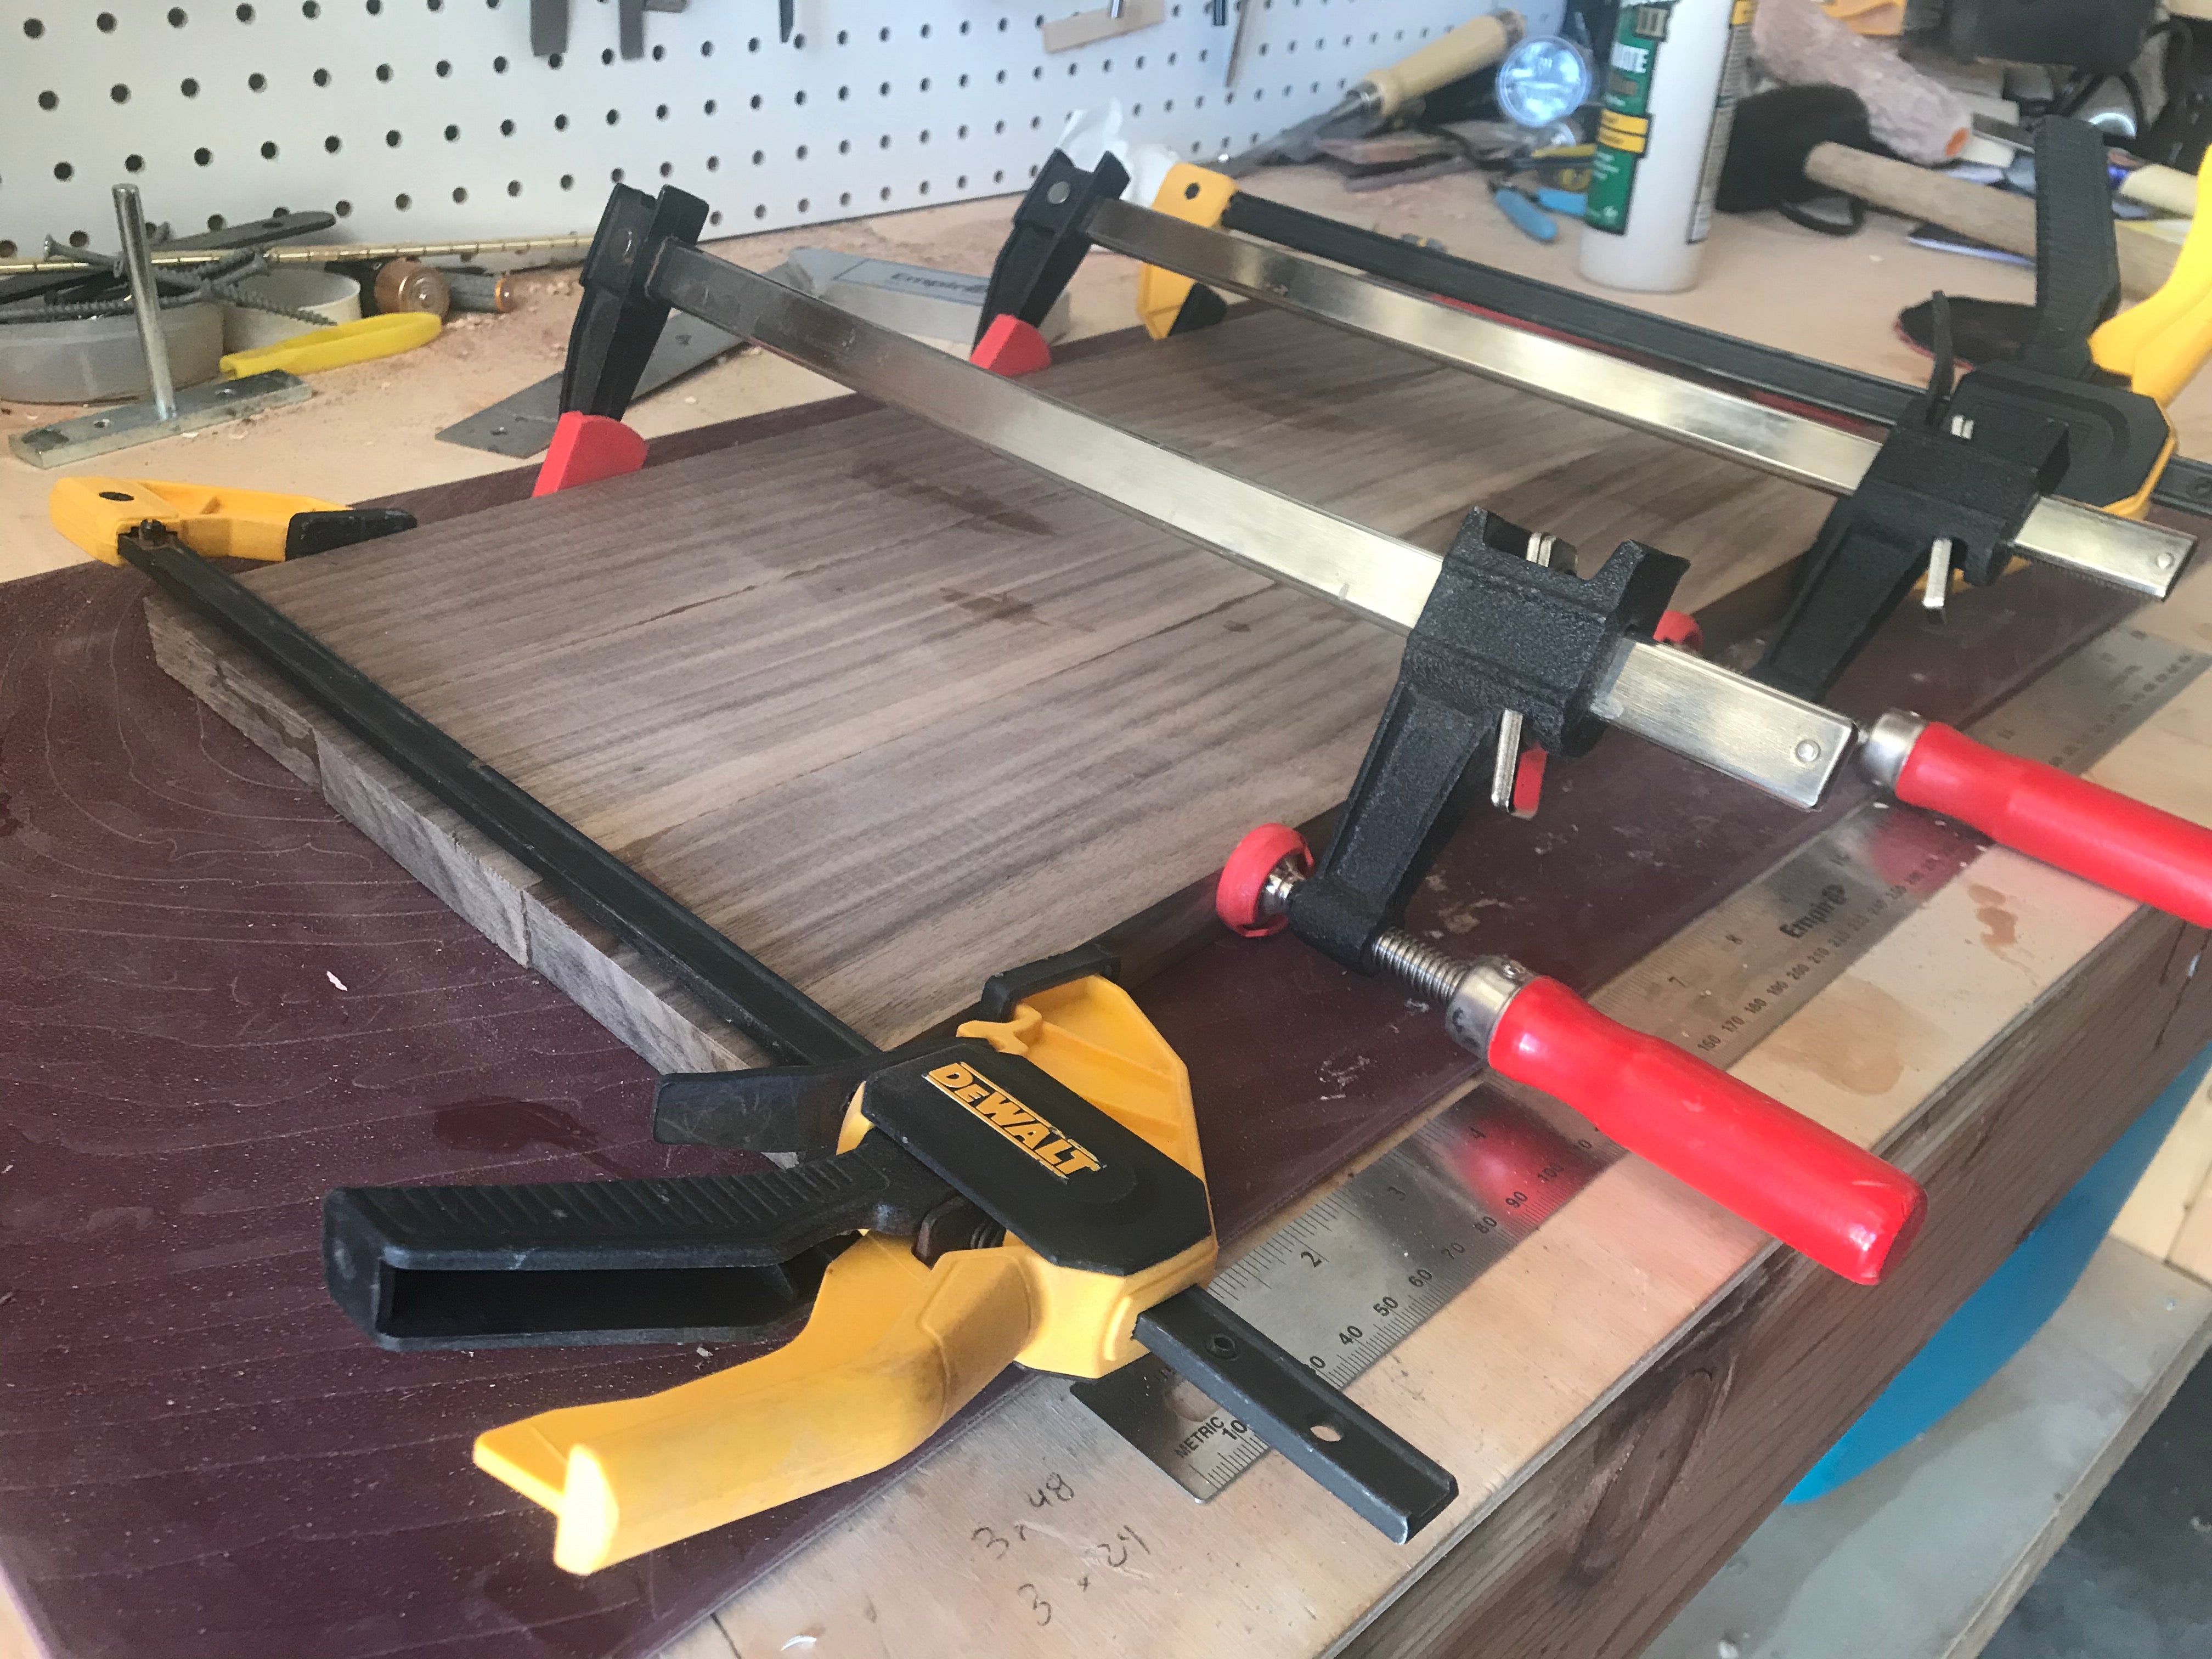
Choosingthe right clamp is important. There are different types. Each type has a specific use. Bar clamps are great for large pieces. C-clamps work well for small projects. Pipe clamps are adjustable. They fit various sizes. Pick the clamp that suits your needs.
Credit: www.youtube.com
Clamping Techniques
Clamp placement matters for strong joints. Align clamps evenly across the wood. Keep clamps close to the glued area. This ensures even pressure. Avoid placing clamps too far. Uneven pressure can weaken the bond. Use small clamps for small pieces. Larger pieces need more clamps. This gives support and balance.
Apply firm pressure to glue joints. Tighten clamps until glue squeezes out. But don’t overtighten. Excessive pressure can cause damage. Check clamps regularly. Adjust if needed. Balance pressure across all clamps. This helps the glue dry evenly. Proper pressure ensures a strong bond.
Avoiding Common Mistakes
Wood can get damaged by too much pressure. Over-clamping squeezes out all the glue. This reduces the bond strength. It might leave marks on the wood. It’s important to use just enough pressure. Keep an eye on the glue line. Excessive force isn’t always better.
Not using enough pressure can be harmful. The wood pieces might not stick well. Under-clamping leads to weak joints. The glue needs enough pressure to set. Without it, the bond can fail. Make sure the pieces fit tightly. Proper pressure helps in strong bonding.
:max_bytes(150000):strip_icc()/100980633-2fcbdd48b8ff41e5bb962dcb7b77951d.jpg)
Credit: www.woodmagazine.com
Safety Measures
Wood glue can be sticky and messy. Wear gloves to protect your skin. Avoid touching your face or eyes. Wash hands after using glue. Read labels for safety tips. Glue fumes can be strong. Work in a place with fresh air.
Glue can spill. Cover your table with plastic sheets. Newspapers can also protect surfaces. Use a tray for easy cleanup. Keep tools away from wet glue. Store glue safely after use.
Troubleshooting Glue Failures
Identifying glue weaknessis important. Weak glue can cause problems. Check the wood pieces. See if they are sticking well. Notice any gaps. Gaps mean weak glue. Feel the glued area. Is it smooth? Rough areas may mean trouble. Look for cracks or breaks. These show glue issues. Check the color of the glue. Has it changed? Color change may mean a problem. Smell the glue. A bad smell can mean weakness. Touch the glue surface. Is it sticky? Sticky glue can fail. Listen to the wood. Does it creak? Creaking shows weak joints. Watch how the wood moves. Does it shift? Shifting means glue issues.
Repairing joint failurescan be tricky. First, remove old glue. Use a scraper for this. Clean the wood surface. Make sure it’s smooth. Apply new glue carefully. Use clamps to hold tight. Wait for the glue to dry. Check if the joint is strong. Test by pressing the wood. Does it hold? If yes, the repair worked. If no, try again. Repeat the steps. Make sure to use good glue. Check the glue instructions. Follow the drying time. This helps the repair last longer.
Credit: cucamongawoodworking.com
Frequently Asked Questions
How Long Should Standard Wood Glue Dry Before Removing Clamps?
Standard wood glue should dry for at least 30 minutes before removing clamps. For maximum strength, wait 24 hours. Ensure a strong bond by checking manufacturer’s guidelines. Drying time can vary based on temperature and humidity. Always prioritize safety and quality in your woodworking projects.
How To Remove Wood Glue From Clamps?
Use a damp cloth to wipe off excess glue from clamps. For dried glue, gently scrape with a plastic scraper. Apply rubbing alcohol to soften the glue and remove it with a cloth. Keep clamps clean to prevent glue buildup.
How Long To Leave Titebond 3 In Clamps?
Leave Titebond 3 in clamps for at least 30 minutes. For maximum strength, wait 24 hours before applying stress. Ensure proper alignment during clamping for optimal bonding results. Adjust clamp pressure as needed to avoid excess glue squeeze-out. Always follow the manufacturer’s instructions for best practices.
How Long Until Wood Glue Fully Dries?
Wood glue typically takes 24 hours to fully dry. Factors like temperature and humidity can affect drying time. Ensure proper clamping for optimal results. Check the manufacturer’s instructions for specific guidance.
Conclusion
Determining the right drying time for wood glue is important. It ensures strong, reliable bonds. Most wood glues need 30 minutes to 24 hours. Check the glue instructions for exact timing. Temperature and humidity can affect drying time too. Warmer, drier conditions speed up the process.
Cooler, humid environments slow it down. Patience pays off with a strong bond. Never rush the process. Removing clamps too early risks weak joints. Always test a small area if unsure. This careful approach guarantees your woodworking projects last longer.
Happy woodworking!