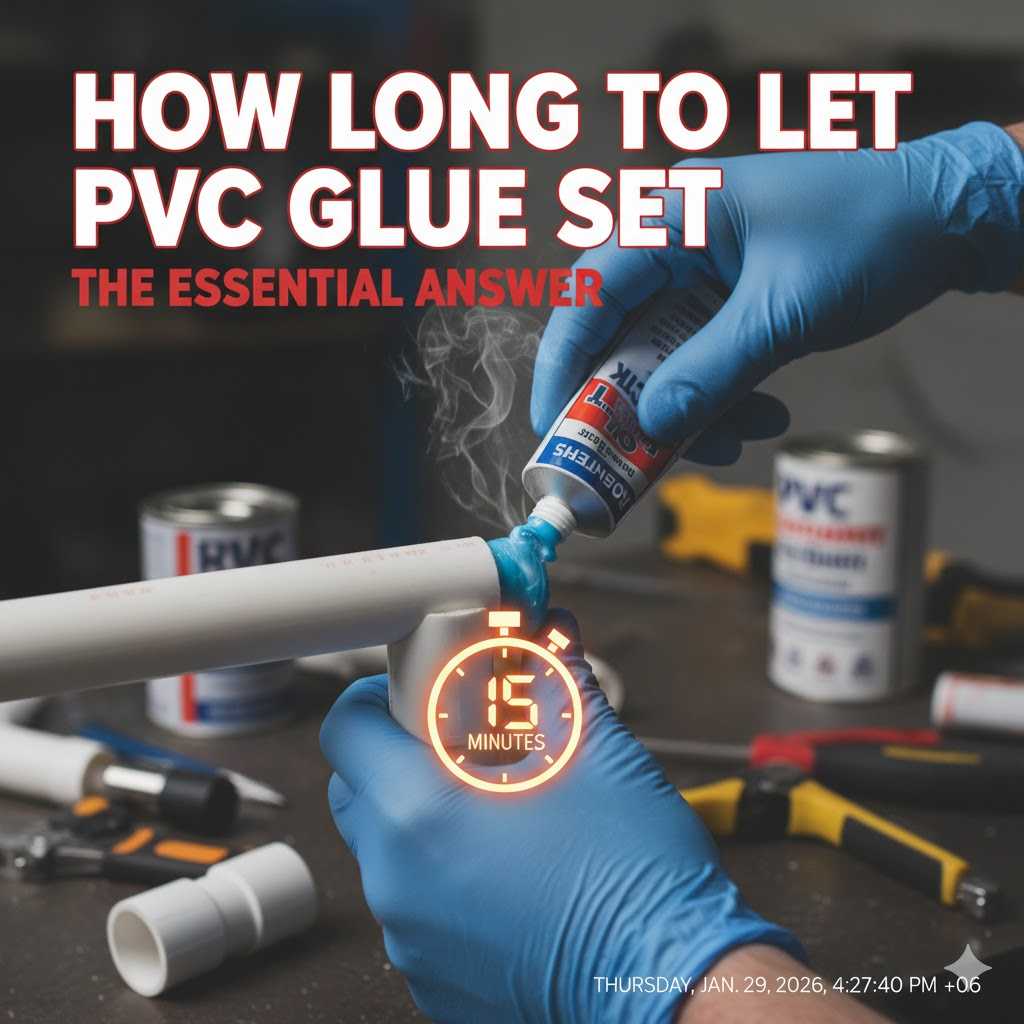
How Long To Let Pvc Glue Set | The Essential Answer
For PVC glue to set enough for handling, wait 30 seconds after joining the pipe and fitting. For light water pressure (up to 160 PSI), you must wait at least 15 minutes for small pipes in warm weather. However, a full cure for high-pressure systems can take anywhere from 2 to 48 hours, depending on pipe size and temperature.
Hello there! I’m Md Meraj, and I’m happy to have you in the workshop with me today. If you’ve ever worked with PVC pipes, you’ve likely found yourself asking a simple but critical question: “How long do I actually need to let this glue set?” It’s a moment we’ve all faced. You’ve made the connection, it looks good, and you’re eager to turn the water on and call the job done.
But wait too little, and you could have a leaky disaster on your hands. Wait too long, and you might feel like you’re wasting valuable project time. Don’t worry! Getting this right is much easier than it seems. We’re going to break it all down together, step-by-step. I’ll show you exactly how to understand the setting and curing process, so you can move forward with total confidence. Let’s get this done right.
What is PVC Glue and How Does It Really Work?
Before we talk about timing, let’s quickly understand what we’re working with. That can of PVC “glue” you have isn’t really glue at all. It’s actually a solvent cement. This is a very important difference!
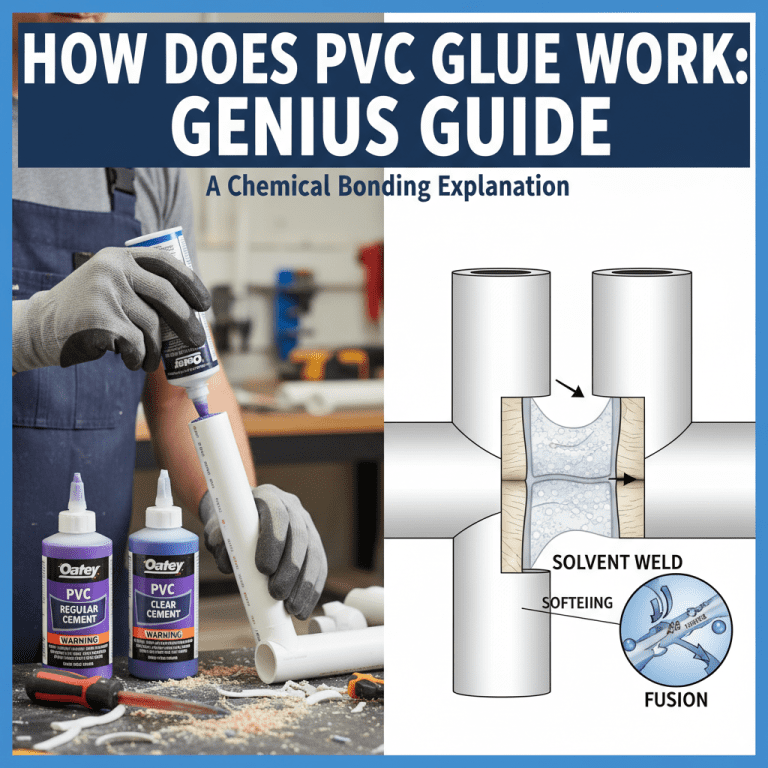
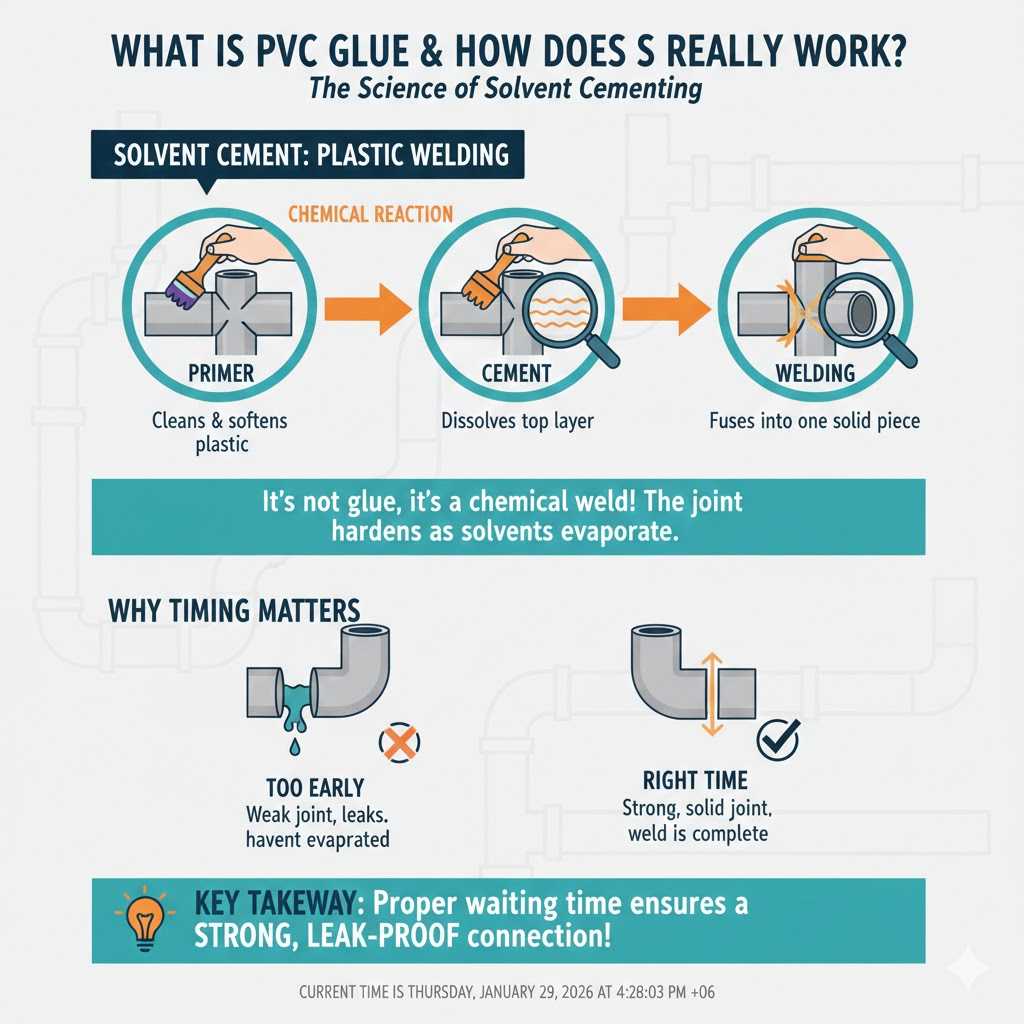
Glue works by sticking two surfaces together. Solvent cement, on the other hand, works by creating a chemical reaction that literally melts and fuses the two pieces of PVC into one solid piece. It’s more like welding plastic than gluing it.
Here’s the simple breakdown of what happens:
- Primer: First, you apply a primer (usually purple, so you can see it). The primer cleans the surface of the pipe and fitting and starts to soften the plastic. This prepares it for the cement.
- Cement: Next, you apply the solvent cement. The cement contains powerful solvents that temporarily dissolve the top layer of the PVC plastic.
- Welding: When you push the pipe and fitting together, the melted layers of plastic flow into each other. As the solvents evaporate, the PVC hardens again, but now the two pieces are permanently welded together.
Understanding this “welding” process helps you see why waiting the right amount of time is so crucial. You’re not just waiting for something sticky to dry; you’re waiting for a chemical reaction to complete and for the plastic to become strong and solid again.
The Big Question: Set Time vs. Cure Time
This is where most of the confusion comes from. People use the terms “set time” and “cure time” interchangeably, but they mean very different things. Getting this right is the key to a leak-proof project.
Set Time: The Initial Grip
Set time is the very short period needed for the joint to be strong enough to handle carefully. This is the time right after you push the pipe and fitting together and hold them for about 30 seconds. The solvents have started to evaporate, and the plastic is beginning to harden.
- How long is it? Usually 30 seconds to a few minutes.
- What can you do? You can let go of the pipe and move on to the next joint. The pipe should not be moved, twisted, or bumped.
- Is it ready for pressure? Absolutely not! The joint is still very fragile at this point.
Cure Time: The Full Strength Bond
Cure time is the total time it takes for all the solvents to evaporate and for the joint to reach its maximum strength. This is the “welding” process completing. The joint is now fully fused and ready to withstand water pressure and stress.
- How long is it? This can range from 15 minutes to 48 hours, or even longer in some cases.
- What can you do? Once fully cured, you can turn on the water and put the system into full use.
- Is it ready for pressure? Yes! This is the moment you’ve been waiting for.
Think of it like this: Set time is like the concrete in a sidewalk being solid enough to walk on carefully. Cure time is like that same concrete being strong enough to drive a truck over. You need to wait for the full cure before you apply pressure.
Factors That Dramatically Change PVC Cure Times
So, why isn’t there just one simple answer? Because several factors in your environment can speed up or slow down how quickly the solvents evaporate. Let’s walk through the most important ones.
1. Temperature: The Biggest Game-Changer
Temperature is the single most important factor. The solvents in PVC cement evaporate much faster when it’s warm and much slower when it’s cold.
- Hot Weather (80°F to 100°F / 27°C to 38°C): The cement will “set” very quickly, sometimes in under 15 seconds. You have to work fast! However, the full cure time is also much shorter.
- Mild Weather (60°F to 80°F / 15°C to 27°C): This is the ideal range. You have a good amount of working time, and cure times are reasonable.
- Cold Weather (40°F to 60°F / 4°C to 15°C): The process slows down significantly. You’ll need to wait much longer for the joint to cure. For this, it’s best to use a cement specially formulated for cold weather.
2. Humidity: The Silent Slowdown
High humidity means there’s a lot of moisture in the air. This moisture makes it harder for the solvents in the cement to evaporate. On a very humid or rainy day, you can expect cure times to be up to 50% longer than on a dry day. It’s always best to do this work in a dry, well-ventilated area if possible.
3. Pipe Size (Diameter): Bigger Pipes Need More Time
This makes perfect sense when you think about it. A larger pipe has a much larger surface area to weld. It requires more cement, and there are more solvents that need to evaporate before the joint is strong. A small 1/2-inch pipe will cure much, much faster than a large 6-inch pipe.
To make this easier, here is a general guide. Always check the instructions on your can of cement, but this table will give you a great starting point for PVC pipes carrying fluids (like water) at up to 180 PSI.
Table 1: Estimated PVC Cement Cure Times
| Pipe Diameter | Temperature: 60°F – 100°F (15°C – 38°C) | Temperature: 40°F – 60°F (4°C – 15°C) |
|---|---|---|
| 1/2″ to 1 1/4″ | 15 Minutes | 30 Minutes |
| 1 1/2″ to 2″ | 30 Minutes | 2 Hours |
| 2 1/2″ to 4″ | 1 Hour | 4 Hours |
| 6″ to 8″ | 2 Hours | 8 Hours |
Note: These are for systems under pressure. For non-pressure systems like a Drain, Waste, and Vent (DWV) line, cure times can be much shorter. Many plumbers feel comfortable running water through a DWV line after about an hour.
4. Type of Cement: Not All Cans Are Equal
When you’re at the hardware store, you’ll see different types of PVC cement. They are designed for different conditions and pipe sizes.
- Medium Body: Great for general use on pipes up to 6 inches. This is what most DIYers use.
- Heavy Body: A thicker cement that fills larger gaps. It’s best for larger pipes (over 6 inches) and takes longer to cure.
- Hot/Blue Cement: A very fast-setting cement designed for situations where you need a quick cure, like in emergency repairs.
- Cold/Green Cement: Specially formulated to work better and cure properly in colder temperatures.
Always choose the right cement for your job! Using a regular cement in freezing temperatures might result in a joint that never cures properly.
Your Step-by-Step Guide to a Perfect PVC Bond
Knowing the cure times is only half the battle. Following the right steps ensures you get that strong, welded bond every time. Let’s walk through the process together.
Step 1: Gather Your Tools and Materials
Having everything ready makes the job go smoothly. You don’t want to be hunting for a tool with wet primer on your pipe.
- Safety glasses and gloves
- PVC pipe cutter or a hacksaw
- Deburring tool or a simple utility knife
- Clean rag
- PVC primer
- The correct PVC solvent cement for your job
- Your PVC pipes and fittings
Step 2: Cut and Prepare Your Pipes
Get a straight, clean cut on your pipe. If you use a hacksaw, make sure it’s perfectly square. After cutting, you’ll see little plastic burrs on the edge. You MUST remove these. Use a deburring tool or a utility knife to carve away the rough edges on both the inside and outside of the pipe. If you skip this, those burrs can scrape away the cement when you join the pieces, causing a leak.
Step 3: Dry Fit Before You Glue
This is a professional tip that saves a lot of headaches. Assemble all your pieces WITHOUT primer or cement first. This lets you check all your measurements and make sure everything fits perfectly. You can even make small marks with a pencil so you can line everything up quickly when you’re applying the cement.
Step 4: Apply the Primer (The Purple Stuff)
Work in a well-ventilated area. Open the can of primer. Using the dauber attached to the lid, apply a liberal coat of primer to the outside of the pipe end and the inside of the fitting socket. The primer should go a little beyond where the pipe will sit in the fitting. The primer needs to be wet when you apply the cement, so don’t wait around!
Step 5: Apply the Cement and Make the Connection
While the primer is still wet, open your cement. Apply a full, even layer of cement over the primed area on the outside of the pipe. Then, apply a thinner layer of cement to the inside of the fitting. Don’t glop it on too thick inside the fitting, as excess cement can get pushed inside the pipe and weaken it.
Immediately—and I mean immediately—push the pipe straight into the fitting until it bottoms out. As you push, give the pipe a quarter-turn. This little twist helps spread the cement evenly and ensures a strong weld.
Step 6: Hold and Wait
This step is non-negotiable! For at least 30 seconds, you must hold the pipe and fitting together firmly. There is pressure inside the tapered fitting that will try to push the pipe back out. If you let go too soon, you’ll ruin the joint. After 30 seconds, the initial set is complete. You can let go, and you should see a nice, even bead of cement all the way around the joint. Wipe away any excess with your rag.
Common Mistakes That Lead to Leaks
We all make mistakes, but in plumbing, they can be messy! Here are a few common ones to avoid.
- Skipping the Primer: Primer is not optional. Without it, you won’t get a proper chemical weld, and your joint is very likely to fail under pressure.
- Not Holding for 30 Seconds: As we just discussed, the pipe will push itself out if you don’t hold it, creating a weak and leaky bond.
- Twisting and Turning After It Sets: Once you’ve held it for 30 seconds, leave it alone. Don’t try to adjust the angle or twist the fitting anymore. The weld has already started forming.
- Using Old, Thick Cement: If your can of PVC cement is old and has become thick and goopy like jelly, throw it away. According to major manufacturers like Oatey, solvent cement has a shelf life, and old cement won’t work properly.
- Applying Pressure Too Soon: This is the most common mistake of all. Be patient! Give the joint the full cure time it needs based on the temperature and pipe size.
How to Test Your PVC Joints Safely
After you’ve waited the recommended cure time, it’s time for the moment of truth. But you want to test it in a controlled way.
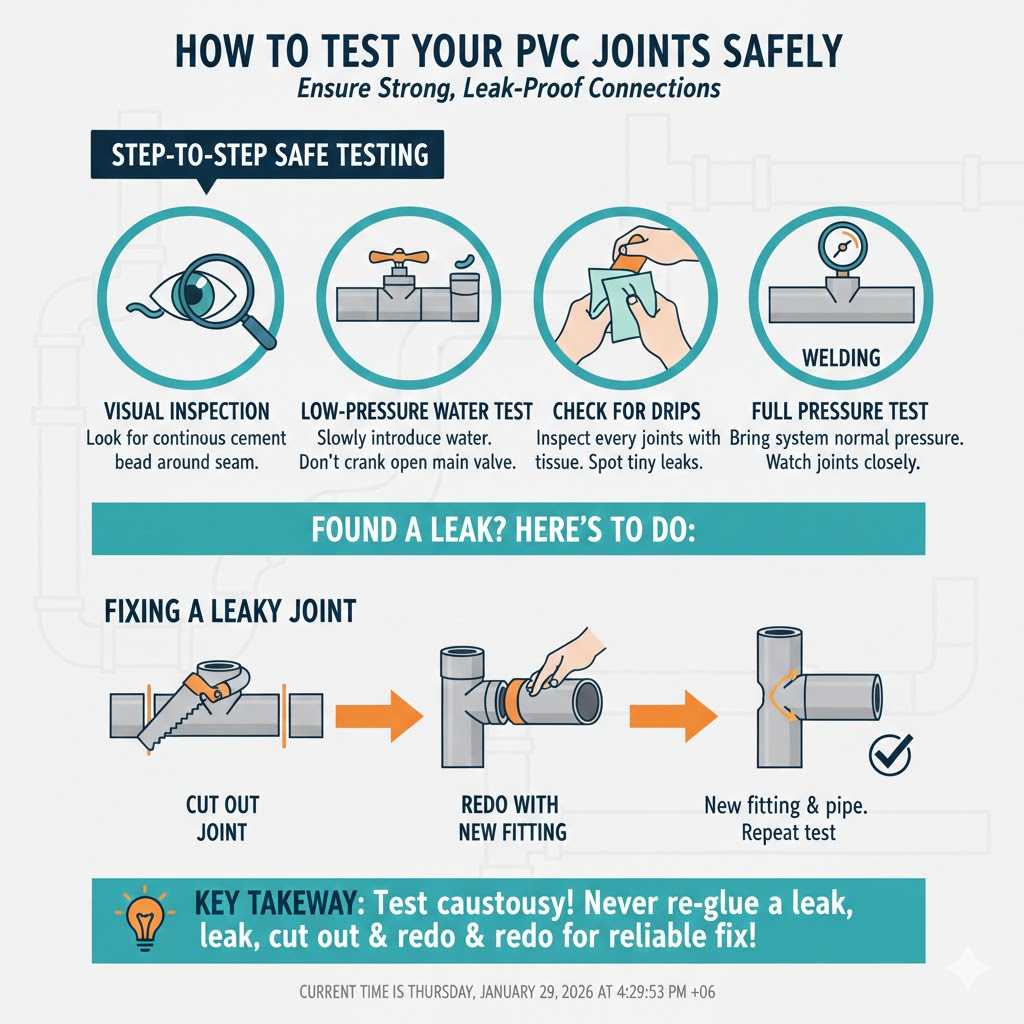
- Visual Inspection: First, look at all your joints. You should see a continuous bead of cement around the entire seam of the fitting. This is a good sign.
- Low-Pressure Water Test: If your system allows, cap the end of the line. Slowly introduce water into the system at a low pressure. Don’t just crank open the main valve.
- Check for Drips: Carefully inspect every single joint for any signs of moisture or dripping. A tissue or paper towel can help you spot tiny leaks you might otherwise miss.
- Full Pressure Test: If everything looks dry, you can slowly bring the system up to its normal operating pressure. Keep watching the joints for a few minutes to ensure they are holding strong.
If you find a leak, don’t panic. Unfortunately, you cannot just apply more glue over the top of a leaky joint. The joint must be cut out and redone with a new fitting and a small piece of pipe using couplings.
Frequently Asked Questions (FAQ)
Can I speed up PVC glue curing time?
You can gently speed up the process by increasing the temperature and air circulation. Using a fan to blow air over the joints can help the solvents evaporate faster. Never use an open flame like a torch, as this is a fire hazard and will damage the pipe.
What happens if I don’t wait long enough for the PVC glue to cure?
If you apply water pressure before the joint is fully cured, the joint can fail. The force of the water can push the pipe and fitting apart, causing a major leak. The semi-cured plastic is still soft and can’t handle the stress.
Can I use PVC glue in the rain?
It is strongly advised not to. Water and moisture will interfere with the chemical welding process, preventing a strong bond from forming. If you absolutely must work in damp conditions, you need to use a specialized wet-set or “blue” cement and ensure the joint surfaces are as dry as possible.
How long is an open can of PVC cement good for?
An opened can of PVC cement generally has a shelf life of about 2 years from the date of manufacture if the lid is sealed tightly after each use. If the cement becomes thick, stringy, or gelatinous, it has gone bad and should be discarded.
Is the smell from PVC primer and cement dangerous?
The fumes from both primer and cement can be harmful if inhaled in a confined space. Always work in a well-ventilated area. Open windows and doors, or use a fan to circulate air. If you’re working in a tight space for a long time, wearing a respirator with organic vapor cartridges is recommended for safety.
Do I really need to use both primer and cement?
Yes, absolutely. For most plumbing codes and for maximum joint strength, using both is required. Primer cleans and softens the plastic, allowing the cement to create a much stronger and more reliable weld. Skipping the primer is one of the top causes of joint failure.
My primer is clear, not purple. Is that okay?
Clear primers are available, but purple primer is often required by plumbing inspectors because it provides a clear visual confirmation that a joint has been properly primed. For DIY projects, a clear primer will work just as well chemically, but be extra diligent to make sure you’ve coated every surface.
Putting It All Together
I know that was a lot of information, but you’ve got this. At the end of the day, working with PVC pipe is one of the most rewarding skills a homeowner or DIYer can learn. It’s like building with adult-sized LEGOs!
The secret to success is simply patience. Understand that you are welding plastic, not just gluing it. Give that chemical reaction the time it needs to work its magic. Always read the label on your can of cement, consider the temperature and the size of your pipe, and give it that extra bit of time just to be safe.
By following these steps and paying attention to the details, you’ll be creating strong, leak-free joints that will last for decades. You’ll save money and gain the immense satisfaction of doing the job right. Happy building!