Super Glue Set Time: 10-45 Sec (Full Cure Takes 24 Hrs)
Super glue sets in 10 to 60 seconds — fast enough to hold most repairs by hand — but full cure to maximum strength takes 12 to 24 hours, not minutes. Stress a joint before then and it can crack even though it already feels solid. Brand matters: Gorilla Super Glue’s own spec sheet lists 10-45 seconds. This guide covers exact set and cure times by brand, accidental-skin-bond safety, and when super glue is the wrong adhesive for wood.
Quick Steps: Apply, Hold, and Cure Super Glue the Right Way
- Clean and dry both surfaces: Wipe away dust, oil, or old glue with rubbing alcohol so the bond isn’t compromised.
- Apply a small drop to only one surface: A thin bead bonds stronger than a thick blob and won’t squeeze out.
- Press the pieces together immediately: Cyanoacrylate starts curing the instant it touches surface moisture, so align first.
- Hold still for 15-60 seconds: Most standard formulas reach handling strength in this window; gels can take up to 3 minutes.
- Wait a full 24 hours before stressing the joint: The bond is set long before it’s fully cured.
Understanding Super Glue: More Than Just Snap
Best Gel Super Glue Pick
Loctite Super Glue Gel Control – $3.82
The no-drip gel format this guide recommends for vertical surfaces and porous materials — the control tip prevents the thin-liquid mess described in the Applying the Glue section above.
- Best for: Vertical joints, porous surfaces, precision drops
- Why we picked it: Gel formula gives more working time and control than thin liquid CA glue
- Main drawback: Slightly slower initial set than thin liquid formulas
Compare more super glue options
 Option 1 Gorilla Super Glue Gel – $5.98
|
 Option 2 Starbond CA Accelerator Spray – $19.49
|
 Option 3 Loctite Super Glue Remover – $10.51
|
As an Amazon Associate we earn from qualifying purchases.
Super glue is a marvel of modern chemistry. It works through a process called anionic polymerization. When the thin liquid glue comes into contact with trace amounts of moisture on the surfaces you’re joining, it rapidly hardens, creating a strong bond. It’s this instant reaction that gives it its reputation for speed — though it belongs to a much larger family of wood glue and adhesive options, each suited to different jobs. There’s a difference between “setting” and “curing,” and understanding this is crucial for achieving the best results and ensuring safety.
Setting vs. Curing: What’s the Difference?
When we talk about how long super glue takes to cure and dry, we’re usually referring to two different stages. Setting is the initial hardening — the glue becomes solid enough that you can let go of the pieces and they’ll hold their shape. This happens very quickly.
Setting Time: This is the initial stage where the glue hardens and the pieces will stay in place when you release them. This is what most beginners are concerned about.
Curing Time: This is the complete hardening process. While the glue might be set enough to hold, it needs more time to reach its maximum strength and durability. For many applications, especially in woodworking or repairs that will endure stress, waiting for a full cure is essential. Think of it like baking a cake – it might solidify in the oven, but it needs to cool properly to reach its best texture and flavor.
How Long Does Super Glue Take to Set? By Brand
So you’ve applied the glue, squeezed the parts together, and now you’re wondering how long to hold this. Set time isn’t universal — it varies by brand and formula, and most labels are vaguer than you’d expect. Here’s what the manufacturers themselves actually state:
| Super Glue | Initial Set Time | Full Cure Time | Best For |
|---|---|---|---|
| Standard drugstore CA glue | 15-60 seconds | 12-24 hours | Small household fixes |
| Gorilla Super Glue | 10-45 seconds (manufacturer spec) | ~24 hours | Plastic, wood, metal repairs |
| Loctite Super Glue Liquid Professional | Sets in seconds; leave undisturbed 10 minutes | 24 hours | Precision drops, small parts |
📊 Gorilla Super Glue’s own product page lists a 10-45 second set time — Source: Gorilla Tough, official product page
This rapid setting is why super glue is so popular for quick fixes and small repairs. You can often mend a broken ceramic handle, reattach a loose veneer piece, or secure a small component in seconds.
Factors Affecting Setting Time
While the advertised setting time is a good guideline, a few things can actually speed up or slow down how quickly your super glue hardens:
- Moisture: This is the catalyst! More moisture on the surface or in the air means faster bonding. Higher humidity can significantly reduce setting time.
- Temperature: Warmer temperatures generally accelerate the chemical reaction, leading to quicker setting.
- Surface Type: Porous surfaces (like unfinished wood or fabric) might absorb some of the glue, potentially requiring more glue or slightly affecting setting. Non-porous surfaces (like glass or metal) will have a more direct reaction.
- Glue Formulation: Thicker “gel” super glues tend to set a bit slower than the super-thin liquids, but they offer more control and can fill small gaps better.
- Airflow: Good airflow can help the polymerization process, especially in higher humidity.
Does Super Glue Set Faster When It’s Warm?
Yes. Warmer temperatures speed up the polymerization reaction, so super glue applied in a heated shop or on a warm summer day sets noticeably faster than in a cold garage. The tradeoff is working time — in a warm room you have less time to align parts before the glue grabs, so dry-fit everything first.
The Full Curing Process: When is it Really Strong?
As mentioned, “set” isn’t “cured.” While your pieces might hold together after a minute, the bond is still developing its full strength. For critical joints or items that will experience any kind of stress, it’s vital to understand the curing timeline:
- 24 Hours: Most manufacturers recommend waiting at least 24 hours for the glue to fully cure and reach its maximum bond strength.
- 48 Hours (or more): For very large surface areas, heavily stressed joints, or in conditions with lower humidity or temperature, it might take up to two days for a complete cure.
This full cure is what gives super glue its reputation for durability. Before the full cure, the bond is strong enough to hold but can be brittle or prone to breaking under sudden impact or significant pressure. Always refer to the specific product packaging for the most accurate curing times.
Proven Safety When Using Super Glue
Super glue is incredibly effective, but it’s also a chemical adhesive. Responsible use is paramount to ensure your safety and prevent accidents. The most common accidents involve accidental bonding of skin, eyes, or even respiratory irritation from fumes. Here’s how to handle it safely:
Handling and Application Safety
Always work in a well-ventilated area. The fumes, while usually not acutely toxic in small amounts, can be irritating to your eyes and respiratory system, especially if you’re sensitive or using a lot of glue.
1. Ventilation is Key: Open windows or use a fan. This helps dissipate the fumes and can also aid in the curing process by managing humidity.
2. Protect Your Workspace: Super glue can bond to almost anything! Cover your work surface with old newspapers, cardboard, or a plastic sheeting. A single drop can ruin a finished table or a favorite shirt in seconds.
3. Wear Safety Glasses: Protect your eyes from accidental splashes or fumes. This is especially important when working overhead or with larger quantities.
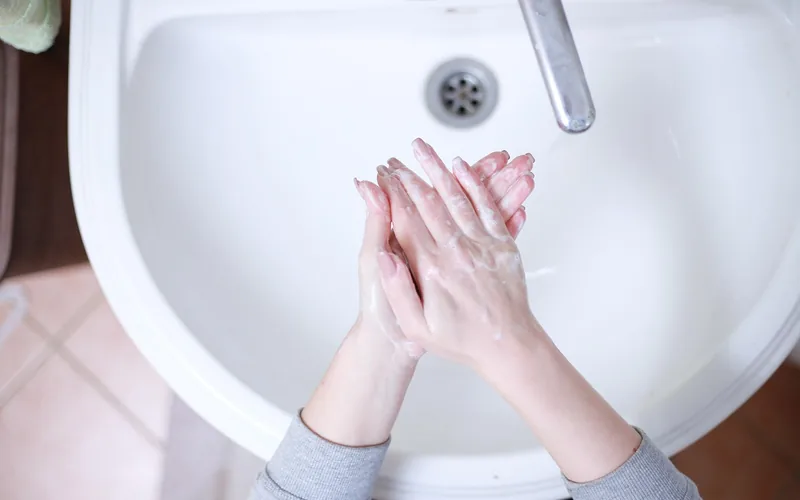
4. Avoid Skin Contact: While super glue bonds skin very quickly, it’s not designed for direct contact. Nitrile gloves can prevent accidental bonding to your fingers. If skin does bond, don’t try to rip it apart forcefully. Warm, soapy water and gentle wiggling are usually best, or consult a medical professional if necessary. For more on this, the U.S. Food & Drug Administration (FDA) provides general information regarding adhesives like super glue.
5. Keep Out of Reach of Children: Super glue is not a toy and can cause injury if misused.
Can Repeated Super Glue Exposure Cause a Skin Allergy?
Yes. Cyanoacrylate can sensitize skin after enough exposure, even in someone who has used it safely for years. A systematic review covering 47 studies and 193 documented cases of allergic contact dermatitis found some reactions surfaced after just one exposure, with symptoms like redness, swelling, and blistering appearing up to 30 days later. Wearing nitrile gloves during repeated use lowers this risk — thin latex gloves don’t fully block cyanoacrylate.
“Allergic contact dermatitis to cyanoacrylate adhesives can develop even after years of trouble-free use, once repeated exposure sensitizes the skin — and some cases occur after a single application.”
What to Do If You Bond Yourself or Something Else Accidentally
Skin Bonding:
- Don’t Panic!
- Soak in Acetone: Nail polish remover containing acetone is the most common household solvent that breaks down cyanoacrylate. Soak the bonded area in warm, soapy water, then gently try to peel or wiggle the skin apart. If that doesn’t work, immerse the bonded area in acetone-based nail polish remover.
- Be Gentle: Never pull bonded skin apart with force, as this can tear the skin.
- Seek Medical Help: If you can’t separate the skin easily or if it’s near your eyes or mouth, consult a doctor.
Bonding to Surfaces:
- Delicate Surfaces: For finishes like paint or varnished wood, carefully try to dissolve the glue with acetone or a specialized adhesive remover. Test in an inconspicuous area first.
- Fabric: Acetone is often effective here too, but again, test first. Freezing the fabric can sometimes help make the dried glue brittle and easier to chip off.
Step-by-Step: Perfecting Your Super Glue Application
Getting a strong bond with super glue isn’t just about speed; it’s about proper preparation and application. Follow these steps for the best results:
Preparation is Paramount
This is the most critical stage for a durable bond.
- Cleanliness is King: Ensure the surfaces you want to join are clean, dry, and free from dust, grease, oil, or any residue. Rubbing alcohol or a degreaser can be very effective for this, but make sure it evaporates completely.
- Ensure a Good Fit: Both pieces should fit together snugly without gaps. Super glue is excellent for thin bonds but doesn’t perform well when trying to fill large voids. For larger gaps, a wood glue or epoxy might be a better choice.
- Dry Surfaces: Excess moisture can interfere with the bonding process or speed it up too much, leading to a weaker joint.

Applying the Glue
Less is often more with super glue.
- Apply to One Surface: Place a small drop or thin bead of glue onto only one of the surfaces. You don’t need much – a little goes a long way. Too much glue will squeeze out, make a mess, and can actually weaken the bond.
- Consider Glue Types: Thin super glues are great for tight-fitting parts and wicking into small cracks. Gel super glues are better for vertical surfaces, porous materials, and give you a bit more working time and control.
Joining and Holding
This is where the speed comes in, but also where patience is needed.
- Quickly Align and Press: Immediately after applying the glue, bring the two pieces together and press them firmly.
- Hold Firmly: Hold the pieces in place for the recommended initial setting time. This is usually 15-60 seconds. Apply steady, firm pressure. Keep them perfectly still.
- Test the Bond (Gently): After the initial hold time, gently try to slide or twist the pieces. If they feel firmly attached and don’t move, you can usually release them. If they still shift, hold for another 30-60 seconds and test again.
- Allow for Full Cure: Even if the bond feels solid, remember the curing process. Avoid putting stress on the joint for at least 24 hours. For critical applications or outdoor projects, consider a stronger adhesive. For woodworking, especially structural elements, PVA wood glues (like Titebond) or epoxies are often preferred for their flexibility and strength over long periods, as outlined by resources like WoodworkingTalk, which highlights the differences.
How Do You Hold Glued Pieces Without Gluing Your Fingers Together?
Use painter’s tape, a rubber band, a spring clamp, or the back of a spoon to apply pressure instead of bare fingers — cyanoacrylate bonds skin as fast as it bonds the material you’re working on. If you must use your hands, wear nitrile gloves rather than thin latex, since cyanoacrylate can seep through latex. A blast of accelerator spray also cuts the hold time to a few seconds, leaving less time for a slip.
When to Reach for Super Glue (and When Not To)
Super glue is a fantastic tool, but it’s not always the best solution for every woodworking or DIY task. Here’s a quick guide:
Ideal Uses for Super Glue:
- Small Repairs: Fixing broken plastic trims, reattaching small ceramic pieces, mending cracked wooden dowels.
- Veneer and Inlay Work: Quickly securing small pieces of veneer or decorative inlays before a more permanent adhesive is applied, or for very small, non-structural applications.
- Temporary Holds: Holding small parts in place while a stronger glue dries.
- Quick Fixes on Non-Porous Materials: Great for metal, plastic, and some ceramics where a fast, strong bond is needed.
When to Choose Another Adhesive:
- Structural Wood Joints: For anything that will bear significant weight or stress (like chair legs, table frames, or structural components), use a strong wood glue (PVA like Titebond) or epoxy. Super glue can be brittle and may fail under load over time.
- Large Gaps: Super glue relies on close-fitting surfaces. If there’s a gap larger than a hair’s width, it won’t bond effectively.
- High-Moisture Environments: While some super glues are formulated for moisture resistance, they generally don’t perform as well as specialized waterproof glues or epoxies in constantly wet conditions.
- Flexible Bonds: Super glue creates a rigid, hard bond. If you need flexibility (e.g., for fabric or rubber that will bend), a more appropriate adhesive is needed.
- Long Assembly Times: If you need to reposition pieces or have a complex assembly, super glue’s fast set time can be a hindrance.
Common Super Glue Problems and Solutions
Even with the best intentions, you might run into a snag. Here are some common issues and how to fix them:
| Problem | Cause | Solution |
|---|---|---|
| Bond is weak or breaks easily | Surfaces weren’t clean or dry; too much glue used; joint experienced stress before full cure; incorrect adhesive for the material. | Clean surfaces thoroughly with alcohol; use minimal glue; allow at least 24 hours for full cure; re-glue with appropriate adhesive for the material and application. |
| Glue freezes up/clumps in applicator | Cap not sealed properly, allowing moisture ingress; old glue. | Ensure cap is on tightly after each use; store in a cool, dry place (refrigerator can sometimes help if sealed well); purchase fresh glue. |
| Accidental bonding of skin/surfaces | Sloppy application; not protecting work area. | Use precise application tips; wear gloves; use acetone for skin (carefully!); protect surfaces with protection. |
| Gap remains between glued parts | Parts didn’t fit tightly; too much glue used, creating a void. | Ensure tight fit before gluing; use very thin bead of glue; for gaps, consider epoxy or wood filler after initial bond. |
| White residue (frosting) around bond | Rapid bonding of excess vaporized cyanoacrylate (common with thin glues and porous materials). | Use less glue; use gel super glue for porous materials; ensure good ventilation; can often be cleaned off with acetone after cure. |
Frequently Asked Questions (FAQ)
Q1: How long do I need to hold the pieces together after applying super glue?
A1: For most standard super glues, hold the pieces firmly together for 15-60 seconds. The glue should be set enough that they will hold their position when you release them.
Q2: Does super glue set faster when it’s warm?
A2: Yes. Warmer temperatures speed up the polymerization reaction, so glue applied in a heated shop sets faster than in a cold garage. The tradeoff is less working time to align parts before it grabs.
Q3: Can I use an accelerator spray to make super glue set faster?
A3: Yes. Cyanoacrylate accelerator (kicker) sprays cut the hold time to a few seconds, which is useful when your hands are the only clamp available. They can cause slight white haze on porous materials, so test first.
Q4: How do I hold glued pieces without gluing my fingers together?
A4: Use painter’s tape, a rubber band, a spring clamp, or the back of a spoon instead of bare fingers. If you must use your hands, wear nitrile gloves — thin latex doesn’t fully block cyanoacrylate.
Q5: My fingers are stuck together with super glue. What should I do?
A5: Don’t panic or try to rip them apart forcefully. Soak the bonded skin in warm, soapy water and gently try to wiggle them apart. If that doesn’t work, try soaking in acetone-based nail polish remover. Seek medical advice if separation is difficult or painful.
Q6: Can repeated super glue exposure cause a skin allergy?
A6: Yes. Cyanoacrylate can sensitize skin after enough exposure, even after years of trouble-free use. A review of 47 studies documented 193 cases of allergic contact dermatitis, some appearing after a single exposure. Nitrile gloves lower the risk during repeated use.
Q7: Can I use super glue on outdoor wood projects?
A7: Super glue is generally not recommended for structural outdoor wood projects because it can become brittle and break down with exposure to moisture and temperature fluctuations. A dedicated exterior wood glue or epoxy is a more durable choice.
Conclusion: Mastering the Quick Bond for Lasting Results
Super glue is an indispensable tool in any DIYer’s arsenal, loved for its speed and strength. Understanding that it sets in 10-60 seconds depending on brand but cures over 12-24 hours is key to achieving a truly robust bond — and knowing when to reach for wood glue or epoxy instead is what separates a repair that lasts from one that fails.
Sponsored / affiliate links. As an Amazon Associate I earn from qualifying purchases. I may earn additional commission from eligible campaigns.