How to Apply Lacquer to Wood: Proven Effortless Guide
Applying lacquer to wood is a straightforward process that can give your projects a beautiful, durable, and professional finish. With careful preparation, the right tools, and a patient approach, you can achieve stunning results to enhance the natural beauty of your wood pieces. This guide breaks down each step for a smooth, effortless finish.
Hey there, woodworking friends! Md Meraj here. Ever look at a piece of furniture and admire that smooth, glossy finish? Chances are, it’s been lacquered! Applying lacquer to wood can seem a bit daunting at first, especially if you’re new to finishing. You might worry about drips, streaks, or an uneven sheen. But don’t you worry! I’ve spent countless hours in my workshop, experimenting and perfecting the art of lacquering. My goal is to share that knowledge with you, making this skill accessible and even enjoyable. This guide is designed to be your go-to resource, breaking down the process into simple, manageable steps. We’ll cover everything from preparing your wood to that final, satisfying buff. Ready to give your projects that professional touch?
Why Choose Lacquer for Your Wood Projects?
Lacquer is a fantastic choice for finishing wood, especially for DIYers. It dries incredibly fast, which means you can apply multiple coats in a day. Also, it creates a hard, durable surface that’s resistant to water, alcohol, and general wear and tear. Think about kitchen cabinets, tabletops, or even smaller decorative boxes – lacquer can protect and beautify them all. It’s also known for its clarity, meaning it won’t significantly darken the natural color of your wood, letting its unique grain shine through. Plus, when applied correctly, it can give a beautiful, high-gloss or satin sheen.
Tools and Materials You’ll Need
Before we dive into the steps, let’s gather what you’ll need. Having all your supplies ready makes the process much smoother and less stressful. Think of this as preparing your workspace for success!
Essential Supplies:
- Wood Project: Your piece of art, ready for its final touch!
- Lacquer: Choose a good quality lacquer. They come in different sheens (gloss, satin, matte). For beginners, a pre-catalyzed lacquer can offer a good balance of durability and ease of application.
- Sandpaper: A range of grits, from 100-150 for initial sanding, 220 for between coats, and up to 400 or finer for a super smooth finish.
- Tack Cloths: Essential for removing fine dust particles after sanding.
- Applicators:
- Foam Brushes: Great for small projects or touch-ups. They don’t leave brush marks like bristle brushes can.
- High-Quality Natural Bristle Brushes: For larger areas, use a good quality brush.
- Sprayer: For the most professional and even finish, a spray system (like a Preval sprayer, HVLP sprayer, or even a spray can) is ideal.
- Mineral Spirits or Lacquer Thinner: For cleaning brushes and thinning the lacquer if needed (follow product instructions).
- Gloves: Nitrile gloves are best for protecting your skin.
- Face Mask/Respirator: Lacquer fumes can be strong and hazardous. A good quality respirator is a must for safety.
- Safety Glasses: Protect your eyes!
- Dust Fan (Optional but Recommended): To help with ventilation and to keep dust away from your wet finish.
- Drop Cloths or Newspaper: To protect your work area.

Preparing Your Wood: The Foundation for a Flawless Finish
This is arguably the most crucial step. A beautiful lacquer finish starts with perfectly prepared wood. Rushing this stage will show in your final result, no matter how carefully you apply the lacquer. Think of it like preparing a canvas before painting – you want it smooth, clean, and ready.
Step 1: Sanding Your Wood
Start with your initial grits (100-150) to smooth out any rough spots, glue residue, or imperfections from previous shaping. Always sand with the grain. Once you’ve gone over the piece with the coarser grit, move to a finer grit (like 220). You want the wood to feel silky smooth to the touch. If you’re not sure about your sanding, lightly run your hand across the wood; you’ll feel any bumps or rough areas.
Step 2: Cleaning Off the Dust
After sanding, there’s always dust. Use a vacuum cleaner with a brush attachment, then follow up with a dry rag. The absolute best way to get rid of those lingering fine particles is to use a tack cloth. Gently wipe down the entire surface with a tack cloth. They are slightly sticky and pick up even the tiniest specks of dust. Don’t skip this – dust under your finish is a common cause of a bumpy, unprofessional look.
Step 3: Inspect Your Work
Take a good look at your wood under good lighting. Are there any nicks, dents, or remaining imperfections? If so, now is the time to fix them. You can use wood filler or a paste wax that matches your wood color. Once dry, re-sand the area lightly with fine-grit sandpaper and then clean off the dust again with a tack cloth.
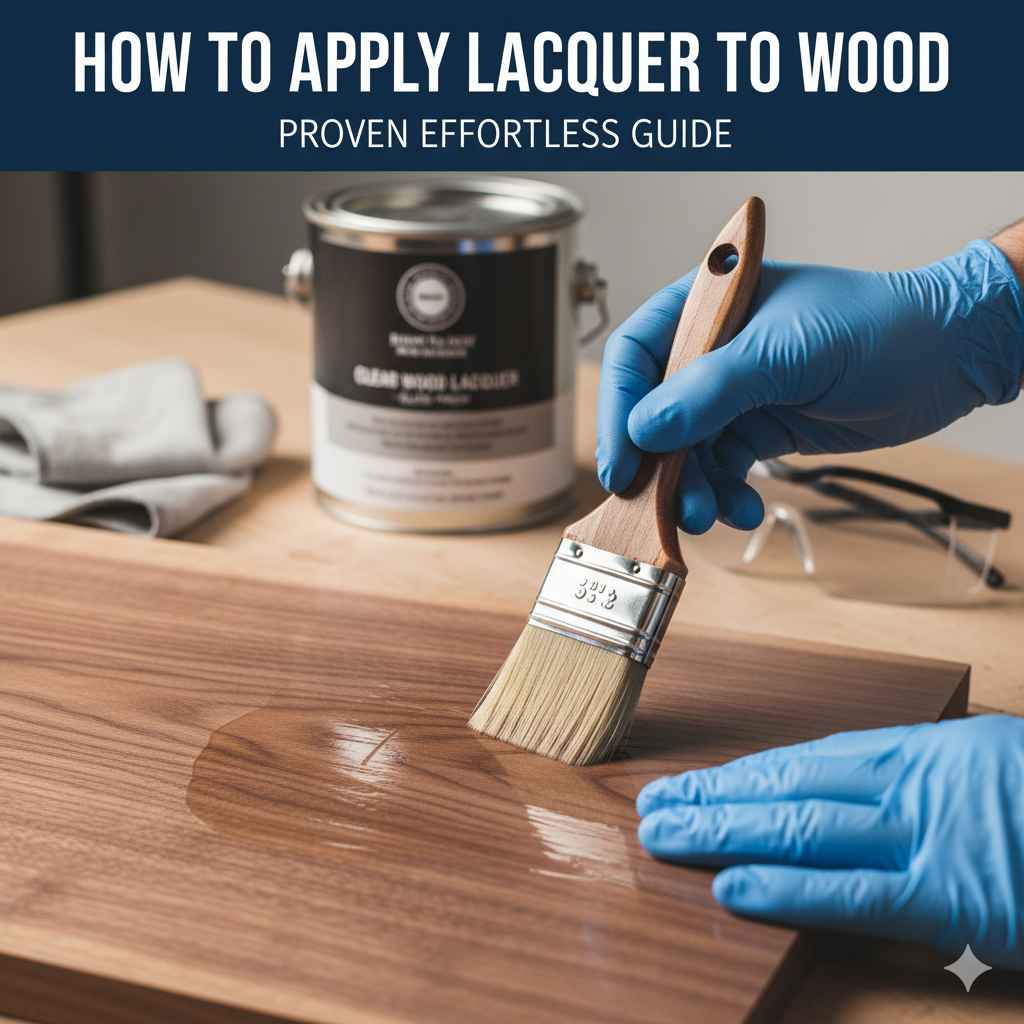
Applying the Lacquer: Step-by-Step Guide
Now for the exciting part – applying the lacquer! Remember, patience is key. We’re aiming for thin, even coats. This process is much more forgiving if you take your time.
Step 4: Stir, Don’t Shake!
Before you start, gently stir the lacquer. Shaking it can introduce air bubbles, which can lead to imperfections in your finish. If your lacquer is a bit thick, you might need to thin it slightly. Check the manufacturer’s instructions – usually, you’ll add a small amount of lacquer thinner. Stir thoroughly until it’s a consistent, smooth liquid.
Step 5: First Coat Application
Using a Brush: Dip your brush about one-third of the way into the lacquer. Tap off any excess. Apply the lacquer in long, even strokes, always following the grain of the wood. Overlap each stroke slightly to ensure complete coverage. Work quickly but steadily. Don’t over-brush; a few smooth passes are better than many hesitant ones.
Using a Spray Can: Shake the can vigorously for the time recommended by the manufacturer (usually 1-2 minutes). Hold the can about 10-12 inches from the surface. Spray in a long, sweeping motion, moving the can back and forth. Slightly overlap each pass. Don’t stop spraying in the middle of a stroke, as this can cause an uneven finish.
Using a Sprayer (HVLP/Preval): Adjust your sprayer according to the manufacturer’s recommendations. Similar to spray cans, maintain a consistent distance (usually 6-8 inches) and use steady, overlapping strokes. Practice on a scrap piece of wood first if you’re new to spraying.
Important: Don’t try to get perfect coverage in the first coat. The goal is a light, even mist over the entire surface. You’ll build up the finish with subsequent coats.
Step 6: Drying Time
This is where lacquer shines! It dries quickly compared to other finishes. Check the product label, but typically, you can recoat in 1-4 hours. Ensure good ventilation in your workspace. You can use a fan set on low to help circulate air, which speeds up drying and helps dissipate fumes. Never apply a new coat over wet lacquer or an incomplete dry layer.
Step 7: Light Sanding Between Coats
Once the first coat is dry to the touch, it’s time for a light sanding. This step is crucial for a smooth, “leveled” finish. Use very fine-grit sandpaper (220 or 320 grit). Gently sand the entire surface. The goal isn’t to remove lacquer, but to knock down any minor imperfections, dust nibs, or slight ridges. After sanding, clean off ALL the dust with a tack cloth. Seriously, this part is very important!
Step 8: Applying Subsequent Coats
Repeat steps 5, 6, and 7 for as many coats as needed to build your desired finish. Most projects don’t need more than 3-5 coats, but larger or high-wear items might benefit from more. Each coat should be applied thinly and evenly, followed by drying and light sanding. As you build up layers, you’ll notice the wood becoming richer and smoother.
Step 9: The Final Coat and Curing
For the final coat, you might choose to skip the sanding after application (though a very light scuff with 400 grit can be done for some finishes). Apply your final coat carefully, ensuring it’s perfectly even. Lacquer needs to cure, which is a longer process than the initial drying. While it’s dry to touch in hours, it can take several days or even weeks to reach its full hardness. Be gentle with your lacquered item during this curing period.
Tips for a Pro-Level Finish
Want to take your lacquered wood from good to absolutely stunning? Here are a few insider tips:
- Work Environment is Key: Choose a dust-free, well-ventilated area. A garage or a dedicated workshop space is ideal. Avoid working in direct sunlight or extreme temperatures.
- Practice Makes Perfect: If you’re using a sprayer or even a new type of brush, practice on scrap wood first. Get a feel for the spray pattern, flow rate, and drying time.
- Thin Coats are Better Than Thick Coats: It’s always better to apply multiple thin coats than one thick one. Thin coats dry faster, are less prone to runs and drips, and build up a smoother finish.
- Always Follow the Grain: Whether brushing or spraying, always keep your strokes in the direction of the wood grain. This helps achieve a natural look and hides any minor imperfections.
- Edge Coating: Don’t forget to apply lacquer to the edges of your project. They are often the first areas to show wear, and coating them properly adds durability.
- Dealing with Runs and Drips: If you get a run, let it dry completely. Then, carefully sand it down smooth with fine-grit sandpaper and reapply a thin coat of lacquer over the area.
- Safety First: I can’t stress this enough! Lacquer contains strong solvents and is flammable. Ensure excellent ventilation, wear your respirator and gloves, and keep it away from open flames or sparks. According to OSHA, proper respiratory protection is vital when working with these types of finishes.
Lacquer Types and When to Use Them
Not all lacquers are created equal, and understanding the differences can help you choose the best one for your project. Here’s a quick rundown:
| Lacquer Type | Key Characteristics | Best For | Beginner Friendliness |
|---|---|---|---|
| Nitrocellulose Lacquer | Traditional, dries very fast, can be easily repaired (solvents re-dissolve previous coats). Can be more prone to yellowing over time. | Guitars, antique furniture restoration, pieces where ease of repair is paramount. | Moderate (requires good technique to avoid issues) |
| Acrylic Lacquer | Dries very fast, generally more resistant to yellowing than nitro. Less prone to blushing (a cloudy appearance caused by moisture). | General furniture, automotive applications, decorative items. Good for achieving a high gloss. | Good (faster drying and fewer blushing issues) |
| Pre-Catalyzed Lacquer | A good balance between durability and application ease. It’s a bit more robust than basic nitrocellulose and offers good chemical and moisture resistance. | Cabinets, tabletops, high-traffic furniture. A great all-around choice. | Very Good (offers good performance with reasonable ease of use) |
| Water-Based Lacquer | Low VOCs (volatile organic compounds), meaning less odor and safer to use. Dries slower than solvent-based lacquers. May not achieve the same depth of gloss as solvent-based options. | Children’s furniture, small decorative pieces, projects where low odor and safety are top priorities. | Good (easier cleanup, less hazardous) |
Troubleshooting Common Lacquer Problems
Even with the best intentions, you might run into a few hiccups. Here’s how to fix some common issues:
- Runs and Sags: Usually caused by applying the lacquer too thickly or moving too slowly. Let it dry completely, sand smooth, and reapply in thin coats.
- Blushing: A milky or cloudy appearance, often caused by moisture in the air or in the wood settling into the finish as it dries too fast. Ensure good air circulation but avoid humid conditions. If it happens, you can sometimes wipe the surface with lacquer thinner or a specific de-blushing product.
- Orange Peel: Small, wave-like textures on the surface. This can happen when lacquer dries too quickly, a spray gun is set incorrectly, or the lacquer is too thick. Thinning the lacquer slightly or slowing down your application can help.
- Brush Marks: If using a brush, these occur from over-brushing or using a poor-quality brush. Use a high-quality natural bristle brush, dip only the tip, and apply with long, smooth strokes. Foam brushes are great for avoiding this.
- Dust Nibs: Tiny specks embedded in the finish are usually from dust in the air. This is why thorough cleaning and tack cloths are vital. For minor dust nibs, light sanding with very fine grit (400+) and a final buff can often remove them.

FAQ: Your Lacquer Questions Answered
Q1: How many coats of lacquer should I apply?
A1: For most projects, 3-5 thin, even coats are sufficient. High-wear items like tabletops might benefit from more. The goal is a smooth, durable finish, so apply as many as needed to achieve that, always with light sanding between coats.
Q2: Can I apply lacquer over an existing finish?
A2: It’s generally not recommended to apply lacquer over oil-based finishes like polyurethane or varnish without significant preparation. Lacquer’s solvents can react with these finishes, causing them to become soft or gummy. It’s best to completely strip any old finish or start on bare wood. However, you can often apply lacquer over another well-cured lacquer finish.
Q3: How long does lacquer take to dry completely?
A3: Lacquer dries to the touch in about 1-4 hours, allowing recoating within that time. However, it takes much longer to fully cure – typically several days to a couple of weeks, depending on humidity and temperature. During curing, the finish hardens to its maximum durability.
Q4: Is lacquer flammable?
A4: Yes, solvent-based lacquers are highly flammable due to the solvents they contain. Always work in a well-ventilated area away from sparks, open flames, and heat sources. Ensure proper storage and disposal of materials.
Q5: What’s the difference between lacquer and varnish?
A5: Lacquer dries by solvent evaporation, meaning it hardens almost immediately once the solvents flash off. Varnish dries through a chemical reaction (oxidation), which takes much longer. Lacquer is generally easier to repair as future coats can partially re-dissolve previous ones, while varnishes create a harder, less repairable surface.
Q6: Can I use lacquer spray cans outdoors?
A6: While you can, it’s best to avoid it due to wind, dust, and humidity. Wind can cause an uneven spray pattern and blow dust onto the wet finish. High humidity can cause blushing. If you must spray outdoors, try to find a sheltered spot and a calm day. A spray booth or enclosed space is always preferable.
Q7: How do I clean my brushes after using lacquer?
A7: Clean brushes immediately after use with lacquer thinner or mineral spirits. Work the thinner through the bristles until all lacquer is removed. Rinse with clean thinner, then wash with soap and water. Allow brushes to dry thoroughly before storing.
Conclusion: Your Beautifully Finished Wood Awaits!
And there you have it! Applying lacquer to wood is entirely achievable, even for beginners. The key is in the preparation – sanding smoothly, cleaning meticulously – and then applying the lacquer in thin, consistent coats. By following these steps, respecting drying times, and prioritizing safety, you’ll be able to transform your woodworking projects with a durable, beautiful finish that will last. Don’t be discouraged if your first attempt isn’t absolutely perfect; every project is a learning opportunity. The satisfaction of achieving a professional-looking finish on your own creations is truly immense. So, roll up your sleeves, gather your supplies, and get