How to Gouge Wood: Sweep Numbers, Angles & Techniques
Gouging wood means cutting a controlled channel with a curved-edge gouge, using hand pressure or a mallet, instead of paring flat the way a straight chisel does. The gouge’s sweep number (flat #3 to deep U-shaped #11) matters more than pressure: the wrong sweep on basswood (Janka 410) tears the grain, while too shallow a bevel angle on oak (Janka 1,290) just skates. This guide covers sweep and wood choice, push and pull cuts, sharpening, and fixing slips.
What Is Wood Gouging? (Gouge vs. Chisel vs. Carving Knife)
Wood gouging is a woodworking and carving technique that uses a gouge, a tool with a curved cutting edge, to remove material in a rounded channel rather than a flat, straight cut. A gouge differs from a flat chisel (straight edge, normally driven with a mallet for flat cuts and joinery) and a carving knife (a fixed blade drawn through the wood for whittling and detail work); for a broader look at knife-based carving, see our guide to carving wood. Gouges come in dozens of curve depths and widths, and matching the right one to the cut is the single biggest factor in a clean result.
Best Wood Gouging Set Pick
 |
BeaverCraft Wood Carving Gouges Kit SC05 – $79.99 A six piece palm gouge set that covers the medium sweeps this guide recommends starting with, from a shallow smoothing gouge to a deep V-tool for detail lines.
|
As an Amazon Associate we earn from qualifying purchases.
Choosing the Right Gouge: Sweep Numbers Explained
Every gouge is classified by two numbers: the sweep (how curved the blade is, numbered roughly 3 to 11) and the width in millimeters across the cutting edge. A shallow number 3 flattens and smooths a surface, a middle number 5 or 6 handles most general shaping, and a deep number 9 or 11 hollows bowls and cuts the fine lines that give a carving its detail.
| Sweep Number | Curve Depth | Best Used For |
|---|---|---|
| 3 | Nearly flat | Smoothing wide surfaces, finishing cuts |
| 5 to 6 | Medium curve | General shaping, roughing out a form |
| 7 to 8 | Deep curve | Rounding contours and shoulders |
| 9 to 11 | U-shaped, very deep | Hollowing bowls, veining, fine detail lines |
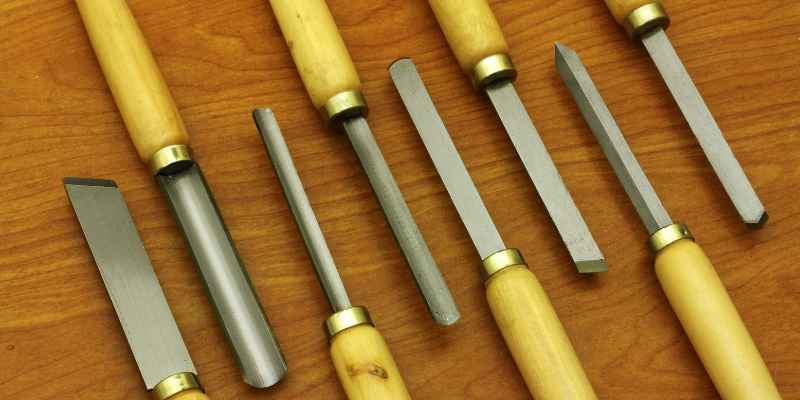
Beginners get more use out of one medium sweep (a number 5 or 6) in a 15 to 20 millimeter width than a full set of eleven, since a #5 can usually substitute for a #4 or #6 in most project instructions.
Best Wood for Gouging (Janka Hardness Compared)
Wood hardness determines how much resistance the gouge meets and how easily the grain tears. Basswood is the standard choice for learning to gouge: it is soft, even-grained, and carves cleanly in almost any direction without splintering.
| Wood | Janka Hardness | Gouging Difficulty |
|---|---|---|
| Basswood | 410 lbf | Easy: carves cleanly in any direction |
| White Pine | 420 lbf | Moderate: alternating grain bands can catch the tool |
| Cherry | 950 lbf | Harder: needs a sharper edge and lighter cuts |
| Red Oak | 1,290 lbf | Hardest: open grain tears easily, mallet often required |
📊 Basswood measures 410 lbf on the Janka hardness scale, less than a third of red oak’s 1,290 lbf. Source: USDA Forest Products Laboratory, Wood Handbook.
For working with harder species like oak or maple, understanding wood grain direction before you start matters even more, since gouging against the grain is what causes tear-out on tougher wood. Softwoods like pine carve faster, but their alternating growth rings can still catch a wide gouge.
How to Hold and Grip a Gouge for Control
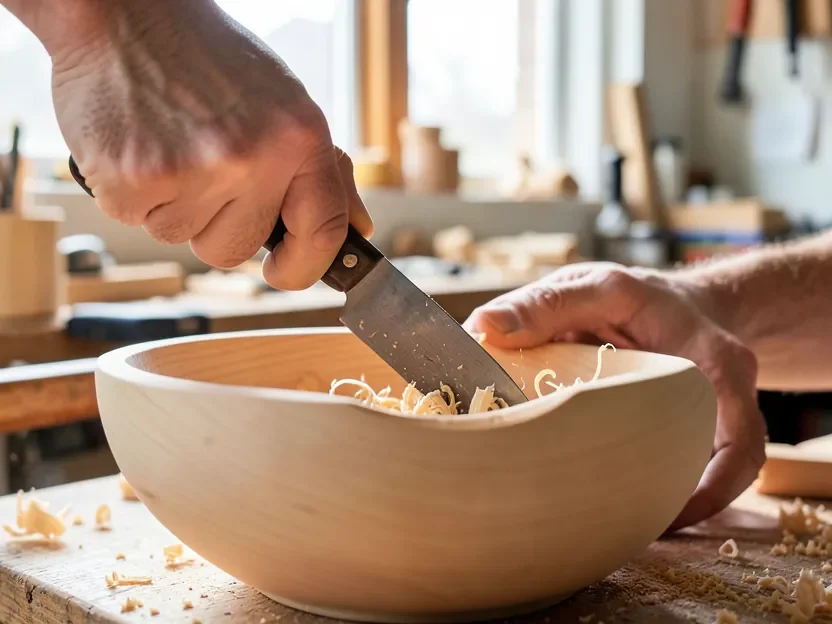
Grip the handle firmly with your dominant hand to guide direction, and rest your other hand along the steel just behind the cutting edge to add downward pressure and stop the tool if it slips. Standing with your dominant foot forward lets you lean your body weight into the cut instead of relying on arm strength alone, which is both more controlled and less tiring over a long session.
Always keep both hands behind the cutting edge. A gouge that breaks free of the wood keeps moving in the direction you pushed it.
The Push Cut and Pull Cut: Two Core Gouging Techniques
Most gouge work comes down to two motions, plus one adjustment for a finished surface.
- Set the bevel angle: Rest the bevel (the flat ground face behind the edge) almost flat against the wood, then tip the handle up slightly until the edge just bites in.
- Push cut: Angle the gouge away from you and drive it forward with steady hand or body pressure to rough out a shape or remove material quickly.
- Pull cut: Angle the gouge slightly toward you and draw it back in a controlled slicing motion; this produces smooth curves and a clean finished surface.
- Finish shallow: For the final pass on any surface, switch to a shallow sweep gouge held at a low angle and take a thin slicing cut rather than a deep gouging cut.
Practice both motions on scrap softwood before starting on a project piece; between them, these two cuts cover roughly every technique described in this guide.
Sharpening: Getting the Bevel Angle Right
A gouge’s bevel angle is the angle ground onto the back of the cutting edge, and it controls how the tool cuts more than raw sharpness alone does.
| Bevel Angle | Effect | Best For |
|---|---|---|
| 20 to 25 degrees | Slices cleanly, edge is more fragile | Fine detail, softwoods, finishing cuts |
| 25 to 30 degrees | Balance of durability and a clean cut | General purpose gouging, most projects |
| 30 to 35 degrees | Edge holds up longer, cuts less cleanly | Deep roughing cuts, hardwoods, mallet work |
Use a whetstone or a sharpening jig to keep the angle consistent every time you sharpen. A wandering angle is the most common reason a gouge that used to cut cleanly suddenly starts to tear the grain instead.
Common Gouge Slips and Mistakes (And How to Avoid Them)
Avoiding Gouge Slips
Most slips happen when a dull edge is forced through wood instead of a sharp one slicing through it. Keep both hands behind the cutting edge at all times, secure the workpiece so it cannot shift, and re-sharpen at the first sign the tool needs more pressure than it used to.
Fixing a Gouge Mistake
A gouge that goes too deep or lands in the wrong spot usually is not fatal to the project. Fill small slips with a color-matched wood filler and sand it flush once dry, or, on a larger piece, work the surrounding area down to blend the mistake into the overall design instead of trying to hide it entirely.
Simple Projects to Practice Gouging
Start with projects that only need a single medium-sweep gouge:
- Wooden spoons: the bowl of the spoon is carved almost entirely with pull cuts from a single gouge.
- Coasters with a carved rim: good practice for controlling cut depth on a flat surface.
- Small relief patterns: see our beginner wood carving designs for patterns sized for a first few gouge projects.
Once push and pull cuts feel controlled rather than forced, most of the techniques in our beginner whittling projects transfer directly, since both crafts rely on the same grain-reading and cut-control skills.
Frequently Asked Questions
How Do You Start Gouging Wood?
Start with a single medium-sweep gouge (a number 5 or 6, 15 to 20 millimeters wide) and a piece of basswood, which is soft and carves cleanly in any direction. Secure the wood, mark the area, and practice push and pull cuts on scrap before starting a real project.
What Tools Are Needed for Wood Gouging?
A gouge in a medium sweep, a mallet for deeper cuts, a sharpening stone or jig to maintain the bevel angle, and safety glasses. A carving vise or bench hook to hold the wood steady prevents most slips and is worth adding early.
Can Beginners Gouge Wood Safely?
Yes. Beginners can gouge wood safely by keeping both hands behind the cutting edge, working on soft wood like basswood or pine, and using a sharp gouge rather than a dull one, which is what actually causes most slips.
What Types of Wood Are Best for Gouging?
Basswood (Janka hardness 410) and white pine (420) are the easiest for beginners. Harder woods like cherry (950) and oak (1,290) hold detail better once you have the technique, but they need a sharper edge and more force to cut cleanly.
Conclusion
Gouge work comes down to matching the sweep and bevel angle to the wood and the cut you want, then controlling the tool with both hands behind the edge. Start with a medium-sweep gouge on basswood, practice the push and pull cuts on scrap, and move to harder wood once those cuts feel controlled rather than forced.
Sponsored / affiliate links. As an Amazon Associate I earn from qualifying purchases. I may earn additional commission from eligible campaigns.