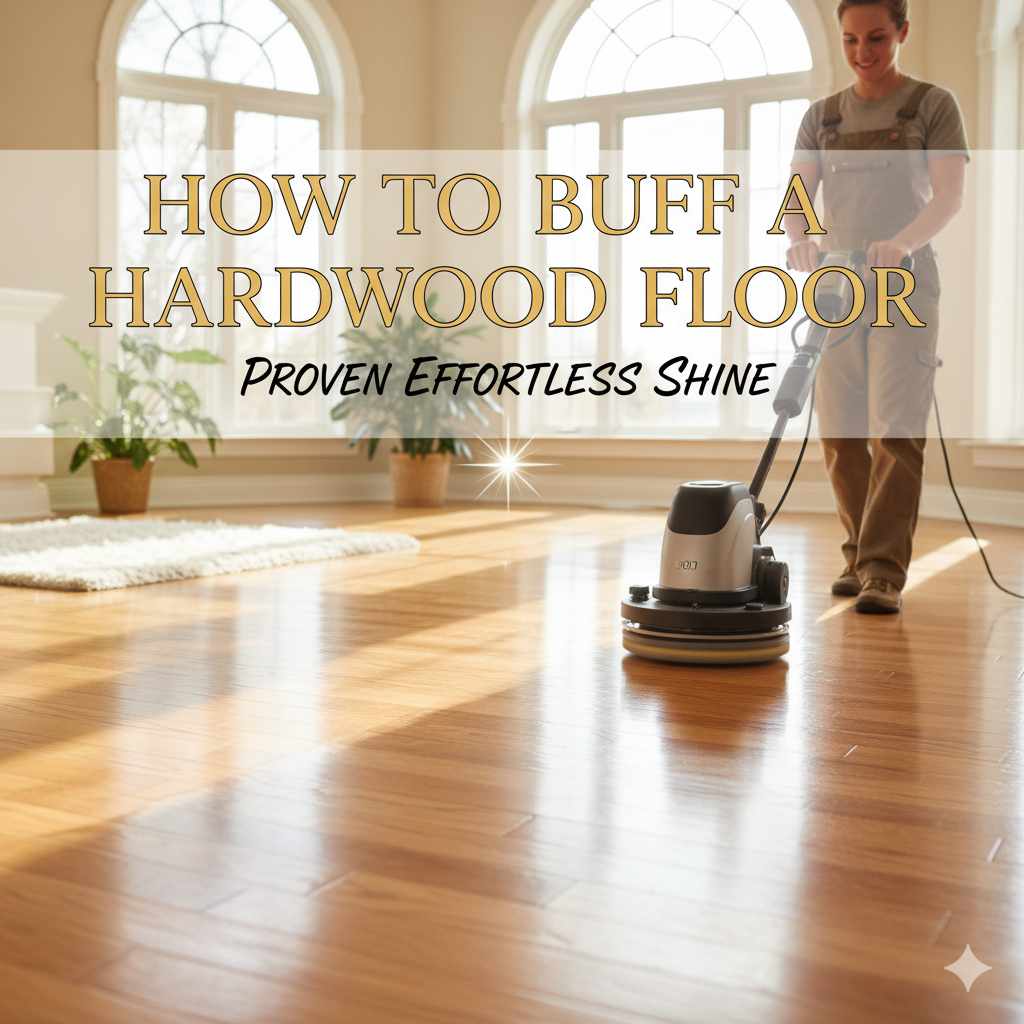
How to Buff a Hardwood Floor: Proven Effortless Shine
Buffing your hardwood floors is an easy way to restore their shine and protect them. You’ll need a floor buffer, polishing pads, and a suitable hardwood floor cleaner. Follow our simple, step-by-step guide to achieve a beautiful, effortless shine without professional help.
Hey there, DIY friends! Md Meraj here, your woodworking buddy. Have your hardwood floors lost their sparkle? Do they look a bit dull, despite all your cleaning efforts? You’re not alone! Many homeowners find that over time, even the best-maintained wood floors can start to fade and show wear. But don’t worry, bringing back that glorious shine is totally achievable, and far less daunting than you might think. We’re going to walk through how to buff a hardwood floor, step-by-step, making it simple, safe, and rewarding. Get ready to rediscover the beauty of your floors!
Why Buffing is Your Hardwood Floor’s Best Friend
Buffing, often referred to as “screen and recoating” or “light refinishing” in professional terms, is a fantastic maintenance technique for hardwood floors. It’s not a full sanding and refinishing job, which can be messy, time-consuming, and expensive. Instead, buffing removes the very top layer of worn-out finish, lightly scuffs the surface to prepare it for a new coat, and then applies a fresh layer of protective coating. This revives the look of your floor, fills in tiny imperfections, and adds a durable, lustrous sheen.
Think of it like giving your favorite piece of furniture a quick polish. It’s about rejuvenation, not a complete overhaul. This process is especially beneficial if your floors have light scratches, fading, or a general lack of vibrancy but the wood itself is still in good condition.
Buffing vs. Sanding: What’s the Difference?
It’s crucial to understand the distinction between buffing and traditional sanding. Sanding is a more aggressive process that removes a significant amount of wood along with the old finish. It’s necessary when there are deep scratches, gouges, or significant damage to the wood itself. Sanding creates a lot of dust and requires multiple grits of sandpaper.
Buffing, on the other hand, is a much gentler approach. It typically uses a buffer with a mild abrasive screen or pad to lightly abrade the surface. This process only removes the top layer of the finish, not the wood itself. It’s ideal for floors that are still structurally sound but have lost their aesthetic appeal due to wear and tear on the protective coating.
Here’s a quick way to think about it:
| Feature | Buffing (Screen & Recoat) | Sanding & Refinishing |
|---|---|---|
| Aggression | Mild; removes top layer of finish only. | Aggressive; removes finish and a layer of wood. |
| When to Use | Worn finish, light scratches, dullness. | Deep scratches, gouges, stains, significant damage. |
| Dust/Mess | Minimal. | Significant. |
| Time Commitment | Shorter; often 1-2 days. | Longer; often 3-7 days. |
| Cost | Generally less expensive. | Generally more expensive. |
| DIY Friendliness | High. | Moderate to Low. |
Gathering Your Buffing Toolkit
Before we dive into the steps, let’s make sure you have everything you need. Having the right tools and materials on hand will make the process smoother and more efficient. Don’t worry; most of these items are readily available at your local hardware store or home improvement center. And remember, safety first!
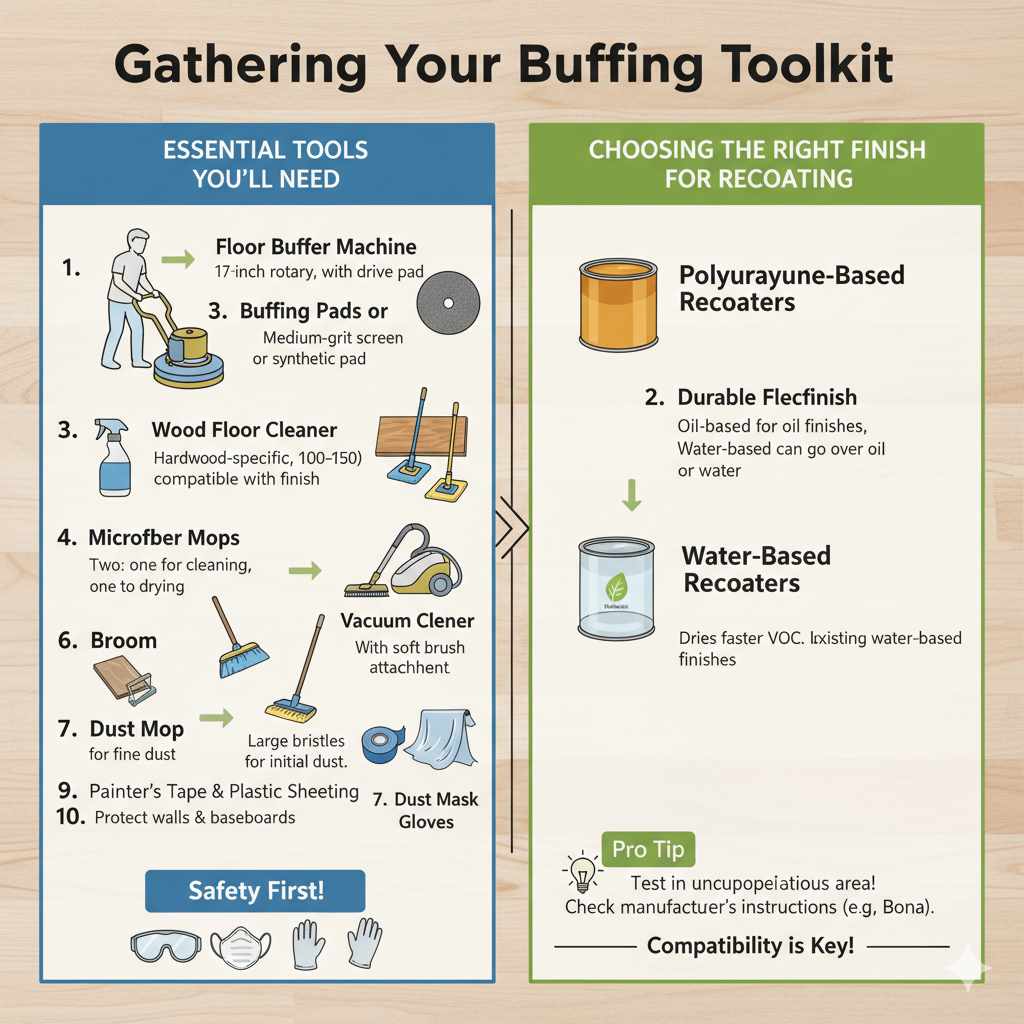
Essential Tools You’ll Need
- Floor Buffer Machine: You can rent these from most tool rental shops. Look for a standard 17-inch rotary floor machine. Ensure it comes with a drive pad.
- Buffing Pads or Screening Discs: These are abrasive materials that attach to the drive pad. For buffing most modern hardwood finishes, you’ll want a medium-grit screen (e.g., 100-150 grit) or a synthetic buffing pad. A screen is generally preferred as it’s less likely to clog.
- Wood Floor Cleaner: Choose a cleaner specifically designed for hardwood floors and compatible with your floor’s finish (e.g., polyurethane, oil-based). Avoid harsh chemicals or all-purpose cleaners, as they can damage the finish.
- Microfiber Mops: You’ll need at least two. One for applying the cleaner and one for drying/buffing.
- Vacuum Cleaner with a Soft Brush Attachment: For removing loose debris.
- Broom with Soft Bristles: For initial dust removal.
- Dust Mop: A large, dry dust mop is excellent for picking up fine dust after vacuuming.
- Painter’s Tape and Plastic Sheeting: To protect walls, baseboards, and any adjacent flooring.
- Safety Glasses: To protect your eyes from any flying debris.
- Dust Mask: To avoid inhaling fine dust particles.
- Gloves: To protect your hands.
Choosing the Right Finish for Recoating
If your floor buffing involves recoating – which it often does for the best results – selecting the right product is key. Most modern hardwood floors are finished with polyurethane (oil-based or water-based). It’s vital to use a recoating product that is compatible with your existing finish.
- Polyurethane-Based Recoaters: These are durable and popular. If you have an oil-modified polyurethane finish, an oil-based recoater will bond well. Water-based polyurethane finishes can often be recoated with either water-based or oil-based products, but check the manufacturer’s instructions.
- Water-Based Recoaters: These dry faster and have lower VOCs (volatile organic compounds), making them more environmentally friendly. They are a great option for recoating existing water-based finishes.
Pro Tip: If you’re unsure about your floor’s existing finish, try applying a small amount of a test product in an inconspicuous area, like inside a closet. Let it dry and check for adhesion and any adverse reactions. Reputable flooring manufacturers often provide detailed information on their websites; for instance, brands like Bona offer excellent resources on maintaining their finishes, which can often be adapted for other compatible finishes. You can check out guidelines on floor finish compatibility from resources like the National Association of Homeowners for general information about wood floor finishes.
Step-by-Step Guide: How to Buff a Hardwood Floor
Now that you’re prepped with your tools and materials, let’s get to the main event! Follow these steps carefully for a smooth and successful buffing process.
Step 1: Clear the Area
This is the crucial first step many people overlook. You need a completely clear workspace. Remove all furniture, rugs, and decor from the floor. The more space you have, the easier and more thorough your buffing will be.
Why this is important: Trying to buff around furniture is not only inefficient but can lead to uneven results and missed spots. Plus, moving furniture is a great opportunity to thoroughly clean it and declutter.
Step 2: Prepare for Dust Containment
Even though buffing creates less dust than sanding, it still produces some airborne particles. Protect your home by taping off doorways and any vents leading to other rooms with plastic sheeting and painter’s tape. This will help contain any dust generated during the process.
Step 3: Deep Clean Your Floors
This isn’t your everyday sweeping. You need to remove every speck of dirt, grit, and debris that could scratch your floor or clog your buffing pad. Start by vacuuming thoroughly with a vacuum cleaner equipped with a soft brush attachment. Pay special attention to corners and edges.
Next, sweep with a soft-bristled broom. Follow up with a good dry dusting using a large, clean dust mop. The goal here is an immaculate surface. Any remaining debris can end up being ground into the finish by the buffer, causing damage.
Step 4: Apply Wood Floor Cleaner
Now, it’s time for a damp clean. Use your specially formulated hardwood floor cleaner. Do not over-wet the floor; this is a common mistake that can damage hardwood. Lightly mist the cleaner onto a section of the floor using your microfiber mop, or follow the instructions on your cleaner’s bottle regarding application.
Work in manageable sections (about 4-5 feet at a time). Gently mop the floor. You’re aiming to lift any remaining grime and prepare the surface for buffing. Do not let the cleaner sit and pool on the floor. Follow immediately behind with a dry microfiber mop to absorb any excess moisture.
Step 5: Attach the Buffing Pad or Screen
Ensure your floor buffer machine is unplugged. Attach the appropriate buffing pad or screening disc to the machine’s drive pad. Make sure it’s securely fastened. If you’re unsure how to attach it, consult the rental shop’s instructions or the machine’s manual. For screening, the screen disc should be flat against the floor.
Step 6: The Buffing Process
Plug in the floor buffer and turn it on. Start in a corner and move the machine in slow, overlapping passes. A common technique is to move in a side-to-side motion, and then make overlapping passes in the opposite direction. Think of it like mowing a lawn – create parallel paths.
Keep the buffer moving at all times. Do not let it sit in one spot, as this can create uneven abrasion or damage the finish. Maintain consistent pressure. Most standard buffers are heavy enough that you just need to guide them; don’t push down excessively.
Buffing Techniques for Best Results
- Work in Sections: Tackle one manageable area at a time. This ensures you don’t miss spots and maintain control.
- Overlap Passes: Each pass should overlap the previous one by about 50%. This guarantees uniform coverage.
- Consistent Direction: Initially, buff in one direction (e.g., side-to-side). Then, make a second pass, buffing in the perpendicular direction (e.g., up-and-down). This helps ensure a uniform abrading of the finish.
- Edge Work: For areas the buffer can’t reach (like near cabinets or tight corners), you might need to use a hand pad or a smaller edge-polishing tool. Be very gentle in these areas to avoid unevenness.
- Check Your Pad/Screen: The buffing pad or screen will collect dust and debris. If it starts to clog or performs poorly, unplug the buffer and switch to a fresh pad or screen.
Step 7: Clean Up Dust After Buffing
Once you’ve buffed the entire floor, unplug the buffer. Use your vacuum with the soft brush attachment to thoroughly remove all the dust created. Follow this with a dry dust mop to pick up any remaining fine particles. The floor should feel slightly slick and smooth to the touch. If you feel any grit, vacuum and dust mop again until it’s completely clean.
Step 8: Recoat the Floor (Optional but Recommended)
If your goal is a renewed shine and enhanced protection, recoating after buffing is highly recommended. This is where you apply a fresh, thin layer of compatible hardwood floor finish (polyurethane, etc.) over the lightly abraded surface.
Applying the Finish:
- Ventilation is Key: Open windows and doors for good air circulation. If using a solvent-based product, ensure proper ventilation is established before you even start.
- Stir, Don’t Shake: Gently stir the finish. Shaking can introduce bubbles.
- Apply Thin Coats: Use a high-quality applicator pad or brush designed for hardwood floor finishes. Apply a thin, even coat in the direction of the wood grain. Avoid puddling or thick application, as this can lead to an uneven sheen or curing issues.
- Work Quickly and Systematically: As with buffing, work in sections. Some finishes allow for back-rolling or spreading to ensure evenness.
- Drying Time: Follow the manufacturer’s recommended drying time precisely. This can range from a few hours to a full day. Light foot traffic might be allowed after 24 hours, but full cure (when you can safely place furniture back) can take several days to a week or more. Avoid heavy traffic, rugs, and furniture placement until the finish is fully cured. Refer to the finish manufacturer’s guidelines for specific timelines. For instance, brands like Minwax offer detailed application guides for their finishes.
Step 9: Final Touches and Curing
After recoating, allow the finish to cure completely. Be patient! This is crucial for the durability of your newly buffed and coated floor. Resist the urge to place furniture back too soon. For heavier pieces, consider using furniture sliders or felt pads, even after the recommended curing time, to prevent scratches.
Clean up your tools immediately after use. Most water-based finishes can be cleaned with soap and water, while oil-based finishes will require mineral spirits.
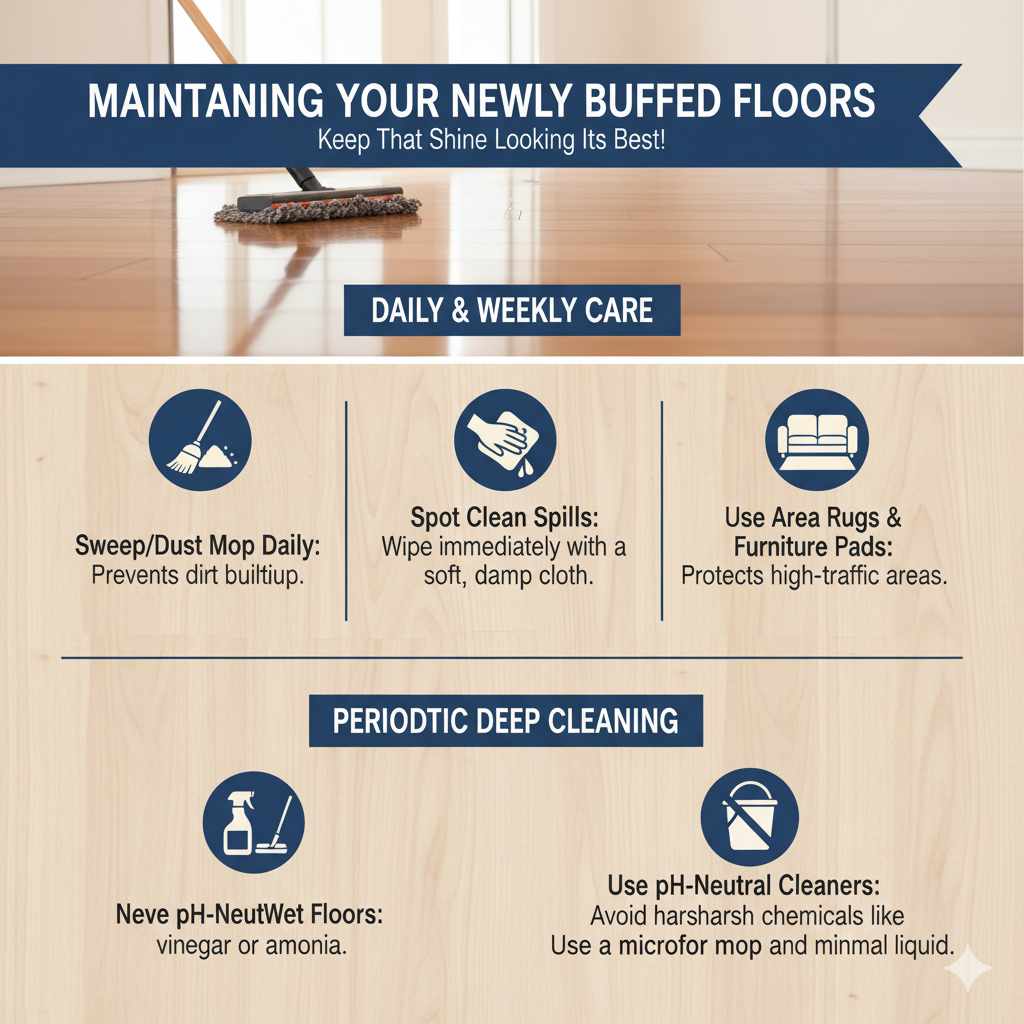
Maintaining Your Newly Buffed Floors
You’ve done it! Your floors are looking fantastic. Now, maintaining that shine is key. Regular, gentle care will keep your floors looking their best for years to come.
Daily and Weekly Care
- Sweep or Dust Mop Daily: This is the most important step. Removing dust, dirt, and pet hair prevents them from becoming ground into the finish.
- Spot Clean Spills Immediately: Wipe up any spills with a soft, damp cloth and dry the area thoroughly.
- Use Area Rugs: Place rugs in high-traffic areas like entryways, hallways, and under the dining table to protect the finish from wear. Ensure rugs have a non-slip backing made of natural materials or a rubber that won’t discolor your finish.
- Use Furniture Pads: Always use felt pads or sliders under furniture legs.
- Avoid Harsh Cleaners: Stick to pH-neutral hardwood floor cleaners and avoid vinegar, ammonia, or abrasive cleaners, which can dull or damage the finish.
Periodic Deep Cleaning
Every few months, or as needed, give your floors a more thorough cleaning. Use a cleaner specifically designed for hardwood floors and a microfiber mop. Remember, never over-wet the floor. Two thin coats of cleaner, followed by drying, is better than one heavy, soaking application.
Frequently Asked Questions (FAQ)
Can I buff my hardwood floors if they have a wax finish?
Buffing is generally not recommended for waxed floors. Wax finishes require different maintenance, typically involving buffing with a fine steel wool (grade #0000) and a wax polish, or stripping and re-waxing. Always identify your finish type before attempting any maintenance.
How often should I buff my hardwood floors?
This depends on foot traffic, pets, and general wear. For most homes, buffing can be done every 1-3 years. If your floors are in a high-traffic area or you have pets, you might consider it annually or bi-annually. If the finish is worn, it’s time!
What grit of screen or pad should I use?
For most modern polyurethane finishes, a 100-150 grit screen or a medium-grit synthetic buffing pad is a good starting point. If the old finish is particularly stubborn, you might go slightly coarser, but always test in an inconspicuous area first. Too rough a grit could damage the wood.
How do I fix deep scratches before buffing?
Buffing is designed for light wear on the finish. Deep scratches that go into the wood itself cannot be fixed by buffing. These typically require sanding and refinishing, or professional repair.
Can I rent a floor buffer?
Yes, absolutely! Most home improvement stores and tool rental shops offer floor buffers for rent by the day. This is a cost-effective option for DIYers.
Is buffing messy? How much dust does it create?
Buffing creates significantly less dust than sanding. It’s more comparable to light abrasion. However, some dust is inevitable, so it’s still wise to protect your home with plastic sheeting and to wear a dust mask and safety glasses.