How to Get Rid of Black Mold on Hardwood Floors Safely
Small, surface-level mold on hardwood floors – a patch smaller than about 10 square feet (roughly a 3×3 foot area) – can usually be cleaned safely with basic supplies and PPE. Larger areas, mold that keeps returning after cleaning, or mold you suspect is growing under the boards from a wet subfloor are jobs for a professional mold remediation company, not a DIY weekend. Don’t underestimate that distinction: cleaning the surface without fixing what’s underneath just hides the problem.
Below is the safe, step-by-step process for the DIY-appropriate cases, plus exactly how to tell when you’re past that point.
What Is It, and Do You Need to Identify the Species First?
Safer Than Bleach on Wood
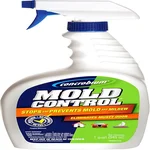 |
Concrobium Mold Control, 32 oz Spray – $13.48 EPA-registered and bleach-free, so it won’t discolor or degrade a wood finish the way bleach can, and it leaves a residue that helps prevent regrowth after the surface mold is gone.
|
Most dark mold found on hardwood floors is not the infamous “toxic black mold” (Stachybotrys chartarum) that headlines love to mention – it’s far more commonly Cladosporium, Aspergillus, or Alternaria, all of which are dark-colored, common, and still worth removing properly, but not the rare, more dangerous species people usually picture. The CDC and EPA both recommend against paying for mold species testing in most residential situations: the guidance is the same regardless of species – clean it up and fix the moisture source – so lab testing is rarely worth the cost unless you have a specific medical reason for identification or the mold keeps recurring despite proper remediation. What matters far more than species is how much mold you’re dealing with and why it’s there.
Why It’s on Your Floor
Mold needs moisture, and on a hardwood floor that moisture usually comes from one of these sources:
- Leaks: Plumbing leaks under the floor, roof leaks, or a leaking appliance like a dishwasher or refrigerator.
- High humidity: Basements, bathrooms, kitchens, and laundry rooms without proper ventilation hold moisture against the wood.
- Condensation: Cold water pipes or condensation on windows near the floor create damp spots that never fully dry.
- Spills: Liquid that isn’t cleaned up promptly penetrates the finish and reaches the wood or subfloor underneath.
- Flooding or a slow crawl-space leak: Water intrusion from below is one of the most common causes of mold that keeps coming back on the surface – the source is under the floor, not on it, which is exactly the scenario surface cleaning can’t fix.
Fixing the moisture source is not optional – it’s the actual fix. Cleaning mold off the surface without addressing why it grew there means it comes back, usually within weeks.
When This Is a DIY Job vs. When to Call a Professional
The EPA’s general rule of thumb for mold in a home is that contamination covering less than about 10 square feet can typically be handled by a capable homeowner with proper protection. Beyond that size, or if any of the following apply, bring in a professional mold remediation company instead of continuing on your own:
- Mold keeps returning in the same spot after you’ve cleaned and dried it properly – this points to an ongoing moisture source you haven’t found or fixed, often under the flooring.
- You can smell a musty odor but can’t find or see the source – hidden mold under flooring or inside a wall cavity needs a professional inspection, sometimes with a moisture meter or borescope.
- The mold followed a flood, major leak, or sewage backup – contaminated water brings other health hazards beyond mold that need professional handling.
- Anyone in the household has asthma, mold allergies, a compromised immune system, or is an infant or elderly – the health stakes of getting DIY cleanup wrong are higher, and professional remediation contains spores far more effectively.
Safety Gear and Containment Before You Start
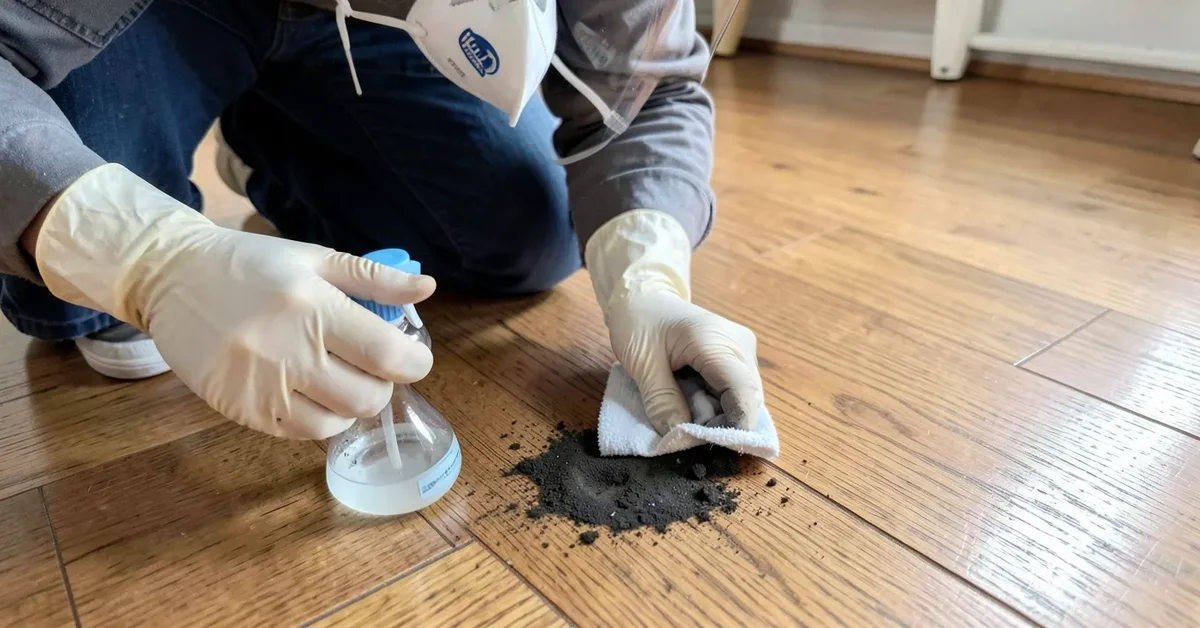
Mold spores become airborne the moment you start disturbing them, and inhaling them is the main health risk during cleanup – more so than skin contact. Gather all of this before you touch the mold, not partway through:
- Respirator, not a paper dust mask: A basic dust mask does not filter mold spores effectively. Use at minimum an N95, or better, a half-face P100 respirator if you have one or are cleaning more than a small spot.
- Rubber or disposable gloves to keep mold and cleaning solutions off your skin.
- Goggles (not just glasses) to keep spores and splashed cleaning solution out of your eyes.
- Clothing you can wash immediately or discard – mold spores cling to fabric and can spread to other rooms on your clothes.
Open windows and run a fan pointed out of the room to vent spores outside rather than into the rest of the house. For anything beyond a small, contained spot, seal the room off from the rest of the house with plastic sheeting and tape before you start – this matters even more if anyone in the household is in one of the higher-risk groups above.
Step-by-Step: Cleaning Surface Mold Safely
Step 1: Find and Fix the Moisture Source First
Don’t clean before you know why the mold is there. Check for a leak, condensation, poor ventilation, or a spill that soaked in. If you can’t identify an obvious cause, or you suspect the source is under the floor rather than on top of it, stop and call a plumber, home inspector, or mold remediation company before proceeding – cleaning over an active, hidden leak is wasted effort.
Step 2: Choose a Cleaning Solution – Mildest First
Always spot-test any solution on an inconspicuous area first to confirm it won’t discolor the finish.
- Mild dish soap and warm water – the gentlest option, good for light surface mold.
- Equal parts white vinegar and water – a mild, natural disinfectant that’s generally safe for sealed hardwood.
- 3% hydrogen peroxide, used straight from the bottle – effective and gentler than bleach, though it can mildly lighten some finishes, so spot-test first.
- An EPA-registered mold control product (see the pick above) as a middle ground between mild home remedies and bleach.
A real word of caution on bleach: most mold-remediation guidance, including the EPA’s, does not recommend bleach for porous or semi-porous materials like wood. Bleach’s chlorine mostly acts on the surface and doesn’t penetrate into wood grain the way mold’s root structure (hyphae) can, so it often bleaches the visible color without actually killing what’s underneath – and the water in a bleach solution adds exactly the moisture that encourages regrowth. If you use it anyway on a sealed floor as a last resort, mix no more than 1 cup of bleach per gallon of water, ventilate heavily, apply sparingly, and never mix it with ammonia or vinegar, which produces toxic chloramine gas.
Step 3: Apply, Scrub Gently, and Rinse
Dampen a cloth or sponge with your chosen solution – wrung out, not dripping, since standing liquid is exactly what damages hardwood. Work in small sections and wipe with the grain. For stubborn spots, a soft-bristled brush (an old toothbrush works for tight areas) lifts mold without scratching the finish. Once the mold is gone, wipe the area again with a cloth dampened with plain water only, to remove any cleaning solution residue.
Step 4: Dry Completely – This Step Decides Whether It Comes Back
Towel-dry immediately, then run fans across the area until it’s dry to the touch with zero lingering dampness – not just surface-dry. Any moisture left behind, especially between boards, restarts the mold cycle within days. If the smell lingers after the area is fully dry, bowls of baking soda or activated charcoal left in the room for a few days will absorb most residual musty odor.
Step 5: Inspect, and Know When to Stop DIY-ing It
If mold or discoloration remains after one or two cleaning passes, or if the wood feels soft, spongy, or shows staining that doesn’t lift with cleaning, the mold has likely penetrated below the surface. At that point sanding (for light, localized penetration) or board replacement (for anything more extensive) is the real fix, and both are worth having a flooring professional assess – sanding stirs up a large volume of contaminated dust that needs proper containment and a respirator rated for it, not just an N95.
Preventing It From Coming Back
Keep indoor relative humidity between 30-50% year-round; a plug-in hygrometer costs a few dollars and takes the guesswork out of this. Run bathroom and kitchen exhaust fans during and after showers or cooking, and confirm your clothes dryer actually vents outside rather than into an attic or crawl space, which is a surprisingly common builder shortcut. Wipe up spills immediately rather than letting them sit, fix leaks the same week you notice them rather than “eventually,” and periodically check under appliances, near exterior doors, and along baseboards – the places moisture problems start invisibly before they ever reach the surface as mold.
Frequently Asked Questions
Is black mold on hardwood floors dangerous?
It can be a genuine health concern, particularly for people with asthma, mold allergies, or compromised immune systems – inhaling spores can trigger respiratory symptoms and irritation. Most household “black mold” is a common species, not the rare toxic variety often referenced in the media, but that doesn’t mean it’s safe to ignore. Wear proper respiratory protection during cleanup and fix the moisture source so it doesn’t return.
Can I use bleach to clean black mold on hardwood floors?
You can, but most remediation guidance advises against it for wood specifically: bleach doesn’t penetrate porous material to kill mold at the root, so it often just bleaches the visible surface while adding moisture that can help mold return. Vinegar, hydrogen peroxide, or an EPA-registered mold control product are generally more effective and less damaging choices for a finished wood floor.
How much does it cost to fix black mold on hardwood floors?
Minor surface mold you clean yourself costs little beyond basic supplies and PPE. If the mold has penetrated the wood and requires sanding and refinishing, or boards need replacing, costs commonly run from a few hundred to several thousand dollars depending on the area affected and your location. Professional mold remediation for larger or recurring problems adds to that, but is worth it once the contamination exceeds roughly 10 square feet.
How do I know if the mold is coming from under the floor?
Warning signs include mold that returns quickly after proper cleaning and drying, a persistent musty smell with no visible source, boards that feel soft, cupped, or spongy underfoot, or mold appearing along seams and edges rather than in an obvious spill area. Any of these point toward moisture under the flooring, which needs a professional inspection rather than repeated surface cleaning.
Do I need to get the mold tested to know what type it is?
Usually not. The CDC and EPA both note that remediation steps are the same regardless of mold species, so testing rarely changes what you should do. It’s worth considering only if mold keeps recurring despite proper cleanup and moisture control, or if a household member’s doctor recommends it for a specific health concern.
Conclusion
Small, surface-level mold on a hardwood floor is a manageable DIY job with the right PPE, a mild-to-moderate cleaning solution, and thorough drying – but only after you’ve found and fixed the moisture source. Mold larger than about 10 square feet, mold that keeps coming back, or anything that smells like it’s coming from under the floor is past the point where cleaning products alone fix it. Getting that distinction right matters more for your health and your floor than which cleaning solution you reach for first.
Sponsored / affiliate links. As an Amazon Associate I earn from qualifying purchases. I may earn additional commission from eligible campaigns.