
How to Cedar Line a Closet: Aromatic Cedar Planks & Steps
Aromatic Eastern red cedar — not construction-grade lumber — lines closets because its cedrol-rich oils mask the scent moths use to find wool, but that scent alone won’t kill eggs or larvae already in stored clothes. Using the wrong grade or skipping cleaning first is why some “cedar closets” still show moth damage. This guide covers choosing 3/8–1/2 in. tongue-and-groove planks, installing them over drywall or studs, and refreshing faded scent by sanding.
Quick Answer
Cedar-line a closet with 3/8–1/2 in. aromatic Eastern red cedar tongue-and-groove planks, nailed or glued directly over drywall or studs after the wood acclimates 48–72 hours. Clean and dry clothes first — cedar’s oils repel adult moths by scent but won’t kill eggs or larvae already on fabric. Never seal the wood, and refresh faded scent every few years with light 100–150 grit sanding.
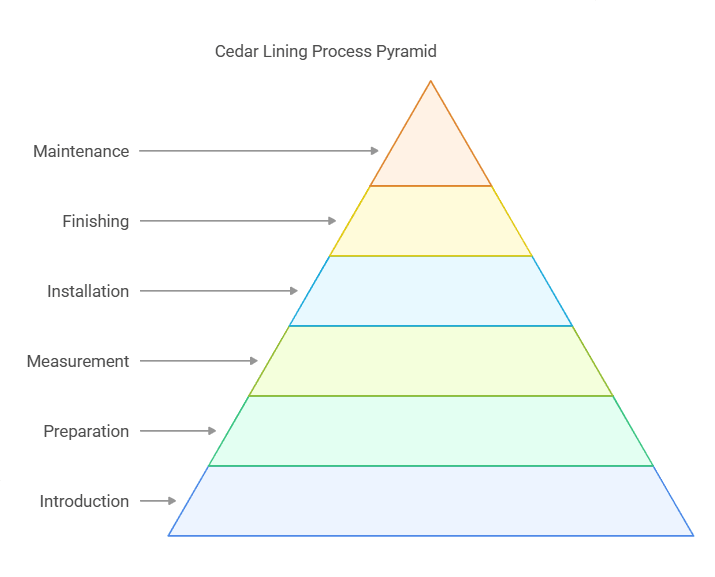
Introduction To Cedar Lining
Best Cedar Closet Lining Pick
Cedar Tongue and Groove Wall Panels, ½″ Thick
Pre-milled tongue-and-groove Western red cedar planks sized for closet and accent-wall lining projects.
- Best for: Standard closet walls needing the classic ridged cedar look
- Why we picked it: Matches the 3/8–1/2 in. tongue-and-groove spec this guide recommends
- Main drawback: Western red cedar carries less scent oil than aromatic Eastern red cedar
Compare more cedar closet lining options
 Option 1 Western Red Cedar Wall Planks
|
 Option 2 Eastern Red Cedar Boards, 3/4″
|
 Option 3 Cedar Oil (Scent Refresh)
|
As an Amazon Associate we earn from qualifying purchases.
Aromatic Eastern red cedar (Juniperus virginiana) is the species used for closet lining, not ordinary cedar lumber sold for fencing or decking — only the aromatic grade carries enough cedrol oil in the wood to produce a scent strong enough to matter. That scent masks the odor moths use to locate wool and other natural fibers; it does not poison or kill moths on contact, and it won’t reach eggs or larvae already inside stored garments. Cedar also resists mold and mildew in humid closets and gives the space a clean, natural look. Properly installed, a cedar-lined closet is a one-time project that keeps working for years, as long as the scent gets refreshed periodically.
| Material | Typical Spec | Notes |
|---|---|---|
| Aromatic cedar tongue-and-groove planks | 3/8–1/2 in. thick | Interlocking edges hide nails; classic closet-lining choice |
| Cedar-safe finish nails or adhesive | 1–1–1/2 in. nails | Use panel nails for drywall backing, shorter nails for studs |
| Measuring tape & stud finder | — | Locate studs before nailing, not just for accurate cuts |
| Hammer or nail gun | — | Nail gun speeds up long walls |
| Level | — | Keeps the first course straight; every row after follows it |
| Wood filler or caulk | — | For gaps between panels after installation |
What Is a Cedar Closet? (And Which Cedar Actually Works)
A cedar closet is a closet with its interior walls (and sometimes floor) lined in aromatic cedar wood instead of drywall, so the wood’s natural oils stay exposed to the air inside the space. Not every cedar works: fence-grade Western red cedar and construction lumber carry much less cedrol oil than aromatic Eastern red cedar, which is milled specifically for closet lining and sold as tongue-and-groove planks or cedar plywood panels.
Tongue-and-groove planks give the classic ridged look and hide fasteners inside the joint, while cedar plywood panels install faster over large flat walls but show visible seams. Either option should be labeled “aromatic” on the packaging — if it isn’t, it’s the wrong grade for this project. For a deeper look at cedar grades, see our Eastern red cedar vs. Western red cedar guide and which cedar is actually best for closets.

| Option | Thickness | Best For |
|---|---|---|
| Tongue-and-groove planks | 3/8–1/2 in. | Traditional look, hidden fasteners, easiest scent refresh by sanding |
| Cedar plywood panels | 1/4–3/8 in. | Large flat walls, faster install, lower material cost |
| Cedar blocks or balls | — | Topping up scent in an existing closet without new planking |
Preparing The Closet
Cedar lining protects clothes from moths and adds a pleasant scent, but preparation determines how well it works. Measure the walls, locate the studs, and let the cedar acclimate before it ever touches the wall.
Clearing Out And Cleaning The Space
Remove everything — clothes, shoes, boxes, rods, and shelving — and wash or dry-clean any garments before they go back in. This step matters more than it looks: cedar’s scent repels adult moths, but it does nothing to eggs or larvae already living in stored fabric, so a closet lined over dirty clothes can still have a moth problem afterward. Wipe down the walls and shelves with a mild cleaner and let everything dry fully before installing anything.
Acclimating The Cedar And Finding The Studs
Bring the unopened cedar boxes into the closet and let them sit for 48–72 hours before installing — cedar shrinks and swells as it adjusts to your home’s humidity, and skipping this step is a common cause of gaps or warping later. While the wood acclimates, run a stud finder over the walls and mark each stud center in pencil; nailing into studs (or using the right length nail into gypsum board) holds far better than adhesive alone on a load-bearing wall.
Measuring And Cutting Cedar Panels
Measure and cut cedar planks to fit each closet wall, working one wall at a time so pieces don’t get mixed up.
Taking Accurate Measurements
Measure the height and width of each wall separately — closets are rarely perfectly square — and write down every measurement before cutting anything. Mark cut lines on the back face of the plank, not the show face, so any small marking errors stay hidden once installed.
Cutting Panels To Size
A miter saw gives the cleanest cross-cuts on tongue-and-groove planks; a sharp utility knife and straight edge work for thinner cedar plywood. Cut the last piece in each row a little long and trim to fit — it’s easier to shave off material than to add it back.
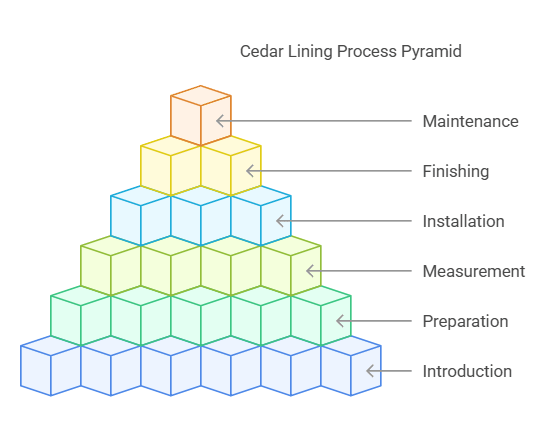
Installing The Cedar Panels
- Snap a level line: Mark a level starting line near the floor on the back wall — every row after this one follows it, so it has to be exact.
- Set the first plank: Fit the first tongue-and-groove plank tightly into the bottom corner with the groove side down, and nail or glue it at the marked stud locations.
- Work up and across: Slide each following plank’s groove over the previous tongue, nailing through the tongue edge so fasteners stay hidden, and continue row by row up the wall.
- Check for gaps as you go: Press each new plank firmly against the one below before nailing — gaps left now are harder to close later and reduce the scent barrier.
- Repeat wall by wall: Finish one wall completely before starting the next, so leftover cut pieces from one wall can be reused to start the next.
Nails hold best when they land in a stud; use a nail gun to speed up long walls. If a section of wall has no stud behind it, cedar-safe construction adhesive is the backup — apply it evenly and press the panel firmly for the time listed on the tube. Whichever fastener you use, never seal or topcoat the finished cedar: any sealant, stain, or clear coat blocks the pores the oil evaporates from, which defeats the entire purpose of lining the closet.
Finishing Touches
Cut trim pieces to cover the top and corner edges, and secure them with small finish nails or adhesive for a clean edge where the cedar meets the ceiling or door frame. Check every panel for loose spots and add extra adhesive or a nail where needed — a rubber mallet helps tap trim into place without marking the wood.

Maintaining Your Cedar Lined Closet
Keep the closet clean with a soft cloth or vacuum — avoid strong cleaners, which can strip the wood’s natural oils. Wipe down shelves and walls occasionally rather than scrubbing them.
Cedar’s scent fades over one to three years as the surface oils oxidize and the exposed pores clog with dust — this is normal and doesn’t mean the wood has “stopped working.” To refresh it, lightly sand every panel with 100–150 grit sandpaper using a random-orbit sander or sanding block, working with the grain. Sanding opens fresh, oil-bearing wood beneath the dulled surface layer, which restores the scent without needing to replace any planks. Vacuum the dust afterward and wipe with a tack cloth; a light coat of pure cedar oil on a cloth can extend the refresh between sandings, though sanding lasts longer than oil alone.
Troubleshooting Common Issues
Warped panels usually mean the cedar didn’t get its full acclimation period before installation. Dampen the warped area with a cloth to soften the wood, weight it flat with a heavy object for a day, and check again; if it’s still warped, pull it and refasten with slightly longer screws driven through the panel into the wall.
Gaps between panels reduce the closet’s scent barrier as well as its looks. Fill small gaps with cedar-colored wood filler applied with a putty knife, then sand smooth once dry. For gaps that need to flex with seasonal wood movement, a paintable caulk works better than rigid filler — just avoid painting over the visible cedar face itself, since that reintroduces the same sealed-surface problem as a topcoat.
Cedar Closet Questions Worth Getting Right
Does Cedar Repel Moths, Or Does It Kill Them?
Cedar repels adult clothes moths — it does not reliably kill eggs or larvae already present on stored fabric. The aromatic oil masks the scent cues adult moths use to find wool and other natural fibers, so fewer new moths lay eggs there. But an egg or larva already on a sweater when it goes into the closet isn’t exposed to a lethal concentration of oil in a normal, ventilated closet, which is why cleaning garments before storage matters as much as the cedar itself. For a deeper breakdown of the mechanism, see our guide on whether cedar really repels insects.
How Thick Should Cedar Closet Planks Be?
Most aromatic cedar tongue-and-groove closet planks run 3/8 to 1/2 inch thick. Thinner 1/4 inch cedar plywood panels cost less and install faster over large flat walls, while thicker 3/4 inch boards hold more oil and refresh-sand more times over their life, at a higher material cost. For a typical closet, 3/8–1/2 inch tongue-and-groove is the standard middle ground between cost and scent longevity.
📊 Aromatic Eastern red cedar contains cedrol, the compound responsible for the wood’s characteristic scent and its insect-deterrent effect. — Source: entomology research on cedar and clothes moths
“Applying any type of sealant or top coat will block the aroma, which defeats the purpose of installing cedar closets.”
Frequently Asked Questions
What Are The Benefits Of Cedar Lining?
Cedar lining repels adult moths by scent, resists mold and mildew in humid closets, and gives off a pleasant natural fragrance. It doesn’t kill moth eggs or larvae already on stored fabric, so cleaning clothes before storage is still worthwhile.
How Do I Install Cedar Lining?
Let the cedar acclimate 48–72 hours, locate the studs, and nail or glue 3/8–1/2 in. tongue-and-groove planks starting from a level line at the bottom, working row by row up each wall.
Can I Cedar Line An Existing Closet?
Yes. Empty the closet, clean and dry the walls, measure and cut planks to fit, then install directly over the existing drywall using cedar-safe nails or adhesive — no need to remove the drywall first.
Does Cedar Kill Moths Or Just Repel Them?
Cedar mainly repels adult moths by masking the scent they use to find fabric; it does not reliably kill eggs or larvae already present in a normal, ventilated closet. Clean garments before storing them for the best protection.
How Often Should I Sand Cedar To Refresh The Scent?
Refresh the scent every one to three years, once you notice it fading. Lightly sand the panels with 100–150 grit sandpaper to expose fresh oil-bearing wood, then vacuum and wipe away the dust.
How Much Does Cedar Lining Cost?
Cost varies with closet size and cedar grade, but a typical closet runs roughly $200 to $500 in materials for tongue-and-groove planks, trim, and fasteners.
Conclusion
Cedar lining a closet is a straightforward weekend project once the right materials are in hand: aromatic Eastern red cedar tongue-and-groove planks, 48–72 hours of acclimation, and studs marked before the first nail goes in. Remember that the scent repels adult moths rather than killing anything already in storage, so clean clothes still belong in a cedar closet. Browse more cedar wood guides for species comparisons, cost breakdowns, and other cedar projects, including the full case for a cedar closet and how cedar prevention actually works against moths.
Sponsored / affiliate links. As an Amazon Associate I earn from qualifying purchases. I may earn additional commission from eligible campaigns.