How To Deep Clean Hardwood Floors Without Causing Damage
There’s a certain magic to a truly clean hardwood floor. It gleams, reflects light, and just feels… right. But achieving that deep clean feeling can be a real headache.
You worry about using the wrong cleaner, or too much water. Will it leave streaks? Will it dull the finish?
These are all valid concerns. It’s tough when you want your home to look its best, but you’re afraid of messing it up. Many people feel this way.
Deep cleaning hardwood floors involves gentle, effective methods that remove built-up grime and restore shine without harming the wood or its protective finish. It requires the right tools, mild cleaning agents, and a careful approach to moisture.
Understanding Your Hardwood Floor’s Needs
Hardwood Flooring Countertop: A Stylish and Durable Upgrade for Your Kitchen” href=”https://woodworkingadvisor.com/hardwood-flooring-countertop/” target=”_blank” rel=”noopener” data-wpil-monitor-id=”21305″>Hardwood floors are beautiful, but they are also sensitive. They are made of natural wood. This means they can be easily damaged by harsh chemicals.
They also don’t like too much water. The finish on your floor is its shield. It protects the wood from scratches and stains.
But this shield can wear down over time. When it does, the wood itself is more at risk.
Different types of finishes exist. Some are oil-based. Others are water-based.
Polyurethane finishes are common. They are quite durable. Older floors might have wax or shellac finishes.
These are much more delicate. Knowing your floor’s finish is key. It helps you choose the right cleaning products.
Using the wrong one can strip the finish. It can even soak into the wood. This leads to warping or staining.
Dirt and grime don’t just sit on top. They can get ground into the finish. This makes the floor look dull.
It can also wear down the finish faster. Regular sweeping and vacuuming help. But sometimes, you need a deeper clean.
This is where careful cleaning comes in. It lifts away that stubborn buildup. It brings back the floor’s natural luster.
Why Regular Cleaning Isn’t Enough for a Deep Clean
You probably sweep or vacuum your floors often. Maybe you even do a quick damp mop now and then. This keeps things tidy.
It removes loose dirt and dust. But over time, a different kind of dirt builds up. This is the sticky grime.
It’s the residue from shoes. It’s the faint film left by spilled drinks. It’s the stuff that makes your floor feel less smooth underfoot.
Think of it like washing dishes. You rinse them after each meal. But occasionally, you need to scrub them really well.
That baked-on food needs more than a quick rinse. Hardwood floors are similar. That ingrained dirt doesn’t come off with just a broom.
It needs a special touch. This deeper clean removes what daily cleaning misses.
This built-up grime can dull your floor’s shine. It can also create a slippery surface. Over time, it can even start to wear away the finish.
A true deep clean tackles this. It removes the dull layer. It reveals the beautiful wood beneath.
It helps protect your floor’s finish for longer. It makes your whole home feel cleaner and brighter.
The Experience of a Sticky Floor Dilemma
I remember one summer evening. It had rained all day. My kids had been inside playing tag.
They’d tracked in a bit of mud. I’d swept it up. But later, as I walked barefoot, my feet felt… sticky.
It wasn’t just one spot. It was the whole living room. I’d wiped them down with a damp cloth earlier.
But that hadn’t helped much. The floor just felt tacky. I felt a surge of annoyance.
How could it look clean but feel so gross? I was worried I’d have to buy some super harsh cleaner. But I remembered how my grandma always said gentle is best for wood.
That thought helped calm me down. I wanted to fix it without ruining anything. It was a puzzle.
Choosing the Right Cleaning Tools
The right tools make a huge difference. You don’t need a lot. But what you have should be good.
For sweeping, use a soft-bristle broom. This won’t scratch your floor. A good vacuum cleaner with a hardwood floor attachment is also excellent.
Make sure the beater bar is off. You don’t want it to dig into the wood. It can leave marks.
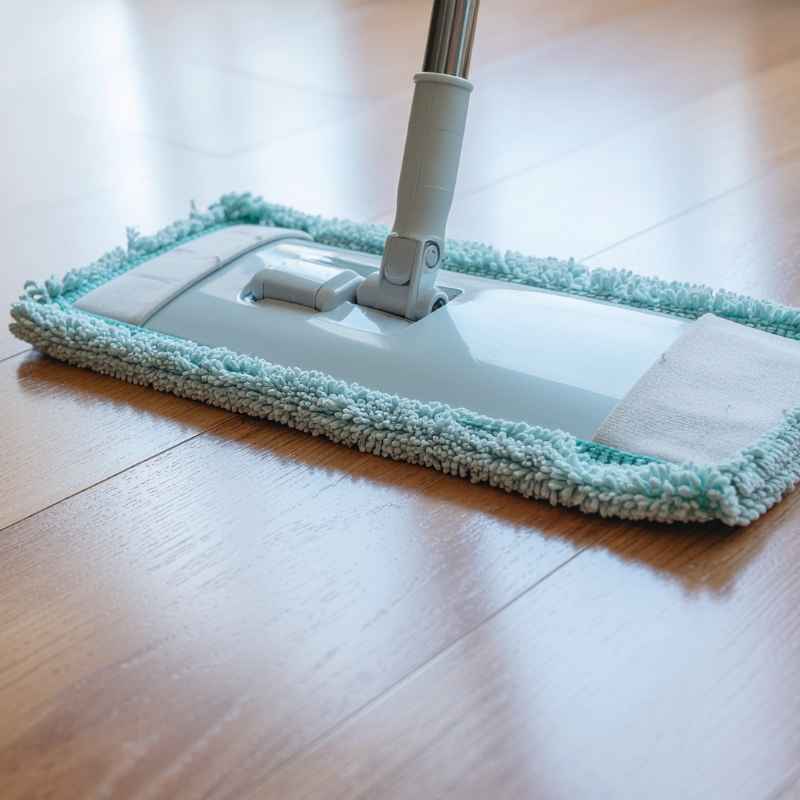
For washing, a microfiber mop is ideal. Microfiber pads are great at trapping dirt. They also hold just enough moisture.
They don’t oversaturate the floor. Avoid mops that use a lot of water. String mops can hold too much water.
Mops with heavy, wet heads are a no-go. They can push dirty water into the wood grain.
You’ll also need a bucket. If you use a concentrated cleaner, you’ll mix it here. Have a couple of clean rags handy too.
These are useful for spot cleaning. They can also help dry any damp spots quickly.
Essential Deep Cleaning Toolkit
- Soft-Bristle Broom: For daily sweeping.
- Hardwood Vacuum Attachment: Cleans without scratching.
- Microfiber Mop: Traps dirt, uses minimal water.
- Two Buckets: One for cleaning solution, one for rinsing (optional but good).
- Clean, Absorbent Cloths: For drying and quick wipe-ups.
Gentle Cleaning Solutions That Work
This is where many people go wrong. They reach for the strongest cleaner they can find. But for hardwood, gentle is the way to go.
You want something that cuts through grease. You also want something that won’t damage the finish.
Water is your first ingredient. But it’s not just any water. It should be slightly damp.
Never use a soaking wet mop. The moisture can seep into the wood. This can cause swelling or warping.
It can also create water stains.
Mild dish soap is a friend to hardwood. Just a tiny amount is needed. One or two drops in a bucket of water is plenty.
Too much soap leaves a residue. This residue dulls the floor. It can also attract more dirt.
So, less is truly more here.
White vinegar is another good option. It’s a natural disinfectant. It also helps cut through grime.
Mix about half a cup of white vinegar with a gallon of water. Vinegar has a strong smell. But it usually dissipates as it dries.
Be cautious if your floor has a very sensitive finish. Test in a hidden spot first.
Avoid cleaners with ammonia. Also, steer clear of oil-based soaps. They can leave a buildup.
Many commercial Hardwood Floor Cleaners: A Guide to Keeping Your Floors Sparkling and Your Pets Happy” href=”https://woodworkingadvisor.com/pet-safe-hardwood-floor-cleaners/” target=”_blank” rel=”noopener” data-wpil-monitor-id=”21302″>hardwood floor cleaners are available. Read the labels carefully. Make sure they are safe for your specific floor finish.
Some are specifically designed for polyurethane. Others are for oiled or waxed floors.
A common mistake is using too much cleaner. This can leave streaks. It can also make the floor feel sticky.
You want enough to clean. You don’t want so much that it leaves a film. Always dilute cleaners as directed.
Or even a little more. A weaker solution is better than a strong one that harms your floor.
The Step-by-Step Deep Cleaning Process
Let’s break it down. Taking it step by step makes it manageable. You’ll feel more confident doing it this way.
Step 1: Clear the Decks
First, remove everything from the floor. Move furniture, rugs, and anything else. This gives you a clear space to work.
It prevents you from cleaning around obstacles. It ensures you don’t miss any spots.
Step 2: Thorough Dry Cleaning
Next, do a really good dry clean. Sweep thoroughly. Get into all the corners and edges.
Then, vacuum with your hardwood attachment. This removes all loose dirt, dust, and debris. If you skip this, you’ll just be pushing dirt around when you wet clean.
This step is super important. It sets the stage for a truly clean floor.
Step 3: Prepare Your Cleaning Solution
Now, get your bucket ready. If using mild dish soap, add just one or two drops to a gallon of warm water. If using vinegar, add about half a cup to a gallon of warm water.
Stir gently. Make sure the water isn’t too hot. Lukewarm is best.
Quick Mix Guide
- For Light Grime: 1-2 drops mild dish soap per gallon of warm water.
- For Tougher Grime: 1/2 cup white vinegar per gallon of warm water.
- Always Use: Lukewarm water.
Step 4: Damp Mop Carefully
Dip your microfiber mop into the cleaning solution. Wring it out thoroughly. The mop should feel barely damp, not wet.
You should not see water pooling on the floor behind you. Mop in small sections. Work with the grain of the wood.
This helps lift the dirt effectively. Rinse your mop pad often. Use clean water for rinsing if you can.
This prevents spreading dirt.
Pay attention to areas that get more traffic. These spots often have more buildup. Go over them a second time if needed.
But always ensure the mop is well wrung out. The goal is to lift dirt, not to soak the wood.
Step 5: Address Stubborn Spots
Got a sticky spot or a dark scuff mark? Don’t scrub hard with the wet mop. Instead, use a clean, damp cloth.
You can add a tiny bit of your cleaning solution to the cloth. Gently rub the spot. For tough scuffs, you might need a bit more pressure.
But avoid scratching the finish.
Sometimes, a magic eraser works for scuff marks. But use it very lightly. Test it in an inconspicuous area first.
They can sometimes dull a finish if used too aggressively.
Step 6: Dry Immediately (If Needed)
In most cases, a well-wrung microfiber mop will dry the floor quickly. However, if you notice any damp areas, or if you live in a very humid climate, it’s wise to dry them. Use a clean, dry microfiber cloth.
Buff the area gently. This prevents any moisture from lingering.
This step is especially important for older floors or those with less robust finishes. It’s a good practice for peace of mind.
Deep Clean Checklist
- Room Clear? Yes/No
- Floor Swept & Vacuumed? Yes/No
- Mop Pad Damp, Not Wet? Yes/No
- Working with Wood Grain? Yes/No
- Mop Rinsed Often? Yes/No
- Stubborn Spots Addressed Gently? Yes/No
- Floor Dry (or Drying Quickly)? Yes/No
What to Avoid for Safe Hardwood Cleaning
This is just as important as knowing what to do. Avoiding the wrong methods protects your investment. Hardwood floors are beautiful.
They add value to your home. Don’t ruin them with harsh cleaning.
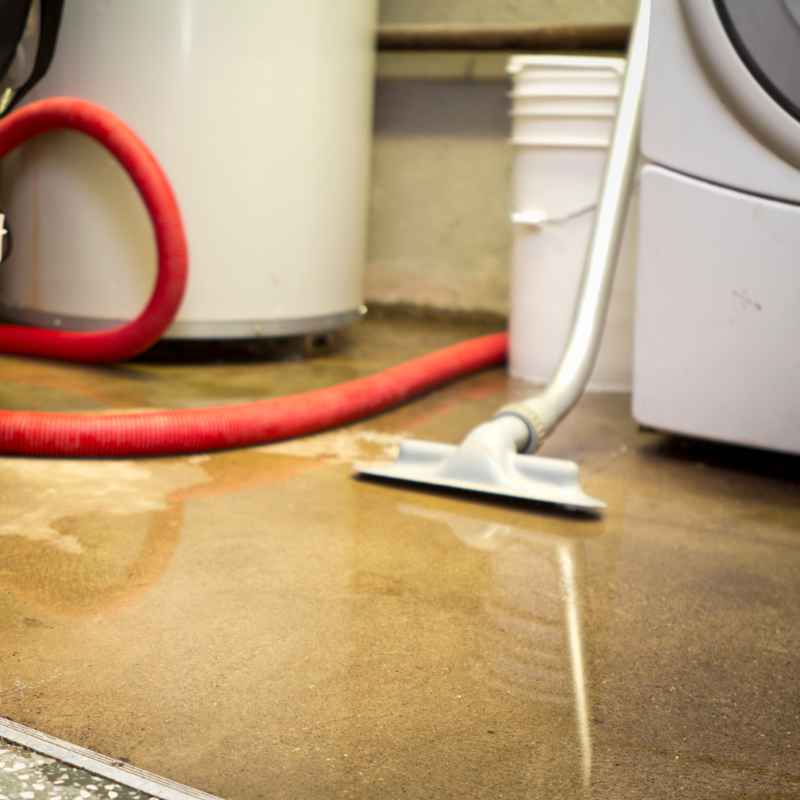
Avoid Excessive Water
This is the golden rule. Water is the enemy of unfinished or poorly sealed wood. Even sealed wood can suffer if water sits on it.
It can seep into cracks. It can cause the wood to swell. This leads to cupping or warping.
It can also damage the finish. Always use a damp mop. Never a soaking wet one.
Avoid Harsh Chemicals
Ammonia-based cleaners are bad. Bleach is also a no-no. These can strip the finish.
They can discolor the wood. Oil soaps can leave a residue. This residue attracts dirt.
It makes the floor look dull. It’s hard to remove. So, stick to mild options.
Avoid Abrasive Tools
Steel wool is too rough. Stiff-bristle brushes can scratch. Even some vacuum cleaner brushes can be too hard.
Use soft cloths and microfiber pads. These clean effectively without scratching.
Avoid Steam Cleaners (Usually)
Many experts say to avoid steam cleaners on hardwood. The high heat and moisture can damage the finish. It can force moisture into the wood.
It might be okay for some very durable, modern finishes. But it’s a risk. For most homes, it’s best to skip them.
Hardwood Cleaning Don’ts
Myth: More cleaner means cleaner floors.
Reality: Too much cleaner leaves residue and dulls the finish.
Myth: Steam cleaning is the deepest clean.
Reality: Steam can damage wood finishes with heat and moisture.
Myth: Any cleaner will work if you wipe it up fast.
Reality: Harsh chemicals damage the finish, even with quick cleanup.
When to Call a Professional
Sometimes, your floor needs more than a DIY deep clean. If you have very old, delicate floors, it’s smart to get expert advice. If your finish is severely worn or damaged, a professional can help.
They can assess the damage. They can recommend refinishing or repairs.
If you’ve tried gentle methods and your floor still looks dull or stained, it might be time. A professional has specialized tools. They have deep knowledge of wood floor care.
They can often restore floors that look beyond help. It’s an investment in your home’s beauty.
Maintaining That Deep Clean Shine
Keeping your floors looking great is an ongoing effort. It’s about smart habits. It’s about regular care.
Daily Habits
Sweep or vacuum daily. This is the first line of defense. It removes grit that can scratch the floor. Use a soft broom or a vacuum with a proper attachment.
Keep doormats at every entrance. These trap dirt before it gets on your floors.
Wipe up spills immediately. Don’t let liquids sit. Even water can cause damage over time. Use a clean, absorbent cloth.
Blot the spill. Don’t rub it in.
Weekly Care
Dust mop or lightly damp mop weekly. This keeps the surface clean between deep cleans. Use a dry microfiber mop pad or a very lightly damp one. This removes light dust and footprints.
Periodic Deep Cleaning
Deep clean as needed. This might be every 1-3 months. It depends on your household. Pets and kids mean more frequent deep cleans.
This process removes the accumulated grime. It restores the shine.
Floor Care Schedule
- Daily: Sweep/Vacuum, Wipe Spills, Use Doormats.
- Weekly: Dust Mop or Light Damp Mop.
- Monthly/Quarterly: Deep Clean (as needed).
Protecting your furniture legs is also wise. Use felt pads. These prevent scratches when furniture is moved.
Avoid walking on your floors in high heels. Or shoes with hard, sharp soles. These can dent the wood.
Understanding Different Floor Finishes
As mentioned, knowing your finish is important. Most modern hardwood floors have a surface seal. This is usually polyurethane.
It’s very durable. It’s also water-resistant. For these floors, the cleaning methods discussed work well.
Older homes might have floors with penetrating oils or waxes. These finishes are different. They soak into the wood.
They offer a more natural look. But they are more susceptible to damage. They require specialized cleaners.
Often, you can’t use water-based cleaners on them at all. They might need buffing or re-waxing instead of washing.
If you’re unsure of your finish, test a cleaner in a hidden spot. Look at how the wood reacts. Does it darken?
Does it look dull? Does it absorb the liquid quickly? These signs can tell you something about the finish.
If in doubt, always consult a professional or the manufacturer of your flooring.
Here’s a simple contrast:
Finish Comparison
| Feature | Polyurethane (Surface Seal) | Oil/Wax (Penetrating) |
|---|---|---|
| Water Resistance | High | Low |
| Scratch Resistance | High | Moderate |
| Appearance | Slight sheen, durable | Natural, matte, can be buffed |
| Cleaning Method | Mild soap/vinegar, damp mop | Specialized cleaners, buffing, re-waxing |
| Repair | Screen and recoat, refinish | Spot repair, re-oiling/waxing |
Most DIY deep cleaning advice is for polyurethane finishes. These are the most common today. They offer the best balance of beauty and durability for busy homes.
The Impact of Household Habits
Your daily routines greatly affect your floors. Consider the impact of pets. Dogs can scratch floors with their nails.
Accidents can stain. Cats can also cause scratches. Proper nail trimming is essential.
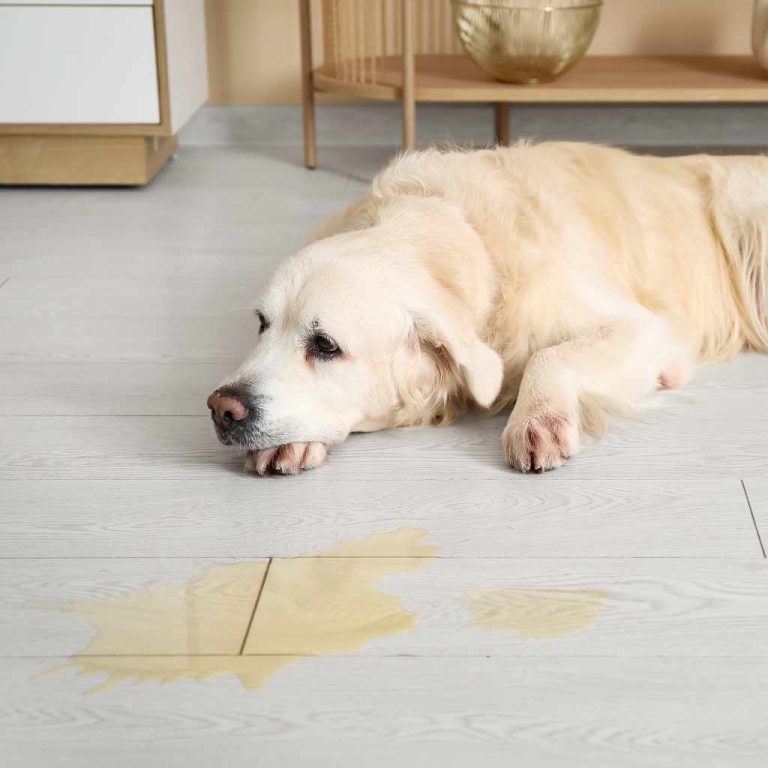
Clean up any pet accidents right away. Use an enzymatic cleaner designed for pet messes. It breaks down odors and stains.
Kids are another factor. They play hard. They spill things.
They drag toys. Teaching them to be mindful of the floors helps. Using rugs in play areas can protect the wood.
Removing shoes at the door is a huge help for everyone. It prevents tracking in dirt, gravel, and moisture.
Even how you clean matters. If you use harsh chemicals on other surfaces, be careful. Don’t let those cleaners drip or splash onto your wood floors.
Keep cleaning supplies organized and stored safely.
When Is a Streak Not a Streak?
Sometimes, what looks like a streak is something else. It could be residue. It could be dirt.
Or it could be the finish itself wearing down. A true streak from a cleaner is often a film. It’s the cleaner not being rinsed properly.
Or it’s too much cleaner being used.
If you see a dull film, it’s likely residue. This means you used too much soap or cleaner. Or you didn’t wring out your mop enough.
The solution is to go back to basics. Use less cleaner. Wring out your mop better.
You might even need to do a rinse-mop. That’s where you go over the floor with a mop dipped only in clean water. Ensure the mop is very well wrung out.
Sometimes, a floor just looks dull. It’s not a streak, but a lack of shine. This often means it needs a deep clean.
The grime has built up. It’s masking the natural luster of the wood. Or, the finish itself might be old and worn.
In that case, no amount of cleaning will restore the shine. It might be time to think about refinishing.
Addressing Scuff Marks Effectively
Scuff marks are a common problem. They happen when rubber or plastic from shoes or furniture rubs against the floor. They usually sit on top of the finish.
They aren’t deep damage.
The first thing to try is a clean, dry microfiber cloth. Often, you can just wipe them away. If that doesn’t work, slightly dampen the cloth.
Try rubbing again. For tougher scuffs, a tiny bit of your mild cleaning solution on the cloth can help.
A tennis ball can also work wonders. Rub the scuff mark gently with the fuzzy side of a tennis ball. It acts as a mild abrasive.
Be gentle and see if it lifts the mark.
As mentioned, a white eraser can also work. But use it very gently. Always test in an unseen area first.
You don’t want to rub off the finish itself. If a scuff mark seems like it’s part of the wood, it might be a deeper scratch. Those require different solutions.
Scuff Mark Solutions
- Try First: Dry microfiber cloth.
- Next Step: Slightly damp cloth.
- For Tough Marks: Mild cleaner on a cloth.
- Alternative: Tennis ball (fuzzy side).
- Last Resort (Carefully): White eraser.
What This Means for Your Home
A clean, well-maintained hardwood floor makes a big difference. It enhances the beauty of your home. It can make rooms feel larger and brighter.
It also contributes to better air quality. Less trapped dust means less allergens in the air.
When you deep clean your floors correctly, you are preserving your home’s value. You are protecting a significant investment. You are also creating a healthier, more pleasant living space for your family.
It’s a task that pays off in many ways.
Understanding what your floor needs is the first step. Then, using the right tools and gentle methods ensures you get that deep clean without worry. It’s about working with the wood, not against it.
Frequent Questions About Deep Cleaning Hardwood
Can I use a general floor cleaner on my hardwood floors?
It’s best to use cleaners specifically made for hardwood floors. General cleaners can be too harsh. They might contain chemicals that damage the finish.
Always check the product label to ensure it’s safe for your type of hardwood flooring.
How often should I deep clean my hardwood floors?
This depends on your household. For homes with pets or children, you might need to deep clean every 1-3 months. For lighter traffic homes, every 4-6 months may be sufficient.
Observe your floors. If they look dull or feel grimy, it’s time for a deep clean.
What’s the best way to remove sticky spots without damaging the finish?
Try using a clean, damp microfiber cloth with a tiny amount of mild dish soap or white vinegar solution. Gently rub the spot. Avoid scrubbing too hard.
For very stubborn spots, a white eraser can sometimes work, but test it in an inconspicuous area first.
Can I use a robot mop on my hardwood floors?
Some robot mops are designed for hard floors and use minimal moisture. Check your robot mop’s specifications and your hardwood floor’s warranty. If it uses a lot of water or steam, it’s generally not recommended.
Always err on the side of caution with moisture.
My floors look dull even after cleaning. What could be wrong?
A dull appearance can be caused by a buildup of cleaning residue or grime. Ensure you are using a mild cleaner and not too much of it. Wring out your mop pad very well.
If the dullness persists after a proper deep clean, the finish itself might be worn and could require refinishing.
How can I tell if my hardwood floor is sealed or unsealed?
A simple water test can help. Place a few drops of water in an inconspicuous area. If the water beads up on the surface, your floor is likely sealed.
If it soaks in quickly and darkens the wood, it might be unsealed or have a penetrating finish that needs different care.
Final Thoughts on a Sparkling Home
Deep cleaning your hardwood floors doesn’t have to be scary. By understanding what your floors need and using gentle, effective methods, you can restore their beauty. Remember to always start with a good dry clean.
Use minimal moisture. Stick to mild cleaners. Protect your floors with good habits.
A little care goes a long way. Your beautiful, clean floors will make your home feel wonderful.