How To Apply Driftwood Stain On Red Oak (Easy Process)
Applying driftwood stain to red oak involves careful prep and technique. The key is to achieve a light, greyish tone that mimics weathered wood. This guide helps you get that desired look efficiently.
Understanding Driftwood Stain and Red Oak
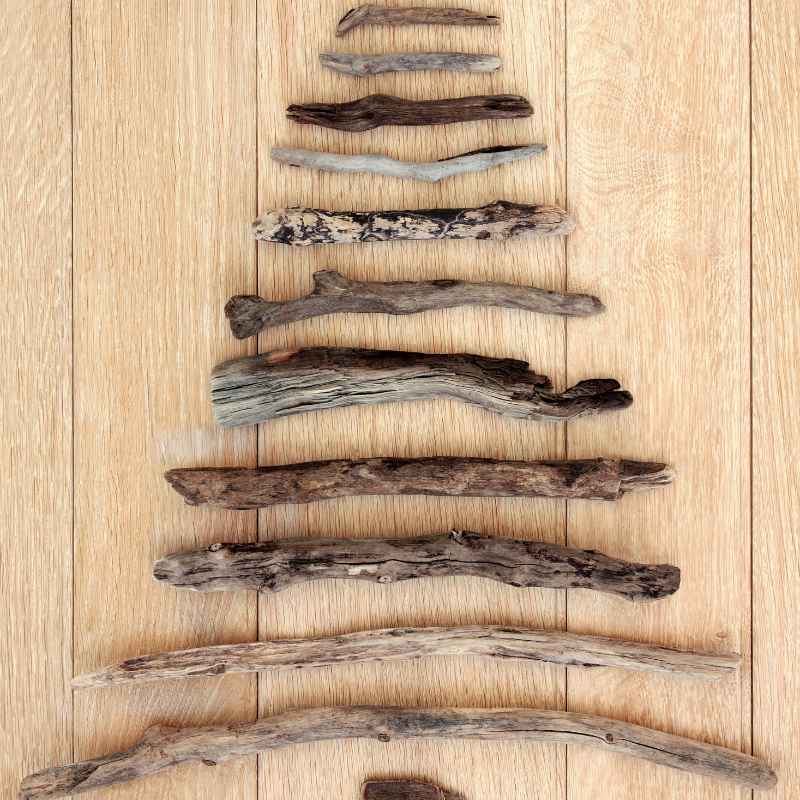
Driftwood stain is not just one color. It’s a look. It aims to replicate wood found on beaches.
This wood has been softened and faded by sun, salt, and sand. It often has a grey, sometimes bluish or even greenish cast. It looks naturally aged.
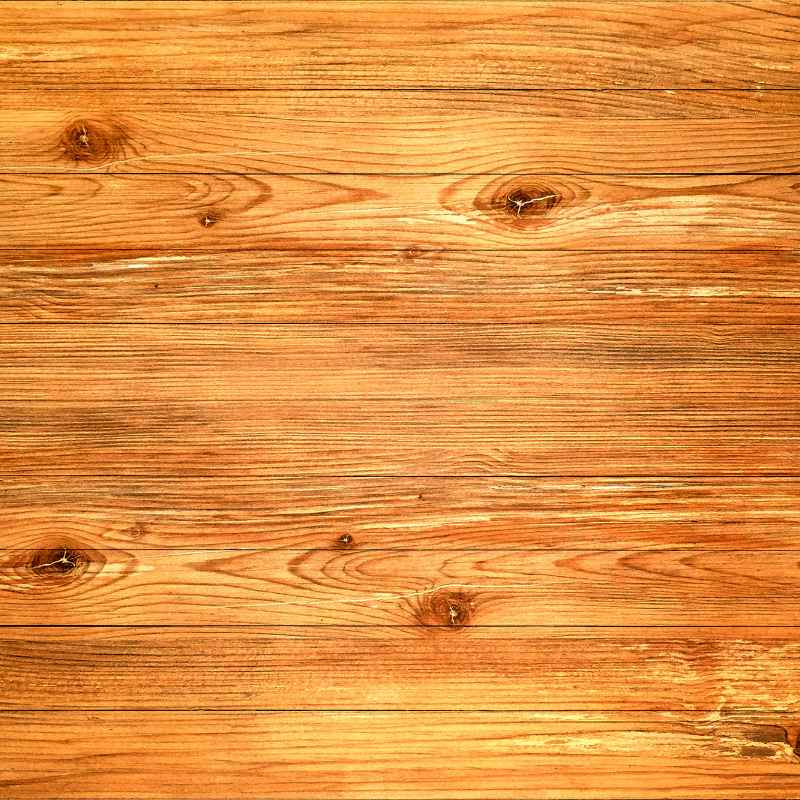
Red oak is a popular wood choice. It has a prominent grain pattern. It also has natural reddish undertones.
These undertones can sometimes make it hard to get a true grey or “whitewashed” look. The open pores of red oak can soak up stain unevenly. This means you need a plan.
You can’t just slap on any stain and expect driftwood magic. Understanding these two elements is the first step to success.
Why is this important? Because red oak’s natural color can fight against the driftwood look. Its red tones might turn a grey stain into a purplish or muddy brown.
This is a common pitfall. Many people end up with results they don’t like. They might get streaks or colors that are “off.” Knowing this helps you prepare.
It guides your choices for stain type and application. You’ll also learn about wood conditioners. These are vital for consistent color.
They help the stain soak in evenly. This is crucial for getting a smooth, natural-looking finish on red oak. It’s all about managing the wood’s natural character.
The open grain of red oak also plays a big role. It means the stain can get into those deeper channels. This can create natural highlights and shadows.
That’s good! It can actually help with the weathered look. But it also means the stain might go on darker in those areas.
You need to control this. Using a pre-stain conditioner is like giving the wood a drink of water. It fills the pores a bit.
This makes the stain absorb more uniformly. Without it, you might get dark lines in the grain. Or you might get blotchy patches on the flat parts of the wood.
It’s a simple step with a huge impact on the final look.
So, when you look at a piece of furniture or flooring that has that perfect driftwood finish, it’s not just luck. It’s the result of smart choices. These choices involve understanding the wood.
They also involve using the right products and methods. We’ll go through all of that. You’ll learn how to prepare your red oak.
You’ll pick the best stains. And you’ll apply them in a way that brings out the best in your wood. The goal is a beautiful, natural look that lasts.
It’s about making your project look like it has a story. Like it’s been sitting by the sea for years.
Choosing the Right Driftwood Stain
Picking the right stain is key. There are several types that work well for a driftwood look. You’ll find specialized driftwood stains.
These are made to give that specific color. They often have grey, white, or blue tones. These are a good starting point.
But you can also create your own driftwood look. You can do this by layering different stains. Or by using a technique called “whitewashing.”
Water-based stains are often a good choice for achieving a light, grey look. They tend to raise the wood grain less than oil-based stains. This makes sanding easier.
They also dry faster. This can be helpful if you’re working on a large project. Many water-based stains come in a wide range of colors.
You can find ready-made greys. Or you can mix colors to get a custom shade. Look for stains with names like “Coastal Grey,” “Barnwood,” or “Weathered Oak.”
Oil-based stains offer a different feel. They penetrate the wood deeply. This can give a rich color.
However, they can sometimes bring out the red undertones of oak more strongly. If you go with an oil-based stain, you might need more prep. A good pre-stain conditioner is a must.
You might also need to go lighter with the stain. Or use a technique to reduce the amount of stain that soaks in. Some people like to dilute oil-based stains with mineral spirits.
This makes them more like a glaze. It helps control the color intensity.
Another popular option is a pre-mixed glaze. Glazes are more like a thin paint. They sit on top of the wood surface.
They don’t soak in as deeply. This makes them great for controlling color. You can wipe them off to achieve a lighter, more subtle effect.
Many woodworkers use a white or grey glaze over a base stain. Or they use it on bare wood. You can then wipe it back.
This leaves color in the wood grain. It gives that lovely contrast. It’s a fantastic way to get a whitewashed or distressed look.
It’s very forgiving.
You might also consider a combination approach. Start with a light grey or white stain. Let it dry.
Then, you can apply a very thin coat of a darker grey or brown stain over the top. Or you can use a glaze. This layering helps add depth.
It mimics the way natural wood ages. It breaks up any uniformity. It makes the finish look more authentic.
Don’t be afraid to experiment. Test your chosen stain on scrap pieces of red oak. This is the best way to see how it will look.
It helps you avoid mistakes on your actual project.
When you’re choosing your stain, think about the finish you want. Do you want a pale, almost white grey? Or a deeper, richer grey with hints of blue?
Consider the look of real driftwood. Look at photos. Then, try to match that.
Sometimes, a light coat of white paint diluted with water can give a great whitewash effect. This is different from stain. But it achieves a similar goal.
It’s a simpler way to get a faded look. It’s good for beginners.
The amount of pigment in the stain is also important. Stains with more pigment will cover more. They might obscure the wood grain.
This is not what we want for a driftwood look. We want to see the grain. We want it to have character.
So, opt for stains with less pigment. Or use techniques to wipe away excess pigment. Think of it like painting with a veil.
You want the color to be there, but not hide the wood underneath. This is where practice on scrap wood really pays off. It helps you gauge the pigment load and how it interacts with your application method.
Stain Types for Driftwood Effect
Water-Based Stains:
- Good for light, grey tones.
- Less grain raising.
- Fast drying.
- Wide color selection.
Oil-Based Stains:
- Deep penetration.
- Can highlight red undertones.
- Require good pre-stain conditioning.
- Can be thinned for lighter effects.
Glazes:
- Sit on top of the wood.
- Excellent color control.
- Great for whitewashing or distressed looks.
- Wipe back for subtle color in grain.
DIY Mixes:
- Combine stains or use diluted paint.
- Experiment for custom shades.
- Test on scrap wood first.
Preparing Your Red Oak Wood
This is where the magic really begins. Good preparation makes all the difference. It’s like prepping a canvas before you paint.
For red oak, this means more than just a quick wipe-down. You need to get the surface smooth. You also need to manage its natural color.
And you need to prepare it for the stain itself.
First, sanding is crucial. Start with a medium-grit sandpaper. Something like 100 or 120 grit.
This removes any old finish. It also smooths out any rough spots. Sand in the direction of the wood grain.
This is very important. Sanding against the grain will leave visible scratches. Once you’ve gone over the whole piece with the medium grit, move to a finer grit.
180 or 220 grit is good. This makes the wood surface really smooth. A smooth surface takes stain more evenly.
It will feel nice to the touch too.
After sanding, you must remove all the dust. Use a vacuum with a brush attachment. Then, wipe the wood down with a tack cloth.
A tack cloth is sticky. It picks up fine dust particles that vacuuming might miss. If you don’t get all the dust off, it will end up in your stain.
It will look like little bumps or specks. This is very hard to fix later. So, take your time with this step.
Make sure the wood is perfectly clean. It should be dust-free.
Now comes the pre-stain wood conditioner. I cannot stress this enough for red oak. This is often overlooked.
But it’s vital for getting an even stain color. Red oak has open pores. These pores soak up stain much faster than the denser parts of the wood.
Without a conditioner, you get dark lines in the grain. You get blotchy patches on the surfaces. A conditioner acts like a barrier.
It evens out the wood’s ability to absorb stain. Apply it according to the product’s instructions. Usually, you brush it on.
Let it soak in for a set time. Then, you wipe off any excess. Do this just before you stain.
Don’t let it dry for too long.
Think about the color of your red oak. If it’s very red, you might want to consider a step before the conditioner. Some people use a very light grey stain.
Or even a thin wash of white paint. You apply this and wipe it off. It helps neutralize the red tones slightly.
It gives the wood a base that’s more neutral. It makes it easier to achieve a true grey. This is an optional step.
But it can be very helpful. It’s a way to manage the wood’s natural character before you even apply the main stain. You apply this light color.
Then you let it dry completely. Then you proceed with the pre-stain conditioner.
If your wood has any existing finish, make sure it’s completely removed. This includes varnish, lacquer, or paint. Sanding usually takes care of this.
But if you’re unsure, you can use a chemical stripper. Always follow safety precautions when using strippers. Wear gloves and eye protection.
Work in a well-ventilated area. Once the old finish is gone, you sand as described before. For new wood projects, sanding is your primary step.
Always sand with the grain. It’s a simple rule that makes a big impact.
After all this, let the wood dry completely. Especially if you used any water-based products. Even a little moisture can affect how the stain absorbs.
Give it plenty of time. Good ventilation helps speed this up. When you’re ready to stain, make sure your workspace is also clean.
You don’t want dust floating around. You’ve put in all this effort for the wood. Don’t let a dusty environment ruin it.
You want a smooth, clean surface. This is the foundation for your beautiful driftwood finish.
Red Oak Prep Checklist
1. Sanding:
- Start with 100-120 grit sandpaper.
- Progress to 180-220 grit for smoothness.
- Always sand with the wood grain.
2. Dust Removal:
- Vacuum thoroughly.
- Use a tack cloth to pick up fine dust.
3. Pre-Stain Conditioner:
- Apply generously to all surfaces.
- Follow product instructions for drying/wiping time.
- Crucial for even stain absorption on red oak.
4. Color Correction (Optional):
- Use a light grey or white wash if oak is very red.
- Wipe off excess color.
- Let dry completely before conditioning.
Applying the Driftwood Stain: Techniques
Now for the exciting part – applying the stain! This is where you bring the driftwood look to life. The technique you use matters a lot.
You want a finish that looks natural and aged. Not like a uniform coat of paint. The goal is to mimic the subtle variations you see in real driftwood.
Start with a clean application cloth. A lint-free rag works well. Or a good quality foam brush.
Dip your cloth or brush into the stain. Don’t overload it. You want to apply a thin, even coat.
Work in sections. Apply the stain in long strokes. Always follow the direction of the wood grain.
This is critical for a natural look. As you apply, you’ll start to see the color change.
For a true driftwood look, you often want to wipe off some of the stain. This is called “wiping off the excess.” After you apply a section, let the stain sit for a few minutes. The exact time will depend on the stain.
Check the product instructions. Then, take a clean, dry, lint-free rag. Wipe the stain off.
Again, wipe in the direction of the grain. This process leaves color in the wood grain. It also leaves color in the pores.
But it removes the excess stain from the flat surfaces. This is what creates that light, faded, weathered appearance.
The amount you wipe off controls the final color. If you wipe more, the color will be lighter. If you wipe less, it will be darker.
This is where testing on scrap wood is so valuable. You can practice wiping off more or less stain. You can see how it affects the red oak.
You’ll find the sweet spot for the look you want. It’s a bit of an art. But it’s very rewarding.
What if you want a more pronounced grain effect? This is where a glaze can be a lifesaver. You can apply a white or light grey glaze.
Let it sit for a short time. Then, use a rag or brush to wipe it out of the grain. This leaves the color in the deep parts of the grain.
It makes the grain pop. Then you wipe the flat surfaces clean. This contrast is very appealing.
It really makes the wood look aged. Some people use a stiff brush to push the glaze into the grain.
Another technique is “dry brushing.” This is done after the stain has dried. You take a brush. Dip the very tip into a lighter stain or paint.
Then, wipe almost all of it off on a rag. You want just a whisper of color on the brush. Then, lightly brush it over the wood surface.
Go with the grain. This adds subtle highlights. It can make the wood look even more weathered.
It’s like adding faint streaks of sun-bleached color.
Consider using multiple colors. You might start with a light grey stain. Let it dry.
Then, you can lightly apply a white stain or glaze. Wipe it back. This layering adds depth and complexity.
It makes the finish look more natural. It breaks up any uniformity. It’s like how nature itself adds layers of color over time.
Don’t be afraid to experiment with different rags. Some people like using cheesecloth. Others prefer old t-shirts.
Each can give a slightly different texture.
Working in good lighting is also important. You need to see the color clearly. Natural light is best.
Make sure you can see any streaks or dark spots. If you see something you don’t like while the stain is still wet, you can often fix it. Gently wipe it with a damp rag.
Or add a little more stain to a light area. But once the stain dries, it’s much harder to correct. This is why the scrap wood testing is so critical.
It lets you learn the stain’s behavior without risk.
Remember that different wood species absorb stain differently. Red oak is quite porous. This means it will take stain readily.
Be prepared to wipe it back generously to get a light, driftwood look. If you were working with a dense wood like maple, you’d have to use more stain or wipe less. For red oak, the key is control.
You’re controlling how much color goes into the wood and how much stays on top. It’s a balance.
Staining Techniques for Driftwood
Basic Application:
- Use a lint-free cloth or foam brush.
- Apply thin, even coats.
- Work with the wood grain.
Wipe-Off Method:
- Let stain sit for a few minutes.
- Wipe off excess with a clean, dry rag.
- Wipe with the grain.
- Controls color intensity and creates faded look.
Grain Highlighting (Glaze):
- Apply glaze (white/grey).
- Wipe glaze out of the wood grain.
- Wipe flat surfaces clean.
- Creates strong contrast and depth.
Dry Brushing:
- Use brush with minimal light color.
- Lightly brush over dried stain.
- Adds subtle highlights and weathering.
Dealing with Red Oak’s Undertones
We’ve talked about red oak having reddish undertones. This is a real challenge when you’re aiming for a cool grey driftwood look. Those reds can peek through.
They can turn your grey into purple or muddy brown. But don’t worry! There are smart ways to manage this.
It’s all about pre-treatment and careful staining.
The most effective way is to neutralize those reds first. One common method is using a pre-tinted conditioner. Some brands offer conditioners that have a hint of grey or white in them.
These conditioners do two jobs. They prepare the wood for stain. And they lay down a very light base color.
This base color can help counteract the red. It gives the grey stain something more neutral to go over.
Another popular method is a diluted white paint wash. This is like a very thin layer of white paint. You mix white latex paint with water.
A common ratio is 1 part paint to 4 parts water. Maybe even thinner at first. You brush this mixture onto the red oak.
Then, you immediately wipe it off with a clean rag. You want to wipe almost all of it away. The goal is to leave just a hint of white.
It should settle into the grain and on the surface. This light layer of white acts as a barrier. It tones down the redness.
Then you let this dry completely.
After the white wash dries, you apply your pre-stain conditioner. This is important. The conditioner will help the grey stain absorb evenly.
It will also prevent the white wash from being completely covered. You’ll still see the underlying wood. But the red undertones will be less obvious.
Then you proceed with applying your grey stain. The grey stain will go over the neutralized red oak. It should give you a much cleaner grey color.
It will look more like true driftwood.
Sometimes, you might need to do a second coat of stain. Or a second wash. If the red is still showing through too much, you can try this.
Apply your grey stain. Let it dry. If it’s still too red, you can do another very light white wash.
Or a light grey glaze. Wipe it back. The key is to keep these layers thin.
You don’t want to cover up the wood grain. You just want to adjust the color tone.
Another trick is to use a grey stain with a blue undertone. Sometimes, a stain that leans slightly blue can help cancel out red. Think about color theory.
Blue and red are opposite on the color wheel. A grey with a bit of blue in it can appear more neutral. Or even slightly cool.
This can make the red undertones less noticeable. When you’re selecting your stain, look at the color swatches carefully. See if they lean warm (red/yellow) or cool (blue/green).
You can also use a layering technique. Start with a very light grey stain. Apply it and wipe it back.
Let it dry. Then, you can apply a white stain or a clear tinted glaze. This is like adding a layer of fog.
It softens the color. It can help mute the red tones. It also adds depth.
This multi-step approach is often the secret to getting that perfect, complex driftwood color.
Always test on scrap pieces of red oak. Seriously, this cannot be said enough. The red oak you have might be different from what someone else has.
Your conditioner might work differently. Your stain might have a slightly different pigment. Testing is your safety net.
It prevents costly mistakes. It helps you see how the wood reacts. It lets you adjust your plan.
It might seem like extra work. But it saves you so much heartache later.
Combating Red Oak Undertones
1. Pre-Tinted Conditioner:
- Use conditioners with a grey or white tint.
- Helps neutralize reds and prepares wood.
2. Diluted White Paint Wash:
- Mix white paint with water (e.g., 1:4 ratio).
- Apply to wood, wipe off excess immediately.
- Leaves a subtle white layer to tone down reds.
- Let dry completely, then condition.
3. Blue-Toned Grey Stain:
- Choose grey stains with a cool, blueish cast.
- Blue can help counteract red undertones.
4. Layering Stains/Glazes:
- Apply a light grey stain first.
- Follow with a white stain or clear tinted glaze.
- Wipe back to create depth and mute reds.
Finishing Your Driftwood Project
You’ve applied the stain. It looks fantastic! Now you need to protect it.
And add that final touch. The finish you choose can affect the final look. It can add sheen.
Or it can keep the matte, natural feel. Protection is also vital. Especially for furniture or flooring.
The most common finish for a driftwood look is a clear matte or satin topcoat. You want something that doesn’t add a lot of shine. Too much gloss will make it look artificial.
It won’t feel like natural, weathered wood. Matte finishes are excellent for this. They preserve the subtle texture of the stain.
They keep the low-sheen look of aged wood.
Polyurethane is a popular choice. You can find it in water-based and oil-based formulas. Water-based poly is great because it dries clear.
It doesn’t add much yellowing over time. This is important when you want a grey finish. Oil-based poly can add a slight amber tone.
This might be okay if you want a warmer driftwood look. But for a cool grey, water-based is often preferred. Look for “matte” or “satin” finishes.
Apply the topcoat in thin, even layers. Just like with the stain, follow the grain. Use a good quality synthetic brush or a foam applicator.
Let each coat dry completely according to the product directions. Lightly sand between coats with a very fine-grit sandpaper. Something like 320 or 400 grit.
This smooths out any dust nibs or imperfections. Wipe away the dust after sanding.
How many coats do you need? For furniture, two or three coats is usually enough. For a high-traffic surface like a table top or floor, you might need four or five coats.
The more coats, the more durable the finish. But don’t go overboard. Too many thick coats can obscure the stain.
They can make the finish look plastic-y.
Another option is a wax finish. Furniture wax can give a very natural, low-sheen look. It feels silky smooth to the touch.
It adds a layer of protection. But wax is not as durable as polyurethane. It can be scratched or damaged by heat or moisture.
It needs to be re-applied periodically. For a truly rustic, matte look, wax can be beautiful. It really enhances the texture of the wood.
Some people like to use a de-glosser or rubbing compound after the topcoat. This is a more advanced technique. It can further soften the sheen.
It makes the finish look even more aged. You apply it sparingly. Then buff it off.
It can help remove any subtle shine. But be careful. You don’t want to rub through the topcoat.
If you used a glaze, make sure it’s fully cured before you apply a topcoat. Glazes are often water-based. They can take a few days to fully harden.
Check the product instructions. Applying a topcoat too soon can cause problems. The topcoat might not adhere properly.
It could lift the glaze. Always wait for the recommended cure time.
Consider the environment your project will be in. If it’s for an outdoor bench, you’ll need a more robust, weather-resistant finish. For indoor furniture, standard polyurethane is usually fine.
The key is to protect your hard work. And to enhance the beauty of the driftwood stain. A good finish makes the whole project look professional.
It ensures it lasts for years to come. It completes the transformation from plain red oak to beautiful, weathered wood.
Topcoat Options for Driftwood Finish
Matte or Satin Polyurethane:
- Protects the wood and stain.
- Preserves a low-sheen, natural look.
- Water-based is recommended for clear finish on grey.
- Apply 2-5 thin coats.
Furniture Wax:
- Provides a very natural, soft sheen.
- Feels silky smooth.
- Needs periodic re-application.
- Not as durable as polyurethane.
De-glosser/Rubbing Compound (Advanced):
- Further reduces sheen after topcoat.
- Adds an extra layer of aged look.
- Use with caution to avoid damaging topcoat.
Troubleshooting Common Issues
Even with the best preparation, sometimes things don’t go perfectly. Don’t get discouraged! Most problems can be fixed.
Or at least improved. Knowing what to look for helps. And knowing how to address it.
Issue: Stain is too dark.
This is a common one. If the stain is already dry, you might be able to lighten it. Try using a clean rag dampened with mineral spirits (for oil-based stain) or water (for water-based stain).
Rub the area gently. Work with the grain. This can lift some of the pigment.
It’s like a second wipe-off. You might need to do this in sections. Or you can apply a clear topcoat.
Then, you can try a diluted white paint wash over the topcoat. This is a bit of a workaround. It adds a layer of light color.
It can mute the darkness. For future projects, just remember to wipe off more stain. Or apply a thinner coat.
Issue: Stain is blotchy or streaky.
This usually means the wood wasn’t properly conditioned. Or there was dust. If the stain is still wet, you might be able to fix it.
Gently blend the areas with a clean rag. If it’s dry, it’s harder. You might need to sand down the area.
Then re-apply the pre-stain conditioner. And re-stain that section. Make sure you feather the edges.
Blend the repaired area into the surrounding stain. For a driftwood look, some subtle variation isn’t always bad. But major blotches are distracting.
Always test your conditioner and stain first.
Issue: Red undertones are still showing too much.
If your grey stain looks purplish or muddy, the red undertones are winning. You can try another layer. A very thin white wash can help.
Or a grey glaze. Apply it carefully. Wipe it back to leave just a hint of color.
Sometimes, a slightly bluer grey stain can help. Or you might need to embrace a slightly warmer driftwood tone. Not all driftwood is stark grey.
Some has warmer undertones. It’s about finding a look you love.
Issue: Topcoat is not adhering or looks uneven.
This can happen if the stain wasn’t fully dry. Or if the surface wasn’t clean. If the topcoat is peeling or bubbling, you might need to sand it off.
Carefully remove the finish. Make sure the stain is completely dry and cured. Then reapply the topcoat.
Make sure you’re using compatible products. For example, some oil-based polyurethanes can react with certain oil-based stains. Always check the compatibility.
Lightly sanding between coats helps adhesion.
Issue: Wood grain is too dark or too light.
If the grain is too dark, it might be because it soaked up a lot of stain. This is where the pre-stain conditioner is key. If it’s too light, the conditioner might have blocked too much stain from entering the grain.
Sometimes, using a glaze can help “pop” the grain. You wipe the glaze out of the grain. This leaves color specifically in those deep channels.
It can add visual interest. Or if it’s too light, you can try a very thin dark stain applied with a rag. Then wipe it back quickly.
Issue: The finish looks too “flat” or artificial.
This can happen if the stain color is too uniform. Or if the topcoat is too shiny. For uniformity, try layering colors.
Or using dry brushing for highlights. For the finish, choose a matte topcoat. If it’s already too shiny, consider a de-glosser.
Or a coat of wax over the matte polyurethane. Wax adds a different kind of low-sheen. It feels more natural.
It can give that aged, tactile quality.
Remember, your project is unique. The wood has its own personality. Embrace the small imperfections.
They can add character. They can make your piece look more authentic. If you encounter a problem, take a deep breath.
Assess the situation. Consult product instructions. And don’t be afraid to try a fix.
Most issues are not the end of the world.
Common Driftwood Stain Problems & Solutions
Stain Too Dark:
- Wipe with mineral spirits/water (if wet).
- Apply a clear topcoat, then a diluted white wash.
- For future: Wipe off more stain.
Blotchy/Streaky Stain:
- Blend if wet.
- Sand, re-condition, and re-stain affected area if dry.
- Ensure proper dust removal and conditioning.
Red Undertones Remain:
- Apply a thin white wash or grey glaze.
- Use a bluer-toned grey stain.
- Embrace a warmer driftwood tone.
Topcoat Issues (Adhesion, Unevenness):
- Ensure stain is fully dry and cured.
- Sand off problematic topcoat, reapply carefully.
- Check product compatibility.
Grain Too Dark/Light:
- Use glaze to highlight grain.
- Apply thin dark stain to grain and wipe quickly.
- Ensure proper use of pre-stain conditioner.
Finish Too Flat/Artificial:
- Layer colors or use dry brushing for variation.
- Use matte topcoat, consider wax finish.
Real-World Context: Where to Use Driftwood Stain
The beauty of the driftwood stain effect is its versatility. It brings a touch of the coast and a relaxed vibe to many different projects. It’s not just for beach houses anymore.
Think about the places you see it, or could use it.
Furniture: This is a big one. Coffee tables, end tables, dining tables, dressers, bookshelves. A driftwood finish can give an old piece new life.
It can make a modern piece look timeless. It works well in living rooms, bedrooms, and entryways. It pairs nicely with neutral decor.
It also complements coastal or farmhouse styles. Imagine a reclaimed wood coffee table with this finish. It looks like it has a history.
Cabinetry: Kitchen cabinets or bathroom vanities can get a stunning update. A pale grey driftwood finish can brighten a space. It makes it feel airy and spacious.
It’s especially good for coastal or casual kitchens. It can also be used on accent cabinets. Or on a pantry door.
It provides a subtle texture and color. It’s a nice change from solid white or wood grain. It’s a way to add personality.
Accent Walls and Paneling: You can create a feature wall with this finish. Think about a bedroom headboard. Or a wall behind a fi
Flooring: Yes, you can stain hardwood floors to look like driftwood. This is a more involved project. But the result can be spectacular.
Wide plank floors stained in a light grey can give a coastal feel. It’s important to use a durable finish if you’re doing floors. Like a commercial-grade polyurethane.
It needs to withstand heavy foot traffic.
Decorative Items: Smaller projects are great for practicing. Picture frames, mirror frames, decorative boxes, candle holders. Even DIY signs.
These are perfect for trying out different stain colors and techniques. They let you get a feel for how the stain behaves on red oak. It’s a low-risk way to build confidence.
Outdoor Furniture (with proper sealing): While wood stains aren’t always ideal for direct outdoor exposure, some finishes can protect driftwood-stained items. You’d need an exterior-grade sealant over the stain. Think about a porch railing.
Or a bench for a covered porch. It’s important to choose products rated for outdoor use.
The key to using driftwood stain successfully in different contexts is the feel it imparts. It’s about creating a sense of calm, natural beauty. It feels relaxed and inviting.
It complements a variety of decor styles. It can make a space feel lighter and more open. It’s a trend that has lasted because it’s so adaptable.
It feels both modern and classic at the same time. It’s a way to bring a little bit of nature indoors.
When Is Driftwood Stain Normal vs. Concerning?
The “driftwood” look itself is a style choice. It’s a deliberate aesthetic. So, in that sense, any time you apply a stain that mimics aged, weathered wood, it’s normal for that style.
The question is more about the quality of the application and the resulting look. Is it achieving the intended effect? Or is it looking like a mistake?
Normal & Desired Outcomes:
- Light Grey or Whitewashed Tones: This is the hallmark of the driftwood look. It should appear faded and soft.
- Visible Wood Grain: The stain should highlight, not hide, the natural grain pattern of the wood. You should see the texture.
- Subtle Color Variation: Real driftwood isn’t perfectly uniform. Slight variations in tone across the surface add authenticity.
- Soft, Matte Sheen: A low-sheen finish is typical. It looks natural, not artificial or overly glossy.
- Aged, Weathered Appearance: The overall effect should be one of age and natural exposure.
Potentially Concerning (Indicating an issue):
- Muddy or Purplish Tones: If your grey stain turns distinctly purple or a mucky brown, it’s usually a sign that the red undertones of the oak weren’t properly managed. This is often a sign of an unsuccessful application of the desired style.
- Dark, Unnatural Streaks: Deep, dark lines in the grain or on the surface that look like harsh paint streaks often indicate uneven stain absorption. This points to poor prep, especially lack of pre-stain conditioner.
- Chalky or Powdery Appearance: If the stain looks like it’s sitting on top in a dry, powdery way, it might not have penetrated properly. Or the finish might be faulty. This is not the aged look; it’s unfinished.
- Overly Glossy Finish: A high-gloss finish on a driftwood stain can look very artificial. It defeats the purpose of the aged, natural look. This means the wrong topcoat was used or too many coats.
- Splotchy or Uneven Color: While slight variation is good, large, obvious blotches of dark or light color across the surface are usually a mistake. They indicate inconsistent application or absorption.
- The Wood Looks “Painted” Rather Than Stained: If the grain is completely obscured and the color looks uniform, it’s likely an over-application of a heavy pigment stain or a paint wash that wasn’t wiped back enough.
The key is to understand your goal. The driftwood style is meant to look like naturally weathered wood. So, if your project looks like it achieved that goal, it’s normal and desired.
If it looks like a mistake – like splotchy, uneven color or the wrong tone – then it’s concerning. It means the process wasn’t followed correctly. Or the materials weren’t right for the wood.
But the good news is, most of these issues can be fixed or improved with careful attention. It’s about achieving the intended aesthetic.
Frequently Asked Questions
What’s the best way to clean driftwood stained wood?
For regular cleaning, use a soft cloth slightly dampened with water. For tougher spots, use a mild soap solution (like dish soap) and water. Always wipe dry afterwards.
Avoid harsh chemicals or abrasive cleaners, as they can damage the finish. For more intensive cleaning on furniture, you might use a specialized furniture cleaner designed for matte finishes.
Can I use driftwood stain on pine or other woods?
Yes, you can apply driftwood stain to other woods! The process might vary slightly. Softwoods like pine tend to absorb stain very quickly and can be prone to blotching.
Always use a pre-stain wood conditioner on pine. Denser woods like maple might require more stain or a different application technique to get the color to show up. Red oak is a good balance because its open grain can hold stain well, but it needs conditioning.
Testing on scrap wood is always recommended for any wood type.
How long does it take for driftwood stain to dry?
Drying times vary greatly depending on the type of stain (water-based vs. oil-based), humidity, temperature, and how thickly it was applied. Water-based stains typically dry in 1-2 hours to the touch, but may need 24 hours before recoating.
Oil-based stains can take 6-12 hours to dry to the touch and 24-48 hours for recoating. Always check the product label for specific drying and recoating times.
What’s the difference between driftwood stain and a whitewash?
Driftwood stain is a type of finish designed to mimic the color and texture of wood weathered by the sea. It often results in grey, muted tones. A whitewash is a technique where a thin layer of white pigment (usually diluted paint) is applied to wood and then wiped off.
Whitewashing leaves a soft, opaque layer that tones down the wood’s natural color and highlights the grain. You can use whitewashing as a technique within creating a driftwood look, or a driftwood stain can be a specific product aiming for that outcome.
Can I repair a damaged section of driftwood stain?
Yes, small repairs are usually possible. If the damage is to the stain itself, you may need to lightly sand the area, reapply the stain, and then reapply the topcoat. Feather the edges of the repair so it blends in.
If the damage is to the topcoat, you can often lightly sand the damaged area and reapply a new coat of topcoat. For larger repairs, it might be challenging to match the exact color and texture, so testing your repair method on a hidden spot is wise.
Should I seal driftwood stained wood for outdoor use?
If your project will be exposed to the elements (sun, rain, snow), you absolutely need a robust outdoor-rated sealant. Standard interior polyurethane is not sufficient. Look for exterior-grade varnishes or sealants that offer UV protection and water resistance.
Apply multiple coats for maximum protection. Even with a good sealant, wood left outdoors will naturally weather over time, which can change the appearance.
Conclusion
Achieving that sought-after driftwood stain look on red oak is totally within your reach. It takes a little patience and the right approach. By understanding the wood’s character and using smart techniques, you can transform your projects.
The steps from careful sanding to precise stain application and protective finishing all play a part. Don’t shy away from testing. It’s your best tool for success.
Enjoy the process and the beautiful, weathered results you’ll create!