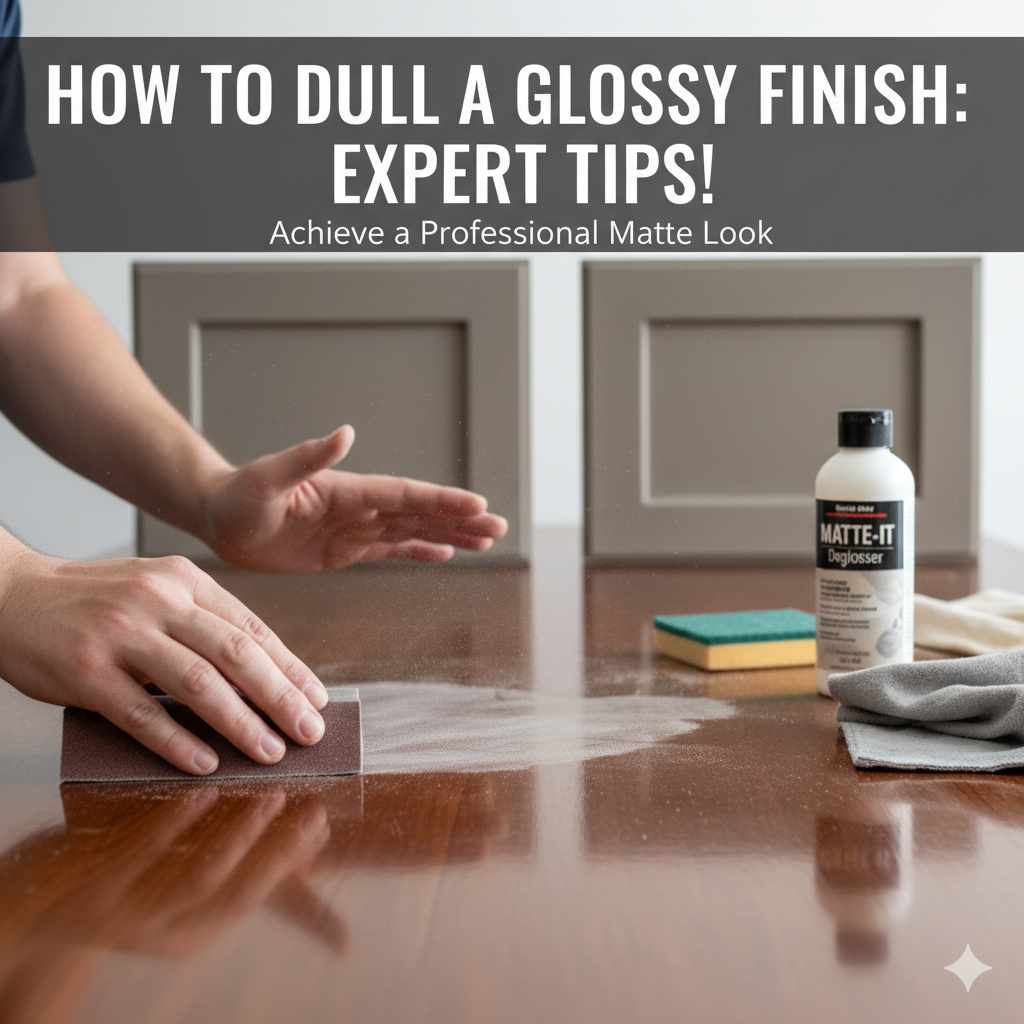
How To Dull A Glossy Finish: Expert Tips!
Quick Summary: To dull a glossy finish, you can use gentle abrasive materials like fine-grit sandpaper, steel wool, or even a paste of baking soda and water. These methods work by creating microscopic scratches that diffuse light, reducing shine without significantly altering the surface. Always test in an inconspicuous area first.
Ever finish a woodworking project, admire your handiwork, and then realize the super-shiny gloss finish is just… too much? Maybe it reflects too much light, making it hard to appreciate the wood’s natural beauty, or it just doesn’t fit the relaxed, matte aesthetic you were aiming for. Don’t worry, this is a super common challenge for beginners and even experienced folks! Many of us love a glossy finish for its protective qualities, but sometimes we want that sophisticated, low-sheen look instead. The good news is, you don’t need to be a finishing expert to achieve this. We’ll walk through some simple, effective ways to tame that shine, making your projects look exactly the way you envisioned.
Why You Might Want to Dull a Glossy Finish
Glossy finishes are fantastic for a lot of reasons. They offer a high level of protection against moisture, stains, and wear and tear. They also make colors pop and can give wood a luxurious, deep appearance. However, there are times when that high gloss just isn’t the right fit:
- Aesthetic Preference: Sometimes, a matte or satin finish simply looks more natural and complements the wood grain better, especially for rustic or modern designs.
- Light Reflection: In brightly lit rooms or areas with direct sunlight, a high gloss can create distracting glare, making it difficult to see the piece itself.
- Durability Concerns (Perceived): While gloss is durable, the very nature of its smoothness means it can sometimes show scuffs or fingerprints more readily than a less reflective finish.
- Repair and Touch-ups: If you need to touch up a spot on a high-gloss finish, matching the sheen perfectly can be incredibly difficult. Dullings offers more forgiveness.
- Matching Existing Finishes: If you’re working on a piece that needs to match existing furniture with a lower sheen, a high gloss will stand out.
The goal is to achieve a controlled reduction in shine, not to remove the finish entirely or leave the surface unprotected. We’re aiming for a subtle change that enhances the overall look and feel of your project.
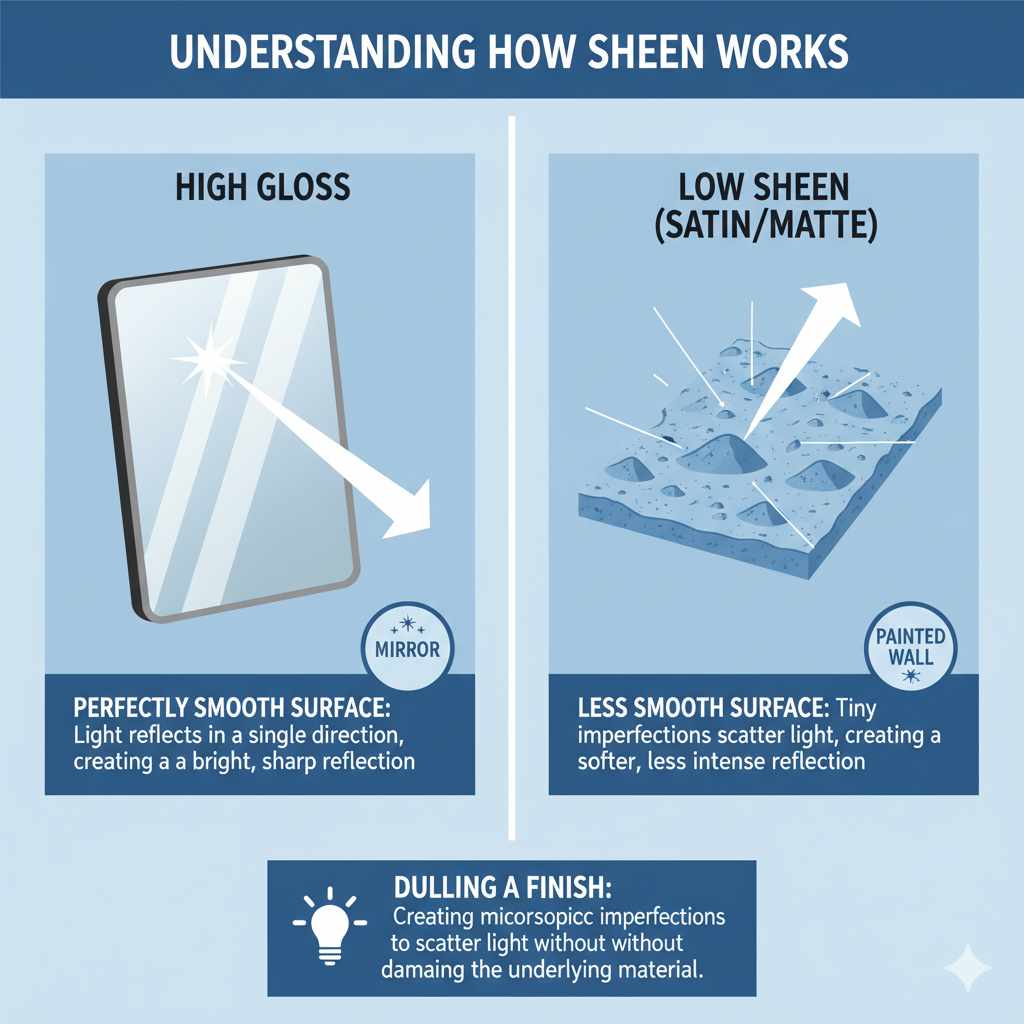
Understanding How Sheen Works
Before we dive into the “how-to,” let’s quickly touch on why finishes have different sheens. Think of it like this: a perfectly smooth mirror reflects light in a single direction, creating a bright, sharp reflection – that’s a high gloss. As a surface becomes less smooth, with tiny microscopic hills and valleys, it reflects light in many different directions. This scatters the light, creating a softer, less intense reflection – that’s a lower sheen like satin or matte. Our goal in dulling a finish is to create these tiny imperfections without damaging the underlying finish.
Prep Work: The Foundation for Success
No matter which dulling method you choose, proper preparation is key. This ensures you get a consistent result and don’t accidentally damage your project.
Cleanliness is Crucial
Make sure the surface of your project is spotlessly clean. Any dust, grease, or debris left on the surface can get caught in your abrasive material, leading to an uneven or scratched finish. A tack cloth is your best friend here. For tougher grime, a mild soap and water solution, followed by a clean water rinse and thorough drying, will do the trick. Ensure the finish is completely dry before proceeding.
Test, Test, Test!
This is probably the most important step, especially when you’re trying a new technique. Find an inconspicuous spot on your project – the underside of a shelf, the back of a leg, or scrap material you finished with the same product. Apply your chosen dulling method there first. Let it sit, check the sheen, and make sure you’re happy with the result. This small step will save you from potential heartache on the main surface!
Methods to Dull a Glossy Finish
Here are several effective and beginner-friendly methods to reduce the shine on your glossy finish. We’ll focus on techniques that are less likely to remove the finish entirely, preserving its protective qualities.
Method 1: The Gentle Touch of Fine-Grit Sandpaper
Using sandpaper might sound counter-intuitive, as it’s often used for aggressive material removal. However, when you use very fine grits and apply light pressure, it’s perfect for creating a uniform, dulling effect. The key is the grit size and consistent, light pressure.
What You’ll Need:
- Very fine-grit sandpaper (400-grit, 800-grit, or even 1000-grit and higher)
- A soft cloth or sanding sponge
- Optional: Water or mineral spirits for wet sanding
Steps:
- Choose Your Grit: Start with a higher grit number (e.g., 600 or 800). Higher numbers mean finer grit and less abrasive action. You can always move to a finer grit if you need smoother.
- Prepare Your Sandpaper: You can use dry sandpaper, but for a smoother, more controlled finish, wet sanding is often preferred. Lightly dampen the sandpaper with water or a bit of mineral spirits. This helps prevent the sandpaper from clogging and reduces the chance of deep scratches.
- Sand Lightly and Evenly: Using very light pressure, sand the surface in the direction of the wood grain. If you’re using a cloth or sponge, wrap the sandpaper around it to provide a flat surface and even pressure.
- Work in Sections: Don’t try to do the whole piece at once. Work in manageable sections, perhaps a tabletop or a shelf.
- Check Progress Frequently: Lift your sandpaper often to check the sheen. You’ll see the glossy reflection disappear and be replaced by a progressively more diffused, matte look. Stop as soon as you achieve the desired level of dullness.
- Wipe Clean: After sanding a section, wipe away any dust or residue with a clean, soft cloth.
- Repeat if Necessary: If you want to dull it further, you can move to a slightly finer grit (e.g., from 600 to 1000).
- Final Clean: Once you’re happy with the sheen across the entire piece, give it a final wipe down with a clean cloth. Some people like to follow up with a paste wax for added protection, which also helps to uniformly distribute the very fine dust left from sanding.
Expert Tip from Md Meraj: For large, flat surfaces, using a sanding block or even a sanding sponge can help you maintain consistent, even pressure. Avoid pressing too hard, especially in corners or edges, as you can wear through the finish. If you’re unsure, always err on the side of using a finer grit and more passes rather than a coarser grit and fewer passes.
Method 2: The Gentle Abrasion of Steel Wool
Steel wool is another excellent choice for dulling finishes. Like sandpaper, the grit size makes a huge difference. For dulling, you want the finest grades.
What You’ll Need:
- Extra-fine steel wool (Grade #0000 is ideal)
- A soft cloth
- Optional: Paste wax or mineral spirits
Steps:
- Select the Right Grade: Make sure you are using #0000 steel wool. This is the finest grade available and is specifically designed for use on finishes without causing significant damage. Any coarser grade can scratch too deeply.
- Work Systematically: Like with sandpaper, work the steel wool gently in the direction of the wood grain. Use light, even pressure.
- Keep Moving: Don’t let the steel wool sit in one spot for too long. Keep it moving continuously to ensure an even dulling effect.
- Check Your Progress: Periodically stop and wipe the surface with a clean cloth to assess the sheen. You’ll see the shine diminish gradually.
- Clean Off Debris: Steel wool can leave behind fine steel particles. It’s important to clean these off thoroughly. A vacuum cleaner with a brush attachment can be helpful, followed by a tack cloth.
- Optional: Apply Paste Wax: After dulling with steel wool and cleaning, a light coat of paste wax applied with a soft cloth and buffed can further even out the sheen and add a bit of protection. This also helps to pick up any stray steel wool fibers.
Important Caution: Be extremely careful when using steel wool around any metal components of your furniture, like hinges or decorative brass. Stray fibers can rust and stain metal surfaces. Also, ensure you clean up all steel wool debris thoroughly, as small fibers can get embedded in the wood grain and potentially rust later.
Method 3: The Household Solution: Baking Soda Paste
For a quick, DIY approach, a paste made from baking soda and water can provide a surprisingly effective way to knock down gloss. Baking soda is a very mild abrasive.
What You’ll Need:
- Baking soda
- Water
- A soft cloth or sponge
- A clean, damp cloth
- A dry cloth
Steps:
- Make the Paste: Mix baking soda with a small amount of water to create a thick, paste-like consistency. It should be like toothpaste.
- Apply the Paste: Using a soft cloth or sponge, gently rub the paste over the glossy surface in a circular or back-and-forth motion, following the wood grain if possible. Don’t scrub aggressively.
- Dull and Check: Work in a small area at a time. You’ll feel the slight grit of the baking soda as you rub. Wipe away the paste in that section periodically with a damp cloth to check the sheen.
- Rinse and Dry: Once you’ve achieved the desired dullness, thoroughly wipe the area with a clean, damp cloth to remove all traces of baking soda. Then, dry the surface immediately with a clean, dry cloth.
- Repeat for Full Coverage: Continue this process section by section until the entire surface has been treated and has the desired reduced sheen.
Pros: Inexpensive, readily available ingredients, generally safe for most finishes.
Cons: Can be messy, might require more effort for a perfectly uniform finish, potential for residue if not cleaned thoroughly.
Method 4: Commercial Matting Agents (For Advanced Users/Future Projects)
While not strictly a “how-to dull an existing finish” method, it’s important to know about matting agents for future projects. These are additives that professional finishers mix into their clear coats (like polyurethane or lacquer) before application.
How They Work: Matting agents, often made of finely ground silica or other inert materials, create microscopic irregularities on the surface of the cured finish. These irregularities scatter light, thus reducing gloss. They come in different concentrations to achieve various sheen levels (e.g., satin, matte, flat). For instance, a common resource for wood finishing supplies is Rockler, which offers various matting additives. You can also find information on how these work by looking at resources from chemical suppliers or finishing companies, though this can get technical.
If you’re planning a new project and want a specific low-sheen finish from the outset, incorporating a matting agent into your chosen clear coat is the most professional and controllable method. Always follow the manufacturer’s instructions carefully when mixing matting agents with your finish. Resources like the Forest Products Laboratory’s Wood Handbook often discuss the science behind wood finishes, including how sheen is achieved and altered.
Comparing the Methods
Choosing the right method often depends on your comfort level, the size of your project, and the specific finish you’re working with. Here’s a quick comparison:
| Method | Ease of Use (Beginner) | Control Over Sheen | Potential for Damage | Cleanup | Best For |
|---|---|---|---|---|---|
| Fine-Grit Sandpaper (Wet) | Moderate | High | Low (with care) | Easy (wipe down) | Large surfaces, precise control |
| #0000 Steel Wool | Moderate | Moderate to High | Moderate (risk of rust if fibrous) | Moderate (must remove fibers) | Curved surfaces, general dulling |
| Baking Soda Paste | Easy | Moderate | Low | Moderate (thorough rinsing needed) | Small areas, quick touch-ups, DIY approach |
| Commercial Matting Agents | Low (for application) | Very High | N/A (applied during finishing) | Standard finishing cleanup | New projects, consistent sheen |
Troubleshooting Common Issues
Even with the best intentions, you might run into a few snags. Here’s how to handle them:
- Uneven Sheen: This is usually caused by inconsistent pressure or coverage. For sandpaper or steel wool, go back over the area with slightly lighter pressure and more overlapping strokes. For baking soda, ensure you covered the exact same area thoroughly. Sometimes, a light overall pass with the finest grit sandpaper or steel wool can help blend unevenness.
- Accidental Scratching: If you notice a scratch that feels too deep, your abrasive might have been too coarse, or you applied too much pressure. For minor scratches, you might be able to level the area with a finer grit. For deeper scratches, you might need to reapply a clear coat and then re-dull that section. Remember that test piece? This is where it pays off!
- Residue Left Behind: This is most common with the baking soda method. Ensure you’re rinsing thoroughly with a clean, damp cloth and drying immediately. For steel wool, make sure all fibers are picked up with a vacuum and tack cloth.
- Sanding Through the Finish: If you can see the wood or previous finish layers, you’ve sanded too much. The only fix is to reapply a compatible clear coat and then very gently re-dull the area, being more careful this time.
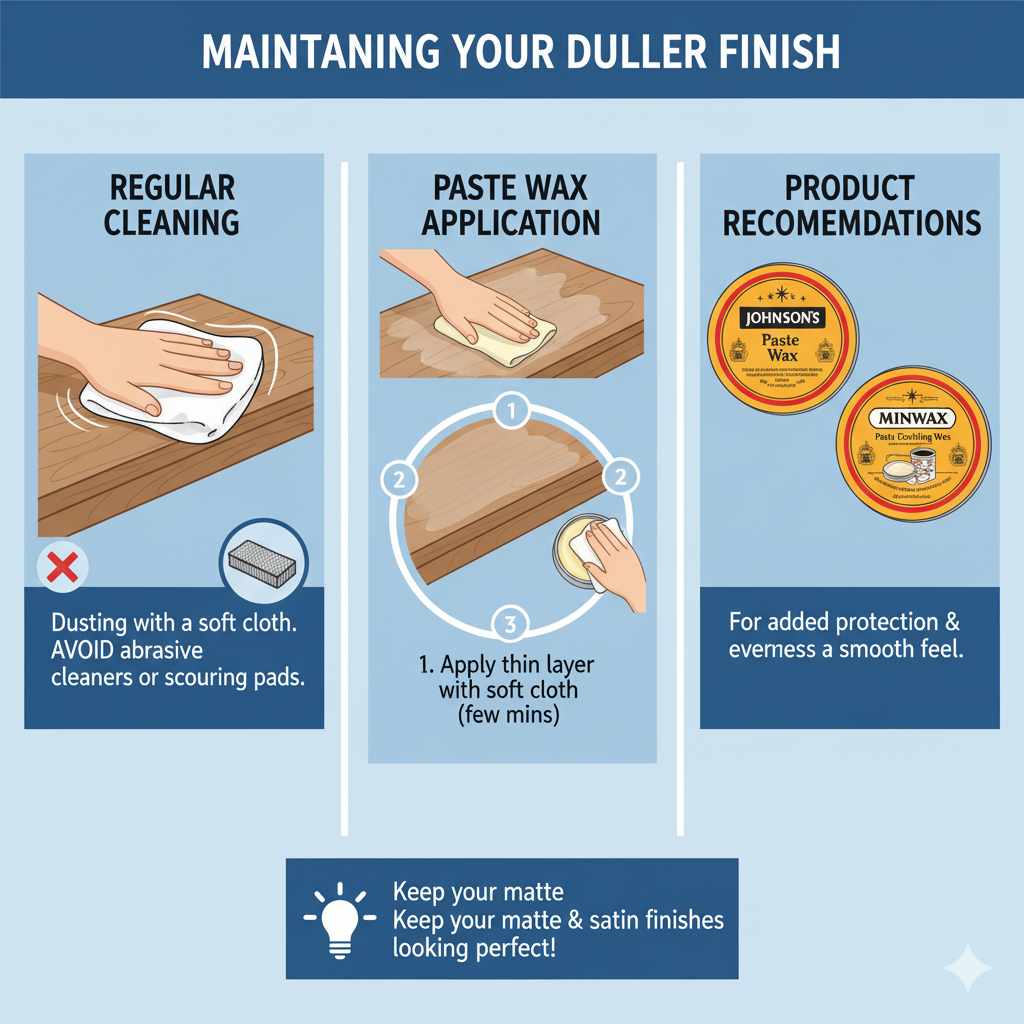
Maintaining Your Duller Finish
Once you’ve achieved your desired sheen, maintaining it is much like caring for any other furniture finish. Regular dusting with a soft cloth is essential. Avoid abrasive cleaners or scouring pads, as these can reintroduce a shine or even damage the finish you worked so hard to perfect.
For added protection and to help even out any inconsistencies, many woodworkers enjoy applying a good quality paste wax. Apply a thin layer with a soft cloth, let it haze over for a few minutes, and then buff to a gentle sheen. This not only protects the finish but also gives it a lovely, smooth feel. Brands like Johnson’s Paste Wax or Minwax Paste Finishing Wax are excellent choices.
Frequently Asked Questions (FAQ)
Q1: Can I dull a factory-applied glossy finish?
A: Yes, most factory-applied finishes, like polyurethanes or lacquers, can be dulled using these methods. Always test in an inconspicuous area first, as some finishes might react differently.
Q2: How do I know which grit of sandpaper to use?
A: Start with a higher number, such as 600 or 800 grit. If you’re not getting the desired dullness, move to a finer grit (lower number) like 1000 or 1500. If you want to dull it significantly, you might start with 400-grit but be extremely careful to avoid deep scratches.
Q3: My project has curves. Which method is best?
A: For curves, #0000 steel wool or a flexible sanding sponge wrapped with fine-grit sandpaper is often best. These conform to the shape better than a rigid block, allowing for more even pressure.
Q4: Will dulling the finish make it less durable?
A: When done correctly using fine abrasives and light pressure, dulling the finish creates microscopic texture that scatters light. It doesn’t significantly remove or weaken the protective layer of the finish, so durability should remain largely intact. However, avoid aggressive sanding that removes finish material.
Q5: Can I use rubbing compound or polishing compound?
A: Rubbing compounds and polishing compounds are designed for automotive finishes or metal polishing. While they can dull a finish, they can sometimes be too aggressive for wood finishes or leave behind unwanted residues. Fine-grit sandpaper, steel wool, or baking soda are generally safer and more predictable for wood projects.