
How to Finish Densglass: Quick & Durable Techniques
To finish Densglass, apply a compatible joint compound over the seams and edges. Sand the surface lightly to achieve a smooth finish.
Densglass is a versatile and durable substrate commonly used in construction. It provides excellent moisture resistance and thermal performance, making it ideal for various applications. Proper finishing techniques ensure the longevity and effectiveness of this material. Understanding how to finish Densglass enhances its aesthetic appeal and functionality.
Whether you’re a contractor or a DIY enthusiast, mastering this process is essential. This guide will walk you through the best practices for achieving a flawless finish, ensuring your project stands the test of time. Explore the essential steps to transform your Densglass installation into a polished, professional result.
Introduction To Densglass
Densglass is a versatile building material. It is widely used for various construction projects. Understanding its properties and benefits is essential for builders and homeowners.
What Is Densglass?
Densglass is a type of fiberglass mat-faced gypsum board. It is designed for interior and exterior applications. This material is moisture-resistant and provides excellent fire safety.
- Water-resistant
- Fire-resistant
- Durable
- Lightweight
Densglass is commonly used in:
- Wall systems
- Ceiling systems
- Roof applications
Benefits Of Using Densglass
Densglass offers many advantages for construction. Here are some key benefits:
| Benefit | Description |
|---|---|
| Moisture Resistance | Prevents mold and mildew growth. |
| Fire Safety | Helps to slow down fire spread. |
| Easy Installation | Saves time during construction. |
| Cost-Effective | Reduces long-term maintenance costs. |
Builders appreciate Densglass for its performance and reliability. It enhances the quality of construction projects. Using Densglass results in durable and safe structures.

Preparation For Installation
Preparing for the installation of DensGlass is crucial. Proper preparation ensures a smooth process. This section covers the essential tools, materials, and safety precautions.
Tools And Materials Needed
Gathering the right tools and materials is key. Here’s a list:
| Tools | Materials |
|---|---|
| Utility knife | DensGlass boards |
| Measuring tape | Adhesive |
| Straight edge | Fasteners |
| Drill | Sealant |
| Level | Tape |
Safety Precautions
Safety is paramount during installation. Follow these precautions:
- Wear safety goggles.
- Use gloves to protect hands.
- Wear a dust mask to avoid inhaling particles.
- Ensure proper ventilation in the workspace.
- Be aware of your surroundings.
By following these guidelines, you can ensure a safe and efficient installation process.
Measuring And Cutting Densglass
Measuring and cutting Densglass correctly is crucial. Accurate measurements ensure a perfect fit. Proper cutting techniques prevent damage. Follow these tips to make the job easier.
How To Measure Accurately
Accurate measurements save time and materials. Use a few simple tools for the best results:
- Measuring Tape: Use a sturdy tape for precise measurements.
- Square: Ensure corners are right angles.
- Marker: Mark measurements clearly on the Densglass.
Follow these steps for accuracy:
- Measure the area where Densglass will go.
- Write down your measurements.
- Double-check each measurement before cutting.
Best Practices For Cutting
Cutting Densglass requires care. Use the right tools for a clean cut:
- Utility Knife: A sharp utility knife works best.
- Straight Edge: Use this for straight cuts.
- Safety Gear: Wear gloves and goggles for protection.
Follow these cutting techniques:
- Score the Densglass along the marked line.
- Make multiple passes for a deeper cut.
- Snap the board along the scored line.
- Trim any rough edges with the knife.
For large pieces, consider using a saw. A circular saw can speed up the process. Ensure you have proper safety precautions in place.
Installation Process
The installation of Densglass involves careful steps. Proper methods ensure a strong finish. Each step is crucial for durability and effectiveness.
Securing Densglass To The Framework
Start by preparing the framework. Follow these steps for a secure fit:
- Measure the area accurately.
- Cut the Densglass panels to size.
- Align the panels with the framework.
- Use screws or fasteners to secure each panel.
Use the right tools for cutting. A utility knife works best for precise cuts. Ensure the panels fit snugly against the framework. This prevents gaps that could lead to moisture problems.
Sealing Joints And Edges
Sealing is vital for moisture control. Here’s how to seal effectively:
- Use a high-quality sealant for joints.
- Apply sealant generously around edges.
- Press down firmly to remove air pockets.
- Ensure a smooth finish for optimal protection.
Inspect all sealed areas. Look for any missed spots. Proper sealing protects the Densglass from moisture damage.
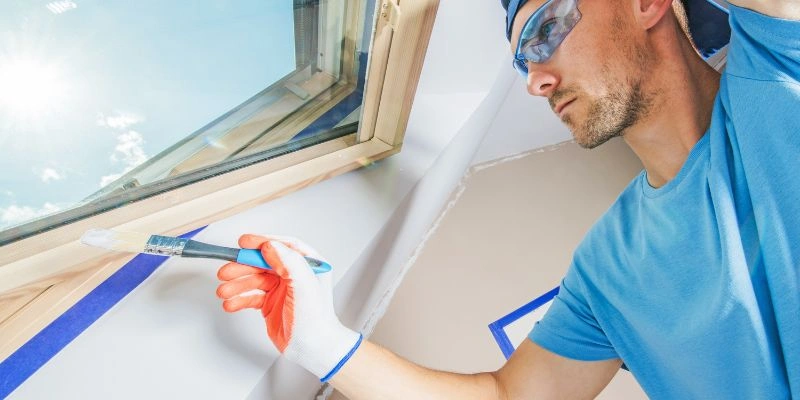
Applying Finish To Densglass
Applying finish to Densglass enhances its durability and appearance. Proper techniques ensure a smooth, professional look. Choose the right products for optimal results.
Choosing The Right Finish
Selecting the best finish for Densglass is crucial. Consider the following options:
- Paint: Water-based or acrylic paints work well.
- Sealants: Use clear sealants for added protection.
- Texture Coatings: Create a unique surface finish.
Check the manufacturer’s recommendations for compatibility. Always test on a small area first.
Application Techniques
Use the right tools and techniques for applying the finish.
- Preparation: Clean the Densglass surface thoroughly.
- Priming: Apply a primer to enhance adhesion.
- Painting: Use a brush or roller for even coverage.
- Sealing: Apply sealant with a sponge or cloth.
Follow the manufacturer’s instructions for drying times. Apply multiple coats for better durability.
| Finish Type | Application Tool | Drying Time |
|---|---|---|
| Paint | Brush/Roller | 1-2 hours |
| Sealant | Sponge/Cloth | 2-4 hours |
| Texture Coating | Sprayer | 4-6 hours |
Always wear protective gear during application. Proper ventilation is important for safety.
Drying And Curing
Drying and curing are essential steps for finishing Densglass. Proper drying ensures a strong bond and prevents future issues. Understanding the drying times and methods can significantly enhance your project’s durability.
Expected Drying Times
Drying times for Densglass can vary. Factors include temperature, humidity, and air circulation. Here’s a quick reference:
| Condition | Drying Time |
|---|---|
| Warm and Dry | 1-2 hours |
| Moderate Conditions | 3-4 hours |
| Cold and Humid | 6-8 hours |
Check the surface regularly. Look for signs of moisture. Surface should feel dry to the touch.
How To Speed Up The Process
Speeding up the drying process helps save time. Here are some effective methods:
- Increase air circulation: Use fans to promote airflow.
- Use a heater: Raise the temperature in the area.
- Apply dehumidifiers: Reduce humidity levels quickly.
- Thin layers: Apply Densglass in thinner coats.
Monitor the drying closely. Ensure the area remains clean and free from dust.
Maintenance And Repair
Proper maintenance and quick repairs keep your DensGlass in top shape. Regular checks prevent small issues from becoming big problems. Here’s how to maintain and repair it effectively.
Regular Maintenance Tips
Follow these simple tips for regular maintenance:
- Inspect surfaces for cracks or signs of wear.
- Clean the surface with a mild detergent and water.
- Check for moisture damage regularly.
- Ensure proper ventilation in areas with high humidity.
- Repaint or seal surfaces as needed.
Use a checklist for inspections:
| Maintenance Task | Frequency |
|---|---|
| Visual Inspection | Monthly |
| Surface Cleaning | Every 3 months |
| Moisture Check | Every 6 months |
How To Repair Damages
Repairing damages quickly prevents further issues. Follow these steps:
- Identify the damaged area.
- Clean the area thoroughly.
- Apply a repair compound suitable for DensGlass.
- Smooth the surface with a putty knife.
- Allow the compound to dry completely.
- Sand the area for a smooth finish.
- Repaint or seal as necessary.
For larger damages, consult a professional. This ensures proper repairs and longevity.
Common Mistakes To Avoid
Finishing DensGlass requires attention to detail. Avoiding common mistakes will ensure a smooth and effective process. Here are key areas to focus on.
Overlooking Prep Work
Preparation is vital for a successful DensGlass finish. Skipping this step leads to problems. Here are common prep mistakes:
- Not cleaning the surface: Dust and debris affect adhesion.
- Ignoring moisture: Wet surfaces hinder proper application.
- Failing to check for damage: Damaged areas need repair before finishing.
Ensure a clean, dry, and intact surface. Proper prep saves time and materials.
Incorrect Application Methods
Using the wrong application techniques can ruin the finish. Follow these guidelines:
- Use the right tools: Select brushes, rollers, or sprayers suitable for DensGlass.
- Apply even layers: Uneven layers lead to peeling and cracking.
- Avoid overworking: Excessive brushing or rolling can damage the surface.
Stick to recommended methods for best results. This will enhance the durability and appearance of your finish.
Frequently Asked Questions
How Do You Finish Densglass Effectively?
To finish Densglass effectively, start by ensuring the surface is clean and dry. Use a suitable primer to enhance adhesion. For best results, apply a compatible finish coat that suits your project needs. Always follow manufacturer instructions for drying times and application methods to achieve optimal results.
What Tools Do I Need For Densglass Finishing?
For Densglass finishing, you will need a trowel, utility knife, and sandpaper. A paint roller or sprayer can be useful for applying finishes. Additionally, a measuring tape and level ensure proper installation. Always use personal protective equipment to ensure safety while working.
Can Densglass Be Painted After Finishing?
Yes, Densglass can be painted after finishing. Choose a high-quality exterior paint that adheres well to gypsum products. Before painting, ensure the surface is clean and free of dust. Follow the manufacturer’s instructions for best results, including recommended drying times between coats.
What Is The Best Primer For Densglass?
The best primer for Densglass is a high-quality latex primer. It promotes adhesion and prepares the surface for paint. Ensure the primer is compatible with the finish coat you plan to use. Always check the manufacturer’s guidelines for specific recommendations to achieve the best results.
Conclusion
Finishing DensGlass requires attention to detail and proper techniques. By following the outlined steps, you can achieve a smooth and durable surface. Remember to use the right tools and materials for the best results. With practice, you’ll master the finishing process and enhance your projects effectively.
Happy finishing!