How to Seal Particle Board: Edges, Faces and Laminate
To seal particle board, prime the raw edges first with two thin coats, then prime the faces, and match the sealer to the surface: shellac, oil or water-based primer for bare board, a bonding primer for laminate. Sealing slows moisture but does not make the board waterproof. This guide covers sealer choice by surface, label dry times, edge banding, and safety.
How to Seal Particle Board: Edges First, Then Faces
Best Water-Based Sealer Pick
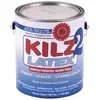 |
KILZ 2 Water-Based Sealer-Primer-Stain Blocker (1 Gallon) – $46.04 A water-cleanup primer for the edge and face coats described below. The can label lists a one-hour recoat, which fits the edges-first, two-coat routine in this guide.
|
As an Amazon Associate we earn from qualifying purchases.
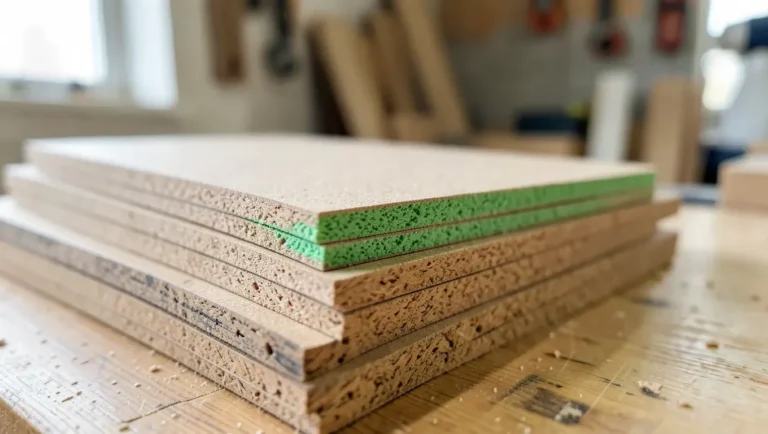
Particle board is made of wood chips and resin, and its edges are where those chips are exposed. Water and wet paint both wick into an unsealed edge faster than into a face, which is why sealing starts there. The stakes are real: the Composite Panel Association states that when particleboard or MDF swells from high humidity or water, the change is not reversible, meaning the panel does not fully recover when it dries out again.
That one fact shapes the whole job. A sealer cannot repair a swollen edge; it can only slow the next wetting. Seal before the board ever sees moisture, and treat sealing as risk reduction, not waterproofing. Moisture-resistant board is the better choice for a bathroom or laundry room, as covered in our chipboard vs MDF vs plywood comparison.
Which Sealer for Which Particle Board Surface
Not every surface wants the same product. The table pairs each surface with a sealer type and the label times manufacturers publish. These times are for roughly 77 degrees F and 50 percent humidity; cooler or damper air means waiting longer.
| Surface | Sealer that fits | Label time (dry to touch / recoat) | Watch out for |
|---|---|---|---|
| Raw cut edges and bare faces, interior | Oil-based primer such as KILZ Original | About 30 minutes / 1 hour | Strong fumes, flammable, needs ventilation |
| Raw edges and faces, low odor needed | Water-based primer such as KILZ 2 | About 30 minutes / 1 hour (can label: recoat in 1 hour) | Adds moisture, so keep coats thin |
| Bare board needing fast, hard seal | Shellac-based primer such as Zinsser B-I-N Advanced | About 25 minutes / 45 minutes, full cure 7 days | Flammable, brush cleanup needs solvent |
| Melamine or laminate-faced panels | Bonding primer such as KILZ Adhesion or Zinsser Bondz, after 180-grit scuffing | Check the can for the chosen product | Gloss must be scuffed first or the primer will not grip |
| Visible edges you do not want to paint | Iron-on edge banding | Not applicable: heat and press | Raw edge must be flat and clean first |
The times above come from manufacturer listings for KILZ Original, KILZ 2 and Zinsser B-I-N Advanced; always confirm them on the can in your hands, since formulas change. For a deeper brand-by-brand comparison, see our shellac-based primer roundup, our wood primer and undercoat comparison and the KILZ vs KILZ 2 breakdown.
Step 1: Prep the Board and Cut Edges
- Support the panel flat: work on sawhorses or a bench so the board does not flex while the coating dries.
- Knock off the fuzz: sand cut edges flat with a sanding block so loose chips do not lift under the brush.
- Remove dust completely: vacuum, then wipe with a barely damp cloth and let the board dry. Particle board dust left under primer shows as grit.
- Fill chipped corners first: repair gouges with filler before sealing so the coating covers the repair too. Our guide on repairing damaged fiberboard covers filler options for chipped board edges.
Step 2: Seal the Edges With Two Thin Coats
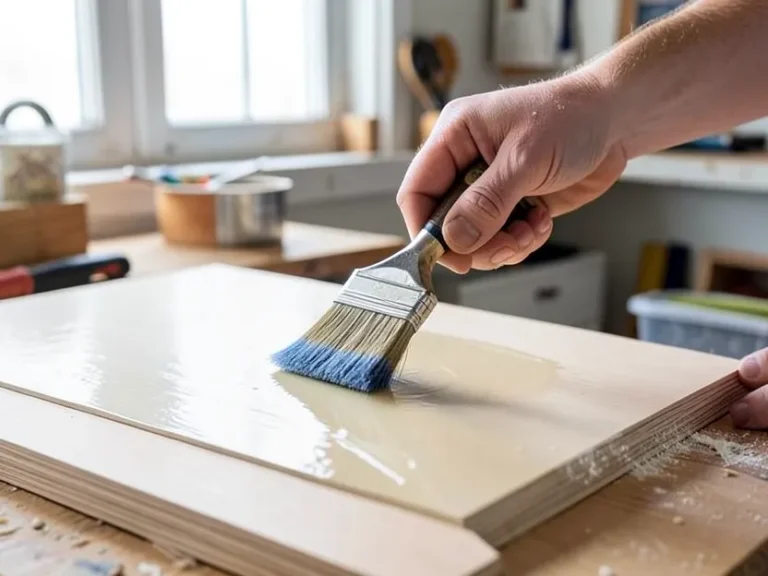
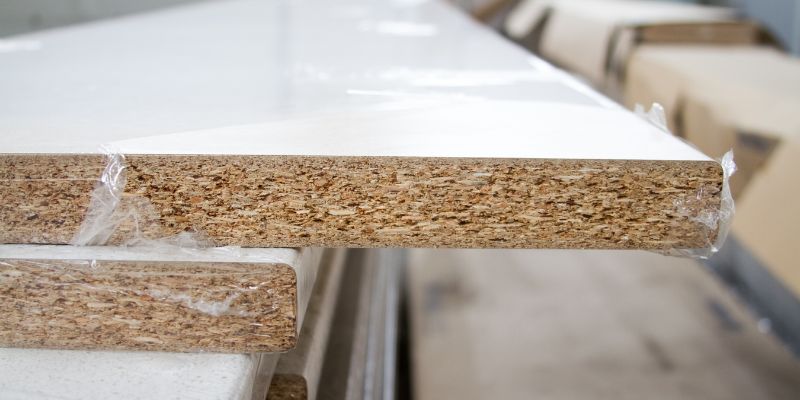
Edges drink the first coat. Brush it on thin, working it into the chips along the edge rather than laying a thick film on top, and brush off the board face so drips do not pool at the corners.
- First coat: brush or foam-brush a thin coat along the edge and corners, wiping drips right away.
- Wait the label time: use the recoat time from the table above, longer if the room is cool or humid.
- Scuff lightly: a quick pass with fine sandpaper knocks down raised fibers before the second coat. This is common finishing practice rather than a label requirement.
- Second coat: repeat, and look for dull, thirsty spots that soaked it up; touch those up before moving on.
If the edge will show and you do not want a painted look, a different route works: iron-on melamine or veneer edge banding covers the chips and gives a finished edge. Our edge banding calculator helps you buy the right length. The Composite Panel Association also warns that solid wood edge banding can cause problems on particleboard cores because wood and particleboard swell differently, so keep the board dry either way.
Step 3: Prime the Faces

Bare faces are less thirsty than edges, but they still soak up paint unevenly. One to two thin coats of the same primer you used on the edges is enough for most jobs. Using one product on both keeps things simple and avoids a compatibility question between coats.
Do the back, underside and every edge too. The Composite Panel Association explains that a panel with a moisture barrier on one side and none on the other develops a moisture gradient, and the unprotected back swells more than the top, which can leave the panel warped. That passage describes overlays rather than primer, so treat the lesson as an inference: coat all sides the same way so moisture cannot take an easy route in through the bare one.
Once the primer is dry, you can finish with paint. Our guides on painting particle board and painting particle board cabinets take it from there, and how to prime MDF is the closest comparison if you are working with both boards.
Melamine and Laminate-Faced Particle Board
Most shelving and flat-pack furniture is particle board under a melamine or laminate skin. The face is already sealed against water, but it is too slick for ordinary primer. Family Handyman recommends cleaning off grease, then scuffing the gloss with 180-grit sandpaper so the primer has something to grip, and lists bonding primers including KILZ Adhesion and Zinsser Bondz.
The edges and any chipped corners are the exception. They expose raw particle board, so give them the two-coat edge treatment or cover them with banding. Laminate that is lifting at an edge lets water behind the skin, so re-glue it first; our particle board glue guide covers adhesives that bond to the core. For the finish chemistry on laminate, see wood finish on laminate.
Why Sealing Is Not Waterproofing: A Moisture Budget
Most how-to guides stop at ‘apply sealer and you are done.’ The better framing is a moisture budget. The Composite Panel Association notes that swelling is not fully reversible, so every wetting event takes something permanent from the panel. A sealed board still swells if it sits in standing water, and a primed edge that cracks at a joint becomes a new entry point.
| Where moisture gets in | What helps | What does not |
|---|---|---|
| Raw cut edge | Two primer coats or iron-on banding | Paint alone with no primer |
| Unsealed back or underside | Same coating as the top | Sealing only the visible face |
| Screw holes and cutouts | Seal the hole walls before assembly | Assuming the face coat covers them |
| Standing water or spills | Wipe up quickly, use moisture-resistant board for wet rooms | Relying on primer as a barrier |
For MDF, the dimensional-change picture is similar; our article on whether MDF shrinks and expands explains how fiberboard moves with humidity, and the particle board vs MDF comparison shows where the two boards differ.
Safety: Fumes, Dust and Formaldehyde
- Flammable primers: oil-based and shellac-based primers are typically flammable. Read the can warnings, keep ignition sources away, and dispose of solvent-soaked rags as the label directs.
- Ventilation: work with open windows and a fan, or outdoors, especially with oil-based or shellac-based products.
- Respirator: use a respirator rated for the product on the can, and a dust mask or respirator when sanding.
- Particle board dust and resin: the EPA identifies the resins used in particleboard and other composite wood products as a source of formaldehyde, and regulates how much those products may release. Sanding and cutting releases dust, so wear protection and clean up with a vacuum rather than blowing it around.
Mistakes That Waste Sealer
- Thick first coat: a heavy film bridges the chips and peels; thin coats soak in.
- Skipping the underside: the uncoated back wicks moisture while the front stays dry.
- Rushing the recoat: the label times assume 77 degrees F and 50 percent humidity; a cold garage needs longer.
- Sealing over dust: grit under the primer shows through the final coat.
- Treating primer as waterproofing: keep water off the board whatever you applied.
Frequently Asked Questions About Sealing Particle Board
How do you seal the raw edge of particle board?
Sand the edge flat, wipe off the dust, and brush on a thin first coat of primer so it soaks into the exposed chips. Let it dry per the label, then add a second coat. If the edge will be visible and not painted, iron-on edge banding is the cleaner finish.
Can you waterproof particle board?
Not fully. Primer and paint slow moisture down, but they are not a waterproof barrier, and the Composite Panel Association says swelling from high humidity or water is not reversible. Seal every face and edge, keep standing water off the panel, and use a moisture-resistant board where it will get wet.
Do you have to seal particle board before painting?
Bare particle board should be primed before paint, with the edges getting the most attention because they soak up the most. Plain paint on raw edges tends to sink in and leave a rough, fuzzy finish.
How many coats of sealer does particle board need?
Plan on two coats on raw edges and one to two coats on bare faces, with the recoat wait taken from the label of the product you chose. Laminate or melamine faces need a bonding primer over a scuffed surface, usually one to two coats.
Can you seal laminate or melamine-faced particle board?
Yes, but only after cleaning and scuffing the gloss with 180-grit sandpaper, then using a bonding primer. The coating grips the scuffed laminate; the exposed edges still need their own sealing coats or edge banding.
Conclusion
Seal particle board in this order: edges with two thin coats, then the faces, then the back, with a bonding primer on laminate and edge banding where you want a clean look. Pick the sealer from the table, follow the label times, protect yourself from fumes and dust, and keep the board dry afterward, since swelling cannot be undone.
Sponsored / affiliate links. As an Amazon Associate I earn from qualifying purchases. I may earn additional commission from eligible campaigns.