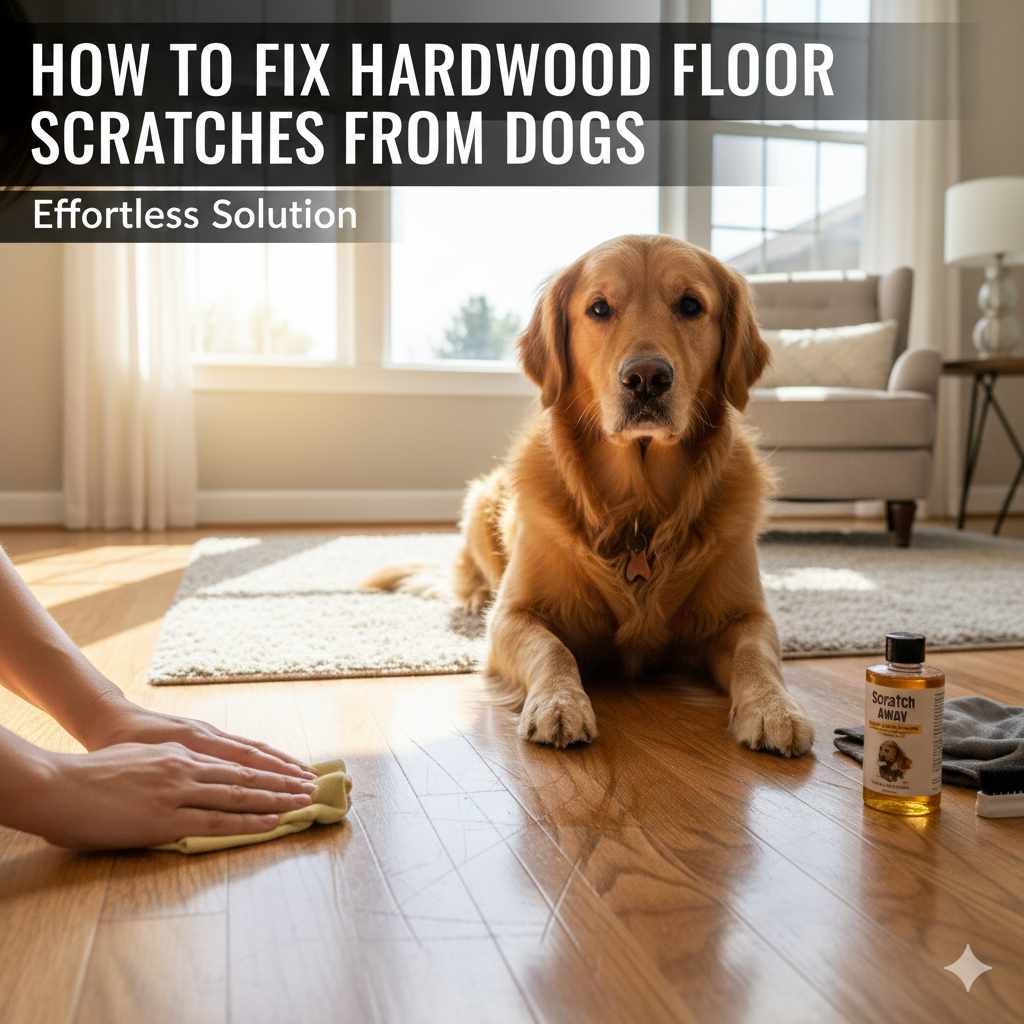
How To Fix Hardwood Floor Scratches From Dog: Effortless Solution
Easily fix hardwood floor scratches from dogs using simple DIY methods. Depending on scratch depth, you can use touch-up markers, wood filler, or even a matching wax crayon. These effortless solutions will restore your floor’s beauty without needing professional help.
Hey there, fellow DIYers and homeowners! Does the click-clack of your dog’s nails on your beautiful hardwood floors sometimes make you wince? You’re not alone. Those little white lines, and sometimes deeper gouges, can be frustrating. But don’t worry! As your woodworking mentor, I’m here to show you how to fix hardwood floor scratches from dogs with easy, affordable methods. We’ll tackle everything from light surface scuffs to slightly deeper marks, restoring that gorgeous shine to your floors.
Understanding Dog Scratches on Hardwood Floors
Dogs, bless their happy paws, can be unintentional architects of floor wear and tear. Their nails, especially when they’re excited or playing, can easily create superficial scratches. These often appear as light-colored lines on the surface of the wood. Deeper scratches can occur if a dog slides or drags something heavy, potentially digging into the wood finish or even the wood itself.
The finish on your hardwood floor plays a big role. Modern polyurethane finishes are quite durable, making them more resistant to light scratches. However, older finishes or those with a lower sheen might show marks more readily. Understanding the type of scratch and your floor’s finish is the first step to a successful repair. Let’s get your floors looking as good as new!
Assessing the Damage: What Kind of Scratch Are We Dealing With?
Before grabbing any tools, let’s take a closer look at the damage. Not all scratches are created equal, and the best fix depends on the depth.
Superficial Scratches (Surface Level)
These are the most common. They only affect the top layer of the floor’s finish – usually a clear protective coating like polyurethane. You’ll see light-colored marks that don’t feel rough when you run your finger over them. They’re essentially just scuffs on the shine.
Medium Scratches (Into the Finish)
These have gone a bit deeper, potentially removing some of the color or finish. You might be able to feel a slight indentation with your fingernail. They might expose a bit of the wood color underneath. These are still quite manageable for a DIYer.
Deep Scratches and Gouges (Into the Wood)
These are the most serious. They’ve dug into the actual wood, leaving a noticeable groove. You’ll easily feel these with your fingernail, and you’ll see the raw wood exposed. These require a bit more effort but are still fixable.

Tools and Materials You Might Need
Gathering the right supplies makes the job much smoother. Here’s a list of what you might need, depending on the type of repair:
- Soft cloths or microfiber towels
- Vacuum cleaner
- Wood floor cleaner (pH-neutral)
- For Superficial Scratches:
- Hardwood floor polish or restorative
- Furniture polish (test first!)
- Walnut or pecan
- For Medium Scratches:
- Wood repair markers (color-matched to your floor)
- Canned air or soft brush for cleaning
- For Deep Scratches and Gouges:
- Wood filler or wood putty (color-matched or paintable)
- Putty knife or flexible scraper
- Fine-grit sandpaper (180-220 grit)
- Optional: Clear finish (polyurethane or polycrylic)
- Optional: Small brush for touch-up finish
Effortless Solutions for Superficial Scratches
These are the easiest to fix and often require just a few simple household items or products designed to refresh the finish. Here’s how to tackle those fleeting scuffs.
1. The Walnut/Pecan Trick (For Light Scuffs)
This might sound a bit unusual, but it really works for very light surface scratches! The natural oils in nuts can help mask minor scuffs.
- Select Your Nut: Choose a walnut or pecan that closely matches the color of your hardwood floor.
- Rub Gently: Take the nut and gently rub it directly over the scratch. The oils and the nut’s shell will help fill in and darken the scratch, making it less visible.
- Buff it Out: After rubbing, use a clean, soft cloth to gently buff the area. This helps blend the oil into the surrounding finish.
Why it works: The oils in the nut act as a sort of lubricant and temporary filler for the scratch, and the nut’s “skin” can deposit a bit of color. It’s a quick, natural fix for the absolute lightest marks.
2. Using Hardwood Floor Polish or Restorers
Many excellent hardwood floor polishes and restorer products are designed to fill in minor imperfections and revitalize the sheen of your floor. They can buff out light scratches by essentially adding a new, even layer of protective finish.
- Clean the Floor: Thoroughly clean the scratched area and its surroundings with a pH-neutral wood floor cleaner. Ensure it’s completely dry. Dust and debris can make scratches look worse. For good cleaning tips, check out the EPA’s guidance on reducing emissions in your home, which highlights the importance of good indoor air quality and cleanliness.
- Apply the Product: Follow the product’s instructions carefully. Usually, you’ll apply a small amount to a soft cloth or applicator pad and wipe it over the scratched area.
- Work with the Grain: Always rub in the direction of the wood grain.
- Buff if Needed: Some products may require light buffing to achieve the desired shine.
Pro Tip: Always test any new polish or restorer in an inconspicuous area first to ensure it doesn’t alter the color or sheen of your floor unexpectedly.
Fixing Medium Scratches: Bringing Back the Color
When scratches have slightly penetrated the finish and removed some color, we need a way to reintroduce that color to blend the scratch in.
Wood Repair Markers (Color-Matching Magic)
These are one of the most straightforward tools for medium scratches. They come in a wide array of wood tones, allowing you to find a perfect match for your floor.
- Clean Seriously: Again, a clean surface is crucial. Ensure the scratch and surrounding area are free of dust, dirt, and grime. A gentle sweep or vacuum with a brush attachment works well.
- Choose Your Color: Select a marker that exactly matches your floor’s color or undertone. It’s often better to go slightly lighter if you’re unsure, as you can always add more. You might even mix two colors to get the perfect shade.
- Test the Color: Before applying to the scratch, test the marker on a scrap piece of wood or an unseen area of your floor to confirm the color match.
- Apply to the Scratch: Carefully apply the marker directly into the scratch, following the direction of the wood grain. Use a light touch.
- Wipe Away Excess: Immediately (or as directed by the marker’s package), use a clean, soft cloth to gently wipe away any excess marker that got onto the surrounding floor. You want the color in the scratch, not on top of the finish.
- Let it Dry: Allow the marker to dry completely according to the product instructions.
- Optional: Seal it: For longer-lasting results, you can apply a small amount of matching clear finish over the repaired scratch once it’s fully dry. This helps protect the color and blend it further.
Where to Find Them: You can find wood repair markers at most home improvement stores, hardware stores, and online retailers. Brands like Minwax, Mohawk, and Old Masters offer good options.
Repairing Deep Scratches and Gouges: The DIY Carpenter’s Approach
Deep scratches and gouges are more challenging, but definitely within the realm of DIY possibility. This involves filling the void. Patience is key here!
Using Wood Filler or Wood Putty
Wood filler (often called wood putty) is the best material for filling deeper imperfections. It’s designed to harden and can be sanded and refinished.
Step-by-Step Guide to Filling Deep Scratches:
- Thorough Cleaning: This is non-negotiable. Clean the scratch and the area around it meticulously. Use a small brush or even a toothpick to remove any debris lodged deep within the gouge. You might want to vacuum afterward to pick up any loose particles.
- Choose Your Filler:
- Color-Matched Filler: If you can find a wood filler that precisely matches your floor color, it’s ideal.
- Tintable Filler: Some fillers come uncolored and can be tinted with universal tints to achieve your desired shade.
- Paintable Filler: If your floors are painted or you plan to refinish, a paintable filler is a good choice.
- Apply the Filler: Using a putty knife or a flexible scraper, carefully load a small amount of wood filler into the scratch. Press it down firmly to ensure it fills the entire depth of the gouge. Don’t overfill; you want it to be slightly below or flush with the surface.
- Smooth and Level: With the putty knife at a slight angle, scrape away any excess filler so it sits level with the surrounding wood surface. Try to leave as little excess as possible.
- Let it Cure: This is crucial. Wood filler needs time to dry and harden completely. Check the product packaging for recommended drying times, which can range from an hour to 24 hours or more, depending on the product and humidity. Rushing this step will ruin your repair.
- Sanding (Optional but Recommended): Once the filler is fully cured, you may need to lightly sand the area to make it perfectly flush with the floor. Use a fine-grit sandpaper (180-220 grit). Sand very gently and only the filled area. You don’t want to sand away the surrounding finish. A sanding block can help keep it flat.
- Clean Again: After sanding, wipe away all dust. You can use slightly damp cloth or a tack cloth.
- Touch-Up Color (If Needed): If your filler wasn’t perfectly color-matched or if sanding removed some color, this is where you might use a wood repair marker (as described for medium scratches) to touch up the colored filler itself.
- Seal the Repair: To protect your hard work and help the repair blend in, apply a clear finish over the dried filler. Use a matching polyurethane or polycrylic. Apply it sparingly with a small artist’s brush, just to the filled area. You might need one or two thin coats, allowing each to dry according to the manufacturer’s instructions.
Important Considerations for Deep Repairs
Matching Finish: Getting the sheen right is important. If your floor has a satin finish, use a satin topcoat. A high-gloss finish will stand out against a matte floor, and vice-versa.
Hardwood Type: Different woods have different grain patterns and hardness. Be gentle when sanding and filling.
Professional Help: For very large, deep, or numerous gouges, or if you’re not comfortable with the process, consider consulting a professional floor refinisher. Sometimes, a full floor refinishing might be the most cost-effective long-term solution.
Preventing Future Dog Scratches on Hardwood Floors
Prevention is always better than cure, right? Here are some tips to keep your floors looking pristine:
- Regular Nail Trims: This is the number one defense! Keep your dog’s nails trimmed regularly. If you’re unsure how to do it safely, ask your vet or a professional groomer for a demonstration. A quick guide on proper nail trimming can be found on resources like the American Veterinary Medical Association (AVMA) website.
- Provide Ramps or Mats: For dogs that love to slide or jump down from furniture, consider ramps for couches or mats in high-traffic sliding areas.
- Protective Booties or Paw Covers: For dogs with particularly sharp nails or if you have very delicate flooring, consider dog booties or paw grips. Introduce them gradually so your dog gets used to them.
- Area Rugs and Runners: Place rugs in high-traffic areas, near entrances, and in zones where your dog tends to play or scratch to absorb impact and catch stray nails.
- Playtime Management: While you want your dog to be happy and active, try to redirect excessive scratching or sliding behavior.
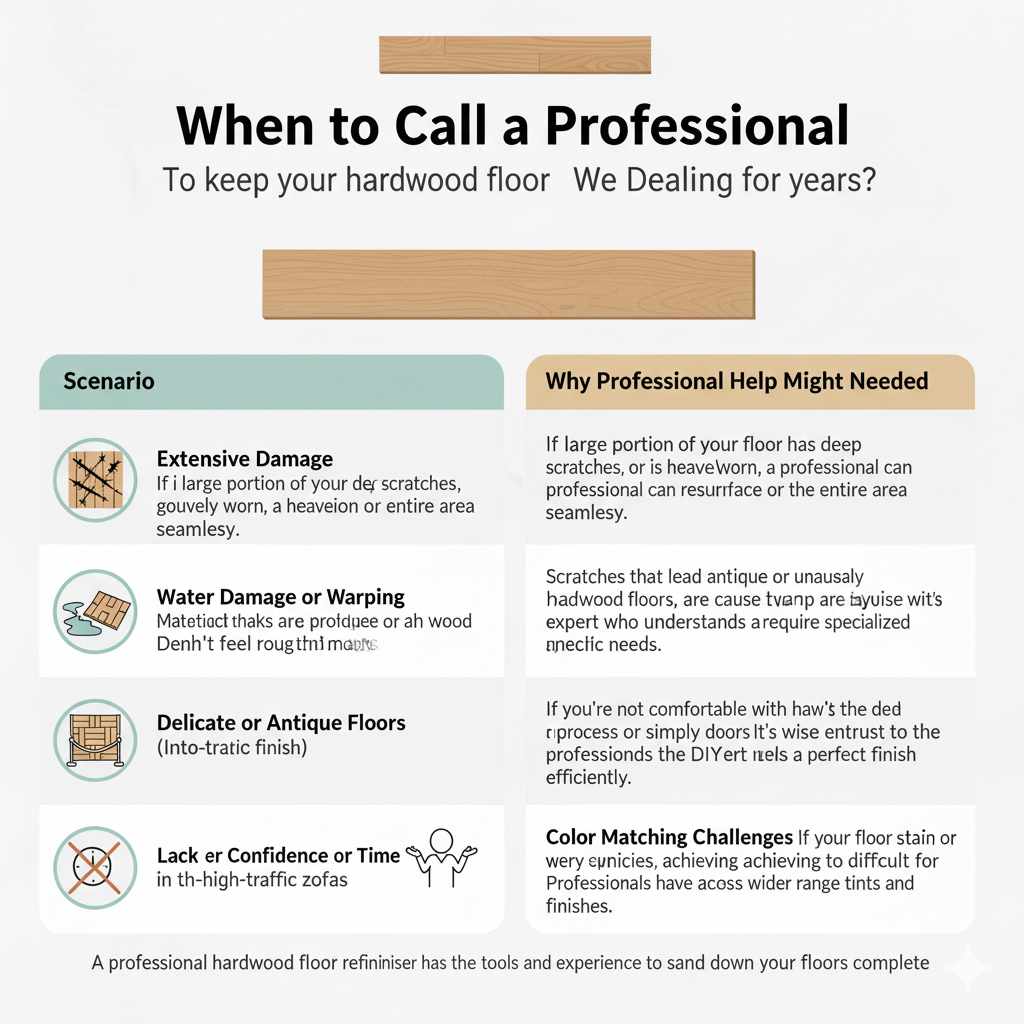
When to Call a Professional
While DIY solutions are fantastic for minor to moderate scratches, there are times when professional help is the best route:
| Scenario | Why Professional Help Might Be Needed |
|---|---|
| Extensive Damage | If a large portion of your floor has deep scratches, gouges, or is heavily worn, a professional can resurface or refinish the entire area seamlessly. |
| Water Damage or Warping | Scratches that lead to water damage or cause wood to warp are beyond typical DIY repair and require specialized expertise. |
| Delicate or Antique Floors | If you have valuable antique or unusually delicate hardwood floors, it’s wise to entrust repairs to an expert who understands their specific needs. |
| Lack of Confidence or Time | If you’re not comfortable with the DIY process or simply don’t have the time, a professional can deliver a perfect finish efficiently. |
| Color Matching Challenges | If your floor has a complex stain or a very unique wood species, achieving a perfect color match can be difficult for DIYers. Professionals have access to a wider range of tints and finishes. |
A professional hardwood floor refinisher has the tools and experience to sand down your floors completely and reapply stain and finish, making them look brand new again. This is a more involved and costly process but can transform a worn-out floor.
Frequently Asked Questions (FAQ)
Q1: Can I really fix hardwood floor scratches from my dog myself?
A: Absolutely! For light to medium scratches, simple methods like using a walnut, floor polish, or color-matching markers are very effective. Deeper scratches can also be repaired with wood filler and a little patience. You can achieve great results as long as you assess the scratch correctly and use the right materials.
Q2: What’s the easiest way to fix a very light scratch on my hardwood floor?
A: The quickest and easiest fix for a faint scratch is often the walnut or pecan trick. Just rub a matching nut over the scratch. The natural oils can help mask the mark. Alternatively, a good hardwood floor polish can often buff out superficial scuffs and restore shine.
Q3: How do I know what color wood filler or marker to buy?
A: It’s best to get a color sample or a small chip of your flooring if possible. Otherwise, look closely at your floor in good natural light. Note the main color, but also any undertones (like red, yellow, or brown). Most stores have sample chips, or you can hold repair products up to your floor (but not touching!) to compare. It’s often better to air on the side of slightly lighter if you’re unsure.
Q4: Can I use regular crayon to fix scratches?
A: While a colored crayon might temporarily camouflage a scratch, it’s not a recommended long-term solution for hardwood floors. Crayons are waxy and can attract dirt, potentially creating more of a mess. Dedicated wood repair markers or waxes are formulated to adhere better and look more natural.