How to Fix Nicks in a Wood Floor (Filler, Wax, or Sand)
A nick that hasn’t broken through the finish usually just needs a color-matched wax fill — a deeper gouge that’s exposed bare wood needs wood filler, sanding, stain, and a fresh coat of sealant. Picking the wrong method for the depth you’re actually dealing with is the most common reason a repair looks worse than the original damage.
Step 1: Figure Out How Deep the Damage Actually Is
Fastest Fix For Shallow Nicks & Scratches
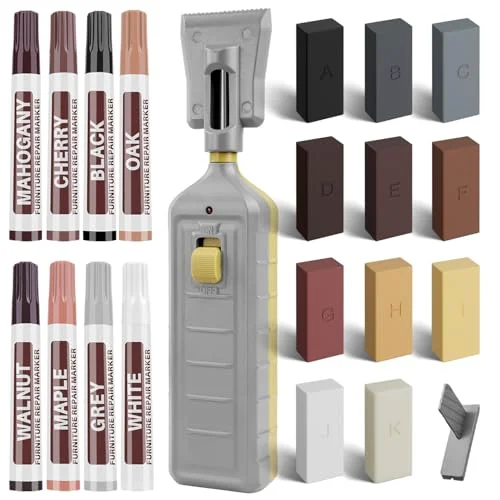 |
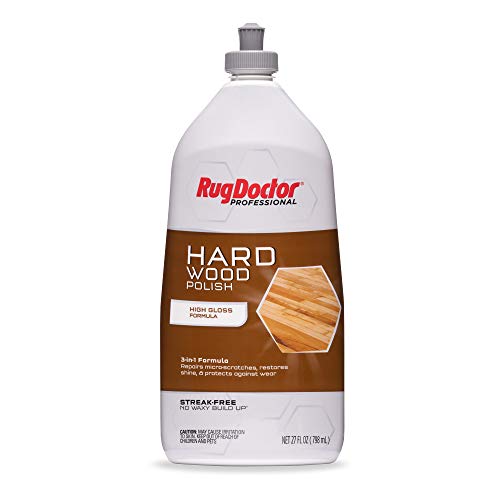
Hardwood Floor Repair Kit, 11 Colors – $23.99 For a shallow nick that hasn’t broken through the finish, melted wax matched to your floor’s color hides it in minutes — no sanding, no drying time.
|
Run a fingernail over the damaged spot. If it catches on bare, unfinished wood, the finish layer is broken and you’re looking at a real gouge or chip — that needs filler. If the surface still feels smooth and glossy despite a visible mark, the finish is intact and you’re dealing with a surface scratch that wax alone can hide.
| Damage Type | How to Tell | Best Fix |
|---|---|---|
| Surface scratch | Finish still smooth/glossy over the mark | Color-matched wax stick |
| Nick / shallow gouge | Fingernail catches, bare wood visible | Wood filler + stain + sealant |
| Chip | A piece of wood is actually missing | Wood filler (deeper fill) + stain + sealant |
| Deep gouge / split | Wide, deep, or running with the grain | Filler may not hold — consider a board replacement |
Fixing a Shallow Scratch (No Filler Needed)
For a scratch that hasn’t broken the finish, a color-matched wax stick or the kit above is genuinely the fastest fix — melt a small amount into the scratch, let it set for a minute, then buff level with a soft cloth. Two older home remedies get repeated a lot online for this same job: rubbing a raw walnut over the scratch (its natural oils can darken and disguise very light marks) and a paste of olive oil and baking soda. Both can take the edge off a faint scratch, but neither is a real repair — they don’t fill or seal anything, and the effect fades. Treat them as a five-minute stopgap, not a substitute for wax or filler on anything you’d notice up close.
Fixing a Nick or Gouge (Filler Method)
- Clean the area with a damp cloth and let it dry fully — filler won’t bond to a damp or dusty surface.
- Choose a wood filler close to your floor’s natural color; you’ll fine-tune the match with stain afterward, so exact isn’t critical here.
- Press the filler into the nick with a putty knife, slightly overfilling since most fillers shrink a bit as they cure.
- Let it cure fully — check the product’s label, but 24 hours is typical. A second thin coat is common if it shrinks more than expected.
Sanding the Filled Area
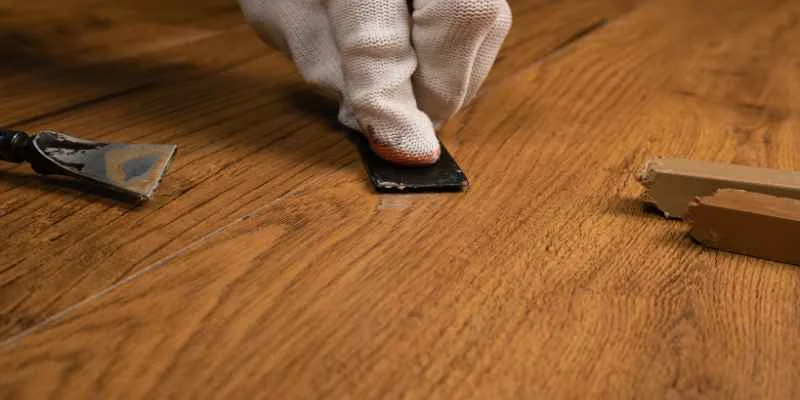
Sand in the direction of the wood grain, never across it — cross-grain scratches show up worse than the original damage once you stain. Start coarse if the filler sits proud of the surface, then step up through finer grits to blend the edges into the surrounding finish.
| Grit | Use |
|---|---|
| 60–80 (coarse) | Leveling filler that sits above the surface |
| 100–150 (medium) | General smoothing |
| 180–220 (fine) | Final pass before staining |
Matching the Stain
Test your stain on a hidden spot first — inside a closet or under a rug — never straight on the repair. Wood absorbs stain differently once it’s been sanded and filled versus the surrounding aged floor, so the same stain can read a shade or two off; a test patch is the only way to know before it’s permanent. Apply with a small brush or cotton swab, feathering the edges into the surrounding finish rather than stopping in a hard line.
Sealing the Repair
Once the stain is fully dry, seal the area to match your floor’s existing finish — polyurethane for most modern floors, oil-based sealant or wax for older or hand-finished floors. Apply in thin coats, letting each dry completely and sanding very lightly between coats, so the repaired patch builds the same sheen as the rest of the room instead of standing out as a glossy or dull spot.
Preventing the Next One
- Felt pads under furniture legs, replaced when they wear thin or fall off
- Rugs or runners in high-traffic paths and pivot points (doorways, in front of sinks)
- Lift and carry furniture instead of dragging it, even short distances
- Trim pet nails regularly — a common, overlooked source of fine scratching
When to Call a Professional Instead
A DIY filler repair is realistic for isolated nicks and gouges. Call a flooring professional instead if you’re seeing warping or buckling boards, water damage or mold, or damage spread across a wide area — those point to a problem below the surface that a surface-level fill won’t fix, and can get worse if patched over rather than properly addressed.
Frequently Asked Questions
How do you fix a nick in a hardwood floor?
Clean the area, press wood filler into the nick, let it cure (about 24 hours), sand flush with the grain, apply a matching stain tested on a hidden spot first, then seal with a finish matching the rest of the floor.
Can you fix a scratch without sanding?
Yes, if the finish is still intact (not broken through to bare wood). A color-matched wax stick melted into the scratch and buffed level works without sanding. Raw walnut or an olive-oil-and-baking-soda paste can take the edge off a very faint scratch, but they’re a stopgap, not a real repair.
How do you know if a scratch needs filler or just wax?
Run a fingernail over it. If it catches on bare, unfinished wood, the finish is broken and it needs filler. If the surface still feels smooth and glossy, wax alone will hide it.
Conclusion
The fingernail test tells you which repair you actually need: wax for a scratch that hasn’t broken the finish, filler-sand-stain-seal for anything that’s reached bare wood. Match the fix to the actual depth of the damage and it’ll disappear into the floor rather than becoming a second blemish next to the first.
Sponsored / affiliate links. As an Amazon Associate I earn from qualifying purchases. I may earn additional commission from eligible campaigns.