Wood Floor to Carpet Transition Strip: Types & How to Install
A wood floor to carpet transition strip closes the height and material gap between hardwood and carpet at a doorway — but the right type depends on how much height difference you’re bridging, not just looks. Using the wrong strip can leave a trip hazard or a gap that catches carpet edges over time. This guide covers the main strip types, material options, and how to install one so it sits flush and stays secure. For the broader picture on flooring choices, see our full wood flooring guide.
Why You Need a Transition Strip
Best Wood-to-Carpet Transition Strip Pick
 |
MD Building Hardwood Carpet Trim, 1-7/16in x 36in – $20.97 An unfinished hardwood carpet trim you stain to match your floor — the screw-down style this guide’s installation steps describe, rather than an adhesive strip.
|
As an Amazon Associate we earn from qualifying purchases.
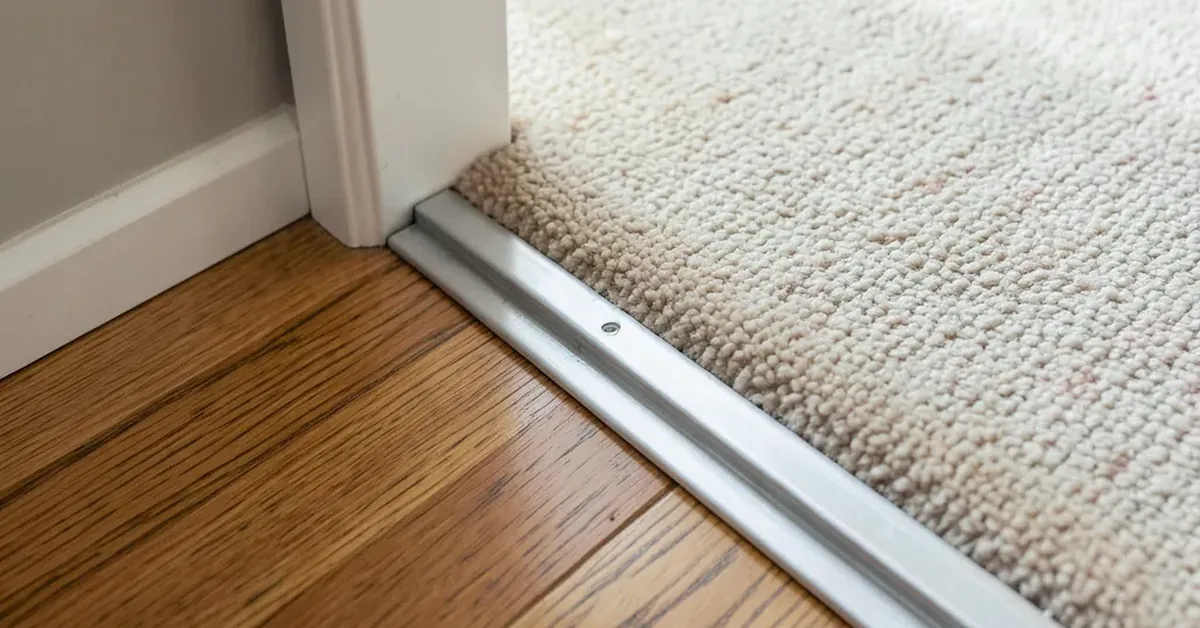
Transition strips solve three problems at once where wood floor meets carpet: they bridge the height difference (hardwood is usually 1/4″ to 3/4″ higher than carpet plus pad), they hide and protect the exposed edge of both materials, and they stop carpet fibers from fraying at the seam. Skipping one at a doorway is one of the most common reasons a carpet edge starts unraveling within a year.
Types of Wood-to-Carpet Transition Strips
The height difference between your two floors determines which strip actually works — picking by looks alone is how strips end up loose or tripping-hazard-high.
- Reducer strip: Slopes gradually from the wood floor down to the carpet. The standard choice when wood sits noticeably higher than carpet plus pad.
- T-molding: Sits level across both surfaces. Works best when the height difference is small (under about 1/8″) — otherwise the wood side ends up proud of the strip.
- Carpet-to-wood gripper strip: A tack strip on the carpet side paired with a track or cap on the wood side; the carpet is stretched and tucked under the cap rather than resting flush against a molding.
- Threshold strip: Used mainly at exterior doors or where two rooms meet at a structural threshold; see our guide to the piece of wood that separates two rooms for that specific case.
If both rooms have hardwood instead of carpet, the transition strip choices and height math work differently — see our guide to transitioning hardwood floors between rooms for that case.
Material Options
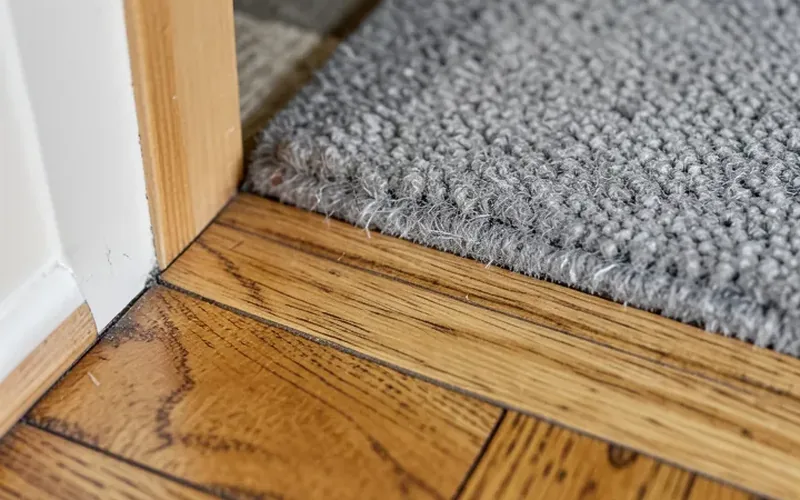
Wood transition strips are typically oak, maple, or cherry, stained to match the adjoining floor — the best choice when you want the seam to disappear rather than stand out. They’re durable but need the same finish care as the floor itself.
Metal strips (aluminum or stainless) hold up better in high-traffic commercial spaces and resist moisture, but they read as more utilitarian than a wood-matched strip. Vinyl and rubber strips are the budget option and the right call in bathrooms or basements where moisture resistance matters more than appearance; laminate strips split the difference between cost and a wood-like look.
Installing a Transition Strip
Most wood-to-carpet transition strips install the same basic way, whether you’re using a screw-down track system or an adhesive strip:
- Clear and measure the doorway: Remove debris, then measure the doorway width to cut the strip to length with a few millimeters of clearance on each side.
- Check the subfloor is level: Use a self-leveling compound on any dip greater than about 1/8″ over 2 feet — an uneven subfloor is the most common reason a strip rocks or squeaks later.
- Position the track or strip: Dry-fit it against the edge of the wood floor before fastening anything.
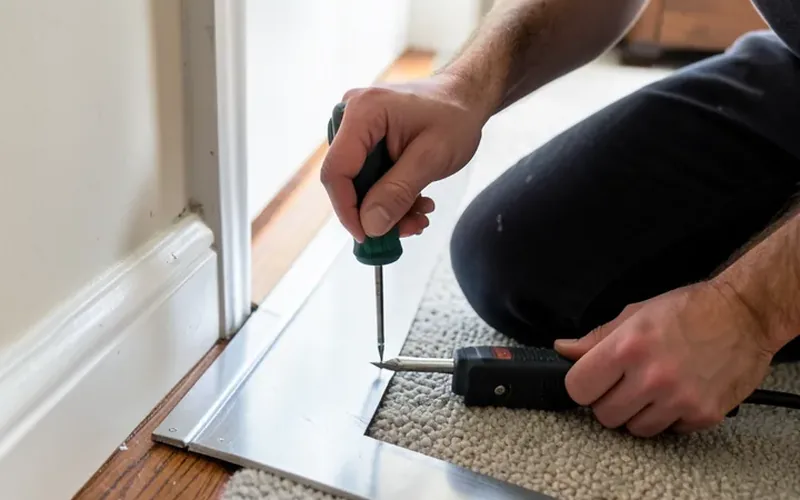
- Fasten to the subfloor, not the flooring: Screw-down track systems attach through the subfloor; adhesive strips need a clean, dust-free surface to bond properly.
- Tuck or seat the carpet edge: For gripper-style strips, stretch the carpet onto the tack strip and press the edge under the cap with a stair tool.
- Snap on the cap (if applicable): Many track systems use a separate cap that snaps over the fastened base, hiding the screws.
DIY installation is realistic for most homeowners with basic tools and takes under an hour per doorway; a professional adds cost but is worth it on uneven subfloors or when matching a stained hardwood strip to an existing floor’s exact finish.
Choosing the Right Strip
Start with the height difference between your two floors — it rules out most of the wrong options before you even get to color. A gap under 1/8″ suits T-molding; anything larger needs a reducer or a gripper-track system that’s built to slope.
Match the strip’s finish to the floor it borders, not the carpet — the eye follows the wood side first. Confirm the installation method (screws, adhesive, or a nail-down track) matches what your subfloor can actually support before buying.
Dealing With Uneven Floors
When the subfloor itself is uneven, a single rigid strip will rock or leave a visible gap on one side. Shim the low side with plywood or a self-leveling compound before installing the track, rather than trying to compensate with extra fasteners — that just stresses the strip and it eventually cracks.
📊 Thresholds at accessible doorways are capped at 1/2 inch (13 mm) high, with any rise over 1/4 inch requiring a beveled edge. — Source: 2010 ADA Standards for Accessible Design, Section 404.2.5
That code figure is a useful ceiling even outside commercial/ADA-regulated spaces: if your finished transition strip rises more than 1/2 inch above the carpet, it’s worth switching to a reducer with a gentler slope regardless of whether the room is required to comply.
Cost and Durability
Expect roughly $10–$25 for a basic vinyl or aluminum strip, $20–$40 for an unfinished hardwood trim you stain yourself, and $40–$80 for a pre-finished or specialty track system. Metal and vinyl strips are the most durable against moisture and heavy foot traffic; a stained wood strip needs the same refinishing schedule as the floor it matches.
Regular care is simple: vacuum built for carpet and wood floors to clear grit at the seam, and wipe the strip with a damp cloth rather than harsh cleaners that can dull a finish.
Frequently Asked Questions
How do I transition between hardwood floors and carpet?
Use a gripper or track-style transition strip: a tack strip or cap track is screwed to the subfloor at the seam, the carpet is stretched and tucked under the cap, and the wood-side edge sits flush against the strip. For a small height difference, T-molding works instead.
What is the strip between carpet and floor called?
It’s called a transition strip (also a reducer, T-molding, or gripper strip depending on the style). It bridges the height and material gap and protects both floor edges from fraying or chipping.
What goes between wood and carpet?
A transition strip goes between wood and carpet. Which type depends on the height difference: T-molding for a small gap, a reducer or gripper-track system when the wood sits noticeably higher.
Can you use a transition strip if the subfloor is uneven?
Not directly — level the low spot with a self-leveling compound or plywood shim first. Installing a rigid strip over an uneven subfloor leaves it rocking underfoot and it will eventually crack or pull loose.
Conclusion
The right wood floor to carpet transition strip comes down to matching the strip type to your actual height difference, then choosing a material that fits the room’s traffic and finish. A reducer or gripper-track system handles most wood-to-carpet doorways; T-molding only works when the two floors are nearly level. Get the height match right and the strip stays flush, quiet, and trip-free for years.
Sponsored / affiliate links. As an Amazon Associate I earn from qualifying purchases. I may earn additional commission from eligible campaigns.