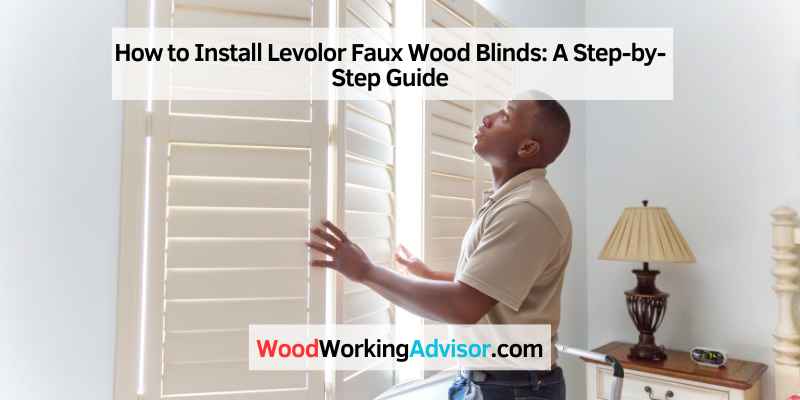
How to Install Levolor Faux Wood Blinds: A Step-by-Step Guide
Installing Levolor Faux Wood Blinds is a simple task. Follow our step-by-step guide to installing Trim+Go™ faux wood blinds and you’ll have them up in no time.
Installing Levolor Faux Wood Blinds is an easy process that can be done by anyone with basic knowledge of household tools. These blinds are specifically designed for the do-it-yourself installer, with a simple bracket system that allows you to install the blinds quickly and easily.
The installation process involves measuring and marking bracket placement, assembling the wand, and attaching the valance, among other things. With our helpful guide, you can confidently install Levolor Faux Wood Blinds in no time, adding a touch of sophistication to your living space.
Valance Installation
Installing Levolor faux wood blinds is made easy with our helpful step-by-step guide. Our instructions come with detailed illustrations to walk you through everything you need to do, including valance installation, marking bracket placement, assembling the wand, adding valance end caps, and operating the blind.
Levolor faux wood blinds are a great addition to any window, adding style and privacy to your home. When installing these blinds, many people often ignore the importance of valance installation. However, adding a valance creates a finished look and hides the headrail of the blinds.
Assembling The Valance
Before attaching the valance, you need to assemble it. Start by laying the valance face down on a clean surface. Clip the valance clips to the back of the valance evenly along the entire length, ensuring they are spaced out as recommended.
Attaching The Valance
Now, it’s time to attach the valance to the headrail. Insert the valance clips that you attached to the back of the valance onto the front of the headrail. Ensure that each clip is correctly inserted to prevent the valance from falling off.
Adding Valance End Caps
End caps give a polished and finished look to the blinds. To add end caps, slide them into the ends of the valance from each side. Be careful while inserting the end caps and ensure that they correctly fit into the valance.
In conclusion, if you’ve followed these simple steps, you have done your valance installation successfully. Your Levolor faux wood blinds are now complete and installed with a sleek finished look.
Blind Installation
Installing Levolor faux wood blinds is a simple task that requires measuring and marking bracket placement, assembling the wand, and installing the valance. This helpful step-by-step guide on YouTube by LEVOLOR provides everything you need to know, including tools needed, valance end caps, and operation.
Installing Levolor faux wood blinds can certainly seem like a daunting task, but here we will walk you through everything you need to know. From selecting the proper tools to adding the valance end caps, we will break down the entire process for you step by step. In this section, we will focus on the subheading – Blind Installation- and the two methods for installation, inside mount and outside mount.
Inside Mount
Installing Levolor faux wood blinds in an inside mount position ensures that the blinds will be flush with your window frame. This is the ideal method when you want to maintain your window’s natural shape and still have control over your blinds’ light filtering capabilities. Here is a step-by-step guide for inside mount installation:
1. Measure the height and width of your window frame to ensure the right size blind and bracket.
2. Check for window obstructions, such as handles, before marking the brackets’ placement.
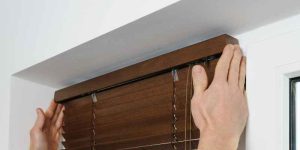
3. Place the brackets at the top inside of your window frame, ensuring that they are level.
4. Attach the valance clips onto the valance and install it onto the valance return clips.
5. Install the headrail onto the brackets and ensure they are secure.
6. Using the wand, check the operation of the blinds.
Outside Mount
Installing Levolor faux wood blinds in an outside mount position gives you more control over light and privacy coming into your room. It is also ideal if you have limited space on your windowsill or want to hide an unattractive window frame. Here is a step-by-step guide for outside mount installation:
1. Measure the height and width of the area you want to cover to ensure the right size blind.
2. Using a level, mark the bracket placement on the wall or molding above the window.
3. Attach the valance clips onto the valance and install it onto the valance return clips.
4. Install the headrail onto the brackets and ensure they are secure.
5. Using the wand, check the operation of the blinds.
Installing Levolor faux wood blinds is a quick and easy process with the right tools and attention to detail. Following these step-by-step instructions for installation can help you achieve a beautiful and functional window treatment.
Frequently Asked Questions For How To Install Levolor Faux Wood Blinds
How Do You Install Faux Wood Blind Brackets?
To install faux wood blind brackets, follow these steps: First, assemble the wand and valance. Second, measure and mark the placement of the brackets. Third, install the valance and end caps. Finally, attach the brackets and blinds, and adjust the tension.
Detailed instructions are available online with Levolor or Blinds. com.
Is It Hard To Install Faux Wood Blinds?
No, it is not hard to install faux wood blinds. You can follow the step-by-step guide provided by the manufacturer or watch tutorials on YouTube. With the right tools and instructions, anyone can install faux wood blinds.
How Do You Install Valance On Levolor Faux Wood Blinds?
To install the valance on Levolor faux wood blinds, follow these steps:
1. Assemble the wand and attach it to the headrail of the blinds.
2. Measure and mark the bracket placement on the wall.
3. Assemble the valance and attach the end caps.
4. Attach the valance to the headrail.
5. Adjust the blinds by operating the wand. For more detailed instructions, download the installation manual from Levolor’s website.
How To Adjust Tension On Levolor Cordless Faux Wood Blinds?
To adjust the tension on Levolor Cordless faux wood blinds, first, locate the tension adjustment inside the headrail. Second, insert a flathead screwdriver into it and turn it clockwise to increase, or counterclockwise to decrease the tension. Finally, test the blind by raising and lowering it to ensure that the tension has been adjusted correctly.
Conclusion
Congratulations, you have successfully learned how to install Levolor faux wood blinds by following our step-by-step guide. Now, you can enhance your home’s aesthetics and privacy to your liking with these durable and cost-effective blinds. By installing them, you will not only reduce the energy bills but also add value to your home.
Remember to take proper measurements, follow the instructions carefully, and use the right tools to ensure a perfect fit. We hope our guide has been informative and helpful. Enjoy your new blinds!