Maloof Chair Plans: The Signature Joint & Sculpting Technique
Maloof chair plans guide you through building the Sam Maloof rocker, whose signature feature is a 1/4-inch tongue-and-groove joint cut into a 2-inch dado, then sculpted — carved down to its final curved shape after assembly, not left square. Skipping that sculpting step is the most common mistake beginners make. This guide covers the tools and hardwoods you need, the exact joint technique, and how to shape the chair’s signature curves.
Introduction To Maloof Chairs
Best Joint-Sculpting Tool Pick
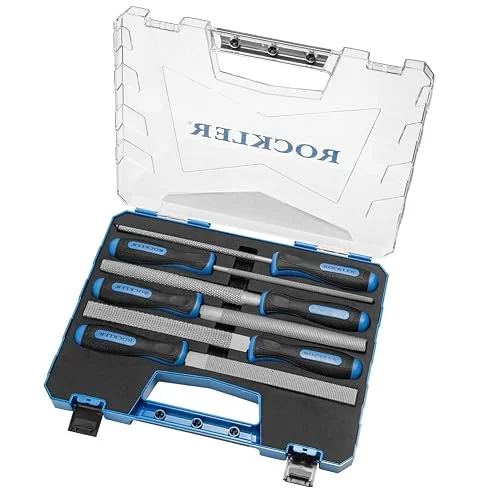 |
Rockler Wood Rasp Set of 6 – $49.99 The Maloof joint is meant to be sculpted after assembly, not cut perfectly square — this round, half-round, and flat rasp set is exactly what you need to carve the joint and the chair’s signature curves down to their final shape.
|
The Maloof chair is a famous piece of furniture designed by Sam Maloof. His work is known for its unique style and craftsmanship. Sam started making chairs in the 1940s. He used handmade techniques to create strong and beautiful furniture.
The legacy of Sam Maloof lives on through his designs. Many people admire his artistic vision, and you can read more about how Sam Maloof approached chair making for background before you start cutting. His chairs are not just furniture; they are pieces of art. Collectors and enthusiasts appreciate the quality and comfort of his work.
Choosing a Maloof rocker offers several benefits. First, they provide excellent comfort for relaxing. Second, the design is timeless and fits many home styles. Lastly, Maloof rockers are made with high-quality materials for long-lasting use.

Essential Tools And Materials
Choosing the right wood is key for your Maloof chair. Hardwoods like oak or cherry work best. They offer great strength and durability. Softwoods may not hold up well over time.
For a beautiful finish, select wood with a good grain. Avoid knots and blemishes. These can weaken the structure and look less appealing.
| Wood Type | Characteristics |
|---|---|
| Oak | Strong, durable, and has a nice grain. |
| Cherry | Rich color that deepens over time. |
| Maple | Hard and smooth, great for finishing. |
Must-have tools for woodworkers include a saw, drill, and sandpaper. A chisel and clamps are also essential. These tools help shape and assemble your chair perfectly.
Getting Started With Your Maloof Chair
Start by carefully reading the Maloof chair plans. Understand each step and measurement. Take your time to grasp the details. This will help you build with confidence.
Next, prepare your workspace. Ensure it is clean and organized. Gather all the necessary tools and materials. A tidy area will help you work more efficiently. Good lighting is also important. It helps you see the fine details clearly.
Sculpting The Signature Maloof Joints
The real Maloof joint is a three-sided housed tongue-and-groove (two-sided on the back legs) using a 1/4-inch tongue and groove. Start by cutting a 2-inch-wide, 1/4-inch-deep dado into the side of the chair seat, then use a rabbeting bit to cut 1/4-inch recesses at the top and bottom of the joint. Sam Maloof reportedly had special router bits made just for this cut.
The part beginners get wrong: Maloof treated the joint as sculpture, not pure joinery. He cut the parts oversized, glued them up, and then carved the whole assembly down to its final curved shape — the joint is never meant to look perfectly crisp and square straight off the router. A small gap where the tongue meets the groove is normal at glue-up; it gets rasped and sanded away during shaping, not fixed by re-cutting the joint tighter.
Shaping The Chair’s Iconic Curves
Creating the Maloof chair requires the right tools for shaping and sanding. Essential tools include wood chisels, hand planes, and sandpaper. These tools help achieve smooth curves and edges.
Start with a band saw to cut rough shapes. Next, use a spokeshave to refine the curves. A router can create detailed designs on the chair’s surface.
For sanding, use various grit levels of sandpaper. Begin with coarse grit for shaping, then progress to fine grit for a smooth finish. Proper sanding ensures a professional look and feel — see our guide on Sam Maloof’s wood shaping techniques for more on getting the curves right.
Achieving symmetry and balance is crucial in chair design. Constantly measure and compare both sides. This practice helps create a visually appealing and comfortable chair.
📊 The Maloof joint uses a 1/4-inch tongue and groove inside a 2-inch-wide, 1/4-inch-deep dado — oversized on purpose, since the whole assembly gets carved down afterward. Source: Popular Woodworking, How to Make a Maloof Joint
“This joint should fit snugly and cleanly with no gaps. I had gaps. [Charles] Brock explains how to simply rasp or sand out those gaps.”
Assembling The Pieces
To build a strong Maloof Chair, gluing and clamping are essential. Use high-quality wood glue for the best bond. Apply glue evenly on the joints. Avoid using too much glue, as it can create a mess.
After applying glue, align the pieces properly. Use clamps to hold them together. Ensure the clamps are tight but not overly tight. This helps prevent damage to the wood.
Let the glue dry completely before removing the clamps. This usually takes at least 24 hours. Proper drying time ensures durability and strength in the joints.
The Finishing Touches
Choosing the right finish for your Maloof chair can enhance its beauty. Different finishes offer unique looks and protections. Oil-based finishes provide a warm glow and deep color. Water-based finishes are clear and dry quickly, making them easy to apply.
Consider your application techniques for a professional look. Start by sanding the wood to create a smooth surface. Use a clean cloth to remove any dust. Apply the finish in thin, even coats. Allow each coat to dry completely before adding another. This technique ensures a smooth and durable finish.
Remember to wear protective gear when applying finishes. Gloves and a mask keep you safe from harmful fumes. Proper lighting helps you see any missed spots. Following these tips will make your Maloof chair stunning and long-lasting.
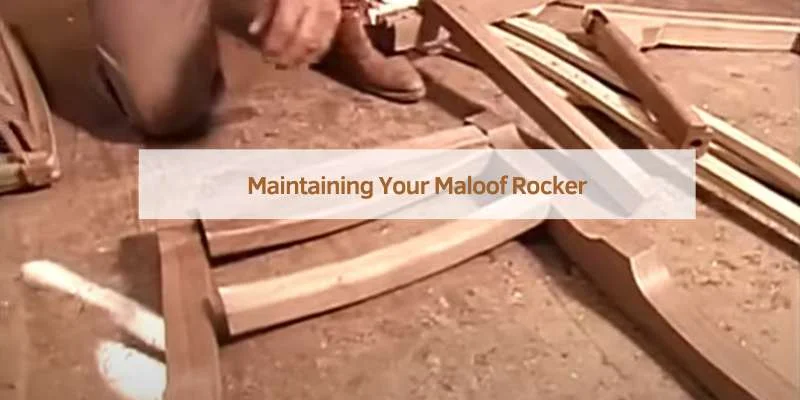
Maintaining Your Maloof Rocker
Regular maintenance keeps your Maloof rocker in great shape. Dust it weekly with a soft cloth. This prevents dirt buildup and keeps the wood looking fresh.
Check for any loose joints. Tighten screws or dowels if necessary. Use wood glue for any cracks or splits.
Apply a wood polish every few months. This adds shine and protects the wood. Avoid harsh chemicals that can damage the finish.
Inspect the seat and backrest for wear. Reupholster if the fabric is worn out. This keeps the chair comfortable and visually appealing.
Store the rocker in a dry place. Avoid exposure to extreme temperatures. This prevents warping and damage over time.
Frequently Asked Questions
What Are Maloof Chair Plans?
Maloof chair plans are detailed blueprints for constructing the iconic Maloof chair. These plans guide woodworkers through the entire process, including dimensions, materials, and assembly steps. Following these plans can help you create a beautiful and functional piece of furniture that showcases the unique design of the Maloof style.
How Difficult Is It To Build A Maloof Chair?
Building a Maloof chair can be moderately challenging. It requires intermediate woodworking skills and tools. Understanding joinery techniques is essential for stability and aesthetics. However, with patience and attention to detail, even novice woodworkers can successfully complete this project by following comprehensive plans.
What Materials Are Needed For Maloof Chairs?
Maloof chairs typically require hardwoods like oak, walnut, or cherry. Plywood may also be used for certain components. Essential tools include a bandsaw, chisels, and a sanding machine. Choosing high-quality materials ensures durability and enhances the chair’s overall appearance.
Where Can I Find Maloof Chair Plans?
You can find Maloof chair plans online on woodworking websites and forums. Many woodworking books also include these plans. Additionally, local woodworking shops may offer classes that provide detailed plans and guidance. Online marketplaces often feature downloadable plans for instant access.
Conclusion
Building Maloof chairs can be a rewarding project. With the right plans and tools, anyone can create a stunning piece of furniture. These chairs blend comfort and elegance, making them perfect for any home. Embrace your woodworking skills and enjoy the craftsmanship involved in creating your own Maloof chair.
Happy building!
Sponsored / affiliate links. As an Amazon Associate I earn from qualifying purchases. I may earn additional commission from eligible campaigns.