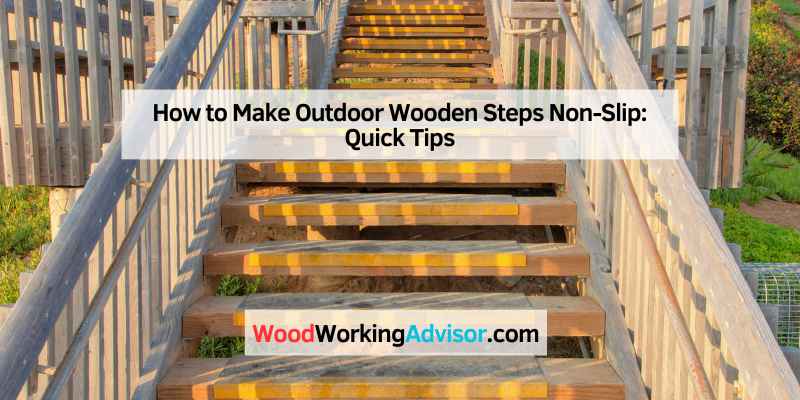
How to Make Outdoor Wooden Steps Non-Slip: Quick Tips
To make outdoor wooden steps non-slip, apply a non-slip coating or use anti-slip treads. Regular maintenance ensures safety and durability.
Outdoor wooden steps can become slippery due to rain, snow, or wear and tear over time. Ensuring safety on these steps is crucial for preventing accidents and injuries. Various methods can enhance traction, making your steps safer for family and guests.
Simple solutions, like applying a non-slip coating or adding anti-slip treads, effectively improve grip. These options are cost-effective and easy to implement, providing immediate results. Regular upkeep will help maintain the non-slip properties, ensuring long-term safety. Investing time and effort into making your wooden steps non-slip pays off by creating a secure outdoor environment for everyone.
Introduction To Non-slip Outdoor Wooden Steps
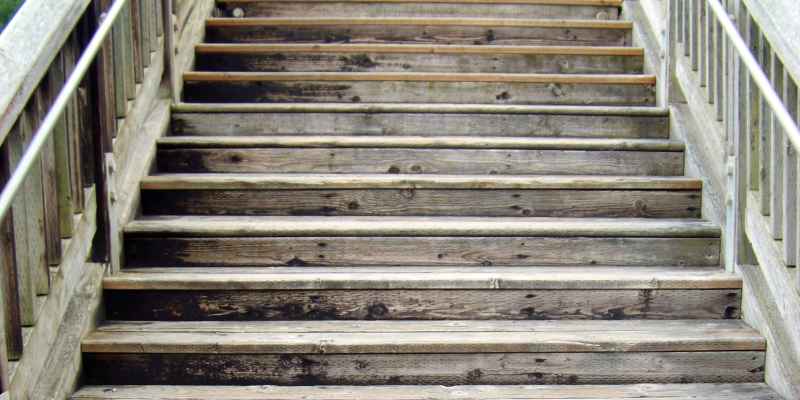
Outdoor wooden steps are beautiful and functional. They enhance your garden or patio. However, they can become slippery, especially when wet. Making these steps non-slip is vital for safety. Understanding how to achieve this is essential for every homeowner.
Importance Of Safety
Safety is a top concern for any outdoor space. Slippery steps can lead to serious accidents. Here are some key points to consider:
- Prevent Injuries: Non-slip surfaces reduce the risk of falls.
- Protects Family: Keep children and elderly safe from accidents.
- Enhances Accessibility: Easier for everyone to use the steps.
Common Hazards
Many factors can make wooden steps slippery. Knowing these helps in prevention. Here are some common hazards:
| Hazard | Description |
|---|---|
| Rain | Wet wood becomes very slippery. |
| Snow and Ice | Accumulation can turn steps into a skating rink. |
| Leaves | Wet leaves create a slippery surface. |
| Algae and Mold | Growth on wood can be slick and dangerous. |
Being aware of these hazards helps maintain safety. Regular inspections and proper maintenance are key. Take action to keep your outdoor steps safe.
Assessing Your Wooden Steps
Proper assessment of your wooden steps is vital. It helps identify hazards and ensure safety. Focus on two main areas: slippery spots and overall step condition.
Identifying Slippery Areas
Start by examining the surface of each step. Look for these factors:
- Weather Exposure: Rain or snow makes wood slippery.
- Wear and Tear: Smooth surfaces can be dangerous.
- Debris Accumulation: Leaves or dirt can create slick spots.
Use a flashlight for better visibility. Check for any areas that look glossy or wet. Mark these spots for further treatment.
Evaluating Step Condition
Next, assess the overall condition of your steps. Check for:
| Condition | Signs to Look For |
|---|---|
| Rot | Soft spots or discoloration. |
| Creaking Sounds | Noise when stepping. |
| Loose Boards | Boards shifting or wobbling. |
| Cracks | Visible splits or breaks. |
Document any issues. Repair damaged areas before applying non-slip solutions. Regular maintenance ensures long-lasting safety.
Materials For Non-slip Solutions
Making outdoor wooden steps safe is crucial. Choosing the right materials for non-slip solutions can help prevent accidents. Many options are available to enhance grip and stability. Understanding these materials is vital for effective application.
Choosing The Right Anti-slip Products
Selecting the right anti-slip products can make a significant difference. Consider these popular options:
- Anti-Slip Paint: Easy to apply and offers good grip.
- Non-Slip Treads: Adhesive strips that stick to steps.
- Sandpaper or Grit Tape: Provides a rough surface for better traction.
- Rubber Mats: Durable and can be placed on steps.
- Wooden Decking Oil: Some contain additives for slip resistance.
Pros And Cons Of Different Materials
| Material | Pros | Cons |
|---|---|---|
| Anti-Slip Paint | Easy to apply Variety of colors |
May wear off Needs reapplication |
| Non-Slip Treads | Instant grip Simple installation |
Can peel off Limited design options |
| Sandpaper/Grit Tape | Very rough surface Affordable |
Can be uncomfortable May trap dirt |
| Rubber Mats | Soft underfoot Weather-resistant |
Can shift Need regular cleaning |
| Wooden Decking Oil | Enhances wood grain Natural look |
Less effective Requires maintenance |
Each material has its benefits and drawbacks. Choose based on your specific needs and preferences. Safety is the priority, so select wisely.
Cleaning And Preparing Steps
Cleaning and preparing your outdoor wooden steps is essential for safety. A clean surface helps improve grip. Follow these steps to ensure your steps are ready for non-slip treatment.
Proper Cleaning Techniques
Start with a thorough cleaning. Remove dirt, leaves, and debris. Use the following steps:
- Gather your supplies: broom, hose, bucket, scrub brush, and mild detergent.
- Sweep: Remove loose dirt and debris using a broom.
- Wash: Mix mild detergent with warm water in a bucket.
- Scrub: Use a scrub brush to clean the steps.
- Rinse: Use a hose to rinse off the detergent.
Ensure all soap is removed. Let the steps dry completely before moving on.
Preparing The Surface
Preparation is key for a non-slip surface. Follow these steps:
- Inspect: Check for damage or rot on the wood.
- Sand: Lightly sand any rough spots. This helps create texture.
- Dry: Ensure the wood is completely dry before applying treatments.
- Apply: Consider a wood preservative for added protection.
These steps create a solid base for your non-slip treatment. A well-prepared surface enhances safety and durability.
Applying Non-slip Tape
Non-slip tape is a simple solution to enhance safety on outdoor wooden steps. It provides excellent traction and prevents slips and falls. Easy to install, it can be a quick fix for any slippery surface. Follow the steps below to apply non-slip tape effectively.
Steps For Installation
- Gather Materials: You will need non-slip tape, a measuring tape, scissors, and cleaning supplies.
- Clean the Surface: Use a broom to remove dirt and debris. Wipe the steps with a damp cloth. Allow them to dry completely.
- Measure and Cut: Measure the width and length of each step. Cut the non-slip tape to fit.
- Apply the Tape: Peel off the backing. Place the tape on the step, pressing firmly. Ensure there are no bubbles.
- Repeat: Continue applying tape on all steps.
- Let it Set: Allow the tape to adhere for at least 24 hours before use.
Maintenance Tips
Regular maintenance keeps non-slip tape effective. Follow these tips:
- Inspect Regularly: Check for wear and tear every month.
- Clean Often: Sweep and wash the steps to remove dirt.
- Replace as Needed: Remove and replace tape if it peels or wears out.
Consider using a pressure washer for deep cleaning. Keep the surface dry to maintain grip. With proper care, your non-slip tape will keep your steps safe for years.
Installing Anti-slip Treads
Outdoor wooden steps can be slippery. Adding anti-slip treads improves safety. These treads give better grip. They help prevent accidents, especially in wet conditions.
Selecting Treads For Wooden Steps
Choosing the right treads is crucial. Here are some options:
- Rubber Treads: Durable and weather-resistant.
- Metal Treads: Long-lasting and strong grip.
- Textured Tape: Easy to apply and inexpensive.
Consider these factors:
| Type | Durability | Cost |
|---|---|---|
| Rubber Treads | High | Medium |
| Metal Treads | Very High | High |
| Textured Tape | Medium | Low |
Installation Guide
Follow these steps to install treads:
- Clean the Steps: Remove dirt and debris.
- Measure: Determine the size for each tread.
- Cut Treads: Use a saw for proper sizing.
- Apply Adhesive: Use strong outdoor adhesive for treads.
- Press Treads: Firmly press each tread onto the step.
- Let Cure: Allow adhesive to set as per instructions.
Test treads after installation. Ensure they are secure and provide grip. Regular maintenance keeps steps safe.
Using Anti-slip Paints And Coatings
Keeping outdoor wooden steps safe is essential. Anti-slip paints and coatings can help. They improve traction and reduce slips. This section covers the right paint and application process.
Choosing The Right Paint
Selecting the right anti-slip paint is crucial. Consider these factors:
- Surface Type: Ensure the paint suits wood.
- Weather Resistance: Choose paint that withstands rain and sun.
- Texture: Look for paint with a gritty finish for better grip.
- Drying Time: Quick-drying options are ideal for fast projects.
Here are some popular anti-slip paints:
| Product Name | Features | Best For |
|---|---|---|
| Rust-Oleum Anti-Slip Coating | Durable, quick-drying, UV resistant | Wood and concrete |
| Behr Premium Anti-Slip Floor Coating | Gritty texture, weatherproof | Decks and stairs |
| Insl-X Sure Step | Low sheen, easy to apply | Indoor and outdoor use |
Application Process
Follow these steps for a successful application:
- Preparation: Clean the steps thoroughly. Remove dirt and debris.
- Sanding: Lightly sand the surface. This helps paint adhere better.
- Priming: Apply a wood primer if needed. It enhances durability.
- Mixing: Stir the anti-slip paint well. Ensure even texture.
- Application: Use a roller or brush. Apply evenly across the steps.
- Drying: Allow the paint to dry completely. Follow the manufacturer’s instructions.
- Second Coat: Apply a second coat for better traction. Repeat the drying process.
After completing these steps, enjoy your safe outdoor wooden steps. Regular maintenance ensures longevity.
Natural Non-slip Solutions
Making outdoor wooden steps safe is essential. Natural non-slip solutions can enhance traction. They are eco-friendly and easy to apply. Here are two effective methods.
Using Rubber Mats
Rubber mats provide excellent grip for outdoor steps. They are durable and weather-resistant. Here are some benefits of using rubber mats:
- Improved Safety: Reduces slipping hazards.
- Easy Installation: Simply place on steps.
- Variety of Designs: Choose styles that match your decor.
- Low Maintenance: Easily cleanable with soap and water.
Consider these tips for using rubber mats:
- Measure your steps for proper mat size.
- Ensure mats fit snugly without gaps.
- Check for wear and tear regularly.
Incorporating Outdoor Carpet
Outdoor carpet is another great option. It adds comfort and slip resistance. Here’s why outdoor carpet works well:
- Soft Texture: Provides a comfortable surface.
- Variety of Colors: Enhances aesthetic appeal.
- Weather Resistant: Designed to withstand rain and sun.
Follow these steps to install outdoor carpet:
- Choose a high-quality, weather-resistant carpet.
- Measure your steps carefully.
- Cut the carpet to fit each step.
- Secure edges with outdoor adhesive.
Both rubber mats and outdoor carpet can greatly improve safety. Choose the option that best fits your style and needs.
Regular Maintenance For Longevity
Maintaining outdoor wooden steps is key for safety and durability. Regular care prevents slips and extends the life of your steps. Consistent maintenance keeps your steps looking great and safe.
Routine Cleaning
Regular cleaning removes dirt and debris. Follow these simple steps:
- Use a broom to sweep away leaves and dust.
- Wash the steps with a hose.
- Mix mild soap with water for stubborn stains.
- Scrub using a soft brush.
- Rinse thoroughly and let dry.
Cleaning once a month helps maintain a non-slip surface. Check for mold or mildew. Remove it immediately to prevent slipping.
Periodic Reapplication
Reapplying protective coatings is essential. Choose a non-slip sealant or stain. Follow these steps for best results:
- Inspect steps for wear every 6 months.
- Clean the surface before reapplying.
- Apply the non-slip product evenly.
- Allow it to dry as per instructions.
Regular reapplication enhances grip. It protects wood from water damage and UV rays. This simple maintenance keeps your steps safe and appealing.
Additional Safety Measures
Ensuring the safety of outdoor wooden steps is essential. Adding extra features can make a big difference. These features enhance stability and visibility. Here are two critical measures you can implement.
Adding Handrails
Handrails provide support as people use the steps. They help prevent falls and improve safety. Consider the following when installing handrails:
- Height: Install handrails between 34 to 38 inches high.
- Material: Use sturdy materials like wood or metal.
- Grip: Ensure the handrail has a good grip surface.
- Continuity: Handrails should run the entire length of the steps.
Follow local building codes for handrail installation. Properly installed handrails can save lives.
Improving Lighting
Good lighting is crucial for outdoor steps. Bright lights help people see where they step. Consider these lighting options:
| Lighting Type | Benefits |
|---|---|
| Solar Lights | No wiring needed; eco-friendly. |
| LED Lights | Energy-efficient; bright illumination. |
| Motion Sensors | Automatically turn on when someone approaches. |
Install lights along the steps and surrounding areas. This enhances visibility, especially at night. Regularly check and replace burned-out bulbs.
Frequently Asked Questions
How Can I Make Wooden Steps Safer?
To make wooden steps safer, consider applying non-slip coatings. These coatings create a textured surface that reduces slipping. Additionally, you can install anti-slip treads or grip tape for extra traction. Regular maintenance, like cleaning and sealing, also helps maintain safety over time.
What Materials Are Best For Non-slip Steps?
The best materials for non-slip steps include rubber, grit, and textured paints. Rubber mats provide excellent traction and durability. Grit coatings add grip to surfaces without altering appearance. Textured paints can also be effective, offering a non-slip finish while enhancing aesthetics.
How Do I Apply Non-slip Coatings?
To apply non-slip coatings, start by cleaning the surface thoroughly. Remove any dirt or debris for better adhesion. Follow the manufacturer’s instructions for mixing and applying the coating. Use a roller or brush for even coverage. Allow adequate drying time before using the steps.
Are Non-slip Treads Worth It?
Yes, non-slip treads are definitely worth it. They enhance safety by providing extra grip on wooden steps. Installation is usually straightforward and affordable. With various styles available, you can choose treads that match your outdoor decor while improving safety.
Conclusion
Ensuring your outdoor wooden steps are non-slip enhances safety and comfort. By applying proper treatments and using effective materials, you can significantly reduce the risk of slips. Regular maintenance is key to keeping your steps safe year-round. Invest time in these solutions for a safer outdoor experience for everyone.