How to Make Wipe on Poly: A DIY Guide for Beginners
To make a wipe-on poly, mix equal parts of oil-based polyurethane and a solvent like mineral spirits. Stir the mixture well before applying it with a clean cloth.
Wipe-on poly provides a smooth, durable finish for wood surfaces. This method allows for easy application, enhancing the wood’s natural beauty. Many woodworkers prefer this technique for its simplicity and effectiveness. It’s ideal for furniture, cabinets, and trim work. The mixture penetrates the wood, offering protection while maintaining a natural look.
Applying multiple thin coats yields the best results, promoting a strong finish without the risk of drips. This approach not only saves time but also minimizes the mess often associated with traditional polyurethane applications. Embrace this simple technique to elevate your woodworking projects.
Introduction To Wipe On Poly
Wipe on poly is a popular wood finish. It is easy to apply and offers great protection. This finish enhances the beauty of wood surfaces.
Many woodworkers choose wipe on poly for its simplicity. It suits both beginners and experienced users. This guide will help you understand wipe on poly better.
The Basics Of Wood Finishing
Wood finishing is essential for durability and aesthetics. Here are some basic concepts:
- Sealing: Protects wood from moisture and damage.
- Enhancing: Improves the color and grain of the wood.
- Durability: Increases the lifespan of the wood surface.
Different finishes exist, each with unique properties. Wipe on poly stands out for its user-friendly application.
Advantages Of Using Wipe On Poly
| Advantage | Description |
|---|---|
| Easy Application | Requires no special tools. Just a cloth or brush. |
| Quick Drying | Dries faster than traditional finishes. Saves time. |
| Low Odor | Less strong smell compared to other finishes. |
| Versatile | Works well on various wood types. |
| Repairable | Easy to fix scratches or damages. |
Using wipe on poly makes finishing projects enjoyable and efficient. This finish offers both beauty and protection for your woodwork.
Tools And Materials
Making wipe-on poly requires specific tools and materials. Choosing the right supplies ensures a smooth application. Below are the essentials you need for the process.
List Of Necessary Supplies
- Polyurethane: Wipe-on or regular, as needed.
- Mineral Spirits: For thinning the finish.
- Mixing Container: A clean, small jar works well.
- Brush or Cloth: For application.
- Sandpaper: Use 220-grit for surface prep.
- Rags: For wiping excess finish.
- Protective Gear: Gloves and a mask for safety.
Selecting The Right Type Of Polyurethane
Choosing the correct polyurethane is vital for your project. There are two main types:
| Type | Features |
|---|---|
| Oil-based Polyurethane | Durable, amber color, longer drying time. |
| Water-based Polyurethane | Fast drying, clear finish, less odor. |
Consider your project’s needs. Oil-based is ideal for durability. Water-based is great for quick projects.
Preparation Is Key
Proper preparation makes applying wipe-on poly easier and more effective. It ensures a smooth finish. Follow these steps to prepare your wood surface.
Cleaning And Sanding The Wood Surface
Cleaning and sanding your wood surface are essential steps. They help the finish adhere better. Here’s how to do it:
- Remove Dirt: Use a damp cloth to wipe away dust.
- Use Soap: For greasy spots, use mild soap and water.
- Dry Completely: Allow the wood to dry before sanding.
Sanding the surface creates a smooth base. Follow these steps for sanding:
- Select Sandpaper: Use 120-grit sandpaper for initial sanding.
- Sand the Surface: Sand in the direction of the grain.
- Clean Again: Remove dust with a tack cloth.
Creating A Dust-free Workspace
A clean workspace is vital for a good finish. Dust can ruin the appearance of wipe-on poly. Here are tips for a dust-free area:
| Action | Description |
|---|---|
| Choose a Location | Find a well-ventilated area away from high traffic. |
| Clear the Area | Remove unnecessary items that might collect dust. |
| Cover Surfaces | Use drop cloths to protect floors and furniture. |
| Minimize Movement | Avoid walking around too much to keep dust down. |
Follow these steps for a clean workspace. A dust-free area ensures a beautiful finish.
Mixing Your Own Wipe On Poly
Creating your own wipe on poly is simple and rewarding. This versatile finish enhances wood surfaces. It provides protection while highlighting natural beauty. Follow these steps for a perfect blend.
Step-by-step Mixing Process
- Gather your materials. You will need:
- 1 part polyurethane
- 1 part mineral spirits
- A clean mixing container
- A stirring stick
- Pour the polyurethane into the mixing container.
- Add an equal amount of mineral spirits.
- Mix thoroughly with the stirring stick. Ensure no lumps remain.
- Check the consistency. It should be smooth and slightly runny.
Tips For Achieving The Right Consistency
Getting the correct consistency is crucial. Here are some tips:
- Start with equal parts of polyurethane and mineral spirits.
- If too thick, add more mineral spirits.
- Test the mix on scrap wood. Adjust as needed.
- Let the mix sit for 10 minutes before use. This helps bubbles escape.
Store any leftover mix in a sealed container. Use it within a few days for best results. Happy finishing!
Application Techniques
Learning the right application techniques is key to a smooth finish. Proper methods enhance durability and appearance. Follow these steps to achieve great results with wipe-on poly.
Applying The First Coat
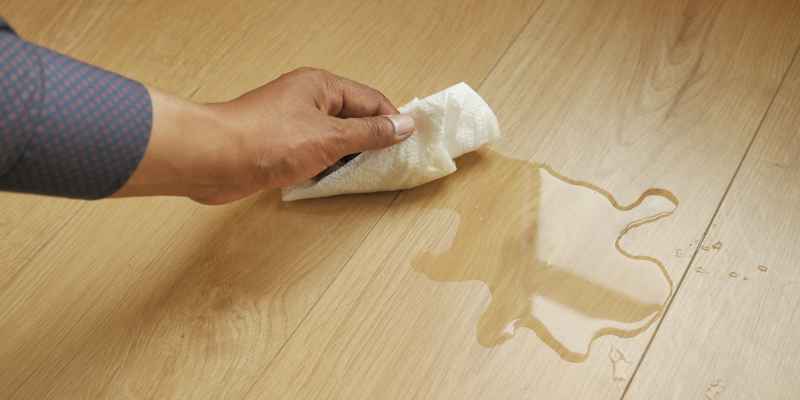
Start with a clean surface. Dust and dirt can ruin the finish. Use a lint-free cloth for best results. Here’s how to apply the first coat:
- Choose the right applicator: Use a foam brush or clean rag.
- Dip the applicator: Lightly coat the brush or rag.
- Apply evenly: Use long, smooth strokes. Follow the grain.
- Watch for drips: Remove excess with the applicator.
Let the first coat dry completely. Drying time varies. Follow the product instructions for best results.
Sanding Between Coats
Sanding is crucial for a smooth finish. It helps the next coat stick better. Follow these simple steps:
- Use fine-grit sandpaper: 220-grit works well.
- Sand lightly: Don’t press too hard; just scuff the surface.
- Clean the surface: Remove dust with a tack cloth or vacuum.
Repeat this process after each coat. This builds a strong, durable finish.
Applying Final Coats
Final coats give the piece its shine. Apply them carefully for the best look. Here’s how to apply the final coats:
- Ensure the previous coat is dry: Check for tackiness.
- Use a clean applicator: This prevents contamination.
- Apply in thin layers: Thin coats dry faster and are smoother.
- Let each coat dry: Follow the recommended drying time.
For a glossy finish, apply two or three final coats. This enhances both beauty and protection.
Common Mistakes To Avoid
Using wipe-on poly can enhance your wood projects. Avoiding common mistakes will ensure a smooth finish. Here are the pitfalls to steer clear of.
Over-application Issues
Applying too much product can lead to problems. Over-application causes an uneven finish. Here are key points to remember:
- Use a lint-free cloth or foam brush.
- Apply thin coats instead of thick ones.
- Allow each coat to dry completely.
Over-application may create a sticky surface. This can attract dust and dirt. Always aim for a light touch.
Avoiding Drips And Streaks
Drips and streaks ruin the beauty of your work. Follow these tips to keep your finish clean:
- Work in small sections.
- Keep the applicator flat against the wood.
- Blend edges well to avoid visible lines.
Check for drips while working. Wipe them away immediately. A little attention goes a long way.
Curing And Aftercare
Curing and aftercare are essential for a lasting finish. Proper curing ensures your wipe-on poly dries evenly. Aftercare protects the surface from damage and maintains its beauty.
Curing Time And Conditions
Understanding curing time and conditions is crucial. Here are some key points to consider:
- Curing Time: Allow 24 hours for the first coat to cure.
- Complete Cure: Full cure may take up to 30 days.
- Temperature: Ideal curing temperature is between 70°F and 80°F.
- Humidity: Keep humidity levels below 70% for best results.
Use a fan to improve air circulation. Avoid direct sunlight during the curing process. Check the surface regularly for any issues.
Maintaining The Finish
Maintaining the finish is vital for longevity. Follow these tips for a stunning surface:
- Clean Regularly: Dust and wipe with a soft cloth.
- Avoid Harsh Cleaners: Use mild soap and water only.
- Reapply Finish: Refresh the surface every year.
- Protect from Scratches: Use coasters and mats.
Inspect the surface for signs of wear. Address any issues immediately to prevent further damage.
Creative Variations And Uses
Wipe on poly offers endless possibilities for creativity. You can enhance your projects with colors, patterns, and textures. Explore these exciting variations and uses to elevate your woodworking.
Adding Tints And Stains
Transform the look of your wood by adding tints and stains. This technique allows for personalization and unique finishes. Here are some key points:
- Choose Your Base: Start with a clear wipe on poly.
- Select Tints: Use oil-based or water-based tints.
- Mixing: Blend tints with poly in a separate container.
- Test First: Always test on a scrap piece of wood.
Follow these steps for a stunning finish:
- Prepare the surface by sanding it smooth.
- Apply the tinted poly with a clean cloth or brush.
- Let it dry completely before adding more layers.
Using Wipe On Poly On Different Surfaces
Wipe on poly is versatile and suitable for various surfaces. You can use it on:
| Surface Type | Benefits |
|---|---|
| Wood | Enhances grain and adds protection. |
| Metal | Offers a smooth, protective layer. |
| Concrete | Seals and protects against stains. |
| Leather | Revives color and adds durability. |
Follow these tips for different surfaces:
- Wood: Sand lightly before applying.
- Metal: Ensure it’s clean and rust-free.
- Concrete: Clean with a degreaser first.
- Leather: Use a soft cloth for application.
Experiment with these creative variations to achieve stunning results.
Frequently Asked Questions
How Long Does Wipe On Poly Last?
Wipe on Poly can last several years with proper care. Its durability depends on factors like application thickness and environmental conditions. Regular maintenance, like cleaning and reapplying, can extend its lifespan. Always choose high-quality products for the best results.
Can I Apply Wipe On Poly Over Paint?
Yes, you can apply Wipe on Poly over paint. Ensure the paint is fully cured and clean before application. Lightly sand the surface for better adhesion. This will create a smooth finish while protecting the painted surface. Always test on a small area first.
How Many Coats Of Wipe On Poly Should I Use?
Typically, two to three coats of Wipe on Poly are recommended. This ensures better protection and a more durable finish. Allow each coat to dry completely before applying the next. Light sanding between coats can enhance adhesion and smoothness.
Is Wipe On Poly Easy To Apply?
Yes, Wipe on Poly is relatively easy to apply. Use a clean cloth or brush to apply a thin, even layer. The product self-levels, reducing visible brush strokes. Follow the manufacturer’s instructions for best results, and you’ll achieve a smooth finish.
Conclusion
Creating your own wipe-on poly can elevate your woodworking projects. With simple steps and the right materials, you’ll achieve a durable finish. Remember to apply thin layers for the best results. Your surfaces will shine and last longer. Enjoy the satisfaction of a job well done with this easy technique!