How to Pull Up Hardwood Floor: Easy Steps for a Flawless Removal
Are you ready to give your space a fresh new look by removing that old hardwood floor? Pulling up hardwood flooring might seem like a big job, but with the right steps, you can do it yourself and save money.
In this guide, you’ll discover simple, clear instructions that make the process easier than you think. Whether you want to replace damaged boards or start a full renovation, knowing how to pull up hardwood floor the right way will help you avoid costly mistakes.
Keep reading, and you’ll gain the confidence to tackle this project like a pro.
Tools Needed
Removing hardwood floors requires the right tools. Using proper equipment makes the job easier and safer. Prepare these tools before starting to save time and effort.
Essential Hand Tools
Start with a pry bar to lift the boards gently. A claw hammer helps pull up nails and loosen planks. Use a putty knife to get under tight edges. A tape measure checks plank sizes for reuse. Knee pads protect your knees during long work hours.
Power Tools For Efficiency
An electric crowbar speeds up the lifting process. A circular saw cuts through stubborn boards quickly. A nail remover drill attachment pulls nails with less effort. Power tools reduce manual work and save energy. Always control the tools steadily to avoid damage.
Safety Gear
Wear safety glasses to shield your eyes from flying debris. Gloves protect your hands from splinters and sharp edges. A dust mask prevents inhalation of harmful dust. Ear protection guards your hearing when using loud power tools. Proper safety gear keeps you safe throughout the project.
Preparing The Area
Preparing the area is the first step to successfully pull up hardwood floors. It helps keep the work smooth and safe. Taking time to get the space ready saves effort later. This part focuses on clearing the room, protecting surroundings, and checking for nails or staples. Each task makes the job easier and prevents damage.
Clearing The Room
Remove all furniture and items from the room. This gives you full space to work. It also stops damage to your belongings. Take out rugs, curtains, and decorations. A clear room makes pulling up floors faster and safer.
Protecting Surroundings
Cover walls and baseboards with painter’s tape or plastic sheets. This keeps dust and debris from causing stains. Use drop cloths or old blankets on nearby floors. Protect vents and electrical outlets with tape. These steps reduce cleanup and protect your home.
Checking For Nails And Staples
Look closely at the floor for nails and staples. Use a flashlight to spot hidden ones. Remove loose nails or staples with pliers or a pry bar. This prevents injury and tool damage. Clearing these helps the hardwood come up smoothly.
Removing Baseboards And Trim
Removing baseboards and trim is the first step in pulling up hardwood floors. These pieces cover the edges of the floor and protect the walls. Taking them off carefully keeps them safe for reuse or replacement. It also makes the floor removal cleaner and easier.
Prying Techniques
Start by loosening the baseboard gently. Use a putty knife to create a gap between the wall and trim. Place the putty knife flat to avoid wall damage. Then, slide a pry bar behind the baseboard. Work slowly and lift the trim a little at a time. Move the pry bar along the length of the baseboard. This prevents cracking or breaking the wood. Keep a scrap piece of wood under the pry bar to protect the wall.
Handling Delicate Trim
Some trim pieces are thin or old and can break easily. Handle these with extra care. Use smaller tools like a painter’s tool or a flat screwdriver. Pry gently and avoid forcing the trim. Remove any nails or fasteners with pliers after the baseboard is loose. Store delicate trim flat and safe to avoid warping or damage.
Loosening The Hardwood Boards
Loosening the hardwood boards is the key step in pulling up a hardwood floor. This process allows you to remove the boards without damaging them or the subfloor. Careful loosening makes the job easier and keeps the wood reusable.
Focus on lifting the boards gently. Use the right tools and techniques to avoid breaking the wood. Take your time to work on each board carefully.
Starting Point Selection
Choose a corner or edge to begin loosening the boards. These spots are easier to access. Starting here helps you lift the first board with less effort. Avoid starting in the middle of the floor. Always check for nails or staples before prying.
Using A Pry Bar
Insert a pry bar under the board’s edge gently. Use slow, steady pressure to lift the board. Move the pry bar along the board’s length to avoid cracks. Work in small sections to keep control. Protect the wood by placing a thin board under the pry bar as a shield.
Dealing With Stubborn Boards
Stubborn boards resist lifting and may have extra nails. Use a hammer to tap the pry bar deeper if needed. Try loosening nails with a nail puller or pliers. If the board still won’t budge, heat the area with a heat gun to soften adhesives. Patience helps; force can cause damage.
Removing Nails And Adhesives
Removing nails and adhesives is a key step in pulling up hardwood floors. Nails hold the wood in place and adhesives keep it stuck firmly to the subfloor. Removing both ensures a clean surface for your next project.
This process takes time but prepares the floor properly. Skipping it can cause problems later, such as bumps or uneven surfaces. Tools like pry bars and scrapers make the job easier.
Pulling Out Nails
Start by locating all the nails in the wood planks. Use a claw hammer or nail puller to remove them. Place the claw under the nail head, then pull straight up. Work slowly to avoid splitting the wood.
Some nails may be deep or bent. Use pliers to grip and pull out stubborn nails. Dispose of nails safely to avoid injury later.
Scraping Old Adhesive
After removing nails, the next step is scraping off old adhesive. Use a floor scraper or putty knife for this task. Hold the scraper at a low angle to lift the glue without damaging the floor.
Work in small sections, applying firm pressure. Some adhesives might need a solvent or heat to soften. Check the adhesive type before applying any chemicals.
Cleaning And Preparing Subfloor
Cleaning and preparing the subfloor is a key step after pulling up hardwood floors. It ensures the new floor will lay flat and last longer. A clean, smooth subfloor prevents problems like uneven surfaces and squeaks.
Take time to check the subfloor carefully. Proper preparation saves work later and gives better results.
Inspecting For Damage
Look closely at the subfloor for cracks, holes, or soft spots. These can weaken the floor and cause issues later. Use a flashlight to see all areas clearly. Tap the wood with a hammer to find weak spots. Mark any damaged areas for repair.
Removing Residue
Clear off old glue, nails, and dirt from the subfloor. Use a scraper or putty knife for stuck-on glue. Pull out nails or screws that remain. Sweep or vacuum the entire surface to remove dust and debris. A clean subfloor helps new materials stick better.
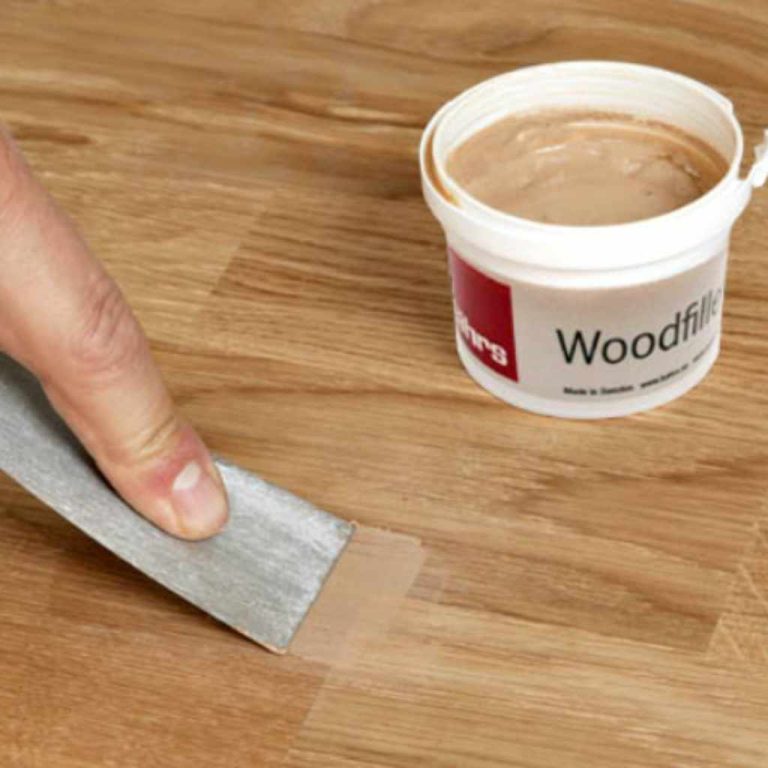
Smoothing The Surface
Sand rough spots and edges to create a flat surface. Fill small holes and cracks with wood filler. Let the filler dry completely, then sand it smooth. Make sure the subfloor feels even under your feet. A smooth surface makes installation easier and improves floor stability.
Disposing Of Old Hardwood
Removing old hardwood floors leaves you with a big question: how to dispose of the wood properly. Old hardwood can take up space and may harm the environment if thrown away carelessly. Handling it the right way helps keep your home clean and supports recycling efforts.
Recycling Options
Many communities accept hardwood for recycling. Some centers turn old wood into mulch or compost. Others reuse wood in crafts or building projects. Check local recycling facilities to see if they take hardwood. Donating usable wood to charities is another good option. It gives old wood a new life and helps others.
Safe Disposal Methods
Burning hardwood is unsafe and often illegal. Hardwood can release harmful chemicals if painted or treated. Use a landfill only if recycling is unavailable. Wrap the wood securely to avoid splinters and injury. Hire a waste removal service for large amounts of flooring. They handle disposal safely and follow local rules.
Frequently Asked Questions
How Do I Safely Pull Up Hardwood Floors?
Start by removing baseboards and trim gently. Use a pry bar to lift the boards carefully. Work slowly to avoid damaging subfloor or surrounding areas. Wear safety gloves and goggles for protection. This method ensures safe and effective hardwood floor removal.
What Tools Are Needed To Pull Up Hardwood Floors?
You will need a pry bar, hammer, utility knife, gloves, and safety goggles. A crowbar helps lift stubborn boards. A mallet can assist in loosening nails. These basic tools make the hardwood floor removal process easier and safer.
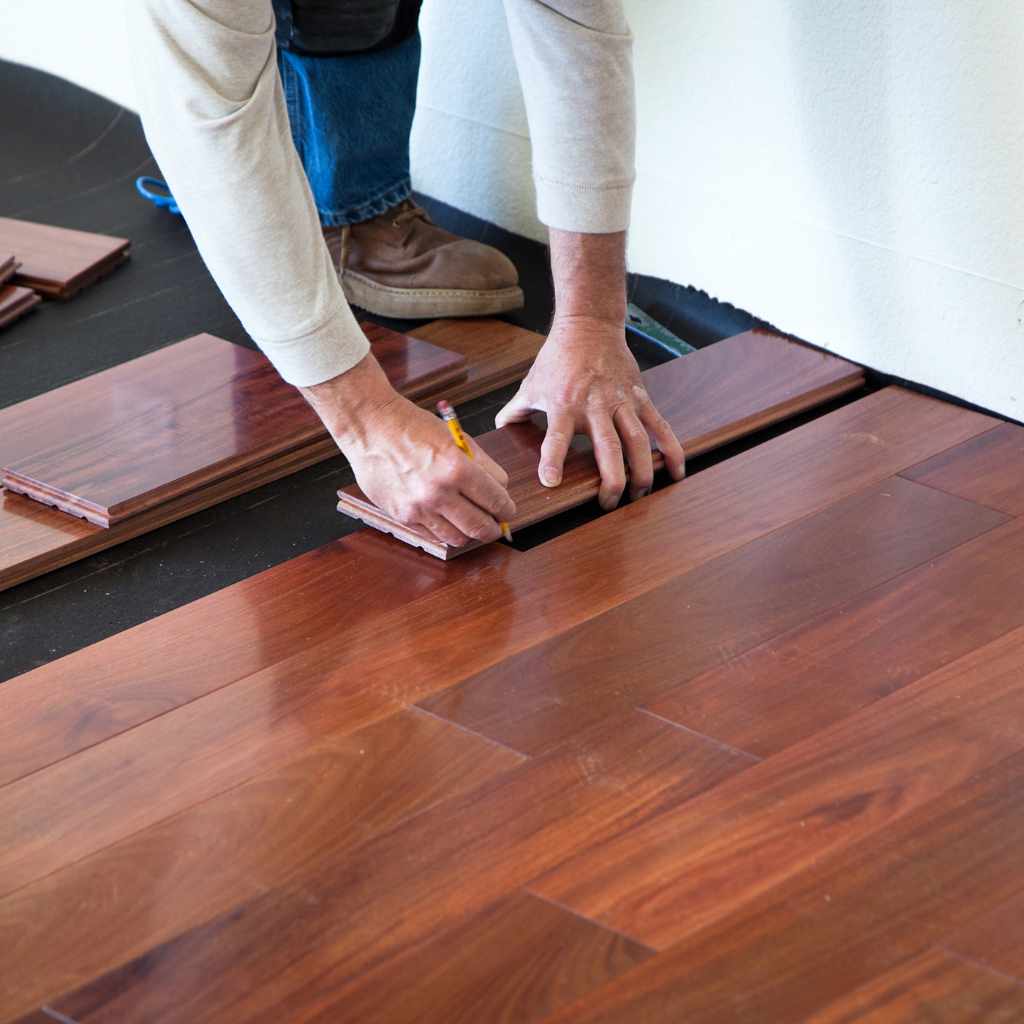
Can I Reuse Hardwood Flooring After Pulling It Up?
Yes, you can reuse hardwood flooring if it’s in good condition. Carefully remove nails and clean the boards. Inspect for damage or warping before reinstalling. Proper storage will preserve the wood for future use. Reusing hardwood is eco-friendly and cost-effective.
How Long Does It Take To Pull Up Hardwood Floors?
The time varies based on room size and floor condition. For an average room, it takes about 3-5 hours. Skilled workers might finish faster. Taking time ensures boards and subfloor remain undamaged during removal.
Conclusion
Pulling up hardwood floors takes patience and the right tools. Start by clearing the room and protecting yourself. Work slowly to avoid damaging the wood beneath. Keep nails and screws handy for reuse or disposal. Clean the area thoroughly after removal.
This task saves money and prepares your space for new flooring. With care, you can complete it safely and efficiently. Ready to begin? Take it one step at a time.