How to Remove Sharpie From Wood: Rubbing Alcohol Works Best
Rubbing alcohol is the fastest way to get Sharpie off finished wood — it breaks down the ink’s solvent without soaking into the wood grain the way water-based cleaners do. Here’s the exact method, plus backup options for marks that have already set in or sunk into raw, unfinished wood.
Preparation Steps
Best Backup Method
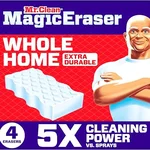 |
Mr. Clean Magic Eraser Sponge (4-Count) – $4.99 When rubbing alcohol alone doesn’t fully lift the mark, this is the next thing to try.
|
Gather rubbing alcohol (91% isopropyl works faster than the 70% drugstore standard, though either will eventually lift fresh ink), cotton balls or a microfiber cloth, and a second dry cloth for buffing afterward. Before touching the actual stain, dab a little alcohol on a hidden spot — inside a cabinet door or the underside of a shelf — and wait 30 seconds. If the finish stays clear and doesn’t go cloudy or tacky, you’re safe to move to the visible mark. This step matters most on lacquer and shellac finishes, which alcohol can actually dissolve if you’re not careful; polyurethane and most modern water-based finishes tolerate it fine.
Have baking soda, white (non-gel) toothpaste, and a Magic Eraser sponge on hand as backups — you likely won’t need all of them, but Sharpie ink varies enough in how deep it’s penetrated that what lifts an hour-old mark won’t always touch one that’s been sitting for a year.
Using Rubbing Alcohol
Sharpie ink is alcohol-soluble by design — that’s what makes it write on glass, plastic, and metal without beading up, and it’s the same property that makes rubbing alcohol the fastest fix on a sealed wood surface. Soak a cotton ball (not the whole cloth, which dilutes the alcohol against the ink too quickly) and dab it directly onto the mark rather than wiping. Hold it there for 5-10 seconds so the alcohol has time to break the pigment’s bond to the finish, then wipe in one direction rather than scrubbing in circles, which can smear ink into the surrounding finish instead of lifting it off.
Switch to a clean section of cotton ball every couple of wipes — reusing an ink-saturated cotton ball just redeposits Sharpie back onto the wood. On a finished surface, most marks under a few weeks old come up in 3-4 rounds of this. Finish with a barely damp cloth to clear any alcohol residue, then dry it immediately; alcohol evaporates fast, but letting it sit on a finish for minutes rather than seconds is what causes the occasional dull spot on the more moisture-sensitive finishes like shellac.
Baking Soda Paste Method
This is the move for raw or unfinished wood, where alcohol alone tends to just push the ink deeper into open grain instead of lifting it out. Mix baking soda and water at roughly 1:1 until you get a paste about the consistency of toothpaste — not runny enough to drip, not so dry it won’t spread. Baking soda is mildly abrasive (it’s about a 2.5 on the Mohs hardness scale, similar to talc) and slightly alkaline, which together break down the ink pigment without cutting into the wood fibers the way sandpaper would.
Work a small amount into the stain with a soft cloth, using light pressure in small circles, and check your progress every 15-20 seconds rather than grinding away continuously. On open-grain woods like oak, expect the process to take longer since the ink has more surface area to cling to inside the pores — you may need two or three applications, wiping the paste away and reassessing between each one, rather than one long session.
Toothpaste Trick
Stick to plain white paste toothpaste with baking soda listed in the ingredients, not gel formulas (which lack the abrasive silica/calcium carbonate particles that do the actual work) and not whitening formulas (which often contain hydrogen peroxide or higher-abrasion silica that can lighten bare wood or haze a finish). The mechanism is identical to the baking soda paste — mild abrasive plus mild alkalinity — but toothpaste’s thicker consistency makes it easier to control on a vertical surface like a cabinet front.
Dab a pea-sized amount onto the stain and work it in with a soft cloth or an old, soft-bristled toothbrush for more precision on small marks. Rinse with a barely damp cloth and dry thoroughly — toothpaste left to dry on wood can leave a chalky residue that’s easy to mistake for a new, permanent white mark.
Using Magic Erasers
A Magic Eraser is compressed melamine foam — under a microscope it looks like extremely fine sandpaper, which is why it lifts ink and scuffs so effectively on hard surfaces. That same abrasion is also why it’s the riskiest option on this list for a glossy or satin finish: it can visibly dull the sheen in the exact spot you scrub, leaving a faded patch that’s more noticeable than the ink was. Wet it, wring out the excess water so it’s damp rather than dripping, and test on a hidden area before touching the actual mark.
Use light pressure and short strokes, checking after every few passes. It works fastest on marks less than a day or two old; on ink that’s had weeks to bond with the finish, you’ll get diminishing returns and rising risk of sheen damage, which is the point to switch to rubbing alcohol or the baking soda paste instead.
Vinegar Solution
White vinegar is mildly acidic (around pH 2.5), which breaks down some of the same ink-to-surface bonds that alcohol does, just more slowly and more gently — useful on finishes you’re worried might react badly to alcohol, like some older shellac or wax-topped pieces. Mix equal parts white vinegar and water in a spray bottle rather than applying it straight; full-strength vinegar left too long can dull a wax finish.
Spray a cloth (not the wood directly, to keep the liquid from pooling in seams or joints) and work the mark with small circular motions. Expect this method to take noticeably longer than alcohol — often 5-10 minutes of patient dabbing versus 30 seconds — since vinegar’s a weaker solvent for permanent-marker pigment. Once the mark lifts, wipe with a dry cloth right away; vinegar’s acidity plus lingering moisture is a bad combination to leave sitting on wood.
Commercial Cleaners
If the home remedies above stall out, a citrus-based adhesive remover (Goo Gone and similar products) or a dedicated wood-safe stain remover is the next step up — these use d-limonene or mineral spirits, which are stronger solvents for permanent ink than alcohol, but they can also soften certain finishes if left on too long. Check the label specifically for “safe on finished wood” language, and always apply to a cloth rather than pouring or spraying directly onto the surface.
Wear gloves — these solvents are harder on skin than rubbing alcohol — and work in a ventilated area. Rub gently rather than scrubbing; the chemical is doing the work, not the friction. Once the ink is gone, wipe the area with a barely damp cloth to clear solvent residue, then dry it. Skipping this final wipe is the most common reason people end up with a hazy ring where the cleaner sat and slowly evaporated instead of being wiped away.
Aftercare Tips
Once the ink’s gone, give the spot a real look under good light before calling it done — alcohol, vinegar, and abrasive pastes can all leave a faint dull patch even when the ink itself is fully removed, especially on satin or gloss finishes. If you see one, a small amount of furniture polish or paste wax worked in with a soft cloth usually blends it back in with the surrounding sheen; on a bare or oiled surface, a light reapplication of the same oil (Danish oil, mineral oil for butcher block, etc.) does the same job.
For prevention, the honest fix is keeping permanent markers off wood surfaces entirely and using coasters or placemats where drinks and craft supplies tend to land — dry-erase and washable markers are a safer choice for anything kids will be using near furniture, since actual permanent marker on bare wood can sometimes need light sanding and a finish touch-up rather than any cleaning method at all.
Frequently Asked Questions
How do you get Sharpie off of wood?
On finished wood, dab rubbing alcohol onto a cotton ball and work it directly into the mark until the ink lifts — usually 3-4 rounds for anything under a few weeks old. On raw or unfinished wood, use a baking soda-and-water paste instead, since alcohol tends to push ink deeper into open grain rather than pulling it out.
What removes dried Sharpie?
Rubbing alcohol or acetone-based nail polish remover both break down dried, set-in Sharpie ink. Acetone is stronger and works faster on old stains, but test it on a hidden area first — it can strip or cloud certain finishes, particularly lacquer, in a way rubbing alcohol won’t.
Is Sharpie permanent on wood?
It’s designed to be permanent, but “permanent” refers to water and light resistance, not resistance to solvents. Isopropyl alcohol dissolves the same pigment-carrier that makes Sharpie ink stick to glass and plastic, which is exactly why alcohol is the standard removal method on sealed wood finishes.
Does rubbing alcohol remove permanent marker from wood?
Yes, on finished wood it’s the most reliable single method — dab it on with a cotton ball rather than wiping broadly, and always test an inconspicuous spot first, since alcohol can dull or soften shellac and some older lacquer finishes.
Conclusion
Rubbing alcohol handles the large majority of Sharpie marks on finished wood in under a minute; save the baking soda paste for raw wood, and treat Magic Erasers and commercial solvents as the higher-risk options you reach for only after the gentler methods have had a fair shot. Whichever method you use, testing a hidden spot first is the one step worth never skipping — a few seconds there is what separates a clean fix from a wood surface that now has both an ink stain and a solvent mark to deal with.
Sponsored / affiliate links. As an Amazon Associate I earn from qualifying purchases. I may earn additional commission from eligible campaigns.