How to Sand a Circle in Wood (Without Going Oval)
To sand a circle in wood without it drifting oval, work the edge against a tool that keeps a fixed pivot point or a perpendicular rotation – a drum sander chucked in a drill press, a stationary disc sander, or a curved hand block – and move the workpiece in small, even increments so no one section gets more sanding time than the rest.
The actual difficulty with a wood circle isn’t getting it smooth – any grit progression will do that. It’s keeping the shape a true circle while you smooth it. Freehand a random-orbital sander around a jigsaw-cut disc and it’s very easy to wear one side down more than another, and a circle that’s gone slightly oval is obvious the moment it’s set next to a lid, a lathe blank, or a matching part.
This guide covers the tools and technique that actually hold a circle’s shape while sanding it, plus the grit sequence and the specific mistakes that cause oval drift, flat spots, and splintered edges. If your project is a bowl, a chair seat, or another 3D curved shape rather than a flat disc, see our separate guide to sanding rounded objects – the tools overlap, but the technique for a flat circular edge is different enough to cover on its own.
The Right Tool for Sanding a Circle True
Best For Keeping A Circle True-Round
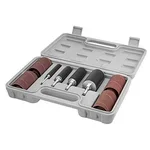 |
POWERTEC 71634 20-Piece Drill Press Sanding Drum Kit – $18.99 Chucks into a drill press so the disc rotates around a fixed center pin, which is what actually keeps a wood circle round while you sand instead of wearing it oval by hand.
|
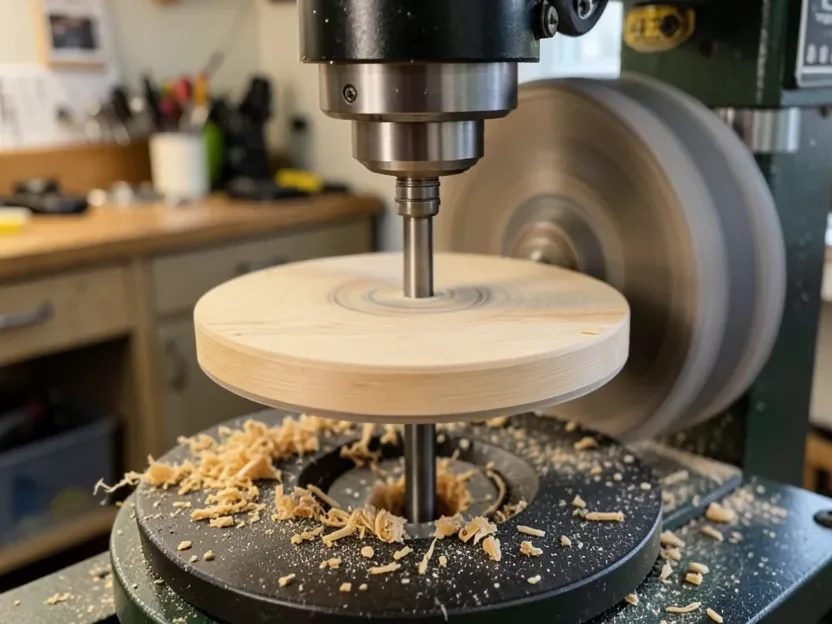
A drill-press drum sander works because the disc rotates on a fixed center pin instead of being pushed around freehand – the same principle a lathe uses, just without cutting. Drill a small pilot hole at the circle’s exact center (the point you used to draw it with a compass usually already has one), mount the drum sander in the drill press chuck, and slowly rotate the disc against the spinning drum by hand. Because the pin holds the center fixed, every point on the edge gets the same radius and the same amount of contact time, which is what a stationary disc sander also does well for discs you’d rather feed by hand across a flat sanding table.
Cut the Circle Before You Sand It
Sanding can smooth a rough edge and knock down small high spots, but it won’t fix a circle that was cut noticeably out of round – you’ll just be sanding an oval smoother. Cut as close to the line as you can first. A bandsaw with a simple pivot-point jig (a nail or screw through a scrap fence at the exact radius) will cut a circle more consistently than freehanding a jigsaw around a penciled line, and a circle-cutting router jig gives the cleanest edge of all if you have one. See our guide on the best way to cut a circle in wood for the specific jigs and setups. Whichever method you use, leave the sanding to correct saw marks and minor waviness – not to reshape a circle that’s off by an eighth of an inch or more.
Why Circles Go Oval – and How to Stop It
Oval drift almost always comes down to uneven dwell time: you spend a few extra seconds on the section of the edge closest to your hand, or the section that’s easiest to reach, and that spot ends up with a slightly smaller radius than the rest. The fix is procedural, not a different sandpaper. Rotate the disc in small, consistent increments – a quarter-turn or less at a time – and give each section roughly the same number of passes before moving on. Stop and check the shape periodically with a pair of calipers measured across several diameters, or lay a scrap trammel arm against the edge; both will show an out-of-round spot well before your eye catches it.
If you’re using a powered spindle or disc sander and the disc still comes out uneven despite steady technique, the machine itself may be the problem. Fine sawdust packed underneath a sanding drum, a worn bearing, or a slightly bent spindle can all throw off an otherwise correct rotation. Pull the sanding sleeve off and spin the bare drum or disc by hand – visible wobble means it’s a hardware issue, not a technique one, and no amount of careful rotation will fully correct for it.
Grit Progression for a Smooth Circular Edge
Three grits handle almost every circle: 80-grit to remove saw marks and true up minor waviness, 120-grit to even out the scratch pattern the 80-grit leaves behind, and 220-grit for a finish-ready surface. Softwoods like pine and cedar cut fast enough that you can often skip from 80 straight to 120 and still end up smooth. Hardwoods like oak and maple hold onto coarse-grit scratches longer, so running the full 80/120/220 sequence matters more – skipping a step tends to show up as faint striping once a finish goes on and the light catches it at an angle.
| Grit | Purpose |
|---|---|
| 80 | Remove saw marks, correct minor out-of-round spots |
| 120 | Even out the scratch pattern left by 80-grit |
| 220 | Finish-ready surface, smooth to the touch |
Hand-Sanding a Circle Without Power Tools
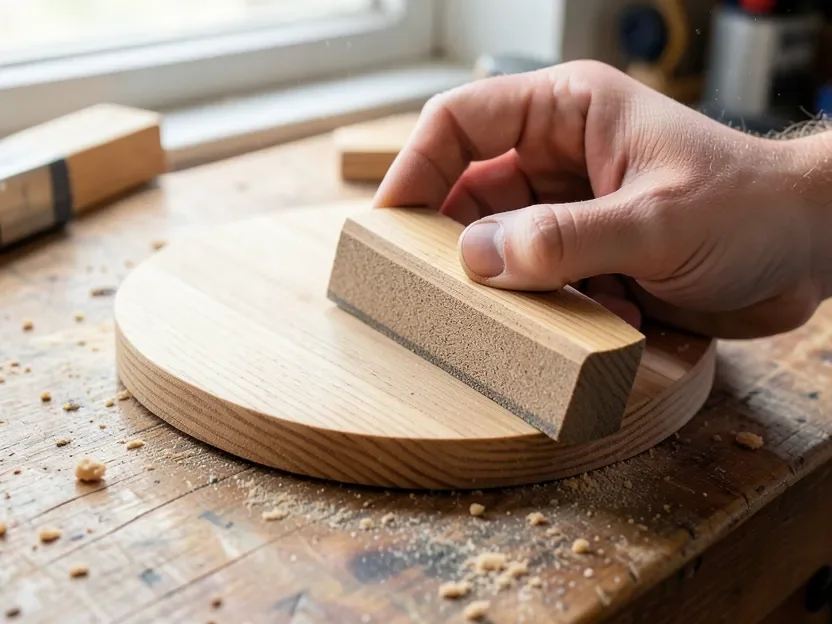
For small circles, or a final touch-up pass after power sanding, shape a sanding block to roughly match the curve instead of using a flat block. A short length of dowel or a scrap of pipe insulation wrapped in sandpaper conforms to the edge and spreads pressure over more of the curve at once, which is what actually keeps a hand-sanded circle from developing flat spots. Work in short strokes that follow the curve’s direction rather than long straight passes, and rotate the workpiece in your other hand as you go so you’re not repeatedly hitting the same few inches of edge.
Common Mistakes When Sanding a Circle
Flat spots show up when sandpaper or a sanding disc contacts the edge at a straight angle instead of following the curve – they’re most common with a flat hand block or a belt sander pressed against the edge. Switch to a curved backer or a drum/disc sander and check with a straightedge held against the curve; light showing under the straightedge in a short, flat stretch means that spot needs more rounding, not more sanding overall.
Splintering and tear-out tend to cluster at specific points around a circle’s edge, not evenly – because the grain direction relative to the edge changes continuously as you go around. At points where you’re sanding against the grain, ease off pressure and use a lighter touch or a finer grit than you would elsewhere on the same piece.
Scratches left after sanding usually mean a grit was skipped. Go back one step finer than the scratch depth suggests, sand lightly over the area, and blend into the surrounding edge before moving to the next grit. For a gouge or chip too deep to sand out, fill it with wood filler, let it cure fully, then re-sand that section through the same grit sequence as the rest of the edge.
Finishing After Sanding
Wipe the disc down with a slightly damp cloth to pull off sanding dust before finishing – dust trapped under a finish coat shows up as visible grit once it dries. Apply an oil or varnish finish with the grain, let it cure fully between coats, and knock down any raised grain with a light pass of 220-grit between coats rather than after the final one. Keep the piece somewhere dust-free while it dries; a curved edge with a lot of surface area at the rim picks up airborne dust more readily than a flat panel does.
Frequently Asked Questions
How Do I Keep a Wood Circle From Sanding Oval?
Sand against a tool that holds a fixed center point or a perpendicular rotation, such as a drum sander on a drill press or a stationary disc sander, instead of freehanding a random-orbital sander around the edge. If you’re hand-sanding, rotate the workpiece itself in small, even increments rather than moving the sandpaper further around one side than another, and check roundness every few passes with calipers or a scrap trammel rather than by eye.
What Tool Is Best for Sanding a Circle in Wood?
A drum sander mounted in a drill press is the most reliable option for a cut disc, because the workpiece pivots on a center pin while the drum removes material evenly around the whole edge. A stationary disc sander works well too, since its rotation is perpendicular to the edge being sanded. A curved hand-sanding block is the best non-power option for small circles or touch-up work.
Can I Sand a Circle Without Power Tools?
Yes. Shape a sanding block or backer pad to roughly match the circle’s curve so it contacts more of the edge at once, then work in short strokes that follow the curve rather than straight passes. It takes longer than a powered drum or disc sander and needs more frequent roundness checks, but it gives you finer control on small or delicate pieces.
What Grit Should I Start With on a Wood Circle?
Start at 80-grit if the edge still has saw marks or is noticeably out of round, then move to 120-grit to even out the curve, and finish at 220-grit for a smooth, paint- or finish-ready edge. Softer woods like pine and cedar can often skip straight from 80 to 120; harder woods like oak and maple hold saw marks longer and benefit from the full three-step progression.
Conclusion
A smooth circle is easy – any grit sequence gets you there. A true circle takes a tool that rotates on a fixed point instead of a hand that drifts, and a habit of checking roundness as you go instead of only at the end. Get the cut close to round first, sand with a drum sander, disc sander, or curved hand block rather than freehanding a flat pad around the edge, and check your work with calipers a few times along the way.
Sponsored / affiliate links. As an Amazon Associate I earn from qualifying purchases. I may earn additional commission from eligible campaigns.