How to Seal Plywood Joints Without Leaks (2026)
Plywood joints leak because glue alone doesn’t seal a gap and paint alone doesn’t survive movement — the joint needs a rigid adhesive bond first (wood glue or epoxy) and a flexible waterproof sealant over the seam second, like a polyurethane construction sealant rated for joint movement. Skip the sealant and even a perfect glue joint wicks water at the seam within a season outdoors. This guide covers prepping the joint, choosing between silicone, polyurethane, and acrylic sealant, and testing the seal before you trust it outside.
Choosing the Right Sealant
Best Plywood Joint Sealant Pick
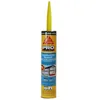
Sikaflex Construction Sealant – $9.18
A polyurethane sealant that matches the flexible, paintable option recommended above for joints exposed to seasonal movement and outdoor moisture.
- Best for: exterior plywood seams that flex with temperature changes
- Why we picked it: polyurethane stays flexible and is paintable, unlike silicone
- Main drawback: longer full cure time than a quick-set acrylic caulk
As an Amazon Associate we earn from qualifying purchases.
| Sealant Type | Best For | Paintable? | Notable Limitation |
|---|---|---|---|
| Silicone | Maximum water resistance, wet areas | No | Can’t be painted over; hard to remove for a redo |
| Polyurethane (e.g. Sikaflex) | Joints that flex or move seasonally, exterior seams | Yes | Longer cure time than silicone or acrylic |
| Acrylic/latex caulk | Interior joints, quick touch-ups | Yes | Least durable outdoors; shrinks and cracks sooner |
For a plywood joint that will actually see rain or ground moisture — a shed base, a deck ledger, an outdoor planter — a polyurethane sealant is the practical default: it stays flexible as the plywood expands and contracts across seasons, unlike a rigid acrylic caulk that eventually cracks at the seam.
Types of Plywood Joints and Where Each Needs Sealing
The joint type changes how much sealing it needs. A butt joint (two edges meeting flat) has the least surface contact and the highest leak risk — it depends entirely on glue plus sealant since there’s no mechanical interlock. A dado joint (one panel let into a groove in the other) and a lap joint (overlapping edges) both have more glue surface area and shed water better on their own, but still need sealant at the exposed seam line if the assembly lives outdoors. For heavier loads or full outdoor exposure, dado or lap joints outperform a plain butt joint; for lighter interior projects a butt joint plus proper sealant is enough.
Preparing the Joint Before Sealing
- Sand the joint area with 120-150 grit to remove mill glaze and expose fresh wood fiber — sealant doesn’t bond well to a shiny factory surface.
- Wipe away all dust with a dry or slightly damp cloth; trapped sanding dust is a common cause of sealant failing to bond.
- Check for gaps wider than about 1/8″ — a standard sealant bead won’t bridge a wide gap without sagging; use a backer rod or a wood filler first on gaps that large.
- Confirm the wood is dry (under about 15% moisture content) — sealing over damp plywood traps moisture inside the joint instead of keeping it out.
Step-by-Step Sealing Process
- Glue the joint first. A waterproof wood glue (Type II or III) bonds the plywood itself — sealant is a surface treatment, not a structural adhesive, so don’t skip the glue step.
- Clamp until the glue cures per the manufacturer’s time, typically 24 hours for a full cure even if it feels dry sooner.
- Sand and clean the exposed seam as described in the prep section above.
- Apply painter’s tape along both sides of the seam if you want a clean sealant line — this is optional but makes cleanup much faster.
- Run a continuous sealant bead along the seam with a caulking gun, then tool it smooth with a wet finger or a caulking tool before it skins over.
- Remove the tape immediately after tooling, while the sealant is still wet, then let it cure fully per the tube’s label (usually 24-48 hours) before exposing the joint to water.
Curing Time and What Affects It
Most wood glues cure enough to handle in about 30-60 minutes but need roughly 24 hours for full strength. Sealants vary more: silicone and acrylic caulks often skin over within an hour but take 24-48 hours to fully cure, while epoxy can take up to 24 hours just to set. Cooler temperatures and low airflow both slow curing significantly — check the product label’s cure time at your actual shop temperature, not just the fastest-case number on the front of the tube.
Testing the Seal Before You Trust It
- Soap and water test: mix a few drops of dish soap into water, apply to the sealed joint, and watch for bubbles — bubbles mean air (and eventually water) is passing through a gap.
- Damp cloth test: after the joint has been exposed to a light spray of water, wipe it with a dry cloth immediately after and check for wetness on the underside.
- Visual inspection: look for any spot where the sealant bead pulled away from either surface (adhesion failure) rather than just stretching — that’s the joint’s actual weak point, and it needs a fresh bead, not just more sealant on top.
Maintenance and Common Mistakes
- Mistake: using paint as the only sealant. Paint forms a surface film but doesn’t bridge a joint gap or flex with the wood — it will crack at the seam long before a purpose-built sealant does.
- Mistake: applying sealant over sawdust or mill glaze. Both prevent real adhesion, so the bead looks fine but peels away under any stress.
- Mistake: skipping the cure time. Exposing a joint to water before the sealant fully cures can wash out the bead before it ever bonds properly.
- Inspect sealed joints every few months for cracking or peeling, especially on anything left outdoors, and re-bead any spot that’s failed rather than waiting for it to spread.
Safety Considerations
Wear safety glasses when sanding the joint and a dust mask for plywood sanding dust specifically, since plywood’s adhesive layers produce finer, more irritating dust than solid wood. Work in a ventilated area when using solvent-based sealants or epoxy, and check the sealant’s data sheet for any specific glove recommendation — polyurethane sealants in particular are difficult to remove from skin once cured.
Frequently Asked Questions
How do I seal plywood joints effectively?
Glue the joint first with a waterproof wood glue, let it fully cure, then run a bead of flexible polyurethane sealant over the exposed seam and tool it smooth. The glue provides the structural bond; the sealant is what actually stops water from tracking into the seam over time.
What materials are best for sealing plywood joints?
A Type II or III waterproof wood glue for the joint itself, plus a polyurethane sealant like Sikaflex for the exposed seam on anything outdoors. Silicone seals slightly better against water but can’t be painted; acrylic caulk is easiest to apply but least durable outside.
Can I use paint to seal plywood joints?
Paint alone isn’t a joint sealant — it coats the surface but doesn’t bridge a seam gap or flex with the wood, so it cracks at the joint line well before a dedicated sealant does. Use paint as the finish coat over a properly sealed joint, not as a substitute for one.
How long does it take for plywood joint sealants to dry?
Wood glue typically handles in 30-60 minutes and fully cures in about 24 hours. Sealants vary: silicone and acrylic caulk often skin over within an hour but need 24-48 hours to fully cure, and epoxy can take up to 24 hours just to set. Always check the product label for your specific sealant.
If the joint still has visible gaps after gluing, see this guide on filling wood joint gaps before sealing, and for the initial assembly itself see how to connect two pieces of plywood.
Conclusion
A leak-proof plywood joint needs two separate steps done right: a waterproof glue bond for strength, and a flexible sealant — polyurethane for anything exposed to weather — over the seam itself. Skip either step and the joint fails at a predictable point: no glue means a weak bond, no sealant means water tracks in at the seam regardless of how tight the joint looks.
Sponsored / affiliate links. As an Amazon Associate I earn from qualifying purchases. I may earn additional commission from eligible campaigns.