How to Seal Whitewash Wood: Ultimate Protection Guide
To seal whitewashed wood, apply a clear, water-based polyurethane after the whitewash dries. This protects the wood and gives it a finished look.
Whitewashing wood is a popular technique for creating a rustic, weathered appearance. It involves applying a mixture of paint and water to wood surfaces, resulting in a semi-transparent, white finish that allows the wood grain to show through. However, to ensure the longevity and durability of the whitewashed wood, it’s essential to properly seal it.
We’ll explore the process of sealing whitewash wood and discuss the benefits of using a water-based polyurethane for this purpose.
Introduction To Whitewashing Wood
Whitewashing wood is a timeless technique that involves applying a mixture of lime, chalk, or paint to wood surfaces to create a soft, white finish. This popular method can be used to achieve a variety of styles, from rustic and weathered to clean and contemporary. Whether you are looking to add a touch of vintage charm or create a bright, modern look, whitewashing wood can be a versatile and cost-effective solution for transforming your interior or exterior spaces.
Benefits Of Whitewashing
Whitewashing wood offers several benefits beyond its aesthetic appeal. It can help to brighten and visually expand a space, making it especially suitable for smaller rooms or areas with limited natural light. Additionally, it allows the wood’s natural grain and texture to show through, adding depth and character to the surface. Furthermore, whitewashing can provide a protective layer against moisture and mildew, making it a practical choice for outdoor applications such as fences and decks.
Common Misconceptions
One common misconception about whitewashing wood is that it requires a sealed finish. While some applications may benefit from a protective sealant, such as a clear, water-based polyurethane, not all whitewashed wood surfaces necessarily need to be sealed. The decision to seal whitewash depends on the specific use and location of the wood, as well as the desired longevity of the finish. It’s important to consider the intended function and level of wear and tear the whitewashed wood will endure before determining whether sealing is necessary.
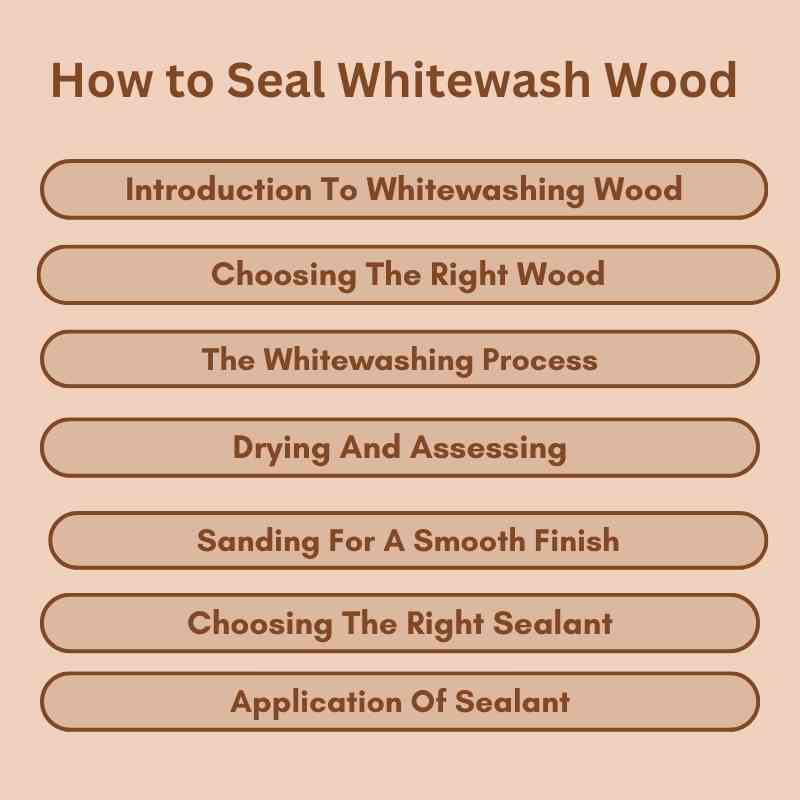
Choosing The Right Wood
To seal whitewashed wood, it is essential to apply a clear, water-based polyurethane after the whitewash has dried. This protective layer will safeguard the wood from damage and give it a polished finish. It is important to use a water-based sealer to prevent any yellowing of the white wash.
Types Of Wood Suitable For Whitewashing
When it comes to whitewashing wood, not all types of wood are created equal. Some types of wood are more suitable for whitewashing than others. Softwoods such as pine and cedar are popular choices for whitewashing as they have a more even grain and absorb whitewash better than hardwoods. Hardwoods like oak and maple have a tighter grain, making it harder for the whitewash to penetrate. However, if you prefer a more rustic look, hardwoods can be whitewashed too.
Preparing The Wood Surface
Before applying whitewash, it is essential to prepare the wood surface properly. The wood should be sanded to remove any rough spots and debris. If the wood has previously been painted or stained, it should be stripped of all old finishes. Any knots or imperfections in the wood should be filled with wood filler and sanded smooth. Once the surface is smooth and even, it is ready for whitewashing.
How To Seal Whitewashed Wood
After whitewashing, it is important to protect the wood from damage. Unless you’re whitewashing a low-touch area like a ceiling, you’ll want to add a clear coat of water-based polyurethane. This layer will not only protect your whitewashed wood from nicks and scratches, but it’ll also give your setup a nice sheen. Ensure that the polyurethane is water-based to prevent yellowing of the whitewash. Once the polyurethane is applied and dried, your whitewashed wood will be protected and ready to use.
To summarize, when choosing the right wood for whitewashing, softwoods such as pine and cedar are more suitable, while hardwoods like oak and maple can also be used. Properly preparing the wood surface is essential before applying the whitewash. After whitewashing, add a clear coat of water-based polyurethane to protect the wood from damage. By following these steps, you can achieve a beautiful whitewashed finish on your wood project.
The Whitewashing Process
To properly seal whitewashed wood, it’s important to apply a clear, water-based polyurethane after the whitewash has dried. This not only protects the wood from damage, but also gives it a nice sheen. Avoid using oil-based sealers, as they can cause the whitewash to yellow over time.
Whitewashing wood is a popular technique that adds a charming, rustic look to any space. Not only does it give the wood a beautiful, weathered appearance, but it also helps to protect it from damage. If you’re looking to seal whitewash wood, follow these simple steps to ensure a successful whitewashing process.
Materials Needed
Before you begin the whitewashing process, gather the following materials:
- Wooden surface to be whitewashed
- Whitewash solution (water and paint)
- Clear, water-based polyurethane
- Paintbrush or roller
- Sandpaper
- Cloth or rag
Mixing The Whitewash Solution
Next, it’s time to mix the whitewash solution. In a container, combine water and paint in a 1:1 ratio. You can adjust the ratio depending on the desired opacity of the whitewash. Stir the mixture well until it is thoroughly blended.
Application Techniques
Now that you have your whitewash solution prepared, it’s time to apply it to the wood. Follow these techniques for a successful application:
- Prepare the wooden surface by sanding it to create a smooth and even texture.
- Using a paintbrush or roller, apply a thin layer of the whitewash solution to the wood, working in the direction of the grain.
- Allow the first coat to dry completely before applying additional coats for a more opaque finish.
- After the whitewash dries, it’s important to seal the wood to protect it from damage. Apply a clear, water-based polyurethane using a paintbrush or roller. This will not only provide a protective layer but also give your whitewashed wood a nice sheen.
- Allow the polyurethane to dry according to the manufacturer’s instructions before using or touching the whitewashed wood.
By following these simple steps, you can easily seal your whitewash wood and enjoy its beautiful, rustic charm for years to come.
Drying And Assessing
After whitewashing wood, allow it to dry thoroughly before assessing the finish. Once dry, seal the whitewash with a clear, water-based polyurethane to protect it from damage and give it a finished look. This will ensure the wood is preserved and lasts for years to come.
Ideal Drying Conditions
When it comes to sealing whitewash wood, proper drying conditions are crucial for achieving the desired results. Ideally, you should allow the whitewashed wood to dry in a well-ventilated area with a temperature between 70-80 degrees Fahrenheit. This will ensure optimal drying and help prevent any unwanted moisture from being trapped in the wood.
In addition, it’s important to avoid exposing the whitewashed wood to direct sunlight during the drying process, as this can cause the wood to dry unevenly and result in an inconsistent finish.
Evaluating Coverage And Color
Once the whitewashed wood has dried completely, it’s time to evaluate the coverage and color of the finish. Start by visually inspecting the wood to ensure that the whitewash has covered the entire surface evenly. Look for any areas that may require touch-ups or additional coats of whitewash.
Next, assess the color of the whitewash. If you’re satisfied with the current color, you can proceed with sealing the wood. However, if you prefer a lighter or darker shade, you can adjust the color by applying another coat of whitewash and allowing it to dry before proceeding with the sealing process.
It’s important to note that the whitewash may appear slightly different when it is wet compared to when it is dry. Therefore, it’s recommended to let the wood fully dry before making any final decisions about the color.
By following these steps and ensuring ideal drying conditions, as well as evaluating the coverage and color of the whitewash, you can achieve a beautiful and sealed finish for your whitewashed wood.
Sanding For A Smooth Finish
To achieve a smooth finish when sealing whitewashed wood, it is important to sand the surface beforehand. This helps to remove any imperfections and create a clean and even surface for the whitewash to adhere to. Once the whitewash has dried, apply a clear, water-based polyurethane to protect the wood from damage and give it a finished look.
Sanding is a crucial step in achieving a smooth and even finish when sealing whitewashed wood. It not only helps to remove any rough spots or imperfections but also prepares the surface for the next step of sealing. Here are some tips for sanding your whitewashed wood for a flawless finish.
Selecting The Right Sandpaper
Choosing the right sandpaper can make all the difference in achieving a smooth finish. For whitewashed wood, it’s recommended to start with a medium grit sandpaper, around 120 to 150 grit, and then progress to a finer grit, such as 220 to 240, for a smoother finish. Be sure to use a sandpaper that is compatible with your sanding tool.
Techniques For Even Sanding
It’s important to sand evenly to avoid any uneven patches or scratches on the surface of the whitewashed wood. Sand with the grain of the wood, using a back and forth motion, and apply even pressure. Make sure to keep the sandpaper flat against the surface to avoid creating any dips or unevenness. When changing to a finer grit sandpaper, be sure to remove any dust or debris left from the previous sanding.
To make sanding easier, consider using a sanding block or a power sander. A sanding block can provide a consistent pressure and help to keep the sandpaper flat against the surface. A power sander can save time and effort, but be careful not to apply too much pressure or sand too aggressively, as this can damage the wood surface.
Applying A Clear Coat
After sanding, it’s important to apply a clear coat of water-based polyurethane to protect the whitewashed wood from damage. This will not only provide a protective layer but also give the wood a nice sheen. Be sure to use a water-based polyurethane to avoid yellowing of the whitewashed wood.
In conclusion, sanding is an essential step in sealing whitewashed wood. By selecting the right sandpaper, using even sanding techniques, and applying a clear coat, you can achieve a smooth and flawless finish that will protect and enhance the beauty of your whitewashed wood for years to come.
Choosing The Right Sealant
Water-based Vs. Oil-based Polyurethane
Water-based polyurethane is a great choice for whitewashed wood as it dries clear and doesn’t yellow over time.
Avoiding Yellowing Of Whitewash
To prevent yellowing, opt for a water-based sealant over an oil-based one for your whitewashed wood.
Application Of Sealant
When it comes to sealing whitewashed wood, the application of the sealant is a crucial step. Properly sealing the wood helps protect it from damage and ensures longevity.
Tools For Application
- Brush or roller
- Clean cloth
- Protective gloves
- Paint tray
Applying Sealant In Layers
Start by applying a thin layer of clear, water-based polyurethane using a brush or roller. Ensure even coverage and allow it to dry completely before adding subsequent layers. Repeat this process for optimal protection.
Maintenance And Care
To seal whitewashed wood, apply a clear, water-based polyurethane after the whitewash dries. This protective layer not only preserves the wood but also gives it a finished look, ensuring long-lasting protection from damage. Additionally, it is a relatively non-toxic and cost-effective method for maintaining and caring for whitewashed wood.
Regular Cleaning Tips
Regularly dust and wipe the whitewashed wood surface with a soft, damp cloth.
For tougher stains, use a mild soap solution and a soft-bristled brush to gently scrub the area.
Avoid harsh chemicals or abrasive cleaners that can damage the whitewash finish.
Touch-up Techniques
For minor scratches or chips, lightly sand the affected area with fine-grit sandpaper.
Apply a matching whitewash stain or paint to the sanded spot, blending it with the surrounding area.
Allow the touch-up paint to dry completely before applying a protective sealant.
Advanced Tips And Tricks
When it comes to achieving a professional finish, implementing advanced techniques can elevate the look of your whitewashed wood.
Creating A Rustic Finish
To create a rustic finish, lightly distress the whitewashed surface with sandpaper. This will add character and depth to the wood.
Adding Additional Protective Coats
- Apply multiple coats of clear, water-based polyurethane to enhance durability.
- Sand lightly between coats for a smooth finish.
- Consider using a matte finish polyurethane for a more natural look.
Common Issues And Solutions
To seal whitewashed wood, apply a clear, water-based polyurethane after the whitewash dries. This provides protection from damage and gives a finished look to the wood. Additionally, using a water-based sealer is essential to prevent yellowing of the whitewash over time.
When it comes to whitewashing wood, there are some common issues that people face. These issues include streaks, runs, and damage. Fortunately, there are solutions to these problems that can help you achieve a beautiful, sealed whitewash finish.
Dealing with Streaks and Runs:
Streaks and runs can be a common issue when whitewashing wood. The best way to avoid this problem is to apply thin coats of whitewash, rather than thick coats. If you do end up with streaks or runs, don’t worry. You can fix them by sanding the affected area and applying another thin coat of whitewash.
Repairing After Damage:
If your whitewashed wood gets damaged, don’t panic. You can repair it easily. Start by sanding down the damaged area until it is smooth. Then, apply a thin coat of whitewash to the area, making sure to blend it in with the surrounding wood. Finally, seal the entire piece with a clear, water-based polyurethane to protect it from further damage.
In conclusion, by following these solutions to common issues, you can achieve a beautiful, sealed whitewash finish on your wood. Remember to apply thin coats, fix streaks and runs with sanding, and repair damage with additional whitewash and polyurethane sealant. With a little patience and effort, you can enjoy the beauty of whitewashed wood in your home for years to come.

Final Thoughts
To protect whitewashed wood, apply a clear, water-based polyurethane once the whitewash dries. This provides a finished look and long-lasting wood protection. Using a water-based polyurethane in satin after the boards are installed is crucial to preserve the wood for years to come.
After completing the process of whitewashing your wood, it is essential to seal it properly to protect it from damage and preserve its beautiful appearance. Applying a clear coat of water-based polyurethane is the recommended method for sealing whitewashed wood. This not only adds a layer of protection against nicks and scratches but also gives the wood a glossy sheen. It is important to use a water-based polyurethane to avoid yellowing the white wash.
Recap Of Key Points
To recap, here are the key points to remember when sealing whitewashed wood:
- After whitewashing, the wood needs to be sealed to protect it from damage.
- Apply a clear coat of water-based polyurethane to seal the whitewashed wood.
- A water-based polyurethane will provide protection and a glossy sheen without yellowing the white wash.
Further Resources
For more information on whitewashing wood and related topics, you may find the following resources helpful:
- How to seal white washed pine?
- How to get white washed wood finish?
- How to Seal the Wood – Martha Stewart
- How to seal whitewash without yellowing? – Reddit
By following these guidelines and using the proper sealing techniques, you can ensure that your whitewashed wood remains protected and maintains its stunning aesthetic appeal for years to come.
Frequently Asked Questions
Does Whitewashed Wood Need To Be Sealed?
Yes, whitewashed wood needs to be sealed. After the whitewash dries, apply a clear, water-based polyurethane to protect the wood from damage.
How To Seal White Washed Pine?
To seal white washed pine, apply a water-based polyurethane in satin after the boards are installed. This will give the wood a finished look and provide protection for years to come. Avoid using oil-based sealers as they can cause yellowing.
How To Get White Washed Wood Finish?
To achieve a white washed wood finish, apply a clear, water-based polyurethane after the whitewash dries. This will protect the wood and give it a finished look.
Does Whitewash Preserve Wood?
Yes, whitewashed wood needs to be sealed to protect it from damage. After the whitewash dries, apply a clear, water-based polyurethane to give it a finished look and protect it for years to come. It is relatively non-toxic, inexpensive, and easy to make and apply, and dries fast.
Conclusion
Sealing whitewashed wood is essential to protect it from damage and give it a finished look. Applying a clear, water-based polyurethane after the whitewash dries will ensure long-lasting protection. This simple step will help maintain the beauty of the wood for years to come.