How to Spread Wood Glue: Master the Art of Perfect Bonding
To spread wood glue, apply a thin, even layer to one surface, then press the two pieces firmly together. Introducing glue to wood is a crucial step to ensure a durable and secure bond.
Whether it’s for woodworking projects or repairs, knowing how to properly spread wood glue is essential. By following a straightforward method and using the right techniques, you can achieve a strong bond between wood surfaces. We will guide you through the process of spreading wood glue, providing useful tips to ensure a successful outcome.
From preparing the surfaces to applying the glue and joining the pieces, we will cover all the necessary steps for a reliable and long-lasting bond. So let’s get started and learn how to spread wood glue effectively.
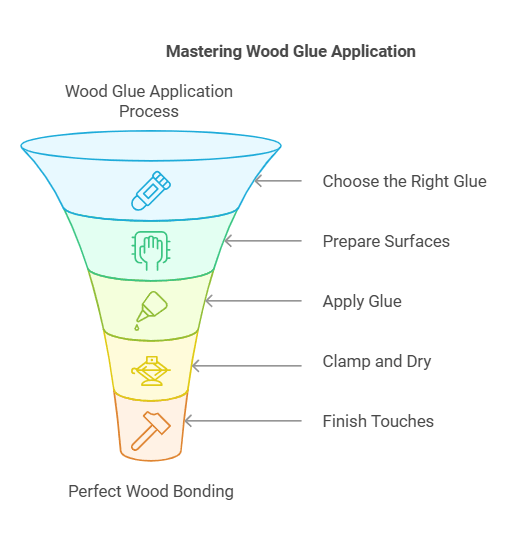
Choosing The Right Glue
Selecting the appropriate wood glue is crucial for ensuring strong and long-lasting bond for your woodworking projects. With numerous options available, it can be overwhelming to determine which glue is the best fit for your specific needs. Fortunately, making an informed decision can be made easier by considering the type of wood and understanding different glue formulas.
Consider The Type Of Wood
When it comes to choosing the right glue, it is vital to consider the type of wood you are working with. Different types of wood have varying levels of porosity and characteristics that can affect how glue adheres to the surface. Softwoods such as pine and spruce, for instance, are more porous and require glue that can penetrate the wood fibers effectively. On the other hand, hardwoods like oak and maple tend to have a higher density and may require a stronger adhesive for optimal bonding.
Understanding Different Glue Formulas
Various glue formulas are available, each designed to meet specific needs and requirements. Familiarizing yourself with these formulas can help you make an informed decision:
- Polyvinyl Acetate (PVA) Glue: PVA glue is a popular option due to its versatility, affordability, and ease of use. Suitable for most woodworking projects, PVA glue offers a strong bond and is ideal for general wood joinery and cabinetmaking.
- Polyurethane Glue: Polyurethane glue is known for its exceptional adhesive properties and ability to bond various materials together, including wood, metal, and plastic. This type of glue expands as it cures, filling gaps in joints effectively.
- Epoxy Glue: Epoxy glue is a two-part adhesive that provides a durable and water-resistant bond. It is commonly used for tasks that require high-strength adhesion and can be an excellent choice for woodworking projects that will be exposed to moisture or require gap filling.
- Cyanoacrylate (CA) Glue: CA glue, also known as super glue or instant glue, is a fast-setting adhesive that forms a strong bond in seconds. It is suitable for small woodworking projects that require quick repairs or where clamping may not be feasible.
By understanding the different glue formulas available and considering the type of wood you are working with, you can make an informed decision when choosing the right wood glue for your project. Remember, selecting the appropriate glue is crucial for ensuring your woodworking creations withstand the test of time.

Preparing The Surfaces
Before you start spreading wood glue, it’s crucial to properly prepare the surfaces to ensure a strong bond. Taking the time to clean the wood surfaces and apply a wood primer will not only improve the adhesion but also enhance the longevity of your project. Let’s dive into the essential steps involved in preparing the surfaces.
Cleaning The Wood Surfaces
Begin by thoroughly cleaning the wood surfaces that will be glued together. Use a clean, lint-free cloth or a soft brush to remove any dust, dirt, or debris. Make sure to pay extra attention to corners and edges where grime may accumulate. Cleaning the surfaces ensures that the wood glue adheres directly to the wood and not to any contaminants. By doing so, you’re creating a clean and smooth canvas for the glue to work its magic.
Applying A Wood Primer
After cleaning the wood surfaces, the next step is to apply a wood primer. A wood primer acts as an intermediary layer, improving the adhesion between the wood and the glue. It also helps to seal the wood, preventing the glue from seeping into the grain. Apply the wood primer evenly, using a paintbrush or foam brush. Make sure to follow the manufacturer’s instructions and allow the primer to dry completely before proceeding to spread the wood glue.
Remember, properly preparing the surfaces by cleaning and applying a wood primer ensures that the wood glue creates a strong and durable bond. Skipping these steps may result in a weaker bond and compromise the overall quality of your project.

Applying The Glue
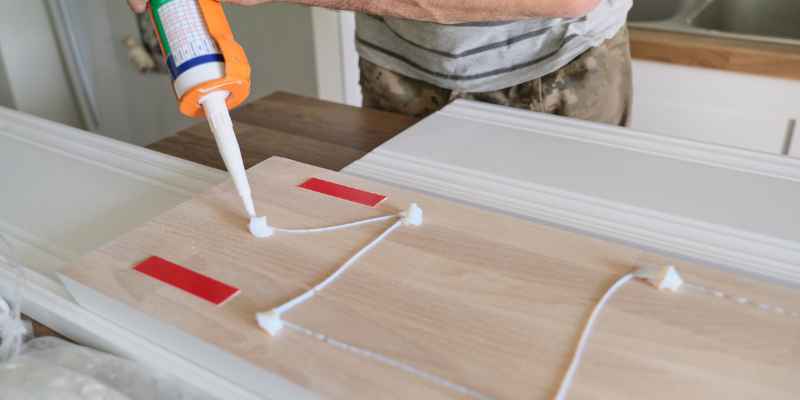
Applying wood glue is a crucial step in any woodworking project. The proper application of wood glue ensures that the joined pieces adhere firmly and create a sturdy bond. To facilitate this, it’s important to use the right tools and ensure proper coverage to guarantee a strong and lasting hold.
Using The Right Tools
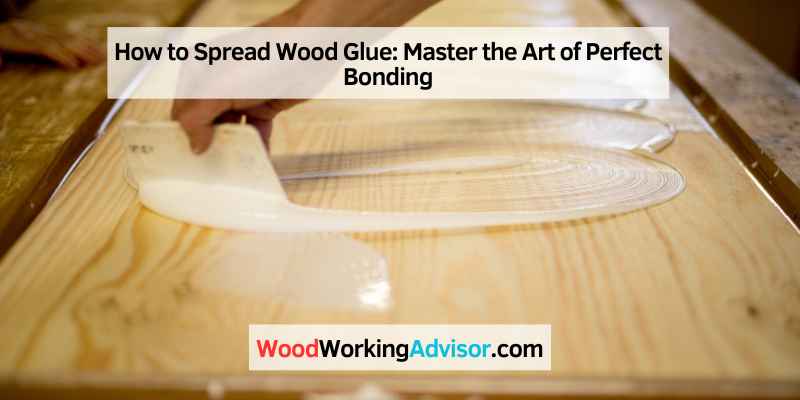
When applying wood glue, it’s important to have the right tools at hand. Utilizing a proper spreader or brush can help ensure even coverage and eliminate excess glue.
Ensuring Proper Coverage
To ensure proper coverage when spreading wood glue, follow these steps:
- Apply a thin, even layer of glue to both surfaces that need to be bonded.
- Press the surfaces together firmly to distribute the glue evenly and remove any air pockets.
- Lastly, wipe away any excess glue that may have squeezed out to achieve a clean and professional finish.
Clamping And Drying
When it comes to woodworking projects, using wood glue is essential for creating strong and reliable joints. However, simply applying the glue is not enough. In order to ensure a successful bond, proper clamping and sufficient drying time are crucial. Understanding how to clamp your project and allowing enough time for the glue to dry will ultimately determine the strength and durability of your woodworking masterpiece.
Selecting The Right Clamps
Choosing the right clamps for your woodworking project is key to achieving a sturdy joint. There are several types of clamps available, each designed for specific applications and project sizes. Here are a few factors to consider when selecting the right clamps:
- Size: Larger projects may require heavy-duty bar clamps or pipe clamps, while smaller projects can be easily clamped using spring clamps or C-clamps.
- Number: Determine how many clamps you’ll need based on the size and complexity of the joint. As a general rule of thumb, use at least one clamp for every foot of material being joined.
- Pressure: Ensure that the clamps you choose can provide enough pressure to maintain a tight bond. Adjustable clamps allow you to control the amount of pressure exerted on the joint.
- Setup: Consider the ease of setup and accessibility. Choose clamps that can be easily positioned and tightened, while still allowing you to work comfortably.
Allowing Sufficient Drying Time
Patience is a virtue when it comes to woodworking. Rushing the drying process can compromise the strength of the bond and lead to joint failure. Here are a few tips for allowing sufficient drying time:
- Follow the manufacturer’s recommendations: Different wood glues have varying drying times, so it’s important to read and follow the instructions provided by the manufacturer.
- Check for squeeze-out: After clamping the joint, carefully remove any excess glue that may have squeezed out. This will ensure a cleaner finish and minimize drying time.
- Temperature and humidity: Keep in mind that lower temperatures and higher humidity levels can increase drying time. Maintain a suitable environment for optimal drying by working in a well-ventilated area.
- Avoid premature handling: Resist the urge to remove the clamps or handle the project too soon. Even if the glue appears dry on the surface, it may still need more time to fully cure.
Finishing Touches
Spread wood glue evenly by utilizing a small putty knife or a disposable foam brush. Apply a thin, uniform layer to both surfaces being glued, and then press them together firmly. Wipe off any excess glue for a clean finish.
Removing Excess Glue
One of the final steps in spreading wood glue is removing any excess that may have squeezed out during the application process. This is important because if left to dry, excess glue can create unsightly and difficult-to-remove blobs on the surface of your project. To remove excess glue, follow these easy steps:
- Allow the glue to partially dry. This makes it easier to work with and prevents it from spreading further.
- Use a putty knife, scraper, or even a plastic spoon to gently scrape away the excess glue. Be careful not to dig into the wood or scratch the surface.
- If the glue is still wet and sticky, dampen a cloth or sponge with warm water and gently dab the excess glue. This can help soften it and make it easier to remove.
- Continue scraping and dabbing until all the excess glue is gone.
Sanding For A Seamless Finish
After removing any excess glue, the next step in achieving a professional look is to sand the surface for a seamless finish. Sanding helps smooth out any rough spots and allows the glue joint to blend in with the surrounding wood. Follow these steps to achieve a seamless finish:
- Select a fine-grit sandpaper, typically around 120 to 220 grit. A finer grit will help achieve a smoother finish.
- Wrap the sandpaper around a sanding block or use a sanding sponge for better control over the sanding process.
- Sand the entire glued area, moving in a circular motion or with the grain of the wood, depending on the desired effect.
- Be sure to give extra attention to the edges and corners to ensure a consistent finish.
- After sanding, wipe down the surface with a clean, dry cloth to remove any dust or debris.
- Inspect the surface closely to ensure it is smooth and seamless. If necessary, repeat the sanding process until the desired finish is achieved.
- Once the sanding is complete, the wood is ready for further finishing treatments like staining, varnishing, or painting.

Frequently Asked Questions On How To Spread Wood Glue
How Do You Spread Wood Glue Evenly?
To spread wood glue evenly, follow these steps:
1. Apply a thin layer of glue on the surface using a brush or spreader.
2. Use the tool in long, sweeping motions to distribute the glue evenly.
3. Avoid applying too much pressure, as it may squeeze out excess glue.
4. Ensure all areas are covered, paying attention to corners and edges.
5. Allow the glue to dry according to the manufacturer’s instructions.
How Do You Spread Glue Easily?
To spread glue easily, follow these tips:
1. Apply a thin layer evenly with a small brush or spatula.
2. Use a toothpick or cotton swab for precise application.
3. Avoid excessive glue to prevent messiness and uneven adhesion.
4.Press the glued surfaces firmly together for proper bonding.
5. Clean any excess glue immediately with a damp cloth.
What Is The Best Way To Apply Wood Glue?
The best way to apply wood glue is to use a brush or roller to spread a thin, even layer on both surfaces. Press the surfaces together firmly and clamp for optimal adhesion. Wipe off excess glue with a damp cloth.
Let it dry as per manufacturer’s instructions for a strong bond.
How Do You Make A Glue Spreader?
To make a glue spreader, follow these steps:
1. Choose a sturdy and flat material, like wood or plastic, and cut it to the desired size.
2. Shape the edges of the material to create a smooth and easy-to-hold handle.
3. Apply a layer of adhesive, like glue or epoxy, evenly onto one end of the spreader.
4. Let the adhesive dry completely before using the glue spreader for spreading glue on surfaces.
Conclusion
Spreading wood glue is essential for strong, lasting bonds in woodworking projects. By following the right techniques and using the proper tools, you can ensure even coverage and reliable adhesion. Remember to prioritize precision and cleanliness to achieve professional results.
With these tips, you can master the art of spreading wood glue effectively.


