How to Tighten a Ryobi Pole Saw Chain: 2 Simple Steps
To tighten a Ryobi pole saw chain, reinstall the guide bar and chain, then turn the tensioning screw clockwise with a wrench (or the tool that shipped with your saw) until the slack is gone. A loose chain wears the sprocket and guide bar faster and raises the risk of the chain jumping the bar during a cut. This guide covers the tightening steps for a Ryobi pole saw, when to replace a worn chain instead, and the tension check to run before every use.
Signs Your Ryobi Pole Saw Chain Needs Tightening
A pole saw chain stretches slightly with normal use as the metal links wear in, so it’s worth knowing the warning signs before the chain causes a problem mid-cut. Check the chain if you notice any of the following:
- Visible sag along the bottom of the bar. A properly tensioned chain sits snug against the underside of the guide bar with no drooping.
- The chain slips off the bar during a cut. This is the most serious sign — stop using the saw immediately, since a derailed chain can whip or bind unpredictably.
- Rough, jagged, or binding cuts instead of smooth, even ones, even though the chain is still sharp.
- Unusual vibration, rattling, or slapping noise coming from the bar while the saw is running.
Tools You’ll Need
Most Ryobi pole saws use a combination wrench or a hex/scrench-style tool included with the saw at purchase. Before you start, gather:
- The combination wrench or multi-tool that shipped with your Ryobi pole saw (a standard wrench or flathead screwdriver works on most models if the original tool is lost)
- Work gloves, since chain teeth stay sharp even when the saw is off
- A flat, stable work surface
- Bar and chain oil, in case the chain needs lubrication after the adjustment
How to Tighten a Ryobi Pole Saw Chain: 2 Simple Steps
With the saw powered off and the chain cool, the tightening process comes down to two steps — but which tool you use depends on your model. Older Ryobi pole saws and Expand-It attachments (like the APR05) use a side-cover nut and a separate adjusting screw; newer models add a tool-less tensioning knob on the bar itself. Check which one your saw has before you start.
- Step 1 – Loosen the bar cover and access the tensioning screw. Loosen (don’t fully remove) the nut or knob holding the guide bar cover in place. On models with a tool-less tensioning knob, turn the knob counterclockwise by hand first to release pressure on the bar. On models with a side-cover-and-screw setup, this step just frees the bar enough for the adjusting screw underneath to move it.
- Step 2 – Turn the tensioning screw or knob to remove the slack. Insert the flat/straight edge of the tool that shipped with your saw into the adjusting block (or use the wrench on the tensioning screw), and turn clockwise until the chain sits snug against the underside of the bar with no visible sag. Then retighten the bar cover nut or turn the tensioning knob clockwise by hand to lock the setting in place. Finish with the pull-away test below before cutting — a small amount of give is correct, a chain that won’t move at all is too tight.
How to Check Chain Tension Correctly
Getting the tension right matters as much as remembering to check it — too loose and the chain can derail, too tight and it strains the motor while accelerating wear on the bar and sprocket. With the saw off and the chain cool, use the pull-away test: grip the chain at the midpoint of the bottom of the guide bar and pull it gently away from the bar.
A correctly tensioned chain will pull away only slightly — the drive links should just clear the bottom of the bar groove and snap back into place when released. If you can pull the chain far enough to see daylight through a noticeable gap, or if the drive links come out of the groove, it’s too loose. The chain should also rotate freely around the bar by hand (with the saw off) without binding or feeling stiff. If it drags or won’t move, it’s too tight.
Common Mistakes to Avoid
- Over-tightening the chain. A chain with no give at all puts extra load on the motor, sprocket, and guide bar, and wears all three out faster than a chain that runs slightly loose.
- Tightening a hot chain. Metal expands when it heats up during use. A chain tensioned right after cutting will often end up too tight once it cools and contracts — always adjust tension when the saw and chain are cool.
- Skipping lubrication after adjusting tension. Repositioning the chain can leave dry spots in the bar groove. Add bar and chain oil after any tension adjustment before cutting again.
- Forgetting to retighten the guide bar retaining nuts. The tensioning screw only sets chain slack — the bar cover nuts have to be snugged back down afterward or the bar itself can shift during a cut.
Chain Maintenance Schedule
A quick routine keeps the chain lasting longer and cutting cleaner between full tune-ups:
- Before every use: Check chain tension with the pull-away test and confirm the bar has enough oil.
- After every use: Wipe down sap and debris, and check the bar groove for buildup.
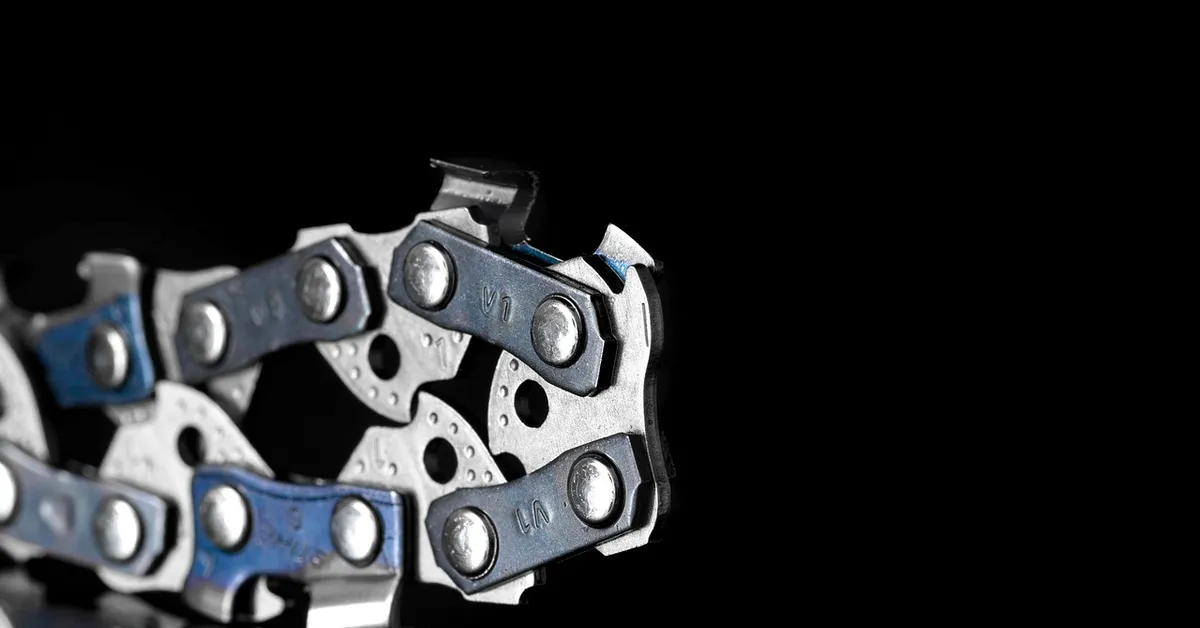
- Every few uses: Inspect the chain for stretched or damaged links and check that teeth are still sharp and uniform in length.
- Sharpen vs. replace: If a chain can still be filed back to a consistent edge and the drive links and rivets aren’t stretched or damaged, sharpening is usually enough. Replace the chain once it stretches beyond what the tensioning screw can take up, if it’s missing or chipped teeth, or if links look elongated or cracked.
Other Tips For Maintaining Ryobi Pole Saw Chain
Maintaining your Ryobi pole saw chain involves more than just tightening it. Make sure to regularly oil the chain, keep it clean and sharpened, and periodically check the tension to ensure optimal performance. Follow the manufacturer’s instructions for tightening the chain, using the provided tool or a wrench to adjust the tension as needed.
Aside from tightening the chain, it is important to maintain the Ryobi pole saw chain to ensure that it performs efficiently and effectively. Here are some other tips for maintaining the Ryobi pole saw chain:
Replacing the Chain
If your Ryobi pole saw chain is worn out or damaged beyond repair, then replacing it might be your only option. To replace the chain, follow these simple steps:
1. Loosen the nuts on the guide bar cover and remove the cover.
2. Remove the old chain by loosening the tension screw and sliding the chain off the bar.
3. Place the new chain onto the bar with the sharp teeth facing forward, making sure that the chain is in the groove.
4. Loop the chain around the sprocket at the end of the guide bar.
5. Tighten the tension screw until there is no slack in the chain, and then tighten the nuts on the guide bar cover.
Common Problems and Solutions
Despite proper maintenance, issues with the Ryobi pole saw chain may still occur. Here are some of the common problems and their solutions:
1. Loose Chain: A loose chain can be easily fixed by tightening the adjustment screw. However, if the chain continues to loosen, there may be a problem with the tensioning mechanism.
2. Dull Chain: A dull chain can cause the saw to work harder and may lead to accidents. Ensure that the chain is sharp and well-oiled before use.
3. Chain Slippage: Chain slippage can be caused by a worn-out sprocket or a loose chain. Check for any damages to the sprocket or tighten the chain tension screw to prevent slippage.
In Conclusion
Proper maintenance of the Ryobi pole saw chain is necessary to maintain its longevity and performance. Tightening the chain, replacing it when it’s worn out, and addressing any common problems are essential to ensure safe and efficient operation. By following these tips, you will be able to use your Ryobi pole saw chainsaw with ease and confidence.
Frequently Asked Questions Of How To Tighten Ryobi Pole Saw Chain
How Do You Tighten The Chain On A Ryobi Expand It Pole Saw?
To tighten the chain on a Ryobi expand it pole saw, reinstall the guide bar and chain onto the saw. Turn the chain tensioning screw clockwise with a wrench or the tool provided with your saw. Adjust the chain tension as needed by turning the tensioning screw.
Pull the chain along by hand to ensure it’s properly in the groove. Retighten the nut or screw.
How Do You Tighten A Chain On A Pole Saw?
To tighten the chain on a pole saw, reinstall the guide bar and chain onto the saw, and tighten the chain tensioning screw by turning it clockwise with a wrench or the tool provided with your saw. Adjust the chain tension as needed by turning the tensioning screw.
How Do You Tighten The Chain On A Ryobi Saw?
To tighten the chain on a Ryobi saw, follow these steps:
1. Reinstall the guide bar and chain onto the saw.
2. Use a wrench or the tool provided with your saw to turn the chain tensioning screw clockwise to tighten it.
3. Adjust the chain tension as needed by continuing to turn the tensioning screw until it’s properly tensioned.
How Do You Tighten The Blade On A Ryobi Chainsaw?
To tighten the blade on a Ryobi chainsaw, follow these steps: First, reinstall the guide bar and chain onto the saw. Then, tighten the chain tensioning screw clockwise with a wrench or the provided tool until the desired tension is reached.
Check and adjust the chain tension as needed.
How Often Should You Check Ryobi Pole Saw Chain Tension?
Check tension before every use with the pull-away test, and again partway through a long cutting session, since a new or recently adjusted chain tends to stretch and loosen faster during its first few uses as the links seat in.
What Type Of Oil Should You Use On A Ryobi Pole Saw Chain?
Use a dedicated bar and chain oil rather than motor oil or another substitute. Bar and chain oil is formulated to be tacky enough to cling to the bar and chain at operating speed instead of flinging off, which keeps the bar groove and drive links lubricated during the cut.
Why Does My Ryobi Pole Saw Chain Keep Loosening After I Tighten It?
A chain that keeps loosening shortly after tightening is often just breaking in — new chains stretch more in their first few uses, so a second or third adjustment soon after is normal. If it keeps happening well after break-in, check the guide bar retaining nuts to make sure they’re fully tightened, and inspect the sprocket and tensioning mechanism for wear.
Conclusion
Keeping your Ryobi Pole Saw chain tight and in good condition is essential to ensure effective and safe use. By following the steps outlined in this guide, you can easily tighten your chain tensioning screw using a wrench or the tool provided.
Remember to check your chain tension regularly and readjust as needed to prevent any potential damage to your saw or injury to yourself. With a little bit of care and attention, you can ensure that your Ryobi Pole Saw remains in top shape and ready for your next project.
Sponsored / affiliate links. As an Amazon Associate I earn from qualifying purchases. I may earn additional commission from eligible campaigns.