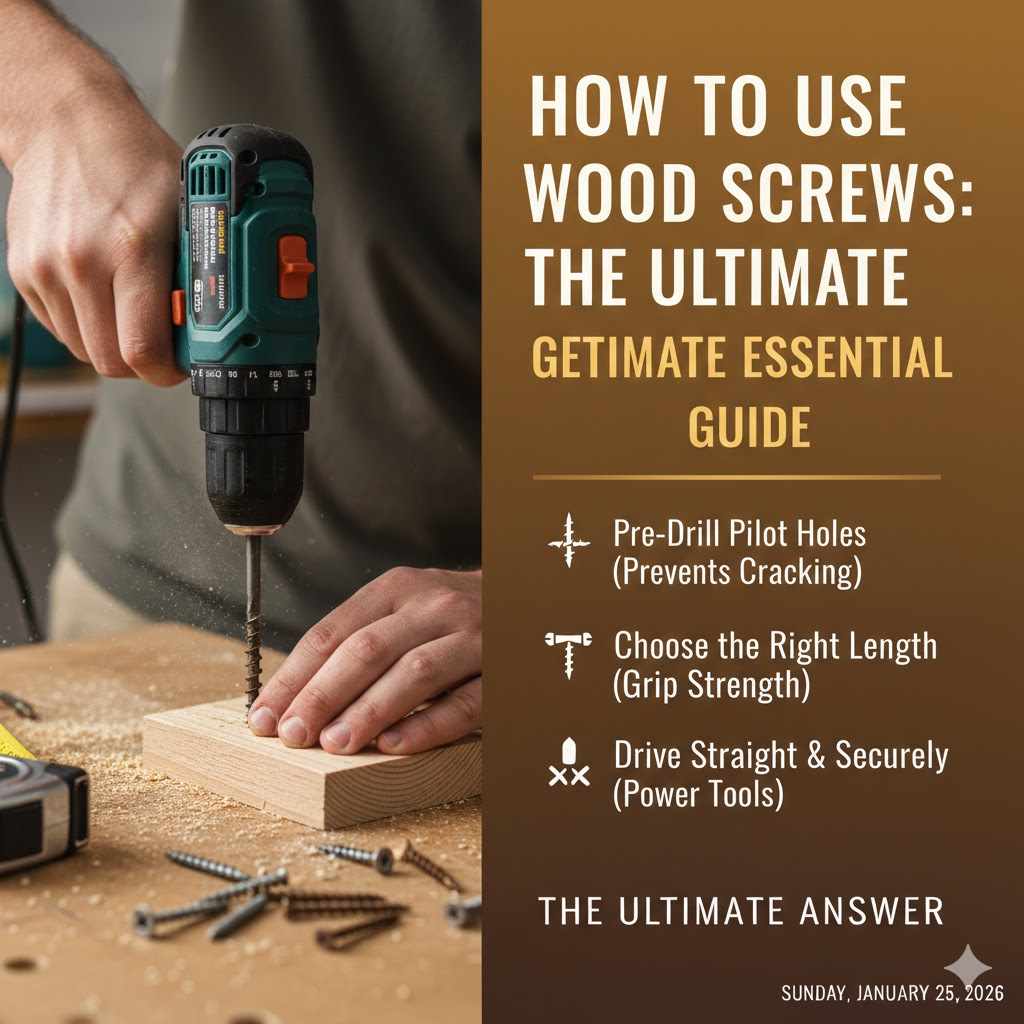
How To Use Wood Screws: The Ultimate Essential Guide
To use wood screws correctly, first select the right screw for your wood and project. Mark your screw location, then drill a pilot hole slightly smaller than the screw’s diameter to prevent splitting. For a flush finish, use a countersink bit. Finally, drive the screw straight into the wood with a drill or screwdriver until it is snug.
Hello there! It’s Md Meraj, your friend in the workshop. Have you ever put hours into a project, only to have the wood split right at the end? Or maybe you’ve built a shelf that wobbles no matter what you do. It’s frustrating, I know. More often than not, the culprit is a small but mighty part of every project: the wood screw.
Many people think you can just pick any screw and drive it in. But learning the right way to use them is a game-changer. It’s the difference between a wobbly birdhouse and a sturdy bookshelf you can be proud of for years. Don’t worry, it’s not complicated! I’m here to break it down into simple, easy steps. Together, we’ll make sure your next project is strong, beautiful, and split-free. Let’s get started!
Why Choosing the Right Wood Screw Matters
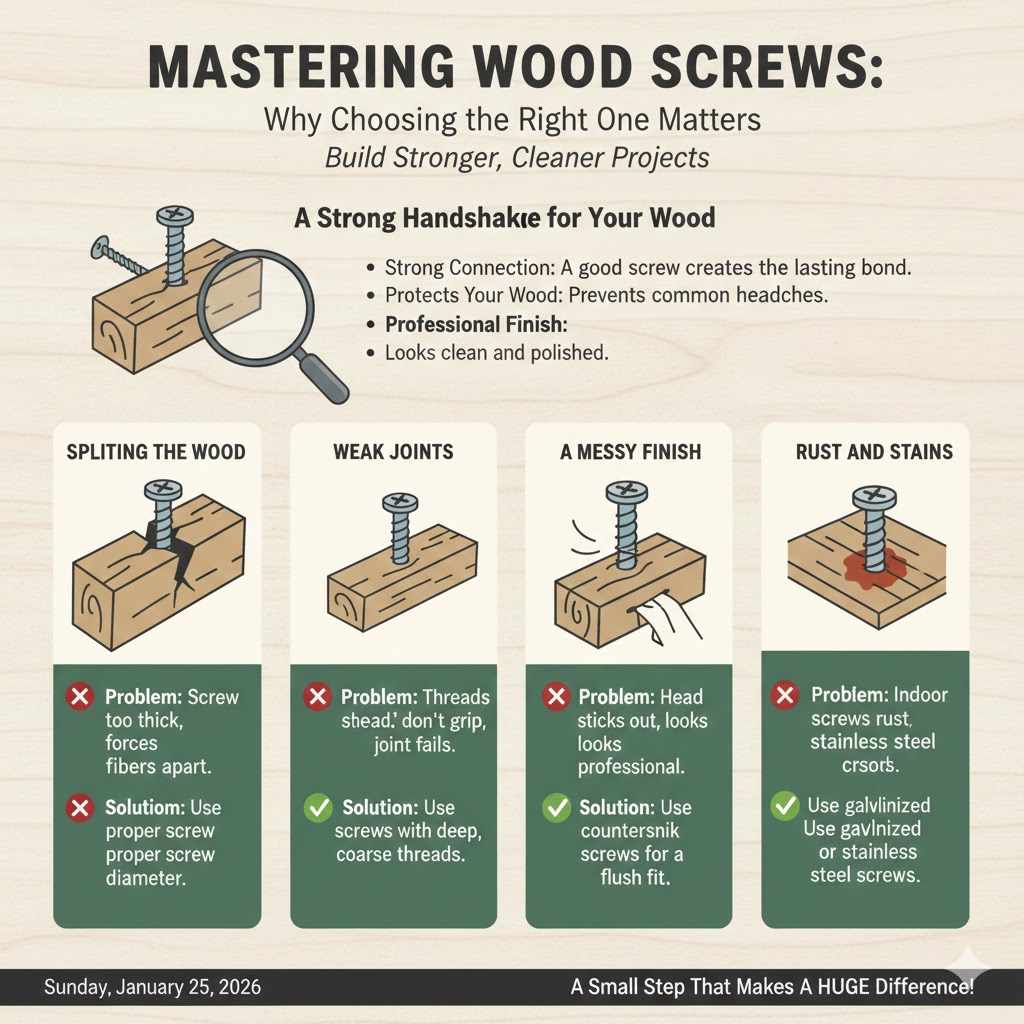
Before we grab the drill, let’s talk about why the screw itself is so important. Think of a wood screw as the handshake that holds your project together. A weak handshake makes for a flimsy connection. A strong one creates a bond that can last a lifetime. Using the wrong screw can lead to common headaches like:
- Splitting the Wood: This is the most common frustration for beginners. A screw that is too thick for the wood forces the fibers apart, creating an ugly and weak split.
- Weak Joints: If a screw’s threads don’t grip the wood properly, the joint will be loose and wobbly. Over time, it will fail.
- A Messy Finish: The wrong screw head can stick out, snag clothes, or just look unprofessional. A good project deserves a clean, polished look.
- Rust and Stains: For outdoor projects, using an indoor screw will lead to rust streaks that stain your wood and weaken the screw itself.
Taking a moment to choose the right screw is one of the easiest ways to improve the quality of your work. It protects your wood, strengthens your project, and gives you a finish you can be proud of. It’s a small step that makes a huge difference.
Understanding the Anatomy of a Wood Screw
Not all screws are created equal. Knowing the different parts of a screw will help you understand what you’re buying and why it’s right for your job. Let’s look at a screw from top to bottom.
The Head
The top of the screw is the head. It’s what you see after the screw is driven in. The shape of the head determines how the screw will sit on the surface of the wood.
| Head Type | Description | Best Use |
|---|---|---|
| Flat Head | Tapers to a flat top, designed to sit flush or below the wood surface. | General woodworking where a smooth, hidden finish is needed. Requires a countersink. |
| Pan Head | Has a slightly rounded top with flat sides, sitting on top of the wood. | Great for attaching hardware like hinges or brackets where you need strong clamping force. |
| Round Head | A simple dome shape that also sits on top of the wood. | Mostly used for a decorative look or when attaching thin materials to wood. |
The Drive
The drive is the slot or pattern on the head where your screwdriver or drill bit fits. Using the wrong bit is a surefire way to “strip” the head, making it impossible to drive or remove.
- Phillips: The classic cross shape. Very common but can “cam out” (slip out) under high torque.
- Square (Robertson): A square-shaped socket that provides a great grip and reduces slipping.
- Star (Torx): A six-pointed star shape. This is a favorite among professionals because it offers the best grip and almost never strips.
The Shank
The shank is the smooth, unthreaded part of the screw just below the head. When you join two pieces of wood, the shank is designed to slide through the top piece. This allows the screw’s threads to pull the bottom piece of wood tightly against the top one, creating a very strong, snug joint. Not all screws have a shank, but those that do are excellent for construction.
The Threads
The threads are the sharp, helical ridges that cut into the wood and hold the screw in place. Wood screws have coarser, sharper threads than screws meant for metal. This design allows them to grip wood fibers securely.
- Coarse Threads: Have more space between the threads. They work best in softwoods like pine and cedar because they grip well without getting clogged with wood fibers.
- Fine Threads: Have less space between them. They are ideal for hardwoods like oak and maple, providing excellent hold in dense material.
The Tip
The tip is the business end of the screw. Most wood screws have a sharp, pointed tip that helps them start easily in the wood. Some modern screws have special self-drilling tips with a small notch that cuts away wood fibers, reducing the need for a pilot hole in some softer woods.
Your Essential Toolkit for Driving Wood Screws
You don’t need a professional workshop to do a great job. Here are the basic tools that will make driving screws simple and effective.
- Cordless Drill/Driver: This is your most important tool. A good cordless drill lets you drill pilot holes and drive screws quickly and easily. Look for one with an adjustable clutch to prevent over-tightening.
- Driver Bits: You’ll need a set of bits that match the drives of your screws (Phillips, Square, Star). Having the right bit is non-negotiable!
- Drill Bits: A set of standard drill bits is needed for drilling pilot holes.
- Countersink Bit: This special bit creates a cone-shaped recess for flat-head screws to sit in perfectly flush.
- Tape Measure and Pencil: For marking exactly where your screws need to go. Precision matters!
- Clamps: Often overlooked by beginners, clamps are your best friend. They hold your work steady, freeing up both hands to focus on drilling and driving straight.
- Safety Glasses: Always, always, always protect your eyes. Wood chips and dust can fly anywhere.
The Core Technique: Driving a Wood Screw Perfectly in 5 Steps
Alright, you’ve got your tools and your screws. Let’s build something! Follow these five simple steps, and you’ll get a perfect result every time.
Step 1: Measure and Mark Your Spot
Precision starts here. Use your tape measure and pencil to carefully mark the exact center of where you want your screw to go. A small “X” or a dot is perfect. Taking your time on this step ensures your project will be square and your screws will be evenly spaced.
Step 2: Drill a Pilot Hole (The Most Important Step!)
A pilot hole is a small hole you drill before putting in the screw. This is the secret to preventing wood from splitting. The pilot hole clears a path for the screw, so it doesn’t have to force the wood fibers apart.
How to do it: Choose a drill bit that is slightly smaller than the shank (the solid part) of your screw. You don’t want it to be as wide as the threads. A good rule of thumb is to hold the drill bit up in front of the screw. You should still be able to see the screw’s threads on either side of the bit. Drill a hole that is just as deep as the screw you plan to use.
Step 3: Add a Countersink (For a Professional Finish)
If you’re using flat-head screws and want them to sit flush with the wood surface, you’ll need to countersink the hole. It makes your work look clean and prevents the screw head from snagging on anything.
How to do it: After drilling the pilot hole, switch to a countersink bit. Place the tip of the bit in your pilot hole and drill just deep enough for the screw head to fit perfectly inside the cone-shaped recess. Test it with your screw; you want the head to be perfectly level with the wood surface.
Step 4: Choose the Right Driver Bit and Set Your Drill
Match your driver bit to the screw’s drive type (e.g., use a Phillips #2 bit for a #2 Phillips screw). A sloppy fit will cause the bit to slip and strip the screw head. Secure the bit firmly in your drill’s chuck.
If your drill has an adjustable clutch (the ring of numbers behind the chuck), set it to a low-to-medium number to start. This feature stops the drill from turning once it meets a certain amount of resistance, which prevents you from over-tightening and stripping the screw or the wood. The U.S. Occupational Safety and Health Administration (OSHA) recommends always reading the tool’s manual to understand its features.
Step 5: Drive the Screw Straight and Snug
Place the tip of the screw into your prepared hole. Apply firm, steady pressure and keep the drill perfectly straight—not tilted. Start slowly to ensure the screw goes in straight. Squeeze the drill’s trigger and drive the screw until the head is flush with the surface (or snug on top, for pan or round heads). When the clutch clicks, stop. You’ve done it!
Common Wood Screw Types and Their Uses
Walking down the hardware aisle can be overwhelming. There are so many types of screws! This table breaks down some of the most common ones you’ll encounter and what they’re best for.
| Screw Type | Primary Use | Key Features |
|---|---|---|
| Construction Screws | General construction, framing, building furniture, and structural projects. | Very strong, often coated for corrosion resistance. Many have Star (Torx) drives for superior grip. |
| Deck Screws | Building decks, fences, and other outdoor projects exposed to weather. | Have a specialized coating (ceramic or stainless steel) to resist rust and corrosion from treated lumber. |
| Cabinet Screws | Installing kitchen and bathroom cabinets. | Have a large, flat washer head to provide maximum holding power without damaging the cabinet frame. Self-tapping tips are common. |
| Drywall Screws | Attaching drywall to wood or metal studs. | Brittle and not designed for structural loads. Avoid using them for woodworking projects, as they can easily snap. |
| Pocket-Hole Screws | Used specifically with a pocket-hole jig to create strong, hidden joints. | Have a flat washer head and a self-tapping tip designed for this special kind of joinery. |
Pro Tips for Flawless Results
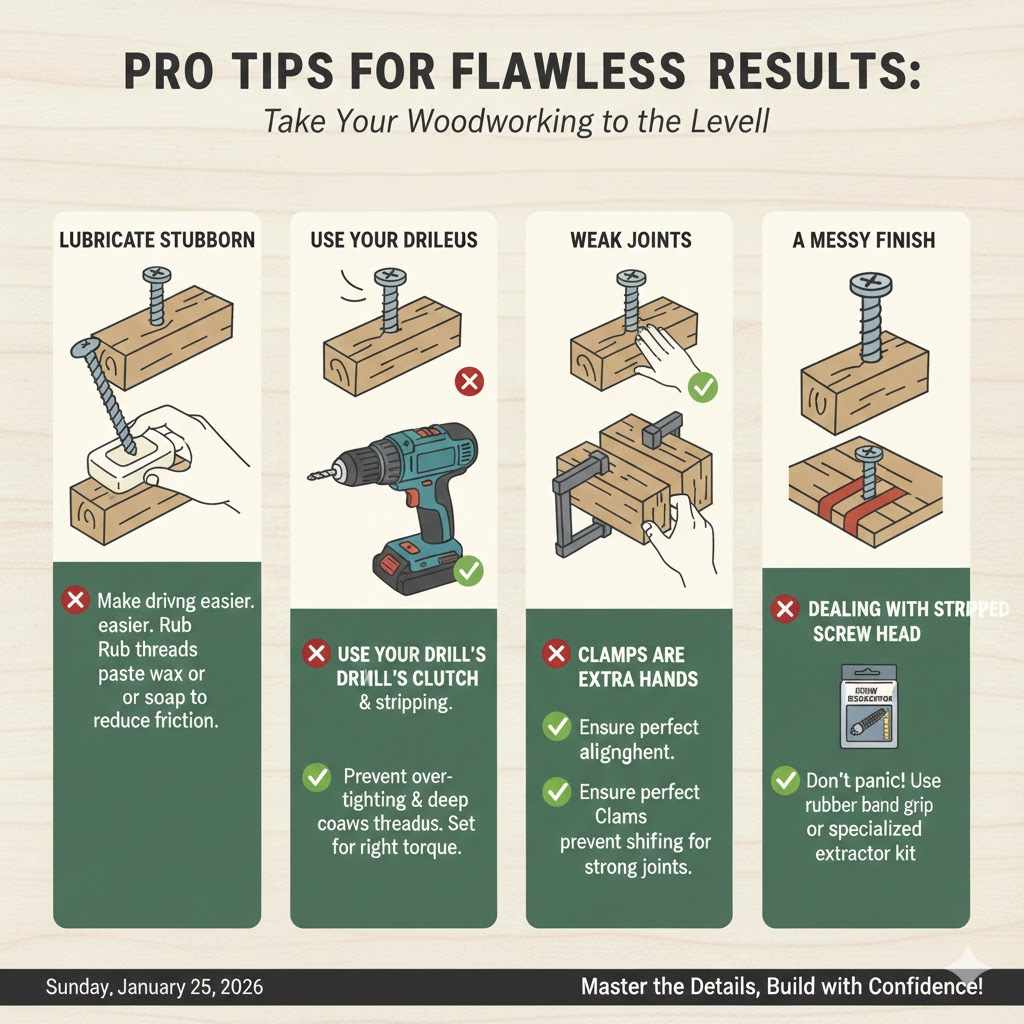
Once you’ve mastered the basics, these simple tips will take your work to the next level and help you solve common problems.
- Lubricate Stubborn Screws: Driving long screws into dense hardwood can be tough. Make it easier by rubbing the threads with a bit of paste wax or even a bar of soap. The lubrication helps the screw go in smoothly without excess friction.
- Use Your Drill’s Clutch: I mentioned it before, but it’s worth repeating. The adjustable clutch is your best defense against over-tightening screws. Stripping the wood means the threads can no longer grip, creating a weak joint. Learn to use your clutch!
- Clamps Are Your Extra Hands: Always clamp your workpieces together before drilling or driving. This ensures they don’t shift, leading to misaligned screws and gaps in your project. A well-clamped joint is a strong joint.
- Dealing With a Stripped Screw Head: It happens to everyone. If you strip a screw head, don’t panic. You can often get it out by placing a wide rubber band over the head before inserting your driver bit. The rubber fills the gaps and provides extra grip. If that fails, specialized screw extractor kits are available at any hardware store.
- Choose Length Wisely: Your screw should be long enough to penetrate the bottom piece of wood by at least half its thickness. For example, joining two 3/4-inch boards? Your screw should go through the top board and at least 3/8-inch into the bottom one. Resources like the Department of Wood Science at Virginia Tech offer deep insights into wood properties and joint strength.
Frequently Asked Questions (FAQ)
What is a pilot hole?
A pilot hole is a small hole drilled into the wood before you insert the screw. Its purpose is to remove wood fibers, creating a clear path for the screw. This prevents the screw from pushing the wood apart and causing it to split.
Do I always need to drill a pilot hole?
For hardwoods like oak or maple, yes, always. For softwoods like pine, you can sometimes get away without one, especially with modern self-tapping screws. However, it is always a good practice, especially when screwing near the edge of a board, where splitting is most likely to occur. It’s a quick step that guarantees a better result.
What’s the difference between wood screws and drywall screws?
Wood screws are designed to pull two pieces of wood together and withstand structural load. They are stronger and more flexible. Drywall screws are designed only to hold drywall against studs. They are brittle and will snap under the kind of stress a woodworking joint endures. Never use drywall screws for building furniture or any structural project.
How do I know what size screw to use?
The screw’s length should be chosen based on the thickness of your wood. A good rule is that the screw should go at least halfway into the piece of wood you are fastening to. The diameter (or gauge) of the screw depends on the load it will carry. For general projects, #6, #8, and #10 screws are the most common.
What does “countersinking” mean?
Countersinking is the process of creating a cone-shaped recess, or “sink,” around the opening of your pilot hole. This allows a flat-head screw to sit perfectly flush with or just below the surface of the wood, creating a smooth, professional finish.
How can I remove a stripped screw?
First, try the rubber band trick mentioned earlier. If that doesn’t work, you can try gripping the edge of the screw head with locking pliers and turning it out. As a last resort, a screw extractor bit set is a great tool. It drills into the stripped head and then uses reverse threads to bite into the screw and back it out.
What’s the difference between Phillips and Star (Torx) drive?
Phillips drive is the classic ‘X’ shape. It’s common but prone to “cam-out,” where the bit slips out under pressure, which can strip the screw. Star drive (also known as Torx) has a six-pointed star shape that provides a much more secure engagement with the bit, allowing for more torque and dramatically reducing the chance of stripping. For construction, it’s often the preferred choice.
You’ve Got This!
See? Using a wood screw isn’t just about twisting something into a board. It’s a skill. But like any skill, it’s one that you can master with a little knowledge and practice. By choosing the right screw, preparing your wood with a pilot hole, and driving it with care, you are well on your way to building projects that are not only beautiful but are built to last.
Don’t be afraid to experiment. Grab some scrap wood and practice driving a few screws. Feel how the drill works. See the difference a pilot hole makes. The more you do it, the more it will become second nature.
Welcome to the wonderful world of making things with your own two hands. You have the knowledge now, so get out there in your workshop, garage, or backyard and build something amazing. I can’t wait to see what you create!