How to Build a Simple Wooden Box (Beginner Plans)
A simple wooden box can serve many purposes. It’s versatile and timeless.
Whether you need storage, decor, or a craft project, a wooden box fits the bill. Made from natural materials, it adds warmth to any space. Wooden boxes are easy to personalize. Paint them, stain them, or leave them natural. They can hold keepsakes, tools, or even be used as gift boxes.
The simplicity of a wooden box makes it a blank canvas for your creativity. Durable and sturdy, they offer practical solutions and charming aesthetics. Explore the endless possibilities a simple wooden box can provide.
Introduction To Wooden Box Crafting
Best Glue for a Box That Won’t Come Apart
 |
Titebond III Ultimate Wood Glue – 16oz Stronger than the wood itself once cured — the glue most box-making joints (including simple butt and rabbet joints) actually need.
|
Wooden boxes are one of the oldest joined-wood projects there is, largely because a box is really just four walls, a floor, and a lid — no curves, no complex angles, nothing that demands a lathe or a router table. Historically that made them a practical first project: a simple butt-jointed box takes a beginner an afternoon, while a dovetailed version of the same box, cut by hand, can take a skilled joiner most of a day just for the corners. That range is still true today. A basic pine box with glued butt joints and a few finish nails is a one-sitting weekend project, while the same design in walnut with through-dovetails and a fitted lid is a multi-session build that teaches real joinery.
What hasn’t changed is the appeal: a box is small enough to finish without a huge lumber budget, forgiving enough that a warped corner or a slightly proud joint doesn’t ruin the whole piece, and useful enough to actually keep once it’s done. That combination is why it’s still the project most woodworking teachers hand a first-timer before moving them on to anything with drawers or doors.
Materials Required
For a basic box roughly 10x6x4 inches, plan on one 6-foot 1×6 board (more than enough for the sides, bottom, and lid with offcuts to spare), a small bottle of wood glue, 1-inch finish nails or #6 wood screws, and 120/220-grit sandpaper for shaping and smoothing. A miter box or a table saw with a stop block makes square, repeatable cuts far easier than a handsaw and a pencil line.
Types Of Wood
Pine is the standard beginner choice — it runs $3-$5 per board foot, cuts easily with hand tools, and takes stain reasonably well even though its softness means dents show more than in a hardwood. Oak costs roughly triple pine’s price but its open, ring-porous grain and real weight give a box a substantial, heirloom feel that pine can’t fake. Cedar is the traditional choice for anything meant to store fabric or keepsakes long-term, since its natural thujaplicin oils genuinely repel moths and resist rot — that’s not folklore, it’s the same chemistry that makes cedar closets a real thing. Cherry starts a light pinkish-brown and darkens to a deep reddish-brown over months of light exposure, which is worth knowing before you pick a stain color that assumes it’ll stay pale. Birch is dense and close-grained like maple but usually cheaper, and it’s a forgiving wood for a first dovetail attempt because it doesn’t tear out as easily as softer species.
Essential Tools
A backsaw or a table saw gives you the clean, square cuts a box’s corners depend on — a standard handsaw works but leaves more cleanup sanding. A combination square is worth the $15 over a tape measure alone, since it checks both length and squareness in one tool. Wood glue (yellow PVA glue like Titebond) does most of the real holding in a box joint; nails or screws mostly just clamp the joint while the glue cures rather than bearing the long-term load themselves. Bar or spring clamps matter more than most beginners expect — a glued butt joint held under clamp pressure for the glue’s full cure time is dramatically stronger than the same joint just nailed and left alone.
Design Inspirations
A classic box design leans on proportion rather than ornament — straight sides, a lid that overhangs the body by about 1/8 inch on each side, and a dark oil or wax finish that lets the grain do the visual work. Adding a routed groove near the top edge, or a contrasting wood strip inlaid along a seam, is usually enough detail to make a plain box look intentional rather than unfinished, without requiring carving skill.
A more modern take swaps the dark stain for a clear finish over a light wood like maple or ash, keeps the lines sharp and unadorned, and sometimes drops in a contrasting material — a strip of brass, a routed acrylic window, or a painted panel on just one face. The trade-off is that a spare, modern design shows joinery mistakes more readily than a dark, detailed box does, since there’s nothing else drawing the eye away from the corners.
Step-by-step Crafting Process
Cut your four side pieces to final length first, checking each one against the others rather than just against the tape measure — a 1/16-inch difference between two “matching” sides is where most box gaps come from. Cut the bottom panel 1/4 inch smaller in each dimension than the outer box footprint if it’s going to sit in a groove, or exactly to the box’s inside dimensions if it’s simply glued to the bottom edge. Dry-fit every piece before any glue comes out; this is the point to catch a cut that’s off, not after the glue has set.
Apply glue to the mating edges, assemble the four sides around the bottom panel, and clamp corner-to-corner (not just side-to-side) so the box can’t rack out of square while it dries. Check the diagonals with a tape measure — if both corner-to-corner measurements match, the box is square; if they don’t, shift the clamps before the glue grabs. Let the glue cure the full time on the bottle (Titebond-style PVA glue is typically clamped 30-60 minutes but wants a full 24 hours before it takes real stress) before adding nails or screws, which are there for extra insurance, not to substitute for glue that hasn’t cured.
Finishing Touches
A simple wooden box earns its keep in the finishing stage as much as the building stage — the same joinery looks amateur with a rushed finish and genuinely handmade with a careful one.
Sanding And Smoothing
Work through the grits in order rather than skipping ahead — 120-grit to remove mill marks and glue squeeze-out, then 180, then 220 for a finish-ready surface. Jumping straight from 120 to 220 leaves deeper scratches underneath that the final grit can’t fully erase, and they’ll show up the moment stain hits the wood and highlights every low spot. Always sand parallel to the grain on the final pass; cross-grain scratches are nearly invisible on bare wood but turn into obvious streaks once stain settles into them.
Staining And Sealing
Test your stain on an actual offcut of the same wood and same grit sanding you used on the box — pine in particular blotches unevenly without a pre-stain conditioner, so what a stain does on an oak sample tells you nothing about how it’ll look on pine. Apply with a rag or foam brush, wipe off the excess after 5-15 minutes (longer contact time means darker color), and let it dry fully, typically 24 hours, before sealing. A wipe-on polyurethane or oil finish protects the stain and deepens the color slightly; two to three thin coats, lightly sanded with 320-grit between coats, beats one thick coat that can stay tacky or show brush marks.
Decorative Elements
Decoration is where a plain storage box turns into something worth displaying, and most of the options below add an hour or two of work, not a new skill set.
Carving And Etching
A V-gouge and a shallow relief pattern — a single leaf, a simple geometric border along the lid edge — is achievable on a first try if you practice the exact cut on scrap of the same species first, since carving behavior varies a lot between, say, soft pine and dense cherry. A wood-burning tool (a basic model runs $20-$30) is a lower-skill alternative for adding initials, a date, or a line-art design, since it’s closer to drawing than to cutting. Either way, keep the design shallow on box lids under 1/2 inch thick — carving too deep risks cutting through and weakening the panel.
Adding Hardware
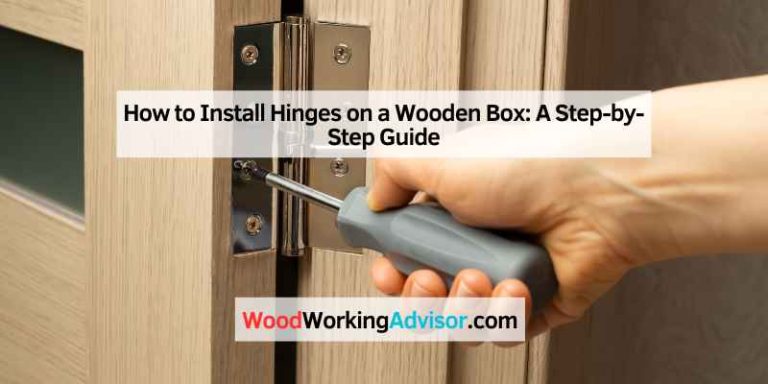
Small brass butt hinges (roughly 1-1.5 inches for a box this size) are mortised into the back edge so the lid sits flush when closed rather than proud on a surface-mounted hinge. Pre-drill every screw hole for hardware with a bit slightly smaller than the screw shank — box lids and sides are thin enough that driving a screw without pre-drilling regularly splits the wood, especially near an edge or a joint. A simple ball or bar latch on the front, or nothing at all beyond friction and gravity, is plenty for a keepsake box; save a hasp-and-lock hardware set for a box meant to actually secure something.
Functional Uses
Beyond generic “storage,” a box this size (roughly 10x6x4 inches) fits a specific set of jobs well: a desktop catch-all for pens, a charging cable, and loose change; a jewelry or watch box if you add a soft satin lining; a tool box for a single specialty (chisels, small hand planes) where a drawer would be overkill. The size that makes it easy to build is also what limits it — anything meant to store more than a few days’ worth of stuff usually needs a second, larger box rather than stacking more into the same one.
As a gift, the box’s value is mostly in the fact that it’s obviously handmade and sized to whatever’s going inside it. A box built to the exact dimensions of a set of coasters, a deck of cards, or a bundle of letters reads as deliberate in a way a generic storage container never does — that’s really the whole case for building one instead of buying a box off a shelf.
Caring For Wooden Boxes
Dust with a dry or barely-damp soft cloth; standing water or a genuinely wet cloth can raise the wood grain and cloud a film finish over time, especially on a box that only has one or two coats of finish protecting it. For a stain or spill, wipe it up immediately and dry the spot fully rather than letting it soak in and sit — the finish is a barrier, not a guarantee, and prolonged moisture will eventually get past it. A drop of mild dish soap on a damp cloth handles most grime that plain water won’t, as long as you dry the surface right after.
Keep boxes away from radiators, heating vents, and direct sun. Wood expands and contracts with humidity and heat, and a box built with tight joints can develop small cracks at the corners if it sits near a heat source for months at a time; direct sunlight also fades stain unevenly, which is more visible on a small object like a box than it would be on a large piece of furniture. An occasional coat of paste wax, buffed out after it hazes, refreshes the sheen and adds a thin extra layer of moisture resistance.
Inspiration From Master Craftsmen
Studio furniture makers George Nakashima and Sam Maloof built their reputations on large-scale furniture, but both made small boxes throughout their careers, and the same design principle shows up at either scale in their work: let the wood’s own grain and figure be the ornament, rather than adding decoration on top of it. Nakashima in particular was known for leaving a live, natural edge on a slab rather than squaring it off — a technique that translates directly to a small box lid cut from an interesting piece of figured wood.
The joinery detail that shows up most in fine box work is the through-dovetail, cut by hand with a dovetail saw and chisel rather than a router jig, because the slight hand-cut irregularity is part of what signals a piece is genuinely handmade rather than machine-made. It’s a slower, higher-skill technique than a glued butt joint, but it’s also mechanically the strongest corner joint for solid wood, since the interlocking pins and tails resist being pulled apart along the grain in a way a glue joint alone can’t match.
Frequently Asked Questions
What Is A Simple Wooden Box Used For?
A simple wooden box can be used for storage, organization, or as a decorative piece. It is versatile and can serve many purposes around the home or office.
How Do You Make A Wooden Box?
To make a wooden box, you need wood, nails, and a hammer. Measure and cut the wood, then assemble by nailing pieces together. Finish by sanding and painting or staining.
What Type Of Wood Is Best For Boxes?
Pine, oak, and cedar are great choices for making wooden boxes. These types of wood are durable, easy to work with, and provide a nice finish.
Can You Paint A Wooden Box?
Yes, you can paint a wooden box. Use sandpaper to smooth the surface, then apply primer. Once dry, paint with your desired color. Finish with a clear sealant.
Conclusion
A simple wooden box brings charm and functionality to any space. It’s versatile, sturdy, and easy to create. Perfect for storage, decor, or a thoughtful gift. Crafting one is a rewarding experience. You can personalize it to match your style.
Enjoy the beauty and usefulness of a handmade wooden box. Try making one today and see how it enhances your home.
Sponsored / affiliate links. As an Amazon Associate I earn from qualifying purchases. I may earn additional commission from eligible campaigns.