Laser Guide for Miter Saws: Red vs Green (Which to Buy)
A laser guide projects a line onto your workpiece showing exactly where the blade will cut — but only a green laser (532nm) stays visible in a bright shop or outdoors, since standard red lasers (650nm) wash out in daylight. Skip that distinction and you’ll buy a laser you can barely see on sunny days. This guide covers red vs green, installation, calibration, and safe use.
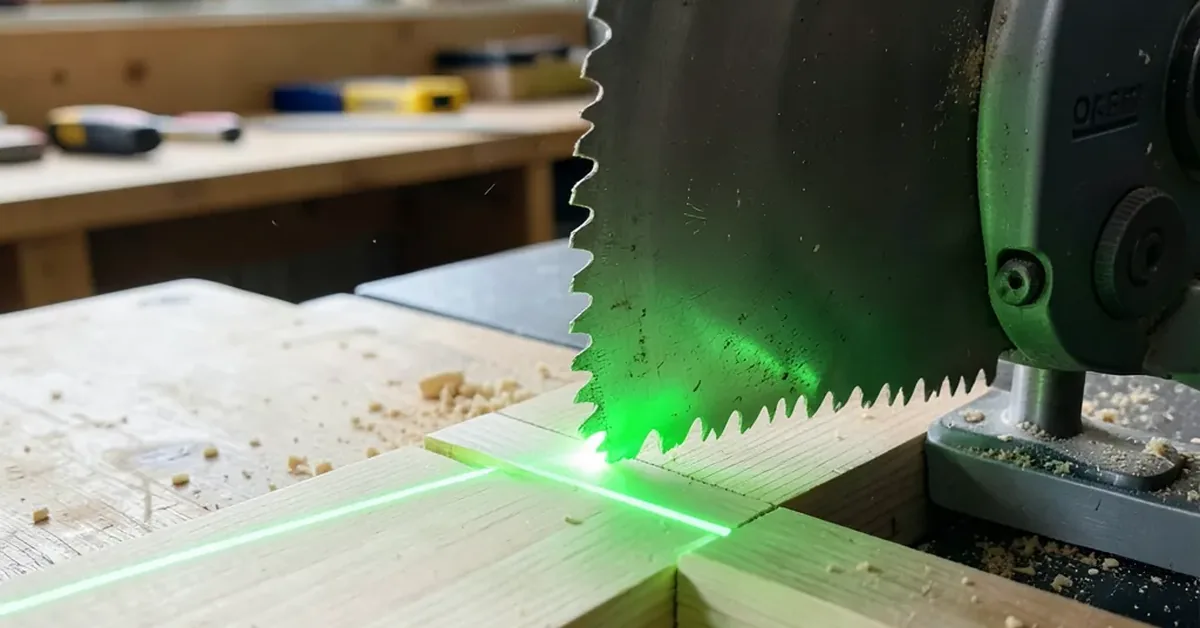
What a Laser Actually Does on a Miter Saw
Best Laser Guide Pick
 |
Oshlun LG-M02 Green Laser Guide for Miter Saws – $47.50 A green laser line stays visible in the bright or mixed lighting most home shops actually have — the exact upgrade this guide’s red-vs-green comparison points to.
|
A laser guide is an alignment aid, not a cutting tool — it projects a thin line onto the workpiece that marks where the blade’s teeth will actually pass through the wood. Instead of eyeballing a pencil mark against the blade, you line the projected line up with your mark and cut. This matters most on angled or compound cuts, where sighting a straight visual reference is harder than it looks.
📊 Green laser guides (532nm) are 4-6x brighter to the human eye than standard red laser guides (650nm), per the ANSI Z136.1-2022 laser safety standard — most aftermarket units are Class II, under 5mW.
Nearly any miter saw can accept an aftermarket laser guide, whether or not it shipped with one built in — most attach to the blade guard or arbor with a bracket and a couple of screws.
Red vs Green Laser: Which Should You Buy?
| Laser Type | Wavelength | Best Environment | Typical Price |
|---|---|---|---|
| Red | 650nm | Dim to normal indoor shop lighting | $15-$25 |
| Green | 532nm | Bright shops, near windows, outdoor use | $35-$50 |
Red is the more common factory option and costs less to add aftermarket, and it works fine in a garage or basement shop with normal lighting. Green costs more but stays legible in exactly the conditions that make red lasers useless — direct sunlight, an open garage door, or bright fluorescent shop lighting.
Installing a Laser Guide on Your Miter Saw
- Unplug the saw first: Never work near the blade guard with the saw powered on.
- Find the mounting point: Most aftermarket kits clamp to the blade guard or bolt near the arbor — check the kit’s instructions for your saw’s guard shape.
- Attach the laser module: Secure it with the included screws or clamp, keeping the lens unobstructed by the guard or dust port.
- Do a test cut on scrap: Make a cut and compare the actual kerf position to where the laser line pointed.
- Adjust and lock down: Most modules have a small adjustment screw to nudge the line left or right until it matches the actual blade path, then lock it in place.

The YouTube channel Redneck Tech demonstrates adding a laser to a miter saw in a few minutes using a simple clamp-on module and a test cut to dial in alignment — the same test-cut-then-adjust approach covered above, rather than trusting factory calibration out of the box.
Calibrating and Maintaining Your Laser
Recheck calibration periodically, not just at install — vibration from normal use can shift a clamp-on module over time. Use a straightedge or a test cut on scrap to confirm the line still matches the blade path, and wipe the lens with a soft, dry cloth if the line looks dim or fuzzy; dust buildup on the lens is the most common cause of a weak-looking laser line.
Laser Safety on a Miter Saw
Most aftermarket miter saw laser guides are Class II lasers (under 5mW), which are considered low-risk for brief incidental exposure but still shouldn’t be pointed directly at anyone’s eyes. Never stare into the beam, keep the laser off when the saw isn’t in active use, and treat it as a visual reference only — not a substitute for standard blade-guard and hand-placement safety practices.
Frequently Asked Questions
What is a laser for miter saws?
A laser for miter saws is an alignment tool that projects a line onto the workpiece showing exactly where the blade will cut. It’s a visual reference only and doesn’t affect the saw’s cutting mechanism.
How does a laser improve cutting accuracy?
A laser line lets you align your cut mark to the actual blade path before you start cutting, rather than sighting the blade against a pencil mark by eye. This matters most on angled and compound cuts, where visual alignment is harder to judge accurately.
Can I install a laser on any miter saw?
Most miter saws can accept an aftermarket laser guide, whether or not one came built in, since most kits mount to the blade guard with a clamp or small bracket. Check that the kit’s clamp size matches your saw’s guard before buying.
Is a green laser worth the extra cost over red?
If your shop has bright lighting, skylights, or an open garage door, yes — green (532nm) stays visible in conditions where red (650nm) washes out. In a dim or normally-lit indoor shop, a cheaper red laser guide works just as well.
Conclusion
A laser guide is a cheap, genuinely useful upgrade for miter saw accuracy — the real decision is red vs green based on your shop’s lighting, not whether to add one at all. Install it, test-cut to calibrate the alignment, and recheck that calibration periodically since vibration shifts clamp-on modules over time.
Sponsored / affiliate links. As an Amazon Associate I earn from qualifying purchases. I may earn additional commission from eligible campaigns.