Compound Miter Saw Calculator
A compound miter saw calculator converts a wall angle, corner type, or polygon count into the miter and bevel settings you need. For a true inside corner, start from 90° and divide the measured corner angle by 2. Wrong inputs waste stock and leave gaps. This guide shows what measurements to enter, how to read the output, and how to correct compound cuts for crown moulding and polygon work.
How is this calculated?
Press Calculate to see the math with your numbers.
What a compound miter saw calculator does


A compound miter saw uses two angle settings: miter and bevel. The bevel angle is the blade tilt from vertical, and the miter angle is the horizontal setting on the saw table. That second setting turns the stock left or right for the cut.
Some saws are single-bevel, so the blade tilts one way only. Others are double-bevel, so you can tilt left and right without flipping the workpiece. A common maximum bevel on saws is 45°, which matters when the calculator calls for a steep tilt on crown or splayed work.
Miter angle versus bevel angle
The miter angle controls rotation in the horizontal plane. The bevel angle controls blade tilt from vertical. If you mix them up, the joint can look close on the saw and still open at the face or the top edge after assembly.
Some saws label the miter scale with a perpendicular cut at 90°; others mark zero differently. Read the saw’s scale before setting the stop. The calculator output only helps if you translate its numbers to the same reference system on the saw.
Single-bevel and double-bevel saws
A single-bevel saw usually means you flip the board for the opposite side of a paired cut. A double-bevel saw cuts that handling because you can tilt the blade both directions. That can save time, but it does not remove the need to label the left and right pieces correctly.
For repeated work, double-bevel saws cut setup changes. For one-off cuts, a single-bevel saw still works if you keep the part orientation consistent and check the first cut on scrap.
Which projects need both settings?
Flat frames usually need miter only. Splayed boxes and many crown setups need both miter and bevel because the face of the work is not square to the blade. If the workpiece is vertical-sided and the blade stays vertical, the bevel stays at 0°.
The calculator pages commonly support polygon boxes, flat picture frames, and crown moulding. Those are the common cases where the output must be translated into a saw setup rather than used as a one-step answer.
What measurements do you need first?
You need the project type, the number of sides if it is a polygon, the splay angle for slanted sides, the wall corner angle for crown, the spring angle for crown, and whether the joint is inside or outside. Those inputs decide whether the calculator returns miter only or a compound cut.
Number of sides
For an N-sided box or frame, the number of sides tells the calculator the corner division. The page also includes calculators for an N-sided box and a rectangular frustum, so the project shape matters before any saw setting does.
A square frame uses four sides. A hexagon has six sides. An octagon uses eight. The calculator does the angle split from that count, but the cut still needs correct piece orientation and saw setup. (Wikipedia)
Splay angle, wall corner angle, and spring angle
A splay angle describes how much a box side leans away from vertical. A wall corner angle tells the calculator the corner being wrapped by crown moulding. A spring angle tells it how the moulding sits on the wall and ceiling during the flat-on-table method.
For crown, the flat-on-table cutting method is common. The DIY page says a 38° spring-angle crown uses flat-on-table cutting. That means the calculator is not only about a corner; it must also account for how the moulding sits during the cut.
Inside corner or outside corner
Inside and outside corners are not interchangeable. An inside corner uses the interior angle of the corner you are fitting. An outside corner uses the exterior corner. The wrong choice often shows up as a face gap on one side and an overlong point on the other.
Say your corner measures 90° and you are fitting crown into an inside corner. The calculator output should reflect that corner type, not an outside wrap. If the wrong corner type is entered, the saw settings can look plausible while the joint still opens.
How do you read the calculator output?
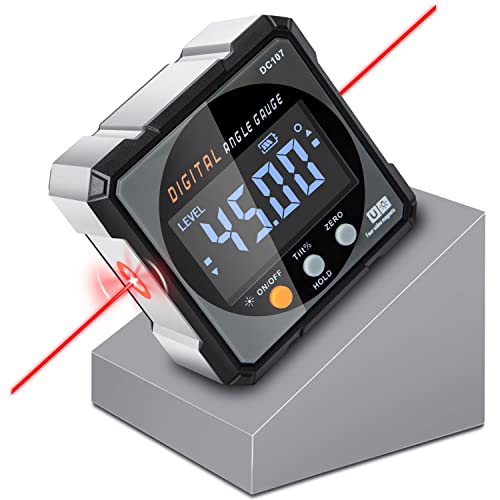
Read the output as a setup command, not as a finished joint. The calculator gives a miter angle, a bevel angle, or both, plus a joint type. You still need to map those values to the saw scale, label the two mating pieces, and confirm the first cut on scrap.
Miter scale conventions from 0° or 90°
Some saws display 0° for a square crosscut. Others show 90° for that same perpendicular cut. That convention changes how you read the miter scale, even when the actual cut is the same. Always confirm which number on your saw means square.
A calculator may state only the angle to cut, while the saw scale may count in the opposite direction. If the saw reads from 90° and you set it as if it reads from 0°, the part will be mirrored and the joint will not close correctly.
Left-hand and right-hand cut direction
Compound joints need clear left and right labels because the two pieces are often mirror images. Mark the face side, the cut direction, and the mating corner before moving the stock to the saw. That is especially important on double-bevel saws, where the blade can tilt either way.
- Mark the show face of both pieces.
- Label the left-hand and right-hand members.
- Mark the inside or outside corner on each end.
- Set the miter angle first, then the bevel.
- Make the first cut on scrap before cutting the part.
Inside dihedral angle and joint type
Compound joint geometry depends on the inside dihedral angle, which is the angle formed by the two faces meeting at the corner. The calculator uses that geometry to decide how the mitered or butted joint should be cut. A mitered joint splits the corner between the two pieces.
A butted joint keeps one piece square to the other and can reduce the need for paired miter cuts. If the joint type changes, the output changes too, even when the visible corner looks similar.
Flat frames and polygon cuts
Flat frames and other vertical-sided polygon work often need miter only. The blade stays vertical, and the calculator output mainly tells you the table rotation. For many square, hexagon, and octagon projects, that is the simplest setup path.
When miter-only cuts are enough
For flat frames, the blade stays vertical and no bevel is needed. That makes the cut easier to set and easier to check. The woodworking page notes that 4-sided flat frames use 45° miter, which is the common square-frame setup.
A 4-sided flat frame is the simplest preset. The calculator can also return common presets for hexagons and octagons, but the same rule still applies: if the sides stand vertical, the bevel stays at zero.
Vertical blade setup for flat-sided work
Set the blade vertical first, then dial the miter. Do not tilt the blade unless the project actually calls for a compound cut. If the cut face looks square but the joint still gaps, the issue is often direction, not bevel.
Picture an octagon picture frame cut from 3/4-inch stock. The calculator gives a miter setting, and the blade remains vertical. If you add bevel by mistake, the faces may no longer meet cleanly on the show side.
Splayed boxes and compound joints
Splayed polygon boxes need both settings because the side leans away from vertical. As the splay angle changes, the bevel changes with it. The miter angle still handles the corner split, but the bevel handles the lean.
How splay angle changes bevel
The more the side is splayed, the more the blade tilt usually matters. That is why calculator output for a slanted-sided box is different from a flat frame. The calculator is translating the side geometry into a blade tilt plus a table rotation.
Suppose a box has slanted sides and the calculator returns both numbers. Set the miter first, then the bevel. A wrong bevel often shows up as a gap at the top edge on one piece and a gap at the bottom edge on the mate.
Mitered versus butted corners
In a mitered corner, both parts are cut so the seam lands at the corner line. In a butted corner, one piece meets the face of the other. The calculator output can change depending on that choice because the joint geometry changes.
Use the joint type the project actually calls for. A butted corner may hide small errors better, but it will not solve a wrong splay angle or a wrong miter convention.
Crown moulding settings
Crown moulding adds two extra inputs that many simple angle pages skip: wall corner angle and spring angle. For common shop use, the calculator must turn those into a saw setup that matches the flat-on-table method. That is the easiest way to avoid a mirrored cut.
Flat-on-table cutting method
With flat-on-table cutting, the moulding lies flat during the cut instead of being held at the installed angle. That is why the spring angle matters. The DIY page says a 38° spring-angle crown uses flat-on-table cutting, so the calculator has to account for the moulding’s position on the saw.
Inside-corner crown cuts are a common source of confusion because the wall corner angle, spring angle, and left-right cut direction all interact. If one of those inputs is wrong, the cope or miter can open at the face even when the numbers look close.
Common inside-corner setup errors
A frequent mistake is swapping the left and right piece labels. Another is reading the saw scale from the wrong reference point. A third is forgetting that crown in flat position is not the same as a flat frame, even if the face angle seems similar.
A common first-timer mistake is entering the wall corner angle but skipping the spring angle. The result can look nearly correct on paper and still leave a visible gap when the moulding meets the wall and ceiling lines.
Compound miter troubleshooting matrix
The matrix below turns common project types into a setup check. Use it when the calculator output seems right but the joint is still open. It is meant for correction, not as a replacement for a test cut.
| Project type | Required inputs | Expected miter/bevel behavior | Common setup mistake | Visible failure symptom | Exact correction step |
|---|---|---|---|---|---|
| Flat picture frame | Number of sides; corner type if not square | Miter only; blade vertical | Adding bevel to a vertical-sided frame | Face gap on the show side | Reset bevel to 0°, confirm the miter scale reference, and recut a scrap pair |
| Square frame | 4 sides; inside or outside corner type | 45° miter on a flat frame setup | Reading the saw scale from the wrong zero point | Two parts meet at the wrong angle | Recheck whether the saw marks 90° as square, then reset to the true 45° reference |
| Hexagon box | 6 sides; face orientation | Miter only if sides are vertical | Mixing left and right parts | One corner closes, the mate opens | Mark left and right before cutting; flip only the part the calculator expects |
| Splayed polygon box | Number of sides; splay angle; inside or outside corner | Both miter and bevel change with the splay | Using the flat-frame preset for a slanted side | Gap at the top on one piece, bottom on the other | Enter the splay angle again, set both angles, and test-cut a mirrored pair |
| Crown moulding, flat-on-table | Wall corner angle; spring angle; inside or outside corner | Both settings depend on wall angle and spring angle | Leaving the moulding in the wrong orientation on the table | Face gap at the corner or a mismatch at the ceiling line | Reorient the moulding flat on the table, then recut with the correct left/right label |
| Rectangular frustum | Top and bottom sizes; side splay; corner type | Compound cut with both settings | Treating it like a simple box | Corner looks square on the saw but opens during assembly | Use the frustum mode, then verify the first corner with a half-degree scrap loop |
Half-degree test-cut loop
Make the first cut on scrap, not on the final part. Label the test pieces left and right, dry-fit the joint, and note where the gap appears. If the face is open, adjust by about half a degree in the direction that closes the show edge first.
If the gap moves from the face to the top or bottom after the first correction, stop and recheck the orientation before making another change. Small half-degree steps are easier to track than a large reset, and they reduce waste.
Frequently asked questions
What is a compound miter saw?
A compound miter saw is a saw that can set both a miter angle and a bevel angle. That lets you make cuts that turn the workpiece left or right while also tilting the blade from vertical. Single-bevel saws tilt one way; double-bevel saws tilt both ways.
What is the difference between miter angle and bevel angle?
The miter angle is the horizontal angle on the saw table. The bevel angle is the blade tilt from vertical. If the numbers are swapped, the cut can look correct on the saw and still produce an open joint, especially on crown and splayed box work.
How do you calculate compound miter saw angles?
Use the project geometry: number of sides for polygon work, splay angle for slanted sides, and wall corner angle plus spring angle for crown. A calculator turns those inputs into miter and bevel settings. Then translate the output to the saw’s scale and verify with scrap.
How do I calculate crown molding compound cuts?
Enter the wall corner angle, spring angle, and whether the joint is inside or outside. The calculator then gives the saw settings for the flat-on-table method. Because saw scales vary, confirm the miter reference and label left and right pieces before cutting the final length.
Why is my compound miter joint opening at the face?
A face gap usually means the miter and bevel are not matching the actual geometry, or the left-right orientation is reversed. It can also happen when the saw scale was read from the wrong reference. Make a scrap test, then adjust in half-degree steps.
What measurements do I need before using a compound miter angle calculator?
Have the number of sides, the splay angle if the sides lean, the wall corner angle for crown, the spring angle for crown, and the inside or outside corner type. Those inputs determine whether you need only miter or both miter and bevel, and they control the cut direction.
Sponsored / affiliate links. As an Amazon Associate I earn from qualifying purchases. I may earn additional commission from eligible campaigns.