Matte vs Satin Wood Finish: Exploring Key Differences
Choosing a wood finish can be tricky, especially when you’re starting a project. The options can seem overwhelming, and figuring out the differences between Matte vs Satin Wood Finish: Key Differences is a common challenge for many. Don’t worry, though! We’ll explore these finishes in a simple, step-by-step way. Get ready to discover the secrets to selecting the perfect finish for your wood projects.
What Sets Matte and Satin Finishes Apart?
This section explores the core differences between matte and satin finishes. We’ll explore how they look, feel, and the levels of protection they offer. We’ll also explore how these differences affect the visual appearance of your wood surfaces. Learning these basics helps you select the suitable finish for the job. Ultimately, you’ll be able to make informed choices based on your project’s specific needs and aesthetic preferences.
Visual Appearance and Light Reflection
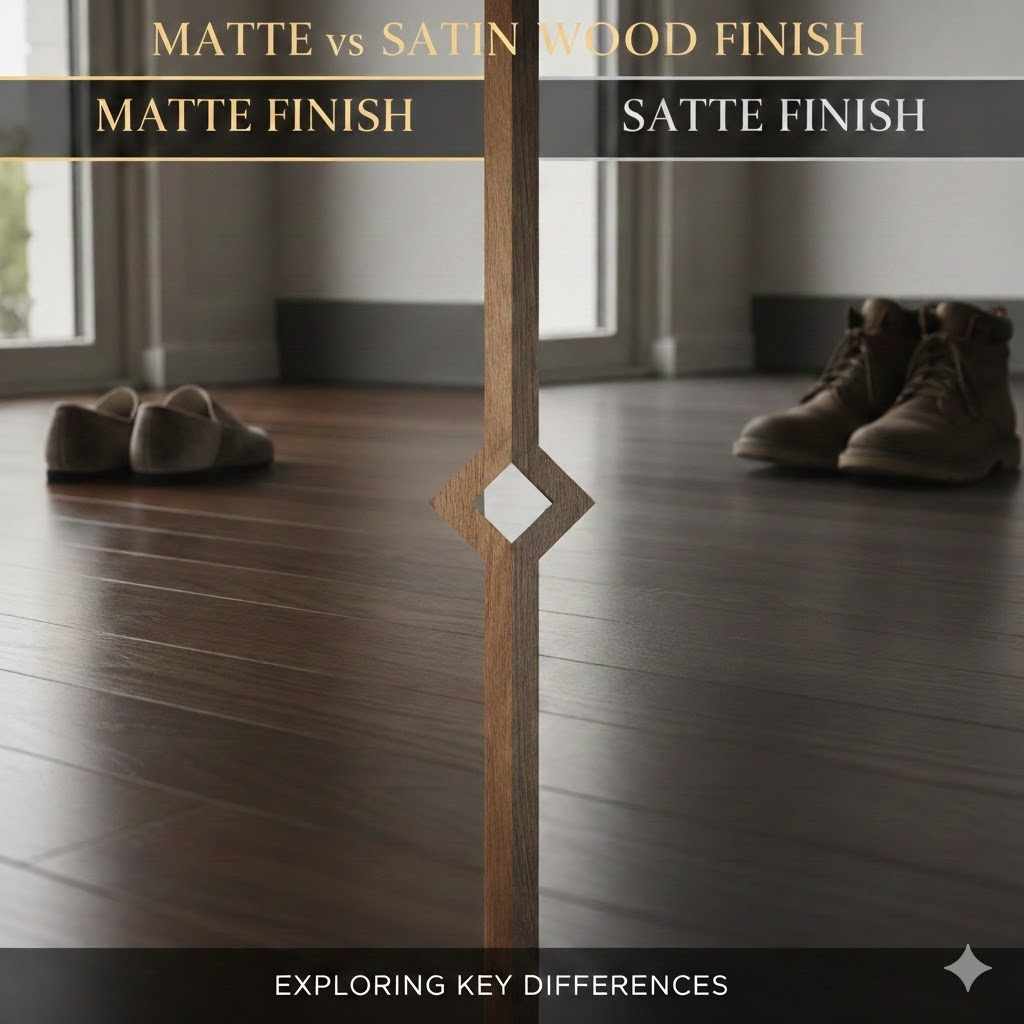
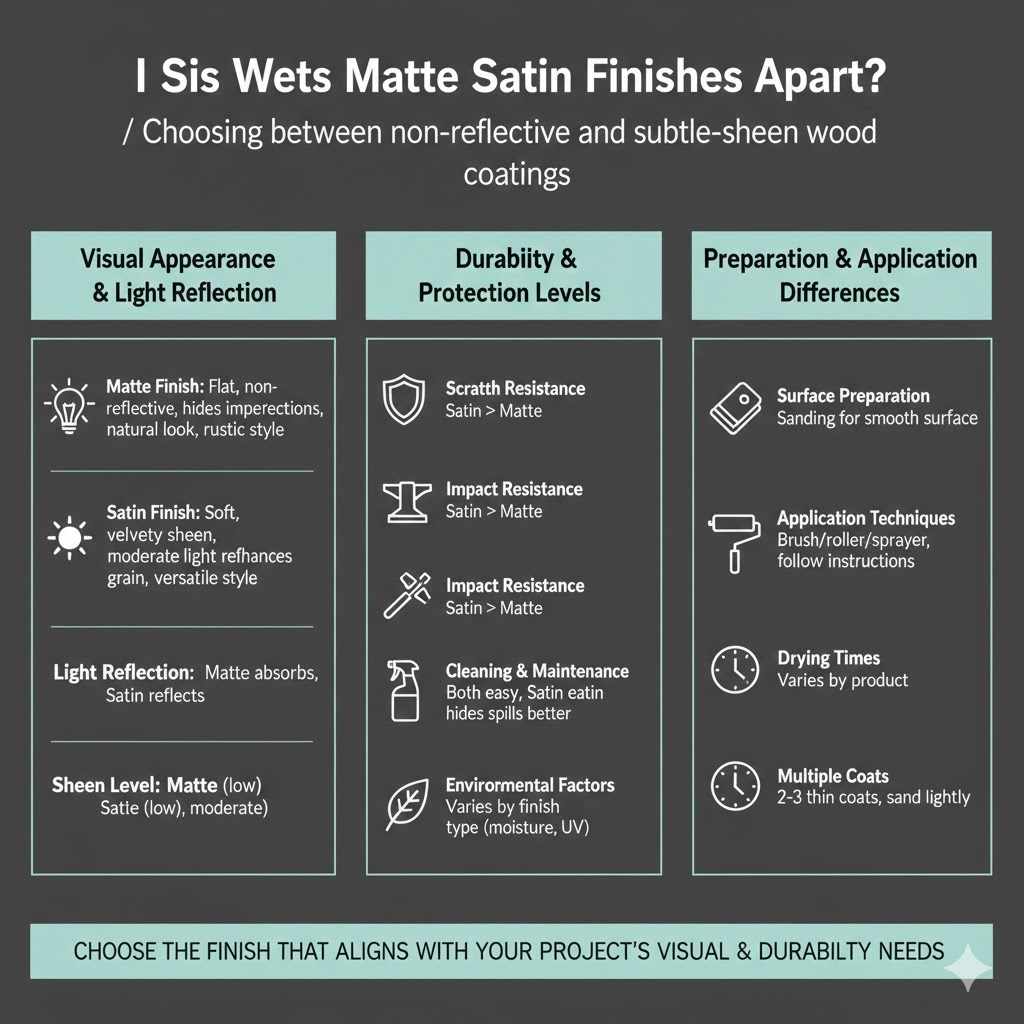
The primary difference between a matte and a satin finish is how they reflect light. This difference significantly impacts the overall appearance of the wood. Matte finishes, also known as flat finishes, absorb light, creating a non-reflective surface. This look is often preferred for a natural or understated look. Satin finishes, on the other hand, have a slight sheen, reflecting more light and giving the wood a subtle glow. This provides a more vibrant and polished appearance.
- Matte Finish: A matte finish appears flat, with minimal light reflection. This finish hides imperfections and gives the wood a natural look. It is often preferred for a casual or rustic style.
- Satin Finish: A satin finish has a soft, velvety sheen. It reflects a moderate amount of light, enhancing the wood’s grain and color. This is a versatile option suitable for various styles, from classic to contemporary.
- Light Reflection: The degree of light reflection directly impacts the visual character. More reflection emphasizes the wood grain and creates depth. Less reflection provides a uniform, even surface, making it excellent at masking imperfections.
- Sheen Level: Sheen is the term for the glossiness of a finish. It describes how much light is reflected. Matte finishes have the lowest sheen, while satin finishes have a moderate level. Choosing the sheen level depends on the desired look and the wood’s intended use.
Durability and Protection Levels
Besides appearance, durability is crucial when choosing a wood finish. Both matte and satin finishes provide protection against everyday wear and tear, but their levels of protection can vary. A satin finish typically offers slightly better scratch and impact resistance because its surface is more hardened. The choice should also depend on the wood’s exposure to elements.
- Scratch Resistance: Satin finishes generally offer better scratch resistance than matte finishes. This is because the reflective surface is slightly harder.
- Impact Resistance: Similar to scratch resistance, satin finishes tend to withstand impacts better. This added protection is great for high-traffic areas.
- Cleaning and Maintenance: Both finishes are easy to clean with a damp cloth, but spills might show up more on matte finishes. Satin finishes often make it easier to clean.
- Environmental Factors: The protection offered also depends on the type of finish. For example, some finishes are better at resisting moisture and UV damage than others.
Preparation and Application Differences
Proper preparation is key to a good finish, and this applies to both matte and satin options. The surface must be clean and smooth. The application process will vary slightly. Understanding these differences helps to ensure a smooth, even finish that looks good. Proper techniques will contribute to the durability and overall look of the finished product.
- Surface Preparation: The wood must be sanded to remove imperfections. The smoothness of the surface affects the final result.
- Application Techniques: Both finishes can be applied by brush, roller, or sprayer. The choice depends on the project’s size and complexity. Following the manufacturer’s instructions is essential.
- Drying Times: Drying times vary depending on the product and environmental conditions. It is important to wait the recommended amount of time.
- Multiple Coats: Applying multiple thin coats will offer better protection and a more uniform look. Sand lightly between coats to ensure a smooth finish.
The Role of Sheen in Your Wood Finish Choice
Sheen is the most significant visual characteristic of a wood finish. Understanding how sheen impacts the appearance helps in the decision-making process. The level of sheen will influence both the aesthetic of the wood and how well it hides imperfections. This section explores different sheen levels and their effects on various wood types, and explains how to select the right sheen for different projects.
Understanding Different Sheen Levels
Sheen levels range from flat (or matte) to high-gloss. Each level has a specific light-reflecting property. Choosing the right sheen comes down to personal taste and the desired end result. The following breakdown will help clarify the terminology used to describe the different sheen levels.
- Matte Finish (0-10% Sheen): Offers a very flat, non-reflective surface. This look is often preferred when a natural or rustic appearance is the goal.
- Satin Finish (20-35% Sheen): Gives a soft, velvety glow. It enhances the wood grain without being too shiny. This sheen level is the most common.
- Semi-Gloss Finish (35-70% Sheen): Has a moderate shine and is more durable. Ideal for surfaces that require more cleaning.
- Gloss Finish (70-90% Sheen): Reflects a lot of light, highlighting the wood’s details. It provides maximum protection.
- High-Gloss Finish (90%+ Sheen): Offers the highest shine and is often used on furniture pieces for a striking appearance.
Sheen and Wood Type Compatibility
The type of wood also affects how the finish looks. The grain and texture of different wood species can look different when paired with different sheen levels. Light-colored woods like maple often look great with satin or semi-gloss finishes. Darker woods, such as walnut, may showcase their beauty with any sheen level. Selecting the right combination will provide the desired look.
- Softwoods: Softwoods, such as pine, often benefit from satin or semi-gloss finishes. These finishes add durability and enhance the grain.
- Hardwoods: Hardwoods, like oak and cherry, are versatile and suit various sheen levels. The choice depends on the desired aesthetic.
- Grain Patterns: Finishes with more sheen highlight grain patterns, while flat finishes can minimize their appearance. Consider the grain pattern when selecting the finish.
- Color and Stain: The stain color and wood color can also influence the choice. Light stains often look better with a satin or semi-gloss sheen.
Factors for Choosing the Right Sheen
Several factors will influence your final decision. Consider the room’s lighting, the style of your decor, and the wood’s intended use. Choosing a finish means evaluating all these aspects and making a choice that aligns with your project goals. Considering these points will help to ensure the final product looks great.
- Lighting Conditions: Room lighting significantly impacts how a finish appears. Natural light will show the finish differently than artificial light.
- Desired Aesthetic: The style of the decor impacts the choice. A modern design may suit a semi-gloss or gloss finish. A rustic design may be better suited for a matte finish.
- Wear and Tear: Consider how much the surface will be used. High-traffic areas might need a more durable finish like semi-gloss.
- Ease of Maintenance: Glossier finishes are easier to clean and maintain than matte finishes. However, they may highlight imperfections.
Making the Right Choice: Applying Matte vs Satin Finishes
Once you understand the basic differences, you can move forward with confidence. This section provides tips for application. Following these guidelines helps ensure a professional result. The quality of your results relies on proper application methods. This helps to extend the lifespan of your work.
Tools and Materials Required
Gathering the right tools and materials is the initial step for a successful project. This includes the appropriate finish, applicators, and safety equipment. Having everything ready saves time and ensures a smooth and effective application process. The specific needs will vary slightly, depending on the type of finish being used.
- Finishes: Either a matte or satin wood finish. It is important to select the correct finish type for the project.
- Applicators: Brushes, rollers, or sprayers. The choice depends on the finish and the surface area. High-quality applicators contribute to a better final look.
- Sandpaper: Different grits of sandpaper for sanding. Smooth surfaces are key to getting a professional-looking result.
- Safety Gear: Eye protection and a respirator. Safety is very important.
- Other Supplies: Tack cloths, stirring sticks, and drop cloths. These are essential for keeping the workspace clean.
Step-by-Step Application Guide
The application process is almost identical for both matte and satin finishes. Following each step correctly guarantees a beautiful, long-lasting finish. Taking your time, following each step, and paying close attention to detail are key to a good finish.
- Prepare the Surface: Sand the wood, removing any imperfections and dust. The surface should be smooth.
- Clean the Surface: Use a tack cloth to remove any remaining dust or debris. This ensures a clean surface for the finish to stick to.
- Apply the First Coat: Apply a thin, even coat of finish, using your selected applicator. Avoid drips and sags.
- Allow to Dry: Wait for the recommended drying time. The duration varies depending on the product and environmental conditions.
- Sand Lightly (Between Coats): Once the first coat is dry, sand lightly to remove any imperfections.
- Apply Additional Coats: Apply two or three more coats, allowing sufficient drying time between each. Multiple thin coats usually lead to a better result.
- Cure the Finish: Allow the finish to cure completely. Curing times will vary, and full curing is critical for hardness and durability.
Troubleshooting Common Issues
Even with careful preparation, some issues may arise during the finishing process. Knowing how to address these problems will help you correct them and achieve the desired outcome. These are the most common issues you’ll encounter and their fixes.
- Runs and Drips: These often happen when too much finish is applied at once. Apply thin, even coats to avoid these issues. If they happen, gently sand them down when dry.
- Brush Marks: Brush marks can happen when applying with a brush. Try using a high-quality brush and following the grain of the wood. Using a sprayer or roller might help.
- Dust Particles: Dust particles can stick to the finish, ruining the smooth surface. Work in a dust-free environment and use a tack cloth before applying each coat.
- Uneven Finish: This can result from inconsistent application. Ensure each coat is applied evenly across the surface.
Real-World Examples: When to Use Matte vs Satin
Real-life examples can better illustrate the differences between these finishes. This section looks at practical scenarios and how each finish performs in different situations. You will gain a solid sense of the practical uses of each type of finish. Learning these details enables you to choose the best finish for any project.
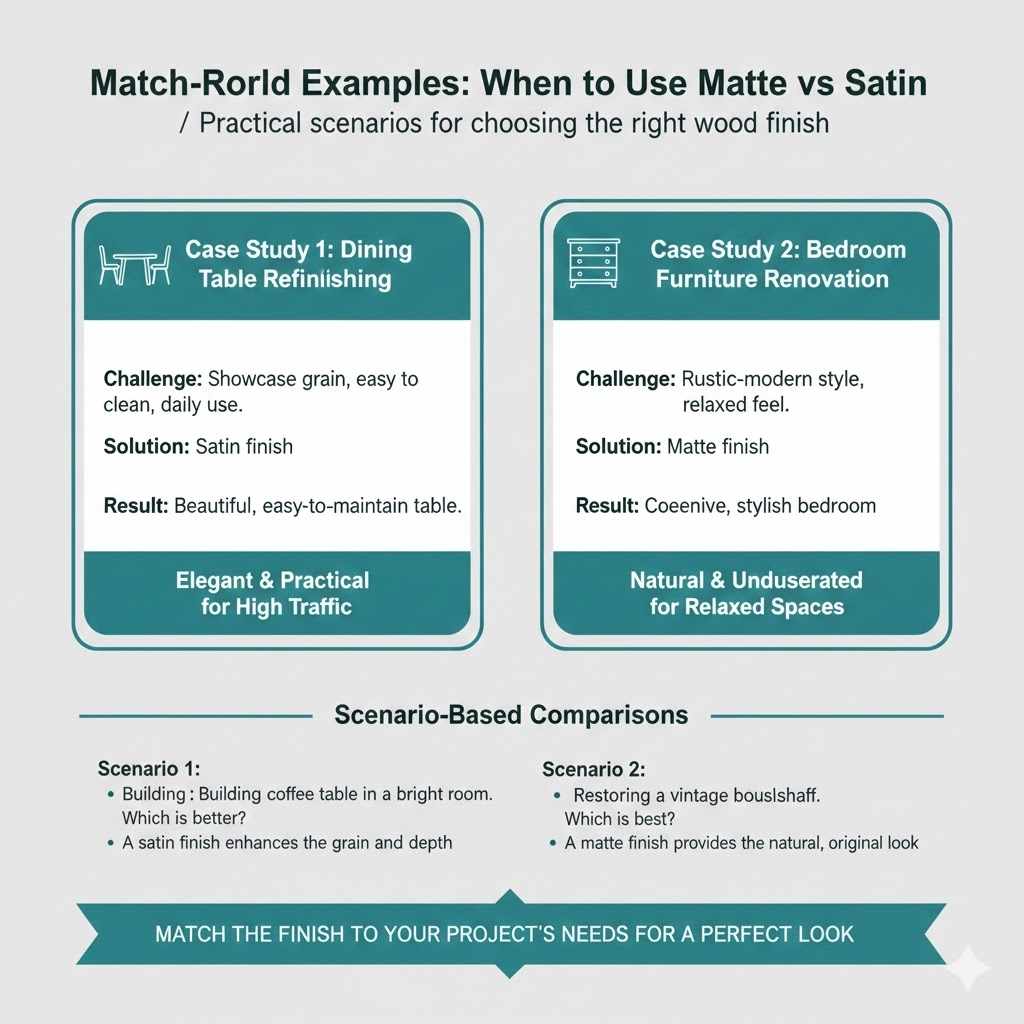
Case Study 1: Dining Table Refinishing
A family decided to refinish their old dining table. They were debating between matte and satin finishes. After weighing their choices, they selected satin. Satin provided a nice sheen, showing off the wood grain. The satin surface also proved easier to clean compared to a matte alternative, standing up better to spills. This was ideal since the table was regularly used for meals.
- Challenge: The family wanted a finish that showcased the table’s grain. The table had to be easy to clean because it was used daily.
- Solution: The choice of satin finish provided a balance between aesthetics and functionality.
- Result: The table now looks great and is easy to maintain.
Case Study 2: Bedroom Furniture Renovation
A homeowner was renovating their bedroom. The project included refinishing a dresser and nightstands. The bedroom style was a mix of rustic and modern. After much consideration, they chose a matte finish for the furniture. The matte look complemented the overall decor. This created a natural, relaxed, and understated appearance.
- Challenge: The homeowner wanted a finish that fit well with their bedroom decor. They needed a finish that provided a relaxed feel.
- Solution: A matte finish made a great choice. It minimized any glare and created a relaxed feel.
- Result: The bedroom now has a cohesive and stylish look.
Scenario-Based Comparisons
-
- Scenario 1: You are building a coffee table. The living room has lots of natural light. Which finish is better?
A satin finish would be the better choice because it enhances the wood grain and offers a pleasing visual depth.
-
- Scenario 2: You are restoring a vintage bookshelf. You want to make it look original and old. Which finish is best?
A matte finish is best since it gives a more natural and aged appearance, matching the vintage style.
Frequently Asked Questions
Question: Is a satin finish more durable than a matte finish?
Answer: Yes, satin finishes are generally more durable. The slightly higher sheen level means they tend to be more resistant to scratches and impacts.
Question: Can I apply a satin finish over a matte finish?
Answer: Yes, in many cases, you can apply a satin finish over a matte finish. Lightly sand the matte finish first to improve adhesion.
Question: How do I choose between a water-based or oil-based finish?
Answer: Water-based finishes dry faster and have less odor, while oil-based finishes offer more durability and enhance the wood’s color.
Question: What’s the best way to clean a surface with a satin finish?
Answer: Use a soft, damp cloth to wipe the surface. Avoid harsh chemicals or abrasive cleaners.
Question: Does the type of wood affect my choice of finish?
Answer: Yes, the wood type will affect your selection. For example, some woods may suit matte finishes, and other woods might look better with satin finishes.
Final Thoughts
Now, you have a better idea of Matte vs Satin Wood Finish: Key Differences. You’ve explored how they look and their protection levels. You’ve also learned about the application process and how to make the right choice based on your specific needs. Both finishes have unique qualities. Understanding these differences allows you to choose what will work best for your project. Consider the room’s lighting and the level of wear and tear the surface will experience. Take your time, prepare well, and enjoy the process of bringing your wood projects to life!