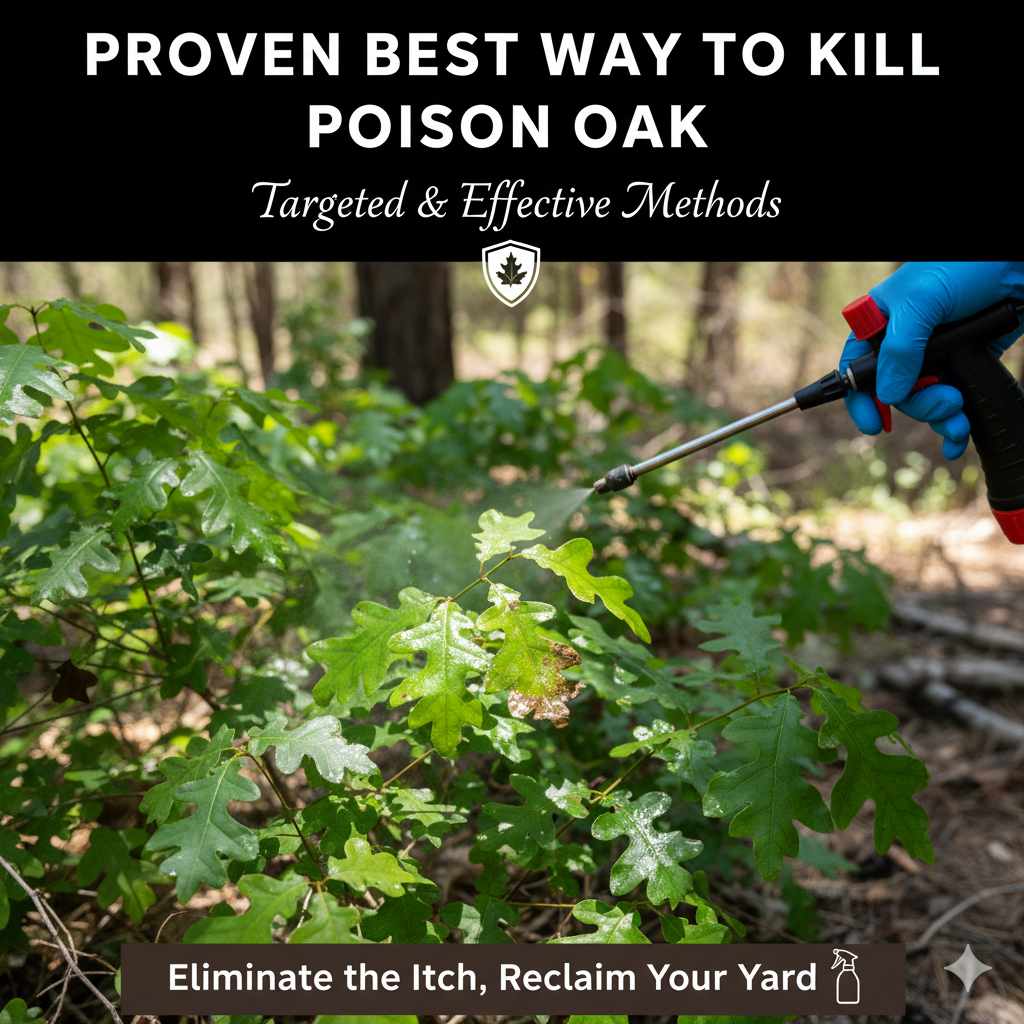
Proven Best Way to Kill Poison Oak Plants
The most effective way to kill poison oak plants involves a combination of mechanical removal and targeted herbicide application, focusing on repeat treatments during the plant’s active growth phase. Persistence is key.
Ah, poison oak. Just the name can make us a little itchy, right? That pesky vine or shrub seems to pop up everywhere, especially in those spots you want to clear for a new workbench, a garden bed, or just a safer path. Dealing with poison oak can feel like a losing battle, and the thought of that rash is enough to make anyone hesitate. But don’t worry! With the right know-how and a bit of patience, you can win the war against this irritating plant. This guide will walk you through the proven methods to effectively and safely eliminate poison oak from your property. We’ll break it down step-by-step, so you can tackle this project with confidence. Let’s get your yard back in shape!
Understanding Poison Oak: Why It’s So Stubborn
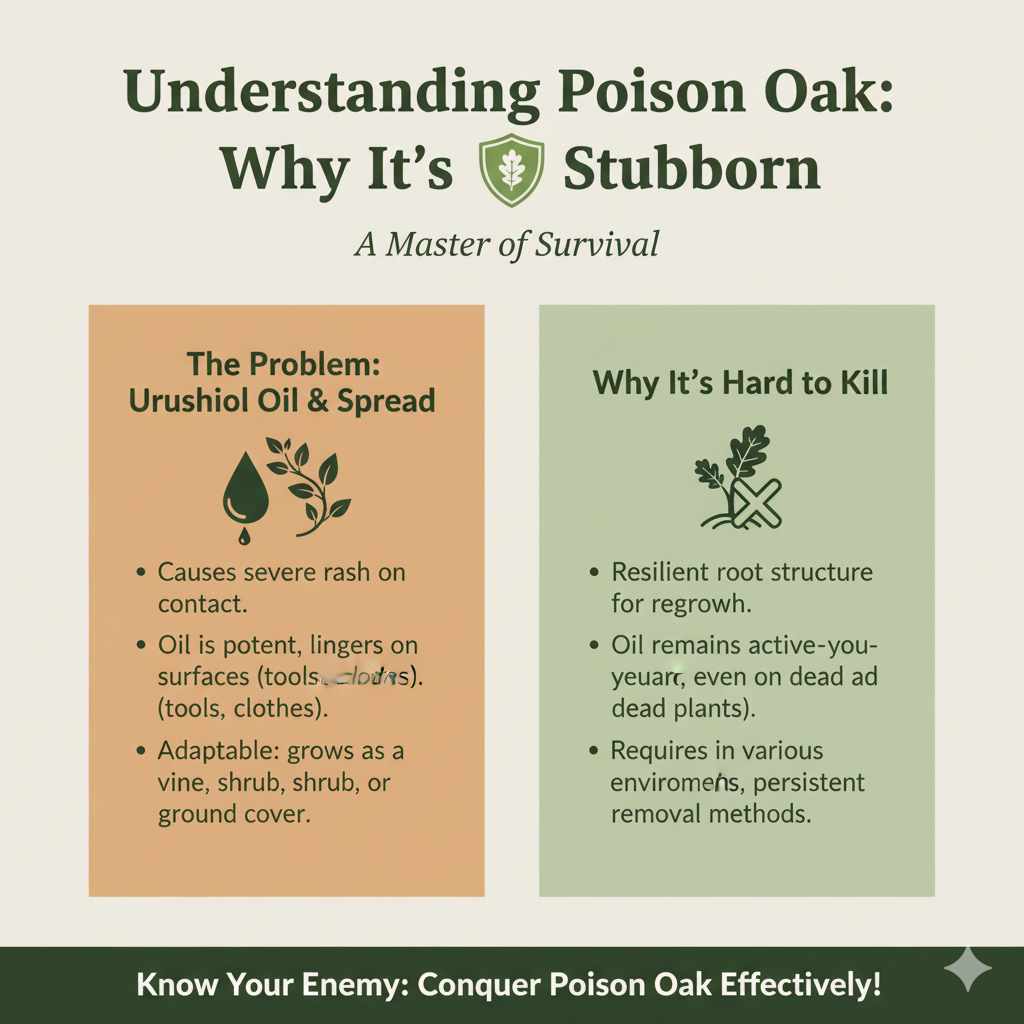
Before we dive into how to get rid of it, let’s quickly look at why poison oak is such a persistent problem. It’s a master of survival! These plants produce oils called urushiol, which is what causes that terrible rash. This oil is potent and can linger on tools, clothing, and skin for a long time. That’s why safety is our number one priority when dealing with it.
Poison oak spreads easily through its roots and by seeds. It likes to grow in sunny to partially shaded areas, often in woodlands, fields, and along fences or trails – places you might be tempted to clear for your next DIY project. Its ability to grow as a trailing vine, a shrub, or even climb trees makes it adaptable and hard to fully eradicate with just one method. Understanding this stubborn nature is the first step to conquering it effectively.
The Best Way to Kill Poison Oak Plants: A Two-Pronged Approach
The most successful strategy for eliminating poison oak involves a persistent, multi-step method. It’s not usually a one-and-done kind of job. We’re going to combine physical removal with chemical treatment for the best results. Think of it like building a sturdy cabinet – you need the right tools and techniques, and you need to be thorough. Here’s how we’ll tackle it:
Phase 1: Gear Up for Safety (Don’t Skip This!)
This is the most crucial part. Working with poison oak without proper protection is asking for trouble. Urushiol, the oil that causes the rash, is incredibly sneaky and can transfer easily. When you’re ready to work, make sure you have:
- Long sleeves and pants: Choose durable, tightly woven fabrics.
- Gloves: Heavy-duty, disposable nitrile gloves are best. Don’t use cloth gloves, as the oil can seep through.
- Closed-toe shoes or boots: Protect your feet and ankles.
- Eye protection: Safety glasses or goggles are a must, especially when cutting or pulling.
- A mask: If you’re cutting or burning (which we’ll discuss later with cautions), a mask is essential to avoid inhaling urushiol particles.
Remember, anything that touches the plant oil might become contaminated. It’s a good idea to have a separate, old set of clothes and shoes you designate for poison oak removal, and wash them separately from other laundry. You can find more detailed safety information from the Centers for Disease Control and Prevention (CDC), which offers excellent advice on preventing and treating reactions.
Phase 2: Mechanical Removal – The Initial Attack
This is where we get hands-on, but safely! The goal here is to remove as much of the plant as possible, especially the root system. The best time for this is when the soil is moist, making it easier to pull out the roots whole.
Option A: Digging and Pulling (Best for Smaller Plants and Shrubs)
If you’re dealing with smaller, shrub-like poison oak or individual vines, digging is effective.
- Loosen the Soil: Use a shovel or trowel to carefully loosen the soil around the base of the plant.
- Pull Gently: Grasp the main stem as close to the ground as possible (while wearing your protective gear, of course!). Pull firmly and steadily upwards. You want to get the entire root system.
- Inspect the Roots: Look for any remaining root fragments. If you see any, try to dig them out. Small pieces left behind can regrow.
- Bag and Dispose: Place all the dug-up plant material, including roots, in a heavy-duty plastic bag. Seal it tightly and dispose of it according to your local regulations for hazardous waste. Do NOT compost poison oak.
This is tough work, and it can be tempting to cut corners. But remember, thoroughness here will save you time and effort later. Think of it as the foundational step for a lasting solution, much like preparing the wood surface before applying a beautiful finish.
Option B: Cutting (More for Vines or Large Infestations)
If the poison oak has grown into large vines or is heavily intertwined with other plants, cutting might be your first step.
- Cut the Main Stems: Use loppers or a sturdy saw to cut the main stems. Do this as close to the ground as you can.
- Remove the Above-Ground Parts: After cutting, carefully pull and gather all the cut vines and leaves. Bag and dispose of them as described above.
- Address the Roots: You’ll still need to deal with the root system. You can either dig them out as described in Option A, or you’ll need to rely more heavily on herbicides for any regrowth from the roots.
Important Note on Burning: While burning might seem like an easy way to clear out vegetation, it’s generally NOT recommended for poison oak. Burning the plant releases urushiol into the smoke, which can cause severe respiratory problems and skin irritation if inhaled or if the ash lands on your skin. Avoid burning poison oak at all costs.
Phase 3: Herbicide Application – The Targeted Strike
Mechanical removal alone often isn’t enough because those tough roots can sprout new growth. This is where herbicides come in. When used correctly, they are a powerful tool for killing the plant and preventing regrowth.
When to Apply Herbicides:
Timing is critical for herbicide effectiveness. You want to apply them when the plant is actively growing and can absorb the chemical down to the roots. This means:
- Late Spring to Early Fall: This is the prime time. The plant is actively producing leaves and drawing nutrients from its roots.
- Avoid Drought or Extreme Heat: Stressed plants absorb herbicides less effectively.
- Wait After Mechanical Removal: If you’ve just cut the plant, wait a few weeks for new growth to appear before applying herbicide. This ensures the herbicide gets to the live, growing parts.
Types of Herbicides to Consider:
For poison oak, you’ll generally want a broad-spectrum herbicide that kills a wide variety of plants. Look for products containing:
- Glyphosate (e.g., Roundup)
- Triclopyr (often found in products specifically for brush and woody plants)
Glyphosate works by inhibiting an enzyme essential for plant growth. Triclopyr, on the other hand, mimics plant hormones, causing uncontrolled growth that ultimately kills the plant. Both are effective, but triclopyr is often preferred for woody plants like poison oak.
Application Methods:
There are a few ways to apply herbicides, and the best method depends on the plant’s size and how it’s growing.
| Method | Description | Best For | Safety Considerations |
|---|---|---|---|
| Foliar Spray | Spraying the leaves directly. Mix the herbicide according to label instructions. Apply on a calm day to avoid drift. Thoroughly wet the leaves, ensuring you cover both the top and undersides. | Larger plants, extensive patches, or when regrowth appears after cutting. | Wear full protective gear. Avoid spraying on windy days. Do NOT inhale spray. Protect nearby desirable plants. |
| Cut Stump Treatment | After cutting the main stem, immediately (within 15-20 minutes) apply herbicide directly to the cut surface of the stump. Use a brush or a specialized applicator. | Larger woody stems, preventing regrowth from the root collar. | Wear gloves and eye protection. Be precise to only treat the stump, minimizing exposure to other plants. |
| Basal Bark Treatment | For woody stems larger than 0.5 inches in diameter. Apply an oil-based herbicide solution to the lower 12-15 inches of the bark. | Larger, established woody poison oak plants and vines. | Requires specific oil-based formulations and careful application. Wear full protective gear. |
Important Herbicide Safety and Environmental Tips:
- Always read and follow label instructions precisely. This is non-negotiable for safety and effectiveness.
- Use the right concentration. Too little won’t kill it; too much wastes product and can harm the environment.
- Apply on a calm, dry day to prevent spray drift onto other plants or water sources.
- Protect desirable plants. Cover nearby flowers, shrubs, or vegetables with cardboard or plastic sheets before spraying.
- Dispose of empty containers properly as per local regulations.
- Consider consulting local extension offices for recommendations specific to your region. Universities like University of New Hampshire Extension often have detailed regional advice.
Phase 4: Persistence and Monitoring – The Long Game
This is where being a bit like a patient craftsman pays off. Poison oak is resilient, and you will likely see new shoots emerging from missed roots or seeds. The key to finally winning is consistent monitoring and repeat treatment.
What to do:
- Inspect Regularly: Walk your property every few weeks, especially during the growing season (spring through fall). Look for any new poison oak sprouts.
- Treat New Growth Promptly: When you see new sprouts, treat them immediately. They’ll be easier to kill when they’re small. You can pull them by hand (with gloves!) or use a spot-spray of herbicide.
- Repeat Treatments: You might need to repeat the herbicide application every few weeks throughout the growing season for 1-2 years. The goal is to exhaust the plant’s energy reserves.
- Root Out Resilient Roots: If you see larger stems regrowing from the root system, consider the cut stump method again, or dig out the roots as they become manageable.
Think of it like sanding a piece of furniture. You might need to sand and re-sand to get that perfectly smooth finish. It takes time and a bit of elbow grease, but the final result – a beautiful, smooth surface – is worth it.
Alternative Methods (Use with Caution)
While mechanical and chemical methods are considered the most proven, a few others are sometimes discussed. It’s important to understand their limitations and risks.
Smothering with Mulch or Tarps
For smaller areas or as a follow-up to physical removal, you can try smothering.
- Method: After clearing the plants, cover the area with several inches of thick mulch (like wood chips or compost) or a heavy-duty landscape fabric or thick tarp.
- Pros: Non-chemical, can suppress small seedlings.
- Cons: May not kill extensive root systems. Can be unsightly for extended periods until plants die or are suppressed. Requires a long commitment (many months to a year).
Vinegar or Hot Water
Some home remedies suggest using horticultural vinegar or boiling water.
- Pros: Natural alternatives.
- Cons: These often only kill the top growth and may not penetrate to the roots, leading to prolific regrowth. They can also damage surrounding soil and plants and require repeated applications. Horticultural vinegar is highly acidic and requires careful handling. It’s generally less effective than targeted herbicides for persistent plants like poison oak.
What NOT to Do When Dealing with Poison Oak
Just as important as knowing what to do is knowing what to avoid. Here are a few common mistakes that can make the problem worse:
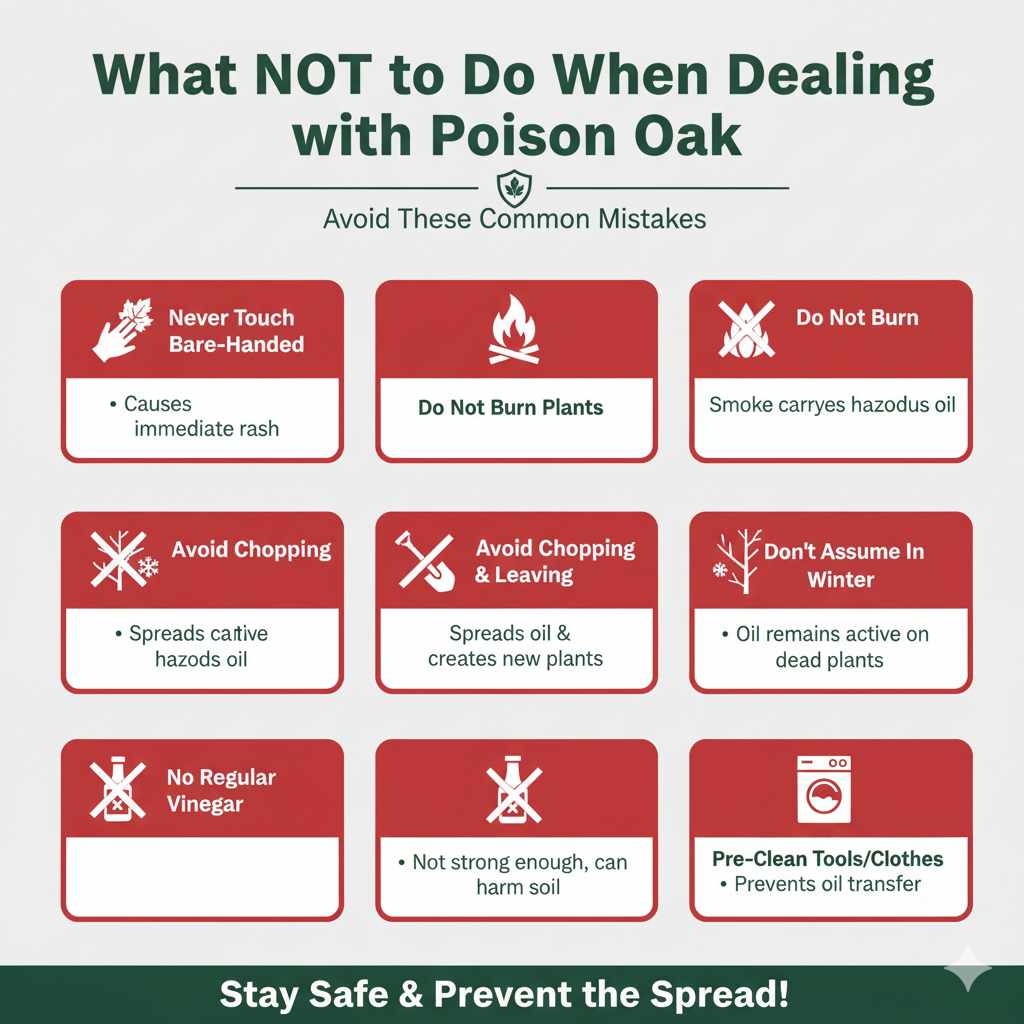
- Never touch the plant bare-handed or with exposed skin. This is the fastest way to get a rash.
- Do not burn poison oak. As mentioned, the smoke can be extremely hazardous.
- Avoid chopping up vines and leaving them on the ground. This can spread urushiol and create new plants.
- Don’t assume the plant isn’t poisonous in winter. Urushiol can remain active on dead plant parts.
- Don’t use regular household vinegar; it’s not strong enough and can damage soil.
- Never wash contaminated tools or clothing in a washing machine without pre-cleaning, as the oil can transfer to other items.
FAQ: Your Poison Oak Questions Answered
Q1: How quickly can I expect to see results from killing poison oak?
With herbicides, you should start seeing wilting and leaf discoloration within days to a couple of weeks. Complete eradication, however, requires persistence over months or even a couple of years, as you’ll need to treat regrowth from roots and seeds.
Q2: Is it safe to kill poison oak near a vegetable garden or play area?
Yes, but with extreme caution. If using herbicides, always shield your garden plants with barriers and avoid spraying during windy conditions. Ensure the area is completely clear of any traces before allowing children or pets near it. For play areas, mechanical removal followed by very careful monitoring is often safer.
Q3: Can I just pull up the poison oak and leave it on the ground?
No, that’s a bad idea. The urushiol oil can remain active on the dead plant material for a long time, and you risk a rash from touching it. Always bag and dispose of the plant material properly.
Q4: I’ve cut the poison oak, but it’s growing back. What did I do wrong?
You likely didn’t get all the root system, or there are viable seeds in the soil. This is normal! The trick is to treat the regrowth promptly. Wait for new leaves to form, and then apply herbicide or dig out the new shoots with their developing roots. Persistence is key!
Q5: Are there any natural ways to kill poison oak that actually work?
While some natural methods like horticultural vinegar or boiling water can kill top growth, they are generally not effective long-term solutions for killing the entire root system of established poison oak. Targeted herbicides are the most effective, proven method, but always follow safety guidelines. Thick mulching can help suppress small seedlings after removal.
Q6: I think I’ve been exposed to poison oak. What should I do?
If you know you’ve been exposed, wash the affected area immediately with soap and cool water for at least 10-15 minutes. Rinse thoroughly. If you develop a rash, over the counter creams (like hydrocortisone) or calamine lotion can help with the itching. For severe reactions, consult a doctor. Remember to wash all clothing and tools that may have come into contact with the plant.
Conclusion: Your Yard, Your Sanctuary
Tackling poison oak can seem like a daunting DIY project, but with the right approach, you can reclaim your space. Remember our two-pronged strategy: thorough mechanical removal followed by targeted herbicide application, all while prioritizing your safety. The key players in this game are preparation—gearing up properly—and persistence—don’t give up after the first attempt. By consistently monitoring and treating new growth, you’ll eventually weaken and eliminate this irritating plant, making your yard a safer and more enjoyable place for everyone.
Think of it like finishing a woodworking project. The final sanding, sealing, and finishing are just as important as the initial cuts and assembly. A little extra effort at the end ensures a durable, beautiful result that lasts. You’ve got this! With a little patience and the right steps, you can say goodbye to poison oak and hello to a cleared, comfortable outdoor space.