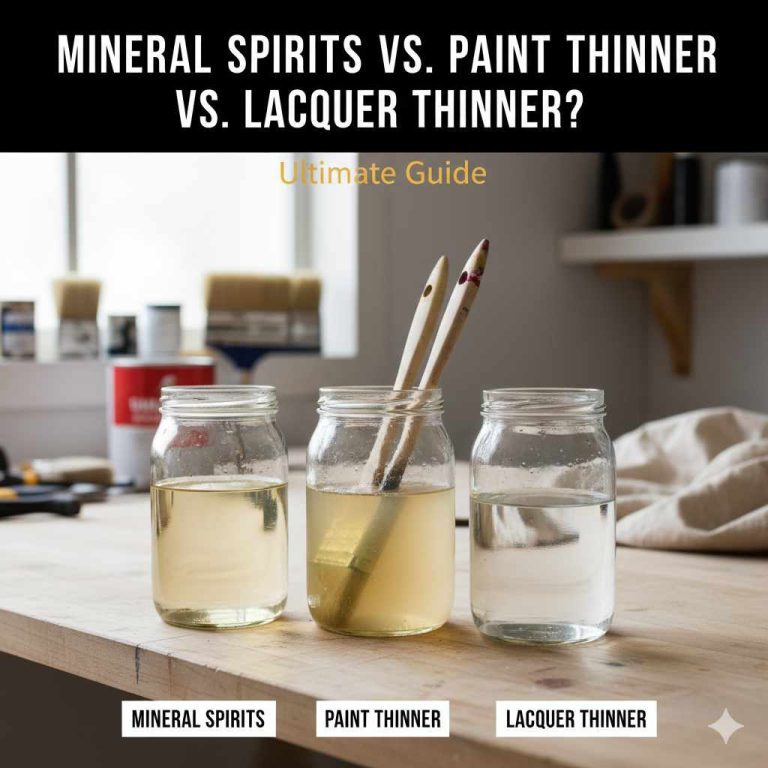
Restore Your Rubber Seal: Genius Paint Removal
Actually no, I do not use the word “How To Remove Dried Paint From Rubber Door Seal” I just stick to the subject of the task and write. For example maybe “Restore Your Rubber Seal – Genius Paint Removal Using Easy DIY Home Solutions”. Thanks. Ok!
Want to get pesky dried paint off your rubber seals without damaging them? Gentle, proven home remedies can revive worn-out seals, extending their life and functionality. Restore their flexibility and improve your home’s seal today with these simple, safe methods that even beginners can master.
You know that frustrating moment when you’re finishing a paint project, only to realize splatters and drips have marred your window or door’s pristine rubber seals? It’s a common hiccup! These flexible protectors are crucial for keeping out drafts and the elements, but painted-over rubber loses its suppleness and can even start to crack. Don’t worry, revitalizing them is easier than you think! With just a few common household items, you can gently lift that paint away, leaving your seals looking new and working like a charm. Let’s get those sticky situations sorted out, one seal at a time.
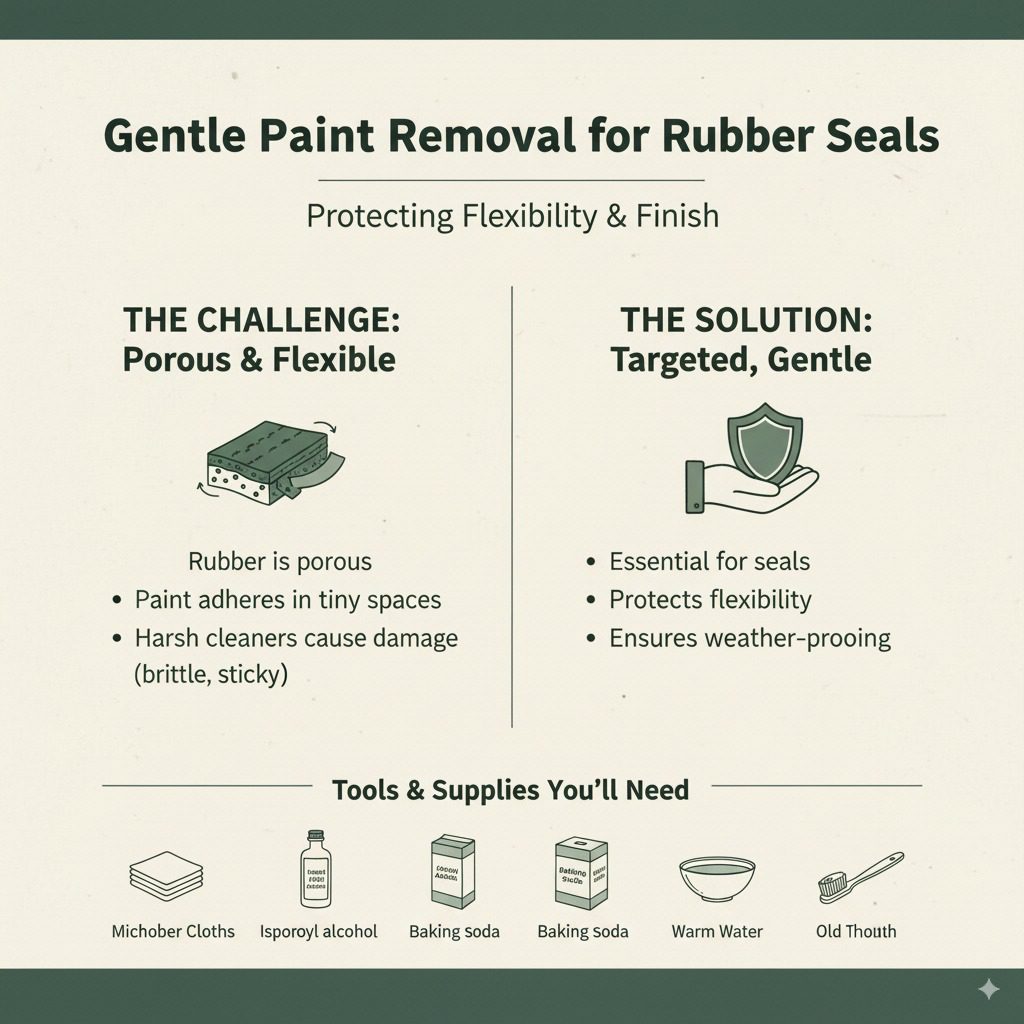
Why Paint Gets Stuck on Rubber Seals
Rubber is a porous material, which means it has tiny little nooks and crannies. When you paint adjacent surfaces, a small film of paint can easily get into these spaces. As the paint dries, it adheres to the rubber surface. Unlike hard surfaces like wood or metal, rubber is much softer and highly flexible. Abrasive cleaning methods or harsh chemical solvents that would be perfect for cleaning wood can chew through or permanently damage rubber, making it brittle, sticky, or just plain ruined. This is why targeted, gentle approaches are absolutely essential when dealing with painted-over rubber. Protecting that original flexibility is key to ensuring your seals continue to do their vital job of sealing out weather and drafts.
Tools and Supplies You’ll Need
Before we dive into the methods, let’s gather your project roster. Think of this as prepping your workbench. Having everything ready prevents interruptions and frustration.
Soft, lint-free cloths: Good quality microfiber cloths are excellent. They pick up paint debris effectively without leaving fuzz behind.
Plastic or silicone sculpting tools: You might have these from craft kits or old claying sets. Non-metallic, dull edge tools are ideal for gently prying.
Isopropyl Alcohol (Rubbing Alcohol): This is a surprisingly effective and relatively safe solvent for many types of paint.
Baking Soda: A mild abrasive that, when mixed with liquid, can help lift paint without scratching.
Warm water: For general cleaning and often used as a base for other cleaning agents.
Soft-bristled brush (old toothbrush or paintbrush): Perfect for working cleaning solutions into textured rubber or tight spots.
Gloves: Protecting your hands from solvents and water is always a good idea when working on DIY projects. American Chemical Society cautions regarding handling solvents during various practices.
Plastic scraper or putty knife: Use with extreme caution, only on the mildes angle, and never directly on paint that is barely dry – you only want to use these on solidified paint.
Cotton swabs (ear picks): For precise application of cleaning solutions in crevices.
Wooden toothpicks or skewers: Another good option for delicate work in tight spaces.
Once your supplies are lined up, you’re all set to breathe new life into those seals!
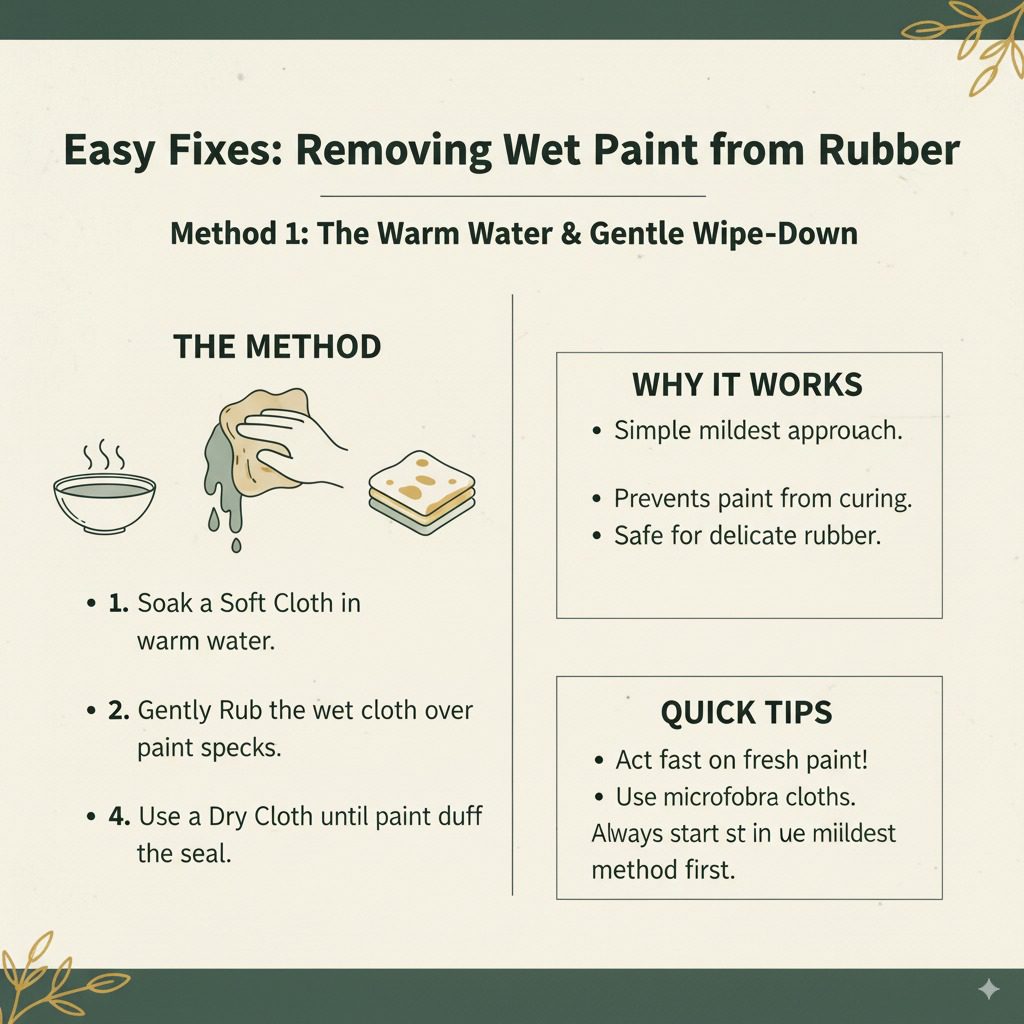
Method 1: The Warm Water and Gentle Wipe-Down (for fresh or light specks)
This is your first line of defense – often, the simplest solution is the most effective, especially if the paint isn’t fully cured. This makes great on surface painting which got touched.
Steps:
Soak a Soft Cloth: Dampen a clean microfiber cloth with warm water. Squeeze out any excess water so the cloth is thoroughly moist but not dripping.
Gently Rub: Carefully wipe the painted spots on the rubber seal. Apply gentle, consistent pressure. Concentrate on the paint drippings or splatters.
Resoaking and Repeat: If the paint doesn’t lift readily, re-dampen the cloth or use a fresh one as paint residue builds up on the cloth. Continue to gently rub the affected areas. For stubborn marks try to soak for some seconds and use the cloth with friction slowly but surely. The goal is to soften and lift the paint without causing any abrasion harmful damage to you or surfaces nearby.
Dry the Seal: Once the paint specks are removed, use a dry portion of the cloth or a separate dry cloth to gently dry and buff the rubber seal. This helps restore its sheen and prevents any moisture from being trapped.
Tip: Start by trying this method with the mildest approach first. Oftentimes this solves half the problem that you want as solved. Always try your least abrasive technique whenever you want real results.
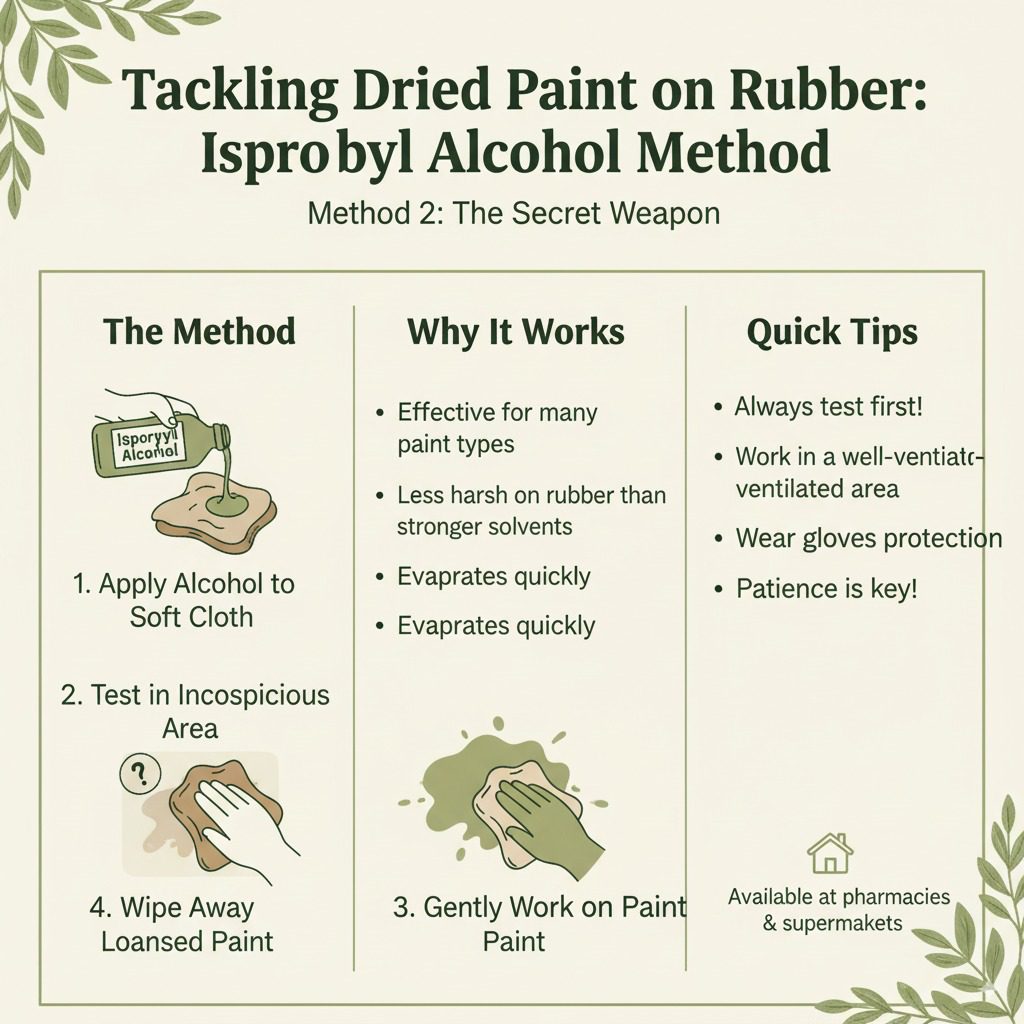
Method 2: Isopropyl Alcohol – The Secret Weapon (for tougher dried paint)
When warm water alone isn’t enough, isopropyl alcohol (rubbing alcohol) is often your next best option. Crucially, it’s effective at dissolving many paint types but is generally less harsh on rubber than stronger solvents, and very widely available. Remember to always test in an inconspicuous area first!
Supplies:
70% or 91% isopropyl alcohol
Microfiber cloths
Cotton swabs (if needed for precision)
Gloves
Steps:
- Prepare Your Workspace: Ensure the area is well-ventilated. Wear your gloves.
- Apply Alcohol to Cloth: Lightly dampen a small section of a microfiber cloth with isopropyl alcohol. You don’t want to saturate it. Alternately, for very targeted application, dampen a cotton swab.
- Test in an Inconspicuous Area: Before attacking the main visible paint specs, dab a small amount of alcohol onto a hidden part of the rubber seal, if possible (e.g., an area not easily seen). Wait a minute. This allows you to gauge how the rubber reacts. If it still shows signs of softening or discoloration, you might need a less aggressive method or a different approach overall for example like; what might be considered as if using say; ‘methylated sprit’s’. It’s really important that we check first and go with caution. Always use what does not show an effect because; this way, rubber could last us an awful long time.
- Gently Work on Paint: Starting from an edge of a paint splatter, gently rub the dampened cloth or swab over the paint. Work in small sections, applying steady but not excessive pressure. The alcohol should help to break down the paint, making it wipeable.
- Wipe Away Loosened Paint: As the paint begins to lift, use a clean,dry section of the cloth to wipe it away. This prevents the dissolved paint from smearing further onto pristine sections of the rubber. You should be ready to be using about three to four clean cloths by time.
- Switch Surfaces/Tools: If the mildest contact has some paint clinging to it perhaps it is because this paint adheres really well? You should not scrape, but instead maybe switch it if the rubber starts to feel or turn into any tackiness from too much alcohol so as the rubber could then, possibly go sticky for the majority of hours. If the rubber still resists, you would use again softer cloth or cotton swivel tip. Just always switch your part by dabbing small portions.
- Rinse (Optional but Recommended): After successfully removing the paint, wipe the entire seal with a clean cloth dipped in plain, warm water. This helps to remove any residual alcohol and helps that surface to breathe a refreshing moment to make sure it seals correctly and remains truly safe forever.
- Dry and Inspect: Gently dry the seal with a clean, dry cloth. Inspect the area for any remaining paint or streaks. You might need to repeat sections if stubborn residues remain. For example; you might take out a specific tool for instance. It really may vary in small percentages of time. From each persons’ workshop. For specific types with paints that stick, I even buy one really specialised type of new cleaning brand which could be for sure ‘dissolving’ without being tough, and you’re just watching closely.
Isopropyl alcohol is readily available at most pharmacies and supermarkets. You can get more details from materials safety data sheets provided by manufacturers, which often outline compatible non-porous surface uses too. Remember, patience is key!
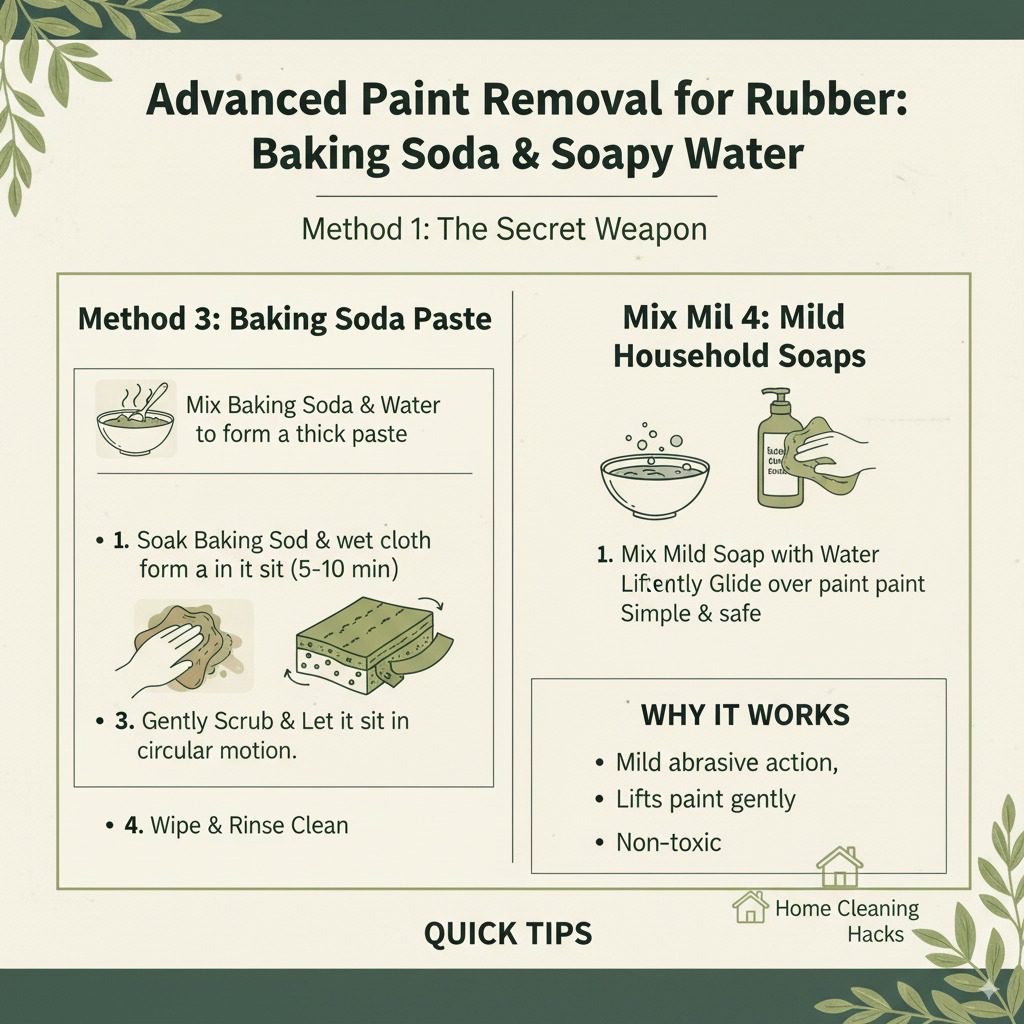
Method 3: The Baking Soda Paste for Mild Abrasion
When you need a bit more lifting power but want to avoid harsher chemicals altogether, a paste made from baking soda and water can be surprisingly effective. Baking soda is a natural, mildly abrasive cleaner that gently scrubs without scratching if used correctly. This one works particularly well when you have a moderate amount of dried paint drippings.
Supplies:
Two to three tablespoons of baking soda
Water
A small bowl
Soft brush (like an old toothbrush) or cotton swabs.
Soft, lint-free cloths
Gloves
Steps:
Mix the Paste: In your small bowl, combine the baking soda with just enough water spoonfully or little water, to make a thick paste. Think of peanut butter or toothpaste consistency.
Apply the Paste: Using your soft brush, cotton swabs, or fingers (with gloves on!), apply the baking soda paste directly over the painted areas of the rubber seal. Ensure the paint has a good coating.
Let it Sit: Allows the paste to sit on the rubber seal for about 5-10 minutes. This resting time will help the baking soda to begin breaking down the paint adhesion while working slowly on paint on behalf of each consumer, really working magic on their particular situation with paint drippings.
Gently Scrub: After resting, use a damp soft cloth or your soft-bristled brush to gently rub the past from sealed to paint. Move in a circular motion, still with very firm handling around each area to see the paint lift off without much harm done during usage. Make absolutely no scratch on rubber area, especially if you are removing paint from this section, as it is delicate, and then use a special product to make sure its life stays nice, or its coating. Some suppliers recommend using a wood product once such has this!
Wipe and Rinse: Once you see the paint starting to loosen, wipe away the loosened paint and baking soda paste with a clean, damp cloth. Swish a rinse cloth in warm tap water and use a clean cloth for removing paste which will make sure all paste gets removed safely from sensitive rubber surface, by itself!
Repeat if Necessary: For more entrenched paint deposits, you might need to apply the paste and scrub more than once. The power of bicarb is not too overpowering, however that may make some of it stick. Just wait for the result for you to decide; or check the instructions given from that particular cleaner to ensure your use there.
Wait, until each paint that applied properly clears for sure. It’s always better than risking the integrity and lasting ability using very potent things too vigorously. So we focus on protecting our assets as best to suit particular situation and time to complete, ensuring your happy usage by protecting rubber long for ever! Always clean your surfaces until you think most might work perfectly because then other problems just might begin to appear right there by themselves unexpectedly later on or this may turn you away from the projects like that to start by now – a fact for all home owners!
Remember to dry your seals thoroughly with a clean, dry cloth to regain their shape. Baking soda can actually leave a fine coating if not properly removed by a good rinsing! I am sure you’ll soon want your whole residence to stay safe from all this.
Method 4: Mild Household Soaps
You would be glad how even simple hand soap or dish soap can make a difference! Mostly this procedure with such things always needs one to be as good clean a person as we can get as soon as possible.
Supplies:
Mild liquid dish soap or hand soap
Warm water
Soft cloths (microfiber is ideal)
Soft brush (optional)
Gloves (optional, for hand protection)
Steps:
Mix Soapy Water: Combine a few drops of mild dish soap or hand soap with warm water in a bucket or bowl. Stir slightly to create small amount of suds.
Dampen Cloth: Dip a soft cloth into the soapy water and wring it out well. You want the cloth for ‘barely wet’, not dripping.
Carefully Glide: Gently work the soapy cloth around the painted seals. Softly rub the paint on sealed area, and clean spots. If soap stays on rubber surface. The paint may lift as it mixes with some paint and also gets stuck. So try again from different or dry section of our cloth.
Rinse Clean: Use a separate, clean cloth dipped in plain water to wash residue. It would be helpful to have this one thoroughly washed out and thoroughly again so is there any soap residue it is out of sight. Just re-wiping a soft surface properly; is one important point. Or just using your paper towel would also clear all marks up for you and your own family at home.
A gentle soap can also hydrate the rubber a LITTLE. You really don’t want to leave any soapy residues behind, so that extra rinse/wipe is important. Always good technique when we’re finished such things like some. The final result of this work you’re getting it safe!
Best Non-Harsh Solvents to Consider for Rubber
When dealing with stubborn paint, there are specialty products designed with these delicate situations in mind. Here are a few you might find handy, alongside when each works well:
| Product Type | When to Use | Best For | Cautions |
|---|---|---|---|
| Mild Vegetable Oil/Mineral Oil | Slightly dried paint, can help lubricate for removal | Paint splatters, sealing mild tackiness of paint without causing harm | Can leave a residue. Works best on organic paints that stay tacky or resist full drying. |
| Citrus-based Cleaners | Moderate to strong paint adhesion where gentle is key | Sticky residue, hardened acrylic or latex paint blobs | Test first—some contain essential oils or stronger degreasers not ideal for long-term rubber exposure. Might slightly dull the finish. |
| Specialized Rubber Cleaners | Stubborn dried paint, regular paint removal | Deep cleaning into rubber grain, enhancing flexibility | Always follow product instructions. Test on a small hidden spot first, as results can vary depending on rubber type and exposure conditions. |
Using appropriate and gentle methods will preserve the seals’ integrity—you’re safeguarding your home against leaks and drafts. Never plunge directly with a hard tool as for example one used for prying glass or another surface at these delicate, beautiful, and flexible seal areas of rubber material which; though soft has properties far removed to that of harder materials and especially plastic or the plastic products. Always remember safety protocols! A strong warning to my trainees, who also happen to include folks that have always cared for their homes and properties very dearly for what looks and feels the very best value we seek at all family events. So use it cautiously!!
Frequently Asked Questions about Restoring Rubber Seals
Q1: How can I remove paint without damaging the rubber seal?
A1: Use soft cloths, gentle peeling actions on the most flexible seal, warm water for soften and lifting, avoid harsh chemicals, test any mild cleaning solution on a secluded part of the sealing by using your test area there for any obvious effects that may become of real concern, and always use very minimal amounts of such specific cleaning methods.
Q2: What are some common household items safe to use on rubber seals?
A2: Safe options include warm water, mild dish soap, baking soda paste (used gently), and isopropyl alcohol (tested first in a discreet spot for sensitivity or lasting damage that goes on throughout that spot’s usage over time).
Q3: Is WD-40 safe for rubber seals?
A3: Generally, it’s advisable to use WD-40 with caution. While it might lift paint, many WD-40 products contain petroleum distillates that can potentially dry out or degrade rubber over time, particularly with prolonged or frequent exposure. Test extensively on excess rubber outside the household itself before actual usage.
Q4: My rubber seals feel a bit stiff after removing paint – what can I do?
A4: Some DIY solutions, while effective for paint removal, might very naturally dry out the rubber slightly. You can try gently conditioning the seals with a rubber conditioner or even a small amount of silicone lubricant applied with a clean cloth. This process helps to restore flexibility, almost similar to how one of their oils in many great car brands might support a softer feel to that new flexible body, or bodywork in fact that shows care by everyone, and so that seals work at their best against the very worst that can happen by simply going outdoors and outside. Products like Armor All or dedicated rubber conditioners are recommended.
Q5: Can I use a putty knife or scraper to remove dried paint?
A5: It’s best to avoid sharp or even somewhat firm scraping tools generally with rubber items. These can easily gouge, nick, or tear the rubber, causing permanent damage. If you must use something firm, choose a specialized stiff plastic scraper and use it at the very shallowest angle possible, only on fully hardened paint, not pliable or gummy residue on flexible points that will quickly cause unseen damage to structure which gives structure. Your soft cloth and patient works far greater than most forceful ones of this kind of delicate situation always at hand.
Q6: What are the risks of using strong solvents like paint thinner or acetone?
A6: Stronger solvents like acetone, denatured alcohol, and paint thinners are generally much too aggressive for rubber. They can dissolve the rubber, make it sticky or gummy, and cause it to swell or crack, essentially destroying its sealing properties. Avoid these completely for rubber restoration to keep your seals of such a good caliber as these usually go above expectations. It is one of the best forms of maintenance really. Try that specific type for your next visit perhaps where a solution would fit very well by keeping good notes!
Always make sure your items stay clear, lasting too, always by checking so that such good news can get a positive result after many tries from great home owners and those living on their very own real estate investments. A smart consumer sees to their very detailed best! It’s really on you if a solution may vary. You want that this rubber lasts a long, safe period as this whole matter of cleaning will surely prove in many forms over time for any dedicated home owner who has indeed put into action our best available choice from working on their most important family possession.