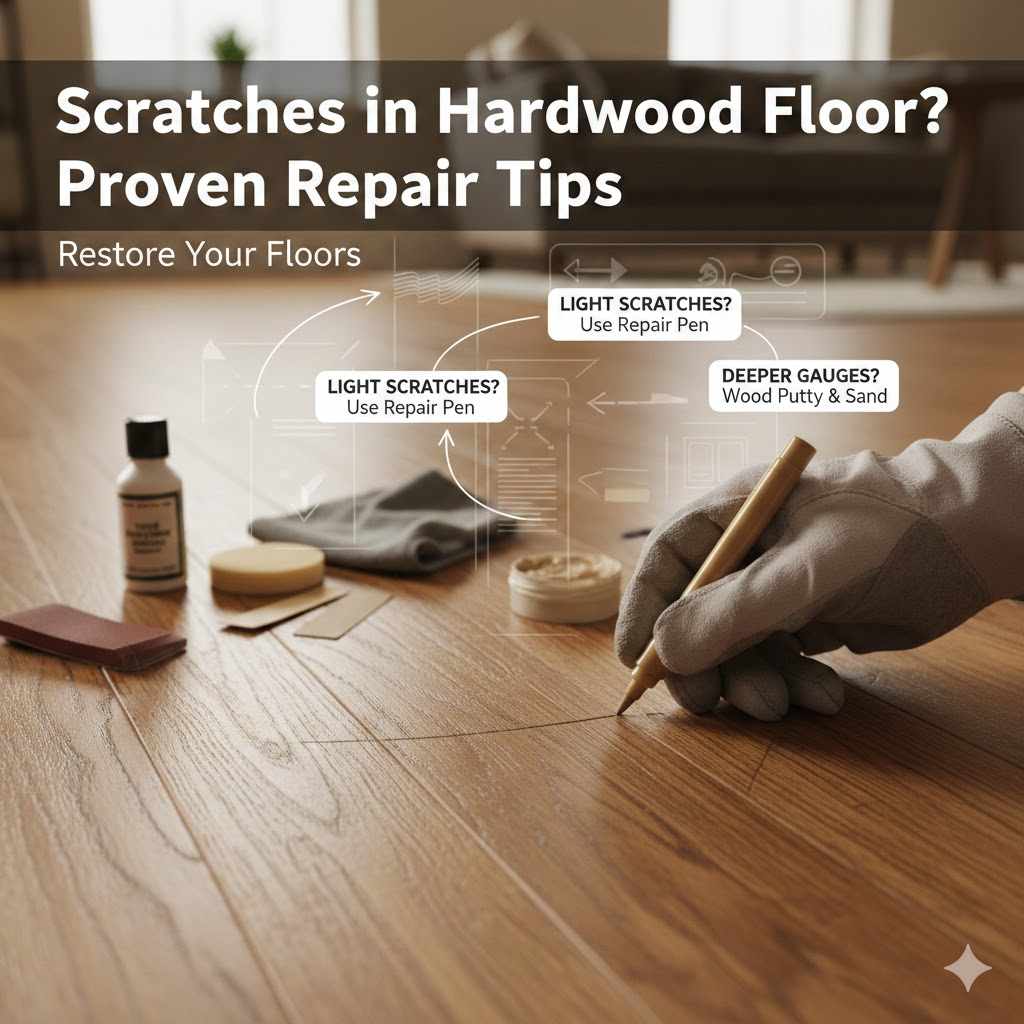
Scratches in Hardwood Floor? Proven Repair Tips
Seeing scratches on your beautiful hardwood floor can be upsetting. Many folks worry that fixing them is hard or costs a lot of money. This guide makes it simple!
We will show you easy ways to make those scratches disappear, step by step. Get ready to love your floors again!
Fixing Scratches in Hardwood Floor Easy Steps
Scratches in hardwood floors are a common problem for homeowners. They happen from everyday wear and tear, like furniture moving, pet claws, or even dropped items. For many people, the thought of repairing them sounds complicated.
They might worry about damaging the floor further or not getting a good finish. This guide aims to clear up that confusion. We will break down the process into simple, manageable steps.
You will learn how to identify different types of scratches and pick the right fix. Our goal is to empower you to tackle these issues confidently.
Understanding Different Scratch Depths
Not all scratches are created equal. Knowing the depth of a scratch is the first step to fixing it. A light scratch only affects the top finish of the wood.
A deeper scratch goes into the wood itself. This difference tells you which repair method will work best.
Surface Scratches
These are the most common. They look like light marks or scuffs on the wood’s protective coating. You can often feel them only slightly with your fingernail.
They do not go into the wood grain itself.
Deep Scratches
These are more serious. You can easily feel them with your fingernail. They might even have small splinters of wood.
These scratches have gone through the finish and into the wood layer below.
Gouges
These are the most severe. They are wide and deep cuts in the wood. Gouges can remove chunks of wood.
They often require more extensive repair or even professional help.
Tools and Materials You Will Need
Having the right supplies makes the job much easier. You do not need a lot of fancy equipment. Most items are easy to find at your local hardware store.
- Soft cloths: These are for cleaning and buffing. Microfiber cloths work very well.
- Wood filler or putty: Choose a color that matches your floor. Some come in neutral tones that can be stained.
- Touch-up markers or pens: Good for very small, light scratches.
- Sandpaper: Fine-grit sandpaper is best for light sanding. You might need a block to go with it.
- Vacuum cleaner: To remove dust after sanding.
- Wood polish or wax: To protect the repair and blend it in.
- Gloves: To keep your hands clean.
DIY Repair Methods for Light Scratches
Light scratches are often the easiest to fix at home. You can usually restore the look of your floor without much effort.
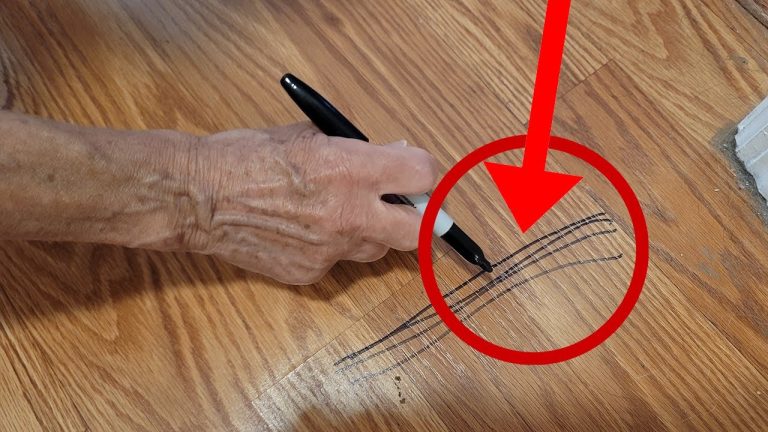
Using Touch-Up Markers or Pens
Touch-up markers are designed for very minor surface scratches. They are like a colored crayon for your floor. They help to fill in the scratch and make it less visible.
- Clean the area: Make sure the scratch and the wood around it are clean and dry. Dust can make the marker application look messy.
- Match the color: Find a marker that closely matches your floor’s color. Test it in an inconspicuous spot first if you are unsure.
- Apply the marker: Gently draw the marker over the scratch. Follow the direction of the wood grain.
- Wipe away excess: Use a clean, soft cloth to wipe away any marker that got on the surrounding wood. Do this immediately.
- Let it dry: Allow the marker to dry completely. This usually takes a few minutes.
This method is best for scratches that are only in the finish. It does not fill the scratch but rather colors it to match. For example, if you have a light blonde oak floor and a small scratch from your dog’s nail, a light brown touch-up marker can camouflage it.
It’s a quick fix for surface-level cosmetic issues.
Wood Floor Repair Kits
There are many kits available that include various tools and materials for scratch repair. These kits often have a range of colors and applicators. They are a good all-in-one solution.
- Follow kit instructions: Each kit is slightly different. Always read and follow the specific directions provided.
- Clean the scratch: Ensure the scratched area is free of dirt and debris.
- Apply the filler: Use the applicator to fill the scratch with the appropriate color.
- Smooth and level: Gently smooth the filler so it is level with the floor surface.
- Buff and protect: Once dry, buff the area with a soft cloth. Some kits include a protective coating.
A typical repair kit might include a stain pen, a wax stick, and a small putty knife. You use the stain pen for light scratches and the wax stick for slightly deeper ones. This is handy because it offers multiple solutions for various minor damages.
Imagine a scenario where you moved a light chair and it left a few faint white marks. A good repair kit could provide a matching wax stick to fill those marks seamlessly.

Proven Repair Tips for Deeper Scratches
When scratches are deeper, they go beyond the surface finish and into the actual wood. These require a bit more effort but are still manageable.
Using Wood Filler or Putty
For scratches that you can feel with your fingernail, wood filler or putty is often the best choice. This material fills the void left by the scratch and can be sanded to match the floor’s surface.
- Clean the scratch: Remove any loose wood splinters or dirt from the scratch. A utility knife can carefully trim away splinters.
- Apply the filler: Use a putty knife to press the wood filler into the scratch. Overfill slightly, as it may shrink as it dries.
- Smooth the excess: Scrape off any excess filler with the putty knife, keeping it as level as possible with the floor.
- Let it dry completely: Follow the product’s drying time. This can range from a few hours to overnight.
- Sand the area: Once dry, gently sand the filled area with fine-grit sandpaper. Sand until it is flush with the surrounding floor.
- Apply finish: After sanding, you might need to reapply a matching finish or wax to protect the repaired spot.
Consider this scenario: a heavy object was dropped, creating a noticeable indentation in your oak floor. The wood itself is visibly damaged, not just the top coat. Wood filler, carefully applied and smoothed, can bridge this gap.
After it dries, it will be sanded down to be level with the original wood. Then, a matching stain or polyurethane can be applied to blend it in. This is a more involved process, but the results can be very satisfying, making the repair almost invisible.
Wood filler is essentially a thick paste made from wood fibers and a binder. It’s designed to harden and become a permanent part of the floor. It’s crucial to get the right color.
If you can’t find an exact match, some fillers can be tinted with universal tinting colors. This allows you to create a custom shade. For a floor with a medium brown stain, you might mix a neutral filler with a touch of dark walnut tint to get that perfect hue.
The Role of Sanding and Refinishing
For deeper scratches, sanding is often a necessary step. This removes the damaged wood and prepares the area for filling and finishing.
- Gentle sanding: Always start with a fine-grit sandpaper. You want to blend the area, not remove a lot of wood.
- Feathering the edges: Sand outwards slightly from the scratch. This helps to blend the repair into the surrounding finish.
- Matching the sheen: After sanding, the repaired area might look dull. You may need to use a matching wood polish or a clear coat to restore the sheen.
Sometimes, if a scratch is very deep or if there are many scratches in one area, a partial refinishing might be considered. This involves sanding down a larger section of the floor and then reapplying the stain and protective finish. It’s more work but can make the repaired area blend in much better.
When to Consider Professional Help
While many scratches are DIY-friendly, some situations call for expert advice. If you are unsure or the damage is extensive, a professional can provide the best solution.
- Extensive damage: If large sections of your floor are deeply scratched or gouged, professional refinishing is likely needed.
- Valuable or antique floors: For very old, valuable, or antique wood floors, it’s wise to consult a professional to avoid damage.
- Lack of confidence: If you are not comfortable with the repair process, a professional can do the job correctly the first time.
A common scenario where professional help is sought is when a large piece of furniture is dragged across the floor, leaving multiple long, deep scratches and scuff marks. Trying to patch each one individually could result in a patchy, uneven appearance. A professional refinisher can assess the damage, sand down the entire affected area, and reapply the stain and protective coating for a uniform, factory-new look.
This often involves machines that remove a thin layer of wood to create a fresh surface.
Maintaining Your Hardwood Floors to Prevent Scratches
The best way to deal with scratches is to avoid them in the first place. Regular maintenance can keep your floors looking great for years.
Regular Cleaning Habits
Keeping your floors clean is a simple but effective way to prevent damage. Dirt and grit can act like sandpaper underfoot.
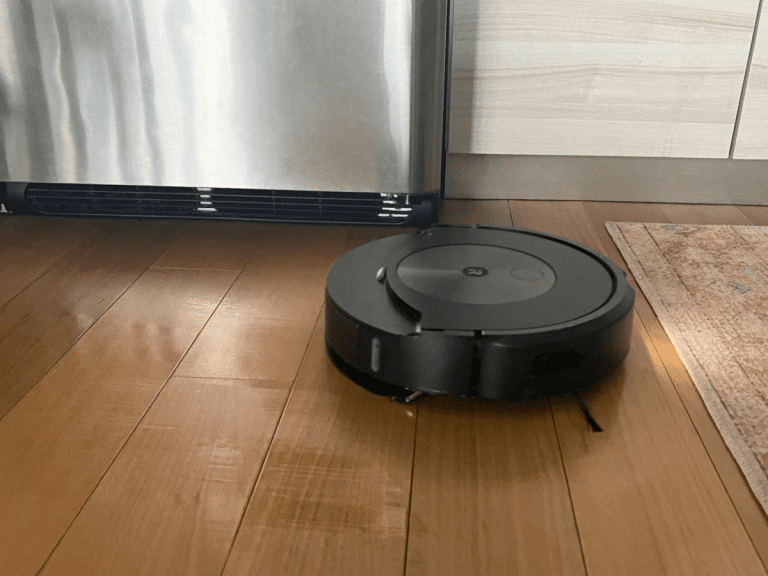
- Sweep or vacuum regularly: Use a soft-bristle broom or a vacuum cleaner with a hard floor attachment. Avoid vacuums with beater bars, as these can scratch.
- Use appropriate cleaners: Stick to cleaners specifically designed for hardwood floors. Avoid harsh chemicals or excessive water, which can damage the wood.
- Wipe up spills immediately: Liquids can stain or warp wood. Blot spills with a soft cloth as soon as they happen.
The frequency of cleaning depends on how much traffic your floors get. In a busy household with pets and children, daily sweeping might be necessary. In a less-used room, every few days might suffice.
The key is to remove abrasive particles before they can do damage.
Protecting Your Floors from Furniture
Furniture is a major culprit for scratches. Simple protective measures can make a big difference.
- Felt pads: Attach felt pads to the bottom of all furniture legs. Check them regularly and replace them when they become worn or dirty.
- Furniture coasters: Use coasters under the legs of heavy furniture that is rarely moved, like sofas or beds.
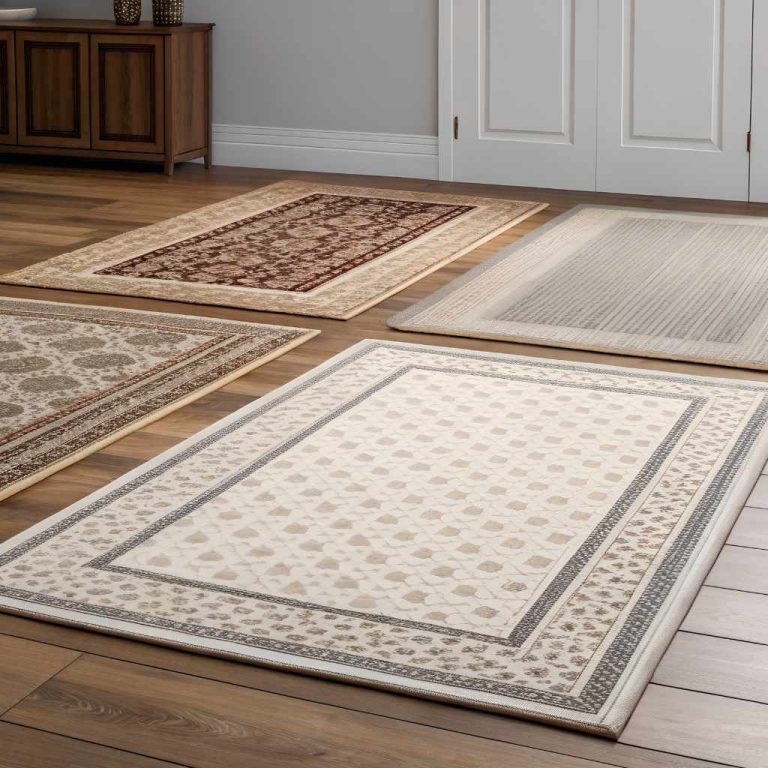
- Area rugs: Place area rugs in high-traffic areas, like hallways and entryways, and under furniture like dining tables and chairs.
Consider the dining room table. Every time chairs are pulled out or pushed in, they can drag across the floor, causing minor scratches over time. Placing a large area rug under the table and chairs eliminates this direct contact.
For chairs that are frequently moved, ensuring they have good quality felt pads is essential. Worn-out pads can lose their protective qualities and start to scratch.
Pet Care for Scratch Prevention
Pets are part of the family, but their claws can wreak havoc on hardwood floors.
- Keep nails trimmed: Regularly trim your pet’s nails. This is the most effective way to reduce scratching.
- Provide scratching posts: For cats, provide plenty of scratching posts to redirect their natural behavior away from your floors.
- Use pet mats: Place mats or rugs in areas where your pets eat, drink, or rest frequently.
A dog with long, sharp nails can create a network of fine scratches across a floor over time. Regular nail trims, perhaps every 2-4 weeks depending on the pet, can significantly reduce this risk. Many pet groomers offer this service if you are not comfortable doing it yourself.
For instance, a quick trip to the vet or pet store for a nail trim can save your floors from considerable wear.
The Impact of Sunlight and Heat
While not directly causing scratches, sunlight and extreme heat can affect the wood’s finish and make it more susceptible to damage.
- Use window treatments: Curtains, blinds, or UV-filtering films can block direct sunlight. This helps prevent fading and drying of the wood.
- Maintain consistent temperature: Avoid extreme temperature fluctuations. Very dry air can cause wood to shrink, potentially leading to gaps that catch debris.
Extended exposure to direct sunlight can dry out the wood’s finish and the wood itself. This makes the finish brittle and more prone to chipping or cracking, which can then lead to scratches appearing more easily. It also causes the wood color to fade unevenly over time.
Advanced Techniques for Difficult Scratches
Sometimes, the scratches are stubborn. These advanced methods can help tackle those tougher spots.
Using Steel Wool for Minor Surface Scuffs
Fine-grade steel wool can be used for very light surface scuffs, but it must be done with caution.
- Choose the right grade: Use only very fine steel wool, such as #0000 grade. Coarser grades will scratch the floor.
- Sand with the grain: Always move the steel wool in the direction of the wood grain.
- Apply light pressure: Do not press too hard. The goal is to gently abrade the finish, not the wood itself.
- Follow with polish: After using steel wool, always apply a wood polish or wax to restore the sheen and protect the area.
This technique is excellent for removing light scuff marks left by shoes or rubber. Imagine you’ve scuffed up the finish near your front door. A gentle buff with #0000 steel wool, followed by a good wood polish, can make those scuffs vanish without damaging the wood itself.
It’s a quick fix for a common annoyance.
Coloring Techniques for More Visible Scratches
When simple touch-up markers aren’t enough, more advanced coloring can be used.
- Wood stain pens: These offer more pigment than simple markers and are designed for wood. They come in various shades.
- Water-based stains: Small amounts of water-based stain can be applied with a fine artist’s brush. This allows for precise control.
- Dye pens: Some specialized dye pens can be used to color deep scratches, providing a more uniform fill.
For a scratch that has removed color but not much wood depth, a stain pen is a great tool. You would carefully apply the stain into the scratch. For example, if your floor has a rich cherry stain and a scratch has taken out that color, a cherry-colored stain pen can restore it.
You’d fill the scratch with the pen and then wipe away any excess with a clean cloth, letting the color seep into the damaged area.
Using Wax Sticks for Filling and Coloring
Wax sticks are a popular DIY option for filling and coloring medium scratches.
- Select the correct color: Wax sticks come in many colors. You can often mix them to achieve a custom shade.
- Warm the wax: You might need to warm the stick slightly to make it pliable. A heat gun on a low setting or even body heat can work.
- Apply and fill: Press the softened wax into the scratch. Overfill slightly.
- Level and buff: Use a plastic putty knife or scraper to remove excess wax and level the surface. Then, buff with a soft cloth.
A wax stick is like a crayon for floors, but it’s made of hardened wax. If you have a scratch that’s deep enough to be noticeable but not so deep that it requires wood filler, a wax stick is ideal. You can melt it directly into the scratch.
For instance, a scratch on a dark walnut floor could be filled with a dark brown wax stick. Once hardened, you scrape off the excess, and it leaves a smooth, colored surface that blends well.
The advantage of wax sticks is their flexibility. Wood expands and contracts with humidity changes. A wax fill is more forgiving than rigid wood filler in these situations.
It’s less likely to crack or pop out over time. This makes it a good long-term solution for many common scratches.
Refinishing a Small Area
In some cases, you might need to refinish a very small area to match the surrounding finish.
- Feather sand: Lightly sand the repaired area and blend it into the surrounding floor.
- Apply matching finish: Use a small brush or applicator to apply a matching clear coat or stain. You might need to build up layers slowly.
- Buff to match sheen: Once dry, buff the area to match the original floor’s sheen.
This is for situations where a deeper repair has left a visible difference in shine or texture. You’ve used wood filler, sanded it smooth, and now the spot looks dull compared to the glossy floor. A small amount of matching polyurethane, applied carefully with a fine brush, can bring back that shine.
You’d feather the edges of the finish to make it blend seamlessly with the rest of the floor.
| Scratch Type | Repair Method | Difficulty Level | Tools Needed |
|---|---|---|---|
| Surface Scratches | Touch-Up Marker, Wood Polish | Easy | Soft cloth, Marker/Polish |
| Slightly Deeper Scratches | Wax Stick, Wood Repair Kit | Easy to Medium | Putty knife, Wax stick, Cloth |
| Deep Scratches | Wood Filler, Sandpaper, Matching Finish | Medium | Putty knife, Sandpaper, Filler, Cloth |
| Gouges/Extensive Damage | Professional Refinishing | Hard | Professional tools and expertise |
This table helps visualize which repair methods are best suited for different levels of damage. For instance, surface scratches are a breeze with just a marker. Deeper scratches, however, might require a few more steps and tools.
The difficulty level is a good indicator of whether you might want to try it yourself or call in an expert.

Frequently Asked Questions
Question: Can I repair scratches in my hardwood floor without sanding?
Answer: Yes, for light surface scratches, you can often use touch-up markers, wood polish, or wax sticks without any sanding. These methods color or fill the scratch without affecting the wood’s surface.
Question: What is the best way to fix deep scratches in hardwood floors?
Answer: For deep scratches, using wood filler is usually the best approach. You’ll need to fill the scratch, let it dry, then carefully sand it smooth and apply a matching finish to blend it in.
Question: How can I prevent my pets from scratching my hardwood floors?
Answer: Regularly trim your pet’s nails, provide scratching posts for cats, and use mats or rugs in high-traffic pet areas to minimize scratches.
Question: My floors have many small scratches. Should I refinish the whole floor?
Answer: If there are many small scratches scattered across the floor, a partial refinishing of a small area might work, but a full refinish might be more effective and provide a uniform look. For widespread minor scratches, regular polishing can also help.
Question: Can I mix wood filler colors to match my floor?
Answer: Many wood fillers are designed to be stained or tinted. You can often mix different colors or add universal tinting colors to achieve a precise match for your floor’s shade.
Summary
Fixing scratches in hardwood floors is manageable for most homeowners. By understanding the scratch depth and using the right tools and techniques, you can restore your floor’s beauty. From simple touch-up markers for light marks to wood filler for deeper damage, there’s a solution for every level of wear.
Regular maintenance and protective measures are key to preventing future scratches. You have the knowledge now to make your floors look great again!