How to Remove Scuff Marks from Wood Floors (Fix by Finish Type)
Most scuff marks on a wood floor are rubber or dirt sitting on top of the finish, so they wipe off with the gentlest method that works, usually a dry rub, a tennis ball, or a damp melamine sponge. The catch is that a scratch looks the same from standing height and needs a different fix. This guide covers how to tell them apart, which method fits your finish, and what to never use.
Scuff or Scratch? A 10-Second Test Before You Rub Anything
Best Scuff-Hiding Restorer Pick
 |
Rejuvenate Professional Wood Floor Restorer, 32 oz – $20.15 A mop-on restorer that fills fine scratches and adds shine in one coat. It is the right follow-up when the scuff is gone but the spot still looks dull or hazy next to the rest of the floor.
|
As an Amazon Associate we earn from qualifying purchases.
A scuff is a mark on the surface of the finish: black heel streaks, gray furniture marks, shoe-sole transfer. A scratch is a groove cut into the finish or the wood. Rubbing a scratch with an abrasive only makes it wider, so spend ten seconds sorting the mark first.
- Fingernail test: drag a fingernail lightly across the mark. If it glides over smoothly, it is a scuff. If your nail catches in a groove, it is a scratch and belongs in our guide to repairing scratches on hardwood floors.
- Smear test: rub the mark firmly with a dry microfiber cloth for ten seconds. A mark that fades or smears is surface residue. A mark that stays put and looks sharp-edged is probably damage to the finish.
- Finish test: put one drop of water on a hidden spot such as inside a closet. If it beads up and sits there, you have a film finish like polyurethane. If it soaks in and darkens the wood within a few minutes, the finish is wax, oil, or worn through. That matters because wax and oil floors tolerate far fewer cleaning products than polyurethane floors.
This floor-finish question is the one most scuff guides skip, and it explains why the same tip works great on one floor and ruins another. A solvent that is fine on cured polyurethane can strip wax, and a water-based method that is fine on polyurethane can darken an oiled floor.
Scuff Removal Methods Ranked From Gentlest to Strongest
Always start at the top of this list and move down only when the method above has failed. Each step removes a little more of whatever is on the floor, including the finish itself once you get to the abrasives.
| Method | Works best on | Safe finishes | Main risk |
|---|---|---|---|
| Dry microfiber rub | Fresh, light marks | All finishes | None |
| Tennis ball on a broom handle | Black heel and rubber marks | Polyurethane, wax | Needs a clean, dry ball |
| Soapy foam on a damp cloth | Gray scuffs mixed with grime | Polyurethane, oil, wax (barely damp) | Too much water at seams |
| Damp melamine sponge | Stubborn marks on sealed floors | Polyurethane only | Can dull satin or matte finish |
| Mineral spirits on a cloth | Heavy rubber transfer | Cured polyurethane (wipe only) | Strips wax; flammable fumes |
| 0000 steel wool with liquid wax | Marks that survived everything above | Wax; light use on polyurethane | Removes a thin layer of finish |
Step-by-Step: The Gentle Methods
- Remove grit first. Sweep or vacuum with a soft-floor head. Dragging a cloth over sand and dirt turns a scuff into a field of fine scratches.
- Rub it dry. Press a clean microfiber cloth on the mark and rub in small circles for ten to fifteen seconds. Fresh scuffs from sneakers often vanish here.
- Try the tennis ball. Cut a small X in a clean tennis ball and push it onto the end of a broom handle, then rub the mark with light pressure. The felt is just abrasive enough to lift rubber transfer without cutting the finish.
- Use soapy foam. Mix a few drops of dish soap in warm water, whisk up foam, and dab only the foam onto the mark with a barely damp cloth. Wipe with a second cloth wrung out in plain water, then dry right away. A University of Georgia extension guide on heel marks recommends the same foam-only approach for oiled, polyurethaned, stained, varnished and waxed wood.
- Move to a melamine sponge only on sealed floors. Wet it, wring it until it barely drips, and use light strokes along the grain for a few seconds, then check. Melamine foam works as a very fine abrasive, which is why it can leave a dull patch on a satin finish. Test in a closet first.
Stubborn Rubber Marks: Mineral Spirits and Wax-Floor Fixes
When a black heel mark survives the foam and sponge, it is usually rubber that has bonded to the surface. A solvent dissolves it faster than scrubbing does, which means less rubbing and less risk to the finish.
Mineral spirits on a polyurethane floor
Dampen a clean white cloth with a small amount of mineral spirits, wipe the mark once or twice, and stop. Follow with a cloth dampened with soapy water, then a dry cloth. Do the hidden-spot test first, because a quick wipe is not the same as soaking. Open a window, keep it away from pilot lights and flames, and lay the used rag flat outdoors to dry before you throw it away rather than balling it up in the trash.
Wax-finished floors
Solvents dissolve wax, so mineral spirits will leave a bare patch. On a waxed floor the standard repair is superfine (0000) steel wool dipped in liquid wax, rubbed gently in small circles, then buffed and re-waxed. The University of Georgia guide lists this for stubborn heel marks and warns that steel wool can take off a light layer of finish, so rub gently. If your floor is waxed, our guide to cleaning waxed wood floors without stripping the wax covers the maintenance side.
Steel wool removes a thin layer of finish, so rub gently and only when softer methods fail. Source: University of Georgia Extension, Removing Heel Marks
What Not to Use on Wood Floor Scuffs
- WD-40 and other oily sprays. They do lift marks, but they leave a slick film that is a real slip hazard on a floor, and the residue can interfere with polish or recoating later. If you used it, wash the area with soapy water until it no longer feels slippery. Our guide to getting sap off wood floors is the better read if the mark is sticky tree sap rather than a scuff.
- Acetone or nail polish remover. They can soften and cloud many floor finishes within seconds.
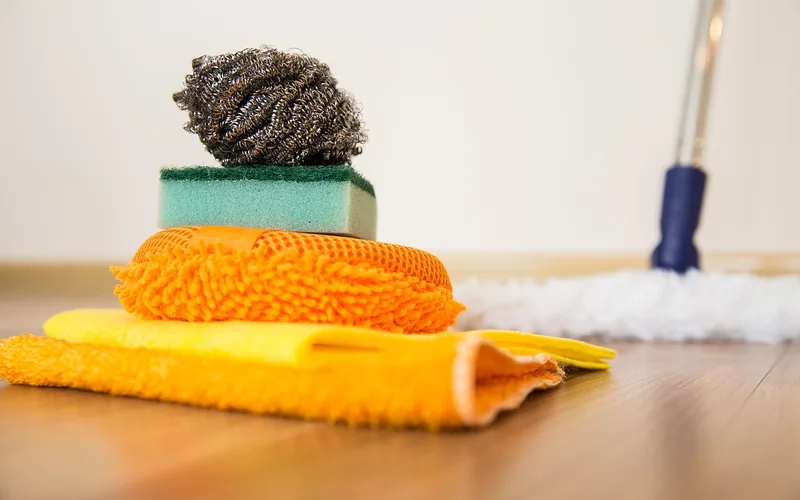
- Scouring powder and scrubby pads. These scratch the finish and turn one scuff into a dull patch.
- Soaking wet mops. Water that reaches the seams can raise the grain and cup boards over time.
- Baking soda or toothpaste as a habit. Both work only because they are mildly abrasive, so they dull the sheen. See our baking soda on wood floors breakdown for what actually happens to the finish.
Laminate, Vinyl Plank and Engineered Floors
Not every wood-look floor behaves like solid hardwood. Laminate and vinyl plank have a printed surface under a clear wear layer, so there is no wax to protect and nothing to refinish. For these, use the gentlest steps: dry microfiber, then a damp cloth with mild soap or the cleaner the manufacturer recommends. Skip steel wool, wax and sanding entirely, and check the care sheet before using a melamine sponge. Engineered hardwood with a real wood veneer should be treated like solid hardwood, with extra care about moisture.
When the Mark Is Not a Scuff
If the mark is a discoloration that goes into the wood, such as a dark ring or a pet spot, it is a stain, and our stain removal guide matches the fix to the stain type. If the whole floor looks gray and sticky rather than just marked, work through our very dirty hardwood floor rescue first, because scuffs hide inside built-up grime. For a safe homemade option, see the homemade hardwood floor cleaner recipes sorted by finish type.
How to Stop Scuff Marks Coming Back
- Make the entry a shoe zone. Grit and rubber soles cause most scuffs, so a shoe rack and a mat at the door removes the main source.
- Use felt pads and replace them. Felt pads on chair and table legs wear flat and pick up grit. Check them every few months and replace any that look thin or gritty.
- Pick floor-safe casters. Hard plastic casters on office chairs scuff and scratch. Soft rubber or polyurethane wheels are gentler on the finish.
- Choose breathable rug pads. Some rubber or vinyl-backed mats can discolor a finish over time, so a felt or natural-fiber pad is the safer choice.
- Dust mop regularly. Removing grit weekly is cheaper than refinishing later.
Frequently Asked Questions
Can you use a magic eraser on wood floors?
Yes on sealed floors such as polyurethane, but use it damp, with light pressure, for a few seconds at a time. A melamine sponge is a fine abrasive and can leave a dull patch on satin or matte finishes. Do not use it on wax or oil finishes, and test a hidden spot first.
Does WD-40 remove scuff marks from hardwood floors?
It can lift a mark, but it leaves an oily film that makes the floor slippery and can interfere with polish or recoating. Mineral spirits on a cloth or a tennis ball are safer first choices. If you do use WD-40, wash the spot with soapy water until it no longer feels slick.
What is the difference between a scuff and a scratch on a wood floor?
A scuff is residue or a light mark sitting on the finish and wipes or rubs away. A scratch is a groove in the finish or wood. Drag a fingernail across it: if the nail catches, it is a scratch and needs filling or touch-up, not scrubbing.
Does mineral spirits damage hardwood floor finish?
A quick wipe on a cured polyurethane finish is generally fine, but soaking or repeated use can dull it. Mineral spirits dissolves wax, so it will strip a waxed floor in that spot. Test a hidden area first, ventilate the room, and keep it away from flames.
How do I remove black heel marks from a wood floor?
Start with a dry microfiber rub, then a clean tennis ball on a broom handle. If the mark remains, wipe once with a cloth lightly dampened with mineral spirits on a polyurethane floor, then wash the area with soapy water. On waxed floors use 0000 steel wool with liquid wax instead.
The Bottom Line
Sort the mark first, identify the finish second, and climb the ladder from a dry cloth to a tennis ball to foam to a damp sponge, only reaching for mineral spirits or steel wool when you have to. Most scuffs never need more than the first three rungs, and keeping grit off the floor does more than any cleaner. If you want a longer reference with extra scenarios and maintenance habits, our companion guide on removing scuff marks on wood floors without damage goes deeper.
Sponsored / affiliate links. As an Amazon Associate I earn from qualifying purchases. I may earn additional commission from eligible campaigns.