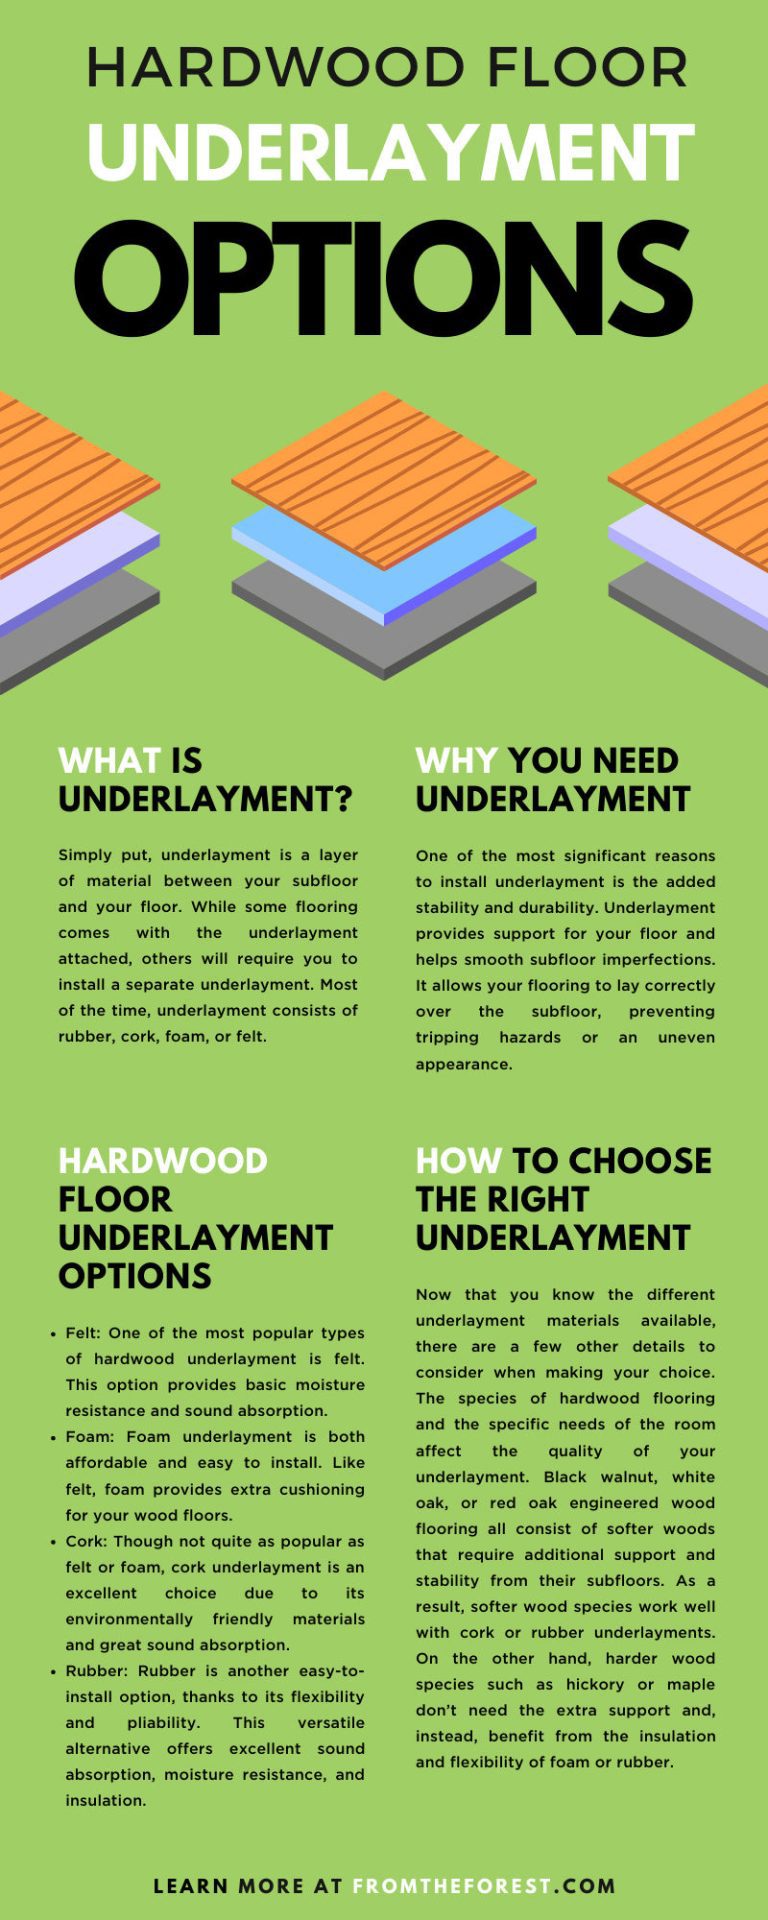
Self Leveling Floor Compound for Wood Floors: A Smooth Success
Self-leveling floor compound can be used on a variety of substrates including wood floors, concrete, screed, and existing tiles. It is ideal for filling in low spots and dips in the floor.
However, it is important to ensure that the wood surface is firm and free of any deflection or bend before applying the compound. The wood must also be prepared in a certain way with no seams or screw heads showing.
Excessive amounts of water are not needed when using self-leveling compound. With proper preparation and application, self-leveling floor compound can provide a smooth and level surface for any type of flooring.
Introduction To Self-leveling Compounds
Benefits For Wood Floors
Self-leveling compounds offer numerous benefits when used on wood floors. They provide a smooth and level surface, which is essential for the installation of various floor coverings such as tiles, hardwood, and laminate. Additionally, these compounds help to address uneven areas and low spots on the wood subfloor, ensuring a flawless and professional finish. They also improve the overall durability and longevity of the wood flooring.
Composition And Properties
Self-leveling compounds are typically composed of a blend of cement, fine aggregates, and other additives. These compounds have a self-smoothing property, which allows them to settle into a level position without troweling. They are also engineered to have high flowability, enabling them to spread evenly across the wood subfloor. Moreover, these compounds possess excellent adhesive properties, ensuring strong bonding with the wood surface.

Prepping The Wood Surface
Before applying self-leveling floor compound on wood floors, it is crucial to properly prepare the wood surface. This step is essential to ensure the best results and long-lasting performance of the self-leveling compound. The prepping process involves cleaning and priming the wood, as well as addressing any deflections and gaps.
Cleaning And Priming
To start, thoroughly clean the wood surface to remove any dirt, dust, or debris. This can be done by sweeping or vacuuming the floor. It is important to ensure that the surface is free from any loose particles that may interfere with the bonding of the self-leveling compound.
Next, it is recommended to prime the wood surface before applying the self-leveling compound. Priming helps to enhance the adhesion between the wood and the compound, creating a strong bond. Choose a suitable primer specifically designed for wood surfaces and follow the manufacturer’s instructions for application.
Addressing Deflections And Gaps
Prior to pouring the self-leveling floor compound, it is essential to address any deflections or gaps in the wood surface. Deflections refer to areas where the wood is uneven or has dips, while gaps are spaces between the wood planks.
To address deflections, use a leveling compound or a suitable filler to fill in the low spots and create a level surface. Apply the leveling compound according to the manufacturer’s instructions and ensure it is fully cured before proceeding with the self-leveling compound.
For gaps between the wood planks, use a flexible sealant or filler to fill in the spaces. This helps to prevent the self-leveling compound from seeping through the gaps and ensures a smooth and even surface.
Once the cleaning, priming, and addressing of deflections and gaps are complete, the wood surface is ready for the application of the self-leveling floor compound. Following these steps will help to ensure a successful and durable installation.
Choosing The Right Compound
When it comes to self-leveling floor compound for wood floors, choosing the right compound is essential to ensure a smooth and durable finish. With a myriad of brands and options available in the market, it’s important to compare brands and prices as well as identify the best fit for wood.
Comparing Brands And Prices
Before selecting a self-leveling floor compound, it’s crucial to compare different brands and their respective prices. This allows you to make an informed decision based on your budget and the quality of the product.
Identifying The Best Fit For Wood
Not all self-leveling compounds are suitable for wood floors. It’s important to identify the best fit for wood by considering factors such as the type of wood and the specific requirements of the project. Look for products specifically designed for wood substrates to ensure compatibility and optimal results.
The Application Process
When applying self-leveling floor compound for wood floors, it’s essential to follow the correct application process to ensure a smooth and level surface. Here are the key steps involved in the application process:
Mixing Techniques
Properly mixing the self-leveling compound is crucial for achieving the desired consistency and performance. Follow these simple steps for effective mixing:
- Start by pouring the recommended amount of water into a clean mixing container.
- Gradually add the self-leveling compound while continuously mixing with a drill and paddle attachment.
- Ensure the mixture is smooth and free of lumps to achieve optimal results.
Pouring And Spreading
Once the self-leveling compound is properly mixed, it’s time to pour and spread it onto the wood floor surface. Follow these steps for a successful pouring and spreading process:
- Begin pouring the mixed compound onto the lowest point of the floor.
- Use a smoothing tool to spread the compound evenly across the surface, working towards the edges of the room.
- Ensure the entire floor is covered with a consistent layer of the self-leveling compound.
Troubleshooting Common Issues
Troubleshooting common issues with self-leveling floor compound for wood floors can be easily done by following proper guidelines and techniques. Ensure that the wood surface is firm and suitable for bonding with the concrete surface. Avoid excessive water usage during the application process.
For more information on how to use self-leveling compounds, check out Topps Tiles’ knowledge base.
Avoiding And Fixing Bubbles
One common issue when using self leveling floor compound for wood floors is the formation of bubbles. These bubbles can be unsightly and can compromise the integrity of the flooring. To avoid bubbles, it is important to mix the compound correctly and to apply it slowly and evenly. If bubbles do form, they can be fixed by popping them with a needle or pin and then smoothing out the area with a trowel or putty knife.
Dealing With Uneven Coverage
Another issue that can arise when using self leveling floor compound for wood floors is uneven coverage. This can be caused by a variety of factors, including improper mixing, uneven application, or the presence of debris on the surface of the wood. To address this issue, it is important to carefully follow the manufacturer’s instructions for mixing and applying the compound. Any debris should be removed from the surface of the wood before application, and the compound should be spread evenly over the entire surface. If uneven coverage does occur, it may be necessary to apply an additional layer of compound to achieve the desired level of smoothness.
In conclusion, using self leveling floor compound for wood floors can be a great way to achieve a smooth, level surface. However, it is important to be aware of common issues that can arise and to take steps to avoid or address them. By following the manufacturer’s instructions carefully and taking the time to prepare the surface properly, it is possible to achieve a beautiful, durable floor that will last for years to come.
Drying And Curing Times
The drying and curing times for self-leveling floor compound on wood floors can vary depending on the specific product used. It is important to follow the manufacturer’s instructions for application and allow sufficient time for the compound to fully dry and cure before installing any flooring on top.
Using a self-leveling compound can help level out uneven or low spots on wood floors, providing a smooth and even surface for further installation.
What To Expect
When using self-leveling floor compound on wood floors, it’s important to understand the drying and curing times. After application, the compound will begin to level itself out and dry to the touch within a few hours. However, the complete curing process can take anywhere from 24 hours to several days, depending on the specific product and environmental conditions.
Speeding Up The Process Safely
If you’re looking to speed up the drying and curing times of your self-leveling floor compound, there are a few things you can do safely. First, ensure that the room is well-ventilated and at a consistent temperature. Avoid turning up the heat too high, as this can cause the compound to dry too quickly and crack. Instead, use fans or open windows to promote air flow.
Another way to speed up the process is to use a fast-drying compound. These products are specifically designed to dry and cure more quickly than traditional self-levelers. However, be sure to follow the manufacturer’s instructions carefully and avoid applying too thick of a layer.
In conclusion, self-leveling floor compound can be a great solution for uneven wood floors. By understanding the drying and curing times and taking steps to speed up the process safely, you can achieve a level and smooth surface for your flooring installation. Be sure to choose a high-quality product and follow all instructions carefully for the best results.
Finishing Touches
When it comes to self-leveling floor compound for wood floors, the finishing touches are crucial to achieving a smooth and flawless surface. From sanding and smoothing to preparing for flooring installation, each step is essential to ensure the best results for your wood floors.
Sanding And Smoothing
Sanding and smoothing the wood subfloor is the first step to prepare for the application of self-leveling floor compound. This process helps to remove any imperfections, rough patches, or high spots, creating a level surface for the compound to adhere to. It’s important to use fine-grit sandpaper and a floor sander to achieve a uniform and smooth subfloor. Once the sanding is complete, the surface should be thoroughly cleaned to remove any dust, debris, and residue before moving on to the next steps.
Preparing For Flooring Installation
After the sanding and smoothing process, it’s essential to prepare the subfloor for the installation of the new flooring. This involves inspecting the subfloor for any remaining imperfections, ensuring that it is clean, dry, and free of any contaminants that could affect the adhesion of the new flooring material. Additionally, it’s important to follow the manufacturer’s guidelines for the specific type of flooring being installed, as different flooring materials may have unique requirements for subfloor preparation.
Maintenance And Longevity
When it comes to self-leveling floor compound for wood floors, proper maintenance is crucial to ensure longevity and durability. By taking the necessary steps to protect the surface and implementing effective repair and touch-up strategies, you can extend the lifespan of your wood floors and maintain their aesthetic appeal.
Protecting The Surface
Protecting the surface of your wood floors is essential for preserving their integrity and appearance. Utilize the following techniques to safeguard the surface:
- Apply a high-quality sealant to create a protective barrier against moisture and stains.
- Use furniture pads and area rugs to prevent scratches and dents caused by heavy objects and foot traffic.
- Regularly clean the floors with a gentle wood floor cleaner to remove dirt and debris without causing damage.
Repair And Touch-up Tips
When it comes to repairing and touching up your wood floors treated with self-leveling compound, consider the following tips:
- Address any visible damage promptly by filling in cracks and gaps with a compatible wood filler.
- Perform routine inspections to identify areas that require reapplication of the self-leveling compound for seamless integration.
- Utilize wood-specific stains and finishes for spot treatments to maintain a consistent and uniform appearance.
Case Studies And Testimonials
Discover how our self-leveling floor compound for wood floors has transformed the homes of our satisfied customers. Read our case studies and testimonials to see how easy it is to achieve a level surface without the need for excessive amounts of water.
Improve the look and feel of your home with our self-leveling floor compound.
When it comes to leveling wood floors, self-leveling floor compound has proven to be a game-changer. Don’t just take our word for it – let’s explore some case studies and testimonials from both DIY enthusiasts and professionals in the industry. From successful DIY projects to valuable insights from experts, these stories will give you a better understanding of the effectiveness and versatility of self-leveling floor compound for wood floors.
DIY Success Stories
One of the most popular YouTube channels for DIY home renovation, DIYTyler, shared a comprehensive tutorial on applying self-leveling compound over OSB floors. The video showcases the step-by-step process, including applying Schluter curb, caulking the edges, primer application, mixing the self-leveler, and applying a second layer for a flawless finish.
Another informative YouTube video by Home RenoVision DIY demonstrates how to use floor leveler on wood subfloors to fill low spots. The tutorial covers the entire process, from mixing the floor leveler to using the screed and achieving a smooth and even surface. The final result speaks for itself, proving the effectiveness of self-leveling floor compound.
Professional Insights
When it comes to finding the right self-leveling floor compound for wood floors, it’s essential to consider the best products available in the market. Home improvement giants like Home Depot and Lowe’s offer a wide range of options. For example, Lanco Ultra Level Self-Leveling Underlayment and Quikrete FastSet Self-Leveling Floor Resurfacer are highly recommended products with competitive prices.
If you’re looking for more budget-friendly options, Amazon.com offers DAP Bondex Flexible Floor Ready to Use Patch & Leveler Subfloor, which provides excellent value for the price. Ace Hardware also offers Akona Self-Leveling Floor Underlayment, which is a reliable choice for professionals.
It’s worth mentioning that self-leveling compounds are not limited to wood floors. They can be used on various substrates such as concrete, screed, and existing tiles. This versatility allows for seamless transitions between different flooring materials, making self-leveling floor compound a go-to solution for many renovation projects.
In Conclusion
These case studies and testimonials highlight the effectiveness and versatility of self-leveling floor compound for wood floors. Whether you’re a DIY enthusiast or a professional contractor, using self-leveling floor compound can help you achieve a flawless and even surface. With a wide range of products available in the market, finding the right one for your project is easier than ever. Don’t let uneven floors be a hindrance – self-leveling floor compound is here to transform your space.
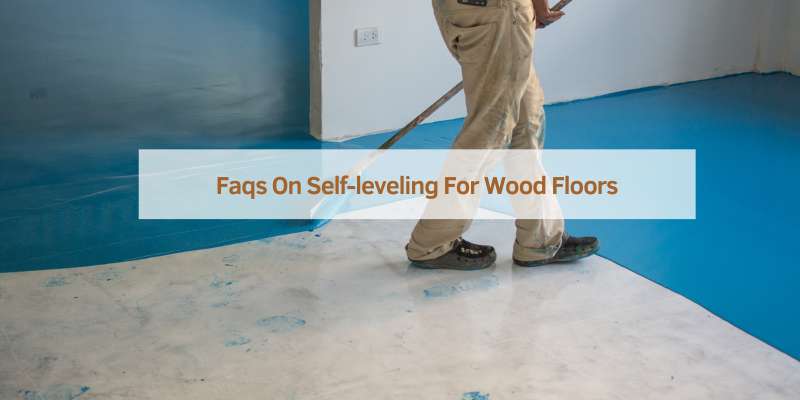
Faqs On Self-leveling For Wood Floors
Welcome to our FAQs on Self-Leveling for Wood Floors, where we address common questions about using self-leveling compounds on wood surfaces. If you’re considering this option for your wood floors, you may have specific concerns that need clarification. Let’s dive into some of the most frequently asked questions about self-leveling for wood floors.
Can It Be Used On All Wood Types?
Self-leveling compounds can generally be used on various types of wood, including plywood, oriented strand board (OSB), and hardwood. However, it’s essential to assess the condition of the wood and follow the manufacturer’s guidelines for compatibility. Some compounds may have specific recommendations for certain wood species, so it’s crucial to check the product specifications before application.
Outdoor Use: Yay Or Nay?
Self-leveling compounds are primarily designed for indoor use and are not suitable for outdoor applications. Exposure to outdoor elements such as moisture, temperature fluctuations, and UV radiation can compromise the performance and durability of the compound. For outdoor leveling projects, alternative materials and methods specifically formulated for exterior use should be considered.
Frequently Asked Questions
Can Self-leveling Compound Be Used On Wood Floors?
Yes, self-leveling compound can be used on wood floors, but the wood surface must be firm and without any deflection or bend. The wood must also be prepared in certain ways, with no seams and screw heads showing. Self-leveling compound is ideal for areas where the floor dips or needs filling in, and excessive amounts of water are not needed.
Will Self Leveler Bond To Wood?
Yes, self-leveler can bond to wood surfaces as long as the wood is firm and free from any deflection or bending. It is important to prepare the wood properly by ensuring there are no seams or exposed screw heads. Excessive amounts of water are not needed when using self-leveling compound.
When Should You Not Use Self Leveler?
Self-leveler should not be used when the wood surface is not firm or has deflection. It is also not recommended if the wood has seams or exposed screw heads. Excessive amounts of water should not be used with self-leveling compound.
How Do You Level An Uneven Floor For Wood Flooring?
To level an uneven floor for wood flooring, use a self-leveling compound. Prepare the subfloor, mix the compound, pour it, and spread it evenly. Let it dry before installing the wood flooring. Avoid excessive water and ensure the wood surface is firm for a good bond.
Conclusion
Self-leveling floor compound is a versatile solution for wood floors that need leveling or filling in low spots. It can be used on various substrates, including concrete, screed, existing tiles, and timber floors. The key is to ensure that the wood surface is firm and free from any deflection or bend.
By following the proper preparation and application techniques, self-leveling compound can provide a smooth and level surface for your wood floors. Remember, excessive water is not needed when working with self-leveling compound.