How to Engrave Wood: Hand Tools, Rotary Tools & Laser Methods
Wood engraving covers more ground than most guides let on. There’s the traditional hand-tool method using gravers and burins on end-grain blocks, there’s a rotary tool like a Dremel for a faster freehand approach, and there’s a diode laser engraver that burns a digital design into the surface without you touching a blade to the wood at all. Which one makes sense for you depends on the detail level you want, your budget, and how much smoke and mess you’re willing to deal with. This guide walks through the classic hand-carving process step by step, then covers how laser engraving actually works and the safety precautions it requires that hand tools simply don’t.
What is Wood Engraving?
Best Diode Laser Engraver for Wood Beginners
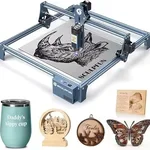 |
SCULPFUN S9 5.5W Diode Laser Engraver – $229.90 If hand tools feel too slow, this open-frame diode laser burns a detailed design into wood automatically, no carving required.
|
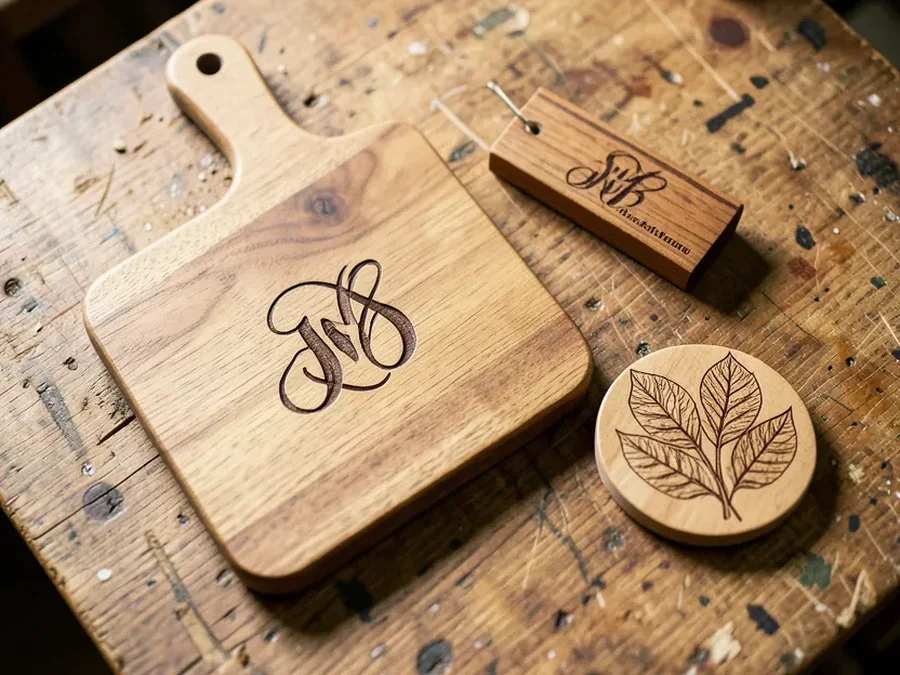
Wood engraving is a printmaking technique where a design is carved into a block of wood, typically end-grain wood, to create a relief surface. Unlike woodcuts, where the image is carved into the side grain, wood engraving uses the harder end grain, allowing for finer details and sharper lines. Once the design is carved, ink is applied to the raised surface, and then the block is pressed onto paper or fabric to create a print. This method is also often used for decorative purposes directly onto wood, creating engraved patterns or images that become part of the wood itself, rather than for mass printing. It’s a versatile art form that can be used for everything from detailed illustrations for books to personalizing wooden gifts.
Why Try Wood Engraving?
Wood engraving offers a unique blend of precision and artistic freedom. It allows you to imbue wooden objects with a personal touch, creating durable and timeless designs. Imagine personalizing cutting boards, creating intricate patterns on furniture, or crafting custom signs. It’s a rewarding craft that helps you develop patience and fine motor skills. With the right approach, it can be a surprisingly affordable way to add a professional finish to your DIY projects. Plus, working with wood is inherently satisfying, and engraving adds another layer of craftsmanship to that experience.
Essential Tools for Beginner Wood Engravers
Starting out in wood engraving doesn’t require a massive investment. Here’s a breakdown of the essential tools you’ll need to get started, focusing on beginner-friendly options:
1. Wood Blocks
For traditional wood engraving (printmaking), you’ll want a smooth, hard, end-grain wood block. Boxwood is the traditional choice for its fine grain and hardness, allowing for incredibly detailed work. However, for decorative engraving directly onto wood or simpler printmaking, other hardwoods like maple or cherry can also work well. For your first projects, consider getting pre-cut, smooth blocks to save time and effort.
2. Engraving Tools (Gravers or Burins)
These are the heart of your engraving kit. They are small, sharp tools with a wooden handle and a metal tip designed for cutting into wood.
- V-Gouge: Creates V-shaped lines. Essential for drawing lines and details.
- U-Gouge (or Round Nose Gouge): Used for clearing areas and creating rounded shapes or textures.
- Scriber/Lozenge Tool: A sharp point for very fine lines and detail work.
For beginners, a basic set with a few different gouges is usually sufficient. Look for comfort in the handles, as you’ll be holding them for extended periods. Many craft stores and online woodworking suppliers offer affordable starter sets.
3. Transfer Paper and Stylus
To get your design onto the wood, you’ll need a way to transfer it. Graphite transfer paper (also known as carbon paper) is excellent. You’ll also need a stylus or a dull pencil to trace your design onto the paper, which then leaves the graphite marks on the wood.
4. Sandpaper
Smooth wood is crucial for clean engraving. You’ll need sandpaper in various grits, starting from around 120-grit to smooth out any rough patches and progressing to finer grits (220-grit and higher) to achieve a smooth surface. Ensure your wood is perfectly smooth before you begin engraving.
5. Magnification (Optional but Recommended)
A magnifying lamp, reading glasses, or a headset magnifier helps you catch fine detail and avoid mistakes on small work.
6. Safety Gear
This is non-negotiable! Small wood chips can fly unexpectedly when you’re gouging, so a few basics matter every session.
- Safety Glasses: Always wear them, no exceptions.
- Gloves: While some prefer not to wear gloves for better tool feel, consider thin, snug-fitting gloves to protect your hands from splinters and cuts, especially when handling rough wood.
- Dust Mask: Fine wood dust can be harmful. Wear a mask, especially when sanding or if you’re sensitive to dust.
You can find reliable safety gear at most hardware or craft stores.
7. Clamps or Workbench Vise
A sturdy workbench vise or a set of clamps holds your wood firmly in place, preventing slips so you can focus on the cut instead of the workpiece shifting.
Preparing Your Wood for Engraving
The foundation of a great wood engraving starts with proper preparation. A smooth, clean surface will make your engraving process easier and the results more professional.
- Select Your Wood: As mentioned, end-grain hardwoods like maple, cherry, or boxwood are ideal for fine detail. For projects where extreme detail isn’t the goal, a smooth piece of furniture-grade plywood or even a harder softwood can be experimented with, though results will vary.
- Surface Preparation: If your wood isn’t already smooth, start by sanding it. Begin with a medium grit sandpaper (around 120-grit) to remove any significant imperfections. Progress to finer grits, such as 220-grit or even 320-grit, until the surface is glass-smooth to the touch. A perfectly smooth surface prevents your engraving tools from catching on rough grain.
- Clean Thoroughly: After sanding, wipe down the wood with a clean, dry cloth or a tack cloth to remove all dust particles. Any residual dust can interfere with the transfer of your design and affect the quality of your engraving.
Transferring Your Design Onto Wood
Getting your artwork onto the wood accurately is a key step. Here are a couple of common methods:
Method 1: Using Transfer Paper
- Print or draw your design in reverse if you plan to create a print (mirror image), or draw it normally if you are engraving directly onto the surface.
- Place a sheet of graphite transfer paper onto your prepared wood block or surface, with the graphite side down.
- Position your design on top of the transfer paper. You can tape it down lightly if needed to prevent shifting.
- With a stylus or a dull pencil, firmly trace over all the lines of your design. Apply even pressure.
- Carefully lift the design and transfer paper to check the transfer. If any lines are faint, re-trace them.
- Once satisfied, carefully remove the transfer paper. You should have a clear outline of your design on the wood.
Method 2: Freehand Drawing
If you’re confident with your drawing skills, you can draw your design directly onto the wood using a pencil. This method offers the most freedom but requires a steady hand. For beginners, it’s often best to start with transfer paper until you gain more confidence.
The Art of Engraving: Step-by-Step
Now for the exciting part – making your mark! Remember, patience and a light touch are your best friends here. This process is all about controlled removal of wood to reveal your design.
Step 1: Secure Your Wood
Place your wood block or piece onto a stable surface and secure it firmly with clamps or a vise. Ensure it won’t move at all while you’re working. This is crucial for safety and for achieving clean, precise lines.
Step 2: Choose Your Tool
Start with a V-gouge for drawing the main outlines of your design. For areas you want to remove completely, you might use a U-gouge. For very fine details, a sharp scriber or a fine V-gouge will be your go-to.
Step 3: Making the First Cut
Hold the engraving tool comfortably, like you would a pencil, but with a firm grip. Position the tip on your design line. Apply gentle, consistent pressure and push the tool forward, cutting a shallow groove into the wood. Don’t try to remove too much wood at once — it’s better to make multiple shallow passes than one deep, uncontrolled cut. For beginners, focus on following your transferred lines precisely.
Step 4: Refining Lines and Details
As you get comfortable, you can start to vary your line weight by changing the pressure or the angle of your tool. Use the V-gouge to create sharp, clean lines for details. Use the U-gouge to scoop out larger areas or to create textures. Remember, the wood you remove is what shapes your image or pattern. Think about sculpting the wood away from your design.
Step 5: Working with Grain
Wood grain can be tricky. On end-grain blocks, the grain runs perpendicular to the cutting surface, making it more forgiving. However, on side-grain wood, you might experience tear-out if you try to cut against the grain. If you encounter resistance, try changing your cutting angle or making shallower passes. Sometimes, working in short strokes can help.
Step 6: Cleaning Up
Periodically, brush away the wood shavings with a soft brush. This helps you see your progress clearly and avoid mistakes. If you’ve made a slip-up, don’t panic. Small mistakes can often be worked into the design, or you can carefully try to correct them with your tools. For a printmaking block, ensure all the ink is only on the raised surfaces.
Step 7: Finishing Touches
Once you’ve completed the engraving, you can lightly sand the surface again if needed, being careful not to round over any sharp edges you intended to keep. For decorative pieces, you can then apply a finish like oil, wax, or varnish to protect the wood and enhance its beauty.
Laser Engraving Wood: A Modern Alternative
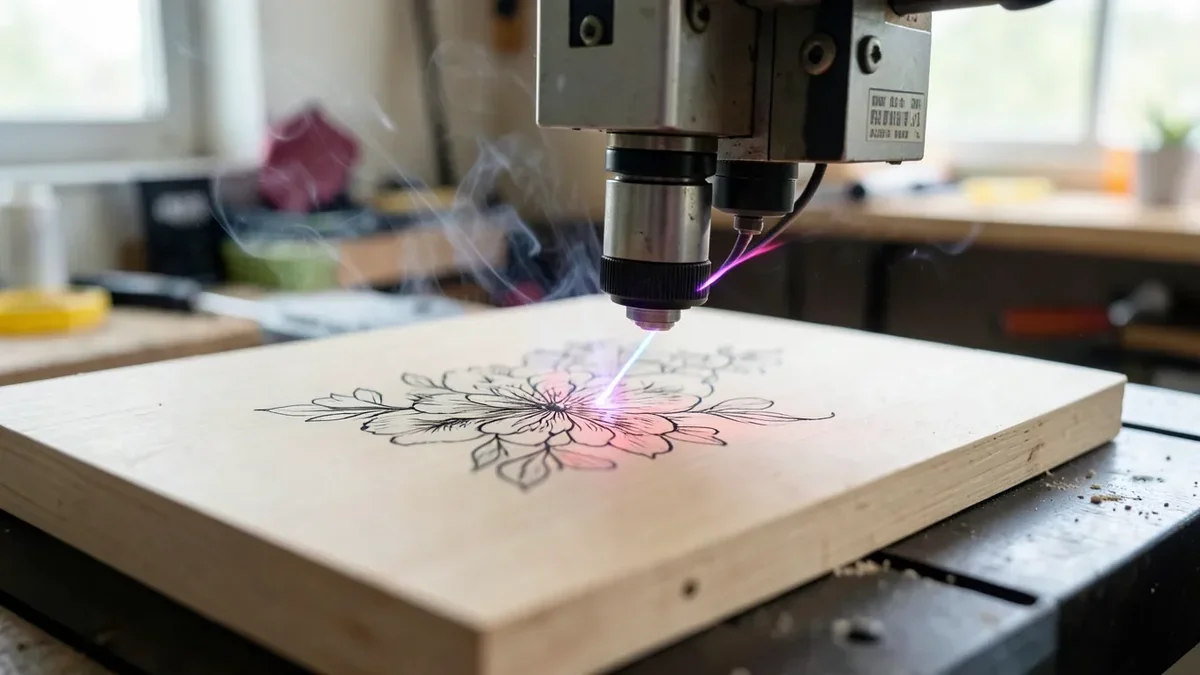
Diode laser engravers have become the dominant consumer option for burning designs into wood, and it’s worth understanding how they differ from hand carving before you decide which method fits your project. Instead of a physical blade removing material, a computer-controlled laser head moves across the wood following a digital file, and the beam’s heat vaporizes or scorches the surface layer to reproduce the design. There’s no hand-tool skill curve involved — the machine handles the precision — but that also means the learning curve shifts to software settings (power, speed, and number of passes) rather than gouge control.
Wood species matters just as much for laser work as it does for hand engraving, arguably more. Denser hardwoods like maple, cherry, and birch plywood char cleanly and hold crisp detail because the heat doesn’t spread far past the beam’s contact point. Resinous or oily softwoods, cedar in particular, tend to smoke more heavily and can burn unevenly since the resin pockets ignite and darken faster than the surrounding grain — it’s not a defect in the machine, it’s the wood’s own chemistry reacting to concentrated heat. Always run a test pass on a scrap of the exact same wood before committing to your final piece, since power and speed settings that work on one board can scorch or barely mark another. If you want to shape plywood with hand tools instead of a laser, our guide on how to carve plywood covers which sheets, rasps and gouges work best.
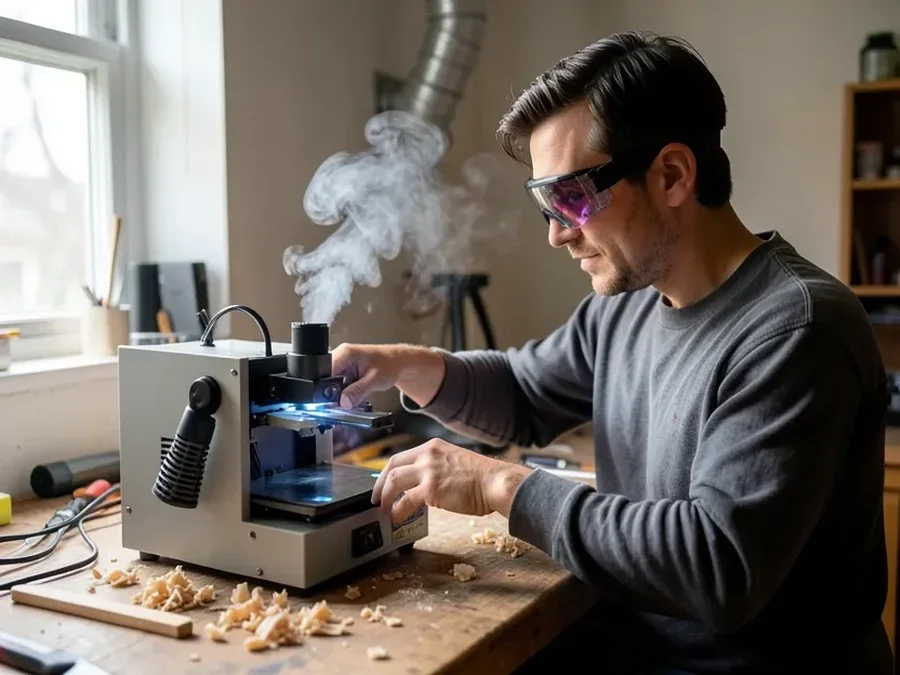
Laser engraving introduces safety considerations that hand tools don’t have, and none of them are optional:
- Eye protection rated for the wavelength: Most consumer diode engravers emit around 445-450nm blue-violet light. Regular sunglasses or tinted safety glasses do nothing against this — you need laser safety glasses with an Optical Density (OD) rating that specifically covers your machine’s wavelength, not a generic pair.
- Ventilation for smoke and fumes: Burning wood releases smoke and volatile organic compounds, and an enclosed room lets them build up fast. Vent the exhaust outside or run it through a proper fume extractor — a window fan pointed vaguely in the right direction isn’t the same thing. Never engrave pressure-treated or stained wood; the chemicals in those finishes can release genuinely toxic fumes when burned, not just irritating smoke.
- Fire risk from unattended operation: A laser head sitting in one spot too long, a paused job left running, or a jam in the material can ignite the wood or the surrounding dust. Stay in the room for the entire job and keep a fire extinguisher within reach.
If you want a deeper comparison of machines and how to choose between them, see our laser wood cutter guide.
Tips for Better Results
Whether you’re working with hand tools or a laser, these habits make the difference between a rough first attempt and a clean finished piece:
- Practice on Scraps: Test your strokes, or your laser’s power/speed settings, on scrap pieces of the same wood before touching your main project.
- Sharp Tools are Key: Dull engraving tools are frustrating and dangerous. A sharp tool (hone it on a stone or honing rod) glides through the wood with less force and cleaner cuts.
- Vary Line Weight: Lines of different thicknesses add depth and visual interest to your engravings.
- Negative Space is Your Friend: What you don’t engrave matters as much as what you do — think about the areas you’re leaving raised, especially for printmaking.
- Embrace Imperfection: Especially when starting out, small quirks add character rather than ruin the piece.
- Study Existing Engravings: Look at how experienced engravers handle line, texture, and form, and let it inform your own practice.
- Good Lighting: Proper illumination in your workspace prevents eye strain and reduces mistakes.
Wood Engraving vs. Other Wood Decoration Methods
It’s helpful to understand where wood engraving fits within the broader landscape of wood decoration. Here’s a quick comparison:
| Method | Description | Best For | Beginner Friendliness | Detail Level | Tools Required |
|---|---|---|---|---|---|
| Wood Engraving | Carving a design into the end-grain of wood for printing or decorative inlay. | Fine detail, creating prints, personalized items, book illustrations. | Moderate (requires precise tool control). | Very High. | Gravers, burins, V-gouges, U-gouges. |
| Wood Carving | Shaping wood using chisels and knives, typically with the grain. Can be shallow (relief) or deep (sculpture). | Decorative reliefs, sculptures, furniture ornamentation. | Beginner to Advanced (depending on complexity). | Moderate to High. | Chisels, knives, gouges, mallets. |
| Laser Engraving | A computer-controlled laser beam burns a digital design onto or into the wood surface. | Precise, repeatable designs, photos, text, and batch work. | Easy once set up (software handles the precision). | Very High. | Diode or CO2 laser engraver, design software, ventilation. |
| Pyrography (Wood Burning) | Using a heated tool to burn designs onto the surface of wood. | Detailed designs, shading, adding texture, personalization on various wood types. | Beginner to Advanced. | Moderate to High. | Pyrography pen/tool, interchangeable tips. |
| Wood Inlay | Setting pieces of different materials (wood, metal, shell) into depressions in the surface of another piece of wood. | Creating patterns, borders, or images using contrasting materials. | Advanced (requires precision cutting and fitting). | High. | Various cutting tools, adhesives, router/chisels. |
| Wood Staining/Painting | Applying colorants to alter the wood’s appearance. | Changing color, pattern creation (e.g., faux grain), protective finishes. | Very Easy. | Low to Moderate (depending on application). | Brushes, rags, applicators. |
Hand-Tool Safety, Always!
Laser safety is covered above — these precautions are specifically for working with gravers, burins, and other hand tools. Working with sharp tools and wood requires a commitment to safety. Always take these precautions:
- Wear Safety Glasses: No exceptions! Protect your eyes from errant chips.
- Keep Tools Sharp: Dull tools require more force, increasing the risk of slipping and injury.
- Cut Away From Yourself: Always direct your cuts away from your body and hands.
- Secure Your Workpiece: Ensure the wood is stable and won’t move during engraving.
- Good Lighting: Work in a well-lit area to clearly see what you’re doing.
- Take Breaks: Fatigue leads to mistakes. Step away if you feel tired or your focus is waning.
- Understand Your Materials: Be aware of the properties of the wood you are using and how it might react to your tools.
For more detailed safety guidelines, the Occupational Safety and Health Administration (OSHA) offers general safety practices that are applicable to any workshop environment.
Frequently Asked Questions (FAQ)
Q1: What is the best type of wood for a beginner to engrave?
A: For traditional wood engraving (printmaking), end-grain maple or cherry are excellent choices. They are hard, smooth, and provide good detail. For decorative engraving directly onto wood, ensure the piece is smooth and free of knots.
Q2: How sharp do my engraving tools need to be?
A: Extremely sharp, like a scalpel. Dull tools will tear the wood, make your work harder, and are more dangerous. You’ll need to hone them regularly.
Q3: My lines are shaky. What can I do?
A: This is common for beginners! Ensure your workpiece is securely clamped. Practice smooth, consistent strokes on scrap wood. Try to initiate the cut at a consistent speed and maintain it. Sometimes, resting your tool hand on the workbench can provide extra stability.
Q4: I made a mistake! Can I fix it?
A: Small mistakes can often be incorporated into the design. For larger errors, you might need to carefully shave away the area and try to blend it in, or if it’s on a printmaking block, you might have to start over on a new block. Don’t get discouraged; mistakes are part of the learning process.
Q5: Is it safe to laser engrave wood indoors?
A: Only with active ventilation. Burning wood produces smoke and VOCs that build up quickly in an enclosed room, so vent the exhaust outside or use a proper fume extractor, and never run pressure-treated or stained wood through the laser since those finishes can release toxic fumes when burned.
Sponsored / affiliate links. As an Amazon Associate I earn from qualifying purchases. I may earn additional commission from eligible campaigns.