Homemade Wood Flatbed for Pickups: Wood, Weight & Legal Checks
A homemade wood flatbed is a 2×6 deck on a rail frame that bolts to your pickup, and the limit is weight, not lumber. An 8 ft deck of 2×6 boards weighs roughly 140 lb in cedar and 400 lb in ipe, and every pound comes off your payload, which is the GVWR minus the empty weight shown on the door jamb label. This guide covers board counts, species weights, fasteners, and the lighting and legal checks to make before you drive.
Homemade Wood Flatbed Plan at a Glance
| Best Flatbed Bolt Pick | |
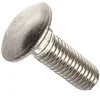 |
1/2-13 x 3 Stainless Steel 18-8 Carriage Bolts (10-pack, Fastenere)
|
The overall build is simple: two long rails, cross members every 16 in or so, a crosswise 2×6 deck, and hardware that will not rust through the wood. The hard part is staying inside your truck’s weight rating and keeping the factory lights and plate visible.
| Tools | Materials |
|---|---|
| Tape measure, square, circular or miter saw | 2×6 deck boards (count in the table below) |
| Drill with 1/2 in bit, impact driver or wrench | Rails and cross members (steel angle or channel, or 4×4 and 2×6 lumber) |
| Clamps, level, sandpaper | Stainless or hot-dip galvanized bolts, washers and nuts |
| Brush or roller for sealer | Penetrating wood sealer for every face and end |
Designing Your Wood Flatbed
Design on paper first. A deck that looks fine on a sketch can rub a tire or hide a tail light once the truck is loaded, so the sketch needs real measurements from your own truck.
Sketching Your Design
Draw the deck length and width, the rail positions, and the wheel wells. Measure from the top of the axle to the frame bump stop with the truck sitting at its normal height, then keep the underside of the deck above that line plus the tire’s travel when the springs compress. Mark where the tail lights, license plate and tie-down points will sit.
Calculating Dimensions And Materials
This is how much wood it takes for a deck that is 80 in wide with 2×6 boards cut crosswise. A 2×6 is really 1.5 in by 5.5 in, and a 3/8 in drainage gap between boards makes each board take 5.875 in of deck length. Weights below are for boards dried to 12 percent moisture, so green or pressure-treated lumber will weigh more.
| Deck length | 2×6 boards (80 in long) | Cedar | Douglas fir | Longleaf pine | White oak | Ipe |
|---|---|---|---|---|---|---|
| 6.5 ft | 13 | 114 lb | 159 lb | 204 lb | 233 lb | 325 lb |
| 8 ft | 16 | 141 lb | 196 lb | 251 lb | 287 lb | 400 lb |
| 9 ft | 18 | 158 lb | 220 lb | 282 lb | 323 lb | 450 lb |
| 10 ft | 20 | 176 lb | 244 lb | 313 lb | 359 lb | 500 lb |
Those figures are deck boards only. Add the rails, cross members, hardware and any headache rack, then subtract the total from your payload before you cut a single board. For lumber sizing questions see our nominal lumber size chart.
Best Wood for Homemade Flatbed: Species Comparison
Weight and rot resistance pull in opposite directions, which is why the heaviest wood is not automatically the best flatbed wood. Dry weights and decay ratings below come from The Wood Database.
| Wood species | Dry weight (lb/ft3) | Natural decay resistance | Weight of one 80 in 2×6 |
|---|---|---|---|
| Western red cedar | 23 | Durable to very durable | 8.8 lb |
| Douglas fir | 32 | Moderately durable (heartwood) | 12.2 lb |
| Longleaf pine (southern yellow pine group) | 41 | Moderately resistant | 15.7 lb |
| White oak | 47 | Very durable | 18.0 lb |
| Ipe | 65.5 | Very durable | 25.0 lb |
Ipe averages about 65.5 lb per cubic foot against about 23 lb for western red cedar. That is roughly 2.8 times the weight for the same board size. Source: The Wood Database, Ipe
Myth worth correcting: hardwood is not automatically the stronger choice for a flatbed. White oak and ipe resist rot better than pine, but they add roughly 36 to 260 lb to an 8 ft deck compared with cedar and pine. On a half-ton pickup with limited payload, that weight is cargo you can no longer carry. Southern yellow pine that has been pressure treated is the usual compromise because it is hard, strong for its weight, and gets its rot protection from the treatment rather than from extra density.
Recommended board size: 2×6 nominal for the deck surface, running crosswise over the rails, with a 1/4 to 3/8 in gap for drainage.
Selecting The Right Wood
Types Of Wood For Durability
Pick the lightest species that gives you the rot resistance you need. Cedar gives the lowest weight but has the lowest hardness, so it dents under dropped tools and heavy point loads. Pressure-treated southern yellow pine is the middle choice. Oak and ipe suit trucks with payload to spare.
Treating And Preparing Your Wood
Let treated or green lumber dry before sealing, then coat every face and both ends of every board, since end grain soaks up water fastest. Our guide to treating a wood trailer deck compares preservatives for the same kind of exposed, load-bearing deck.
Building The Frame
The frame carries the load, so it is where the build either works or fails. Rails run front to back, cross members tie them together, and the deck boards are the skin on top.
Cutting And Assembling The Base Frame
- Measure the truck frame or bed rails and cut two rails to your deck length.
- Cut cross members to the deck width minus the rail thickness, and space them about 16 in apart under the deck.
- Square the frame by checking that both diagonals match, then fasten the joints with bolts, not just screws.
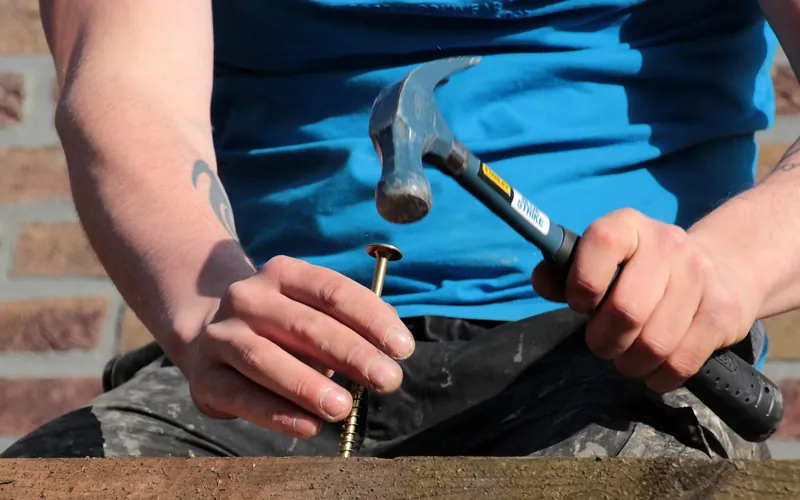
- Lay the deck boards crosswise, 3/8 in apart, and drill each board for two bolts per rail it crosses.
Reinforcing The Structure
Add diagonal braces at the front and rear corners and an extra cross member where the rear axle load lands. Bolts with washers and nuts hold better than wood screws when the load shifts side to side. If you are fastening wood to steel rails, our wood-to-metal fastening guide covers which hardware holds.
Installing The Flatbed Onto Your Truck
Preparing The Truck Bed
If you keep the stock bed, clean it and check the floor for rust before you set the frame on it. If you are removing the bed instead, see our separate guide on building a wood bed for a truck, which covers the swap rather than the bolt-on flatbed.
Securing The Flatbed
- Set the frame on the truck and check that it sits level and square to the cab.
- Measure tire clearance with the truck loaded, or with the springs compressed to the bump stops.
- Bolt the frame down through the bed rails or chassis brackets using heavy-duty steel hardware sized for your truck.
- Re-torque every bolt after the first 50 miles and again after the first loaded trip.
Use stainless carriage bolts to fasten deck boards to the frame, but use high-strength steel bolts for the points that tie the frame to the truck itself. Have a welder or truck-equipment shop review a frame mounting plan if you are unsure.
Weight, Lighting And Legal Checks Before You Drive
This is the section most homemade flatbed guides skip. The rules differ by state, so treat the table below as a checklist of questions to answer with your own state motor vehicle agency, not as legal advice.
| Check | What to do | Where to look |
|---|---|---|
| Payload | Find the GVWR on the driver’s door jamb certification label, subtract the truck’s empty weight, then subtract the flatbed weight from what is left. | Door jamb label and owner’s manual |
| Added weight | Federal rules for retailer-installed accessories call for a reduced-capacity label when added weight is over 1.5 percent of GVWR or 100 lb, whichever is lower. A wood deck easily passes that line. | NHTSA bulletin on load carrying capacity labels |
| Lights and reflectors | Do not let the deck, a tailboard or the load hide the tail, stop and turn lamps or reflectors. Move or add lamps if the new deck blocks them. | 49 CFR 393.9 for commercial vehicles; your state code for private trucks |
| License plate | Keep the plate lit and readable where your state requires it. | State motor vehicle agency |
| Cargo tie-down | Add rated tie-down points and use rated straps. | State code; 49 CFR Part 393 for commercial work |
| Inspection and insurance | Ask your state inspection station and insurer whether a body swap or added deck needs a re-inspection or notice. | State inspection rules and your insurer |
The federal lamp rule in 49 CFR 393.9 says required lamps must work and must not be obscured by a tailboard or part of the load. It governs commercial vehicles, so a private pickup falls under your state’s version, but the principle is the right design target either way. The accessory-label threshold comes from an NHTSA bulletin and is written for vehicle retailers, so use it as a yardstick for how much weight is significant.
Finishing Touches
Sanding And Sealing The Wood
Ease sharp edges with sandpaper, then apply a penetrating oil-based sealer to the top, bottom, edges and ends. Film-forming paints trap water and peel under load and abrasion, while penetrating sealers wear off gradually and are easy to recoat.
Customization Ideas
- Stake pockets or D-rings for tie-downs
- A headache rack behind the cab
- A metal or wood tailgate that does not cover the lights
- LED lamps added if the stock lamps are blocked
- A toolbox mounted between the rails
Maintenance Tips
Regular Inspection And Care
Check the deck every few months for cracks, soft spots and loose bolts, and look under the boards where water collects. Reseal on a schedule that suits your climate and use.
Dealing With Wear And Tear
- Replace any board that is cracked through or soft, since boards are cheap and cross members are not.
- Re-tighten bolts and replace any that show rust streaks or thread damage.
- Wire-brush surface rust on steel rails and recoat with a rust-resistant paint.
- Wash off dirt and debris so water does not sit on the deck.
Frequently Asked Questions
How much wood does it take to build a wooden flatbed?
An 8 ft long, 80 in wide deck takes 16 full 2×6 boards cut to 80 in with a 3/8 in gap between them. A 6.5 ft deck takes 13 and a 10 ft deck takes 20. Add lumber or steel for rails and cross members on top of that.
What is the best wood for a homemade flatbed for a truck?
Pressure-treated southern yellow pine 2×6 is the usual balance of strength, rot resistance and weight. White oak and ipe last longer but add roughly 36 to 260 lb to an 8 ft deck over cedar or pine. Cedar is the lightest option but dents more easily.
How much does a homemade wood flatbed weigh?
An 8 ft by 80 in deck of 2×6 boards weighs about 141 lb in western red cedar, 251 lb in longleaf pine and 400 lb in ipe at 12 percent moisture. Rails, hardware and accessories add more, and wet or treated lumber weighs more than dry.
Do I have to move my truck’s lights for a homemade flatbed?
Yes if the new deck, a tailboard or the load hides them. Federal commercial rules say required lamps must not be obscured by a tailboard or load, and states apply their own rules to private trucks, so check your state’s requirements before driving.
How do you attach wood decking to a flatbed frame?
Drill pilot holes, set the deck boards across the rails with a 1/4 to 3/8 in gap, and fasten each board to each rail with a stainless carriage bolt, washer and nut. Use stronger steel hardware for the frame-to-truck connection.
A homemade wood flatbed pays off when the weight math and the lighting check are done first. Build the frame square, keep the deck light enough for your payload, and confirm your state’s rules before the first load.
Sponsored / affiliate links. As an Amazon Associate I earn from qualifying purchases. I may earn additional commission from eligible campaigns.