Creating the Perfect Above Ground Pool with Wood Deck: A Woodworker’s Guide to Building Your Backyard Oasis
Hey there! If you’re dreaming of a backyard that feels like a mini resort, an above ground pool with a wood deck might just be your ticket. I’ve spent years tinkering with woodworking projects, and let me tell you, building a wood deck around an above ground pool is one of the most rewarding projects I’ve tackled. It’s not just about slapping some boards around a pool—it’s about creating a space where your family can splash, relax, and make memories. In this guide, I’ll walk you through everything I’ve learned, from choosing the right materials to adding those special touches that make your pool area pop. Whether you’re a seasoned woodworker or just starting out, this article is packed with tips to help you build a stunning, functional, and safe above ground pool deck.
Let’s dive in and explore how you can transform your backyard into a summer paradise!
Why Choose an Above Ground Pool with a Wood Deck?
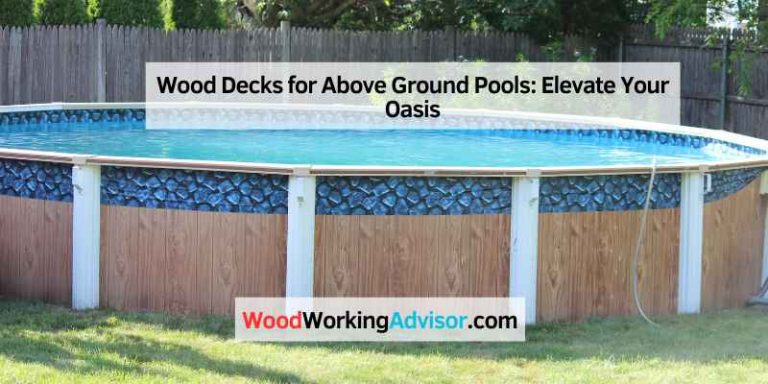
When I first considered adding a pool to my backyard, I was torn between in-ground and above ground options. In-ground pools are gorgeous, but the cost and construction time can be overwhelming. That’s when I realized an above ground pool with a wood deck was the perfect solution. It’s budget-friendly, quicker to set up, and with a well-built deck, it can look just as sleek as an in-ground pool.
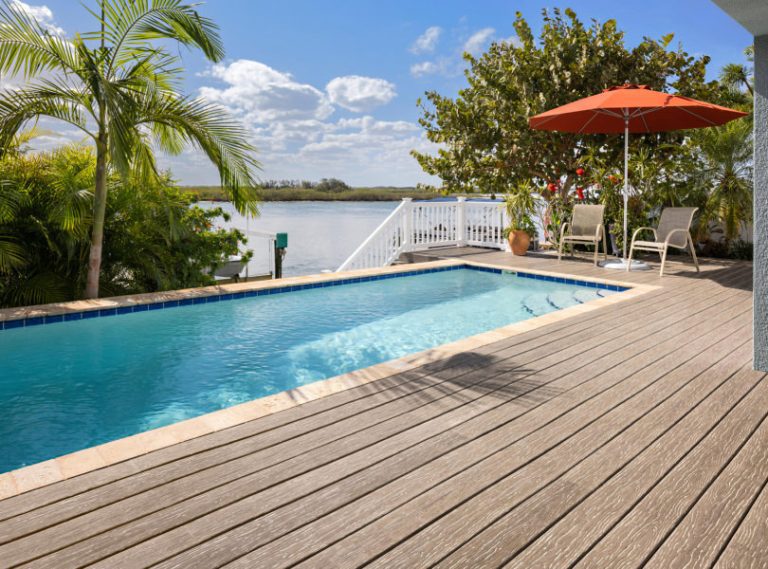
An above ground pool with a wood deck offers a few key benefits. First, it elevates the aesthetic of your backyard. Without a deck, above ground pools can look a bit out of place, like a giant kiddie pool plopped in the grass. A wood deck wraps it up nicely, making it feel integrated into your outdoor space. Second, it adds functionality. A deck gives you a place to lounge, set up chairs, or even add a grill for poolside barbecues. Finally, it improves safety. With a deck, you can add gates or railings to keep kids and pets safe, which was a huge priority for me since I have two young kids and a curious dog.
Planning Your Above Ground Pool Deck: The First Steps
Before you grab your hammer, you need a solid plan. I learned this the hard way when I started my first deck project without a clear vision—it ended up costing me extra time and money. Here’s how I approach planning now.
Start by sketching out your ideas. Think about the size and shape of your pool and how much deck space you want. Do you want a full-surround deck that wraps all the way around the pool, or a side deck that covers just one section? I went with a half-surround deck for my 21-foot round pool because it gave me enough space for lounging without eating up my entire backyard.
Next, check your local building codes. Every town is different, and you don’t want to build a deck only to find out it doesn’t meet regulations. I had to get a permit for mine, and the inspector was picky about things like railing height and footing depth. Also, consider your budget. Lumber prices can fluctuate, and when I built my deck, I was shocked at how much costs had spiked. Plan for materials, tools, and maybe a few rentals like a concrete mixer if you’re pouring footings.
Finally, think about how you’ll use the space. My family loves hosting summer barbecues, so I included a wide section for a table and chairs. If you’re more into sunbathing, you might want space for lounge chairs or even a pergola for shade. Write down your must-haves to guide your design.
Choosing the Right Wood for Your Pool Deck
Picking the right wood is crucial for a pool deck that lasts. I’ve tried a few materials over the years, and each has its pros and cons. Here’s a breakdown of the options I’ve explored:
| Material | Pros | Cons |
|---|---|---|
| Pressure-Treated Pine | Affordable, widely available, treated to resist rot and insects | Requires regular maintenance, prone to splinters, shorter lifespan (10-20 years) |
| Cedar | Naturally rot-resistant, attractive grain, pleasant aroma | More expensive than pine, still needs sealing, softer wood can dent |
| Hardwoods (e.g., Ipe) | Extremely durable (up to 75 years), slip-resistant, low maintenance | High initial cost, harder to work with, requires special tools |
| Composite Decking | Low maintenance, resistant to fading and staining, variety of colors | Higher upfront cost, can get slippery when wet, may stain with sunscreen |
For my pool deck, I chose cedar because I love its warm, natural look, and it’s less splinter-prone than pine. I also sealed it with a high-quality waterproof sealant to protect it from pool water. If you’re on a tight budget, pressure-treated pine is a solid choice, but you’ll need to stain and seal it every year to keep it in good shape. If you want something that lasts decades with minimal upkeep, hardwoods like Ipe are amazing, though they’re pricier. Composite decking is another great option if you want a modern look with less maintenance, but test samples for slip resistance, especially since pool decks get wet.
Designing a Safe and Functional Deck
Safety was my top concern when building my pool deck. With kids running around and water everywhere, you need to think about preventing slips and falls. Here’s what I focused on to make my deck both safe and functional.
First, add railings and gates. I installed 42-inch-high railings around the outer edges of my deck, which is the minimum height required by my local building code. I also added a self-latching gate to keep my kids from wandering into the pool area unsupervised. Choose materials that match your deck for a cohesive look—my cedar railings blend seamlessly with the deck boards.
Second, think about slip resistance. Wet feet on a smooth surface can lead to accidents, so I sanded my cedar deck lightly and applied a non-slip sealant. If you’re using composite decking, look for boards with an embossed wood grain, as they tend to have better traction. I also added textured pavers at the pool’s edge to create a safe transition from deck to water.
Finally, consider access points. I built wide, sturdy stairs leading up to the deck, with handrails on both sides for extra stability. I also included a small platform near the pool’s ladder for easy entry and exit. These little details make a big difference in how user-friendly your deck is.
Building Your Wood Deck: A Step-by-Step Guide
Building a wood deck around an above ground pool isn’t as daunting as it sounds, but it takes patience and precision. Here’s how I built mine, step by step.
Step 1: Prepare the Ground
Before laying any boards, you need a stable foundation. I started by clearing the area around my pool, removing grass, rocks, and debris. Then, I leveled the ground as much as possible. For my deck, I used crushed gravel as a base to prevent weeds and ensure drainage. If your yard slopes, you may need to dig out sections or add fill dirt to create a flat surface.
Step 2: Set the Footings
Footings are the backbone of your deck. I dug holes about 12 inches deep and 12 inches wide, spaced every 4 feet along the deck’s perimeter. Then, I poured concrete into each hole and set metal post anchors. These anchors hold the deck’s support posts securely. Make sure to check that each footing is level—this step took me a full day, but it’s worth it to avoid a wobbly deck.
Step 3: Frame the Deck
Once the concrete cured, I attached 2×8 pressure-treated beams to the post anchors to create the deck’s frame. I used galvanized screws to prevent rust, since the deck would be exposed to pool water. I also added joists every 16 inches to support the deck boards. Double-check that everything is level and square; I used a laser level to make this easier.
Step 4: Install the Decking
Laying the deck boards was the most satisfying part. I used 5/4-inch cedar decking boards, spacing them about 1/8 inch apart to allow for water drainage. I cut the boards to fit around the pool’s curve, which took some careful measuring and a jigsaw for precision. Secure the boards with deck screws, and make sure they’re flush with the pool’s edge for a clean look.
Step 5: Add Railings and Stairs
After the decking was down, I installed the railings and stairs. I used pre-made cedar balusters for the railings, spacing them 4 inches apart to meet code requirements. For the stairs, I built a simple set of three steps with a gentle slope, making sure each step was wide enough for safe footing.
Step 6: Finish and Seal
To protect my deck, I sanded it lightly to remove any rough spots, then applied a waterproof sealant. I chose a clear sealant to let the cedar’s natural beauty shine through, but you can use a stain for a different look. Apply at least two coats, and plan to reapply every year or two, depending on your wood type.
Adding Style to Your Pool Deck
A wood deck can be more than just functional—it can be a showstopper. Here are some ideas I’ve tried or seen that can take your deck to the next level.
Incorporate a Pergola
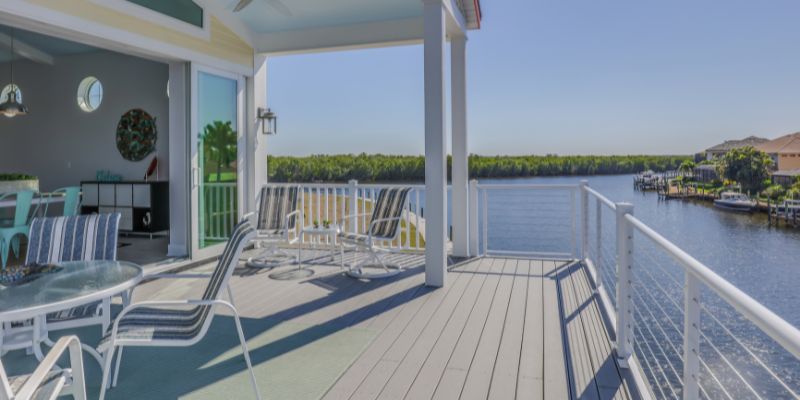
I added a small pergola to one end of my deck, and it’s been a game-changer. It provides shade for hot summer days and gives the deck a cozy, resort-like feel. You can hang string lights or drape fabric over the pergola for extra charm.
Use Planters for Color
To soften the look of my deck, I placed large terra cotta planters filled with bright flowers along the edges. They add a pop of color and make the space feel more inviting. Just be careful not to splash chlorinated water on your plants, as it can harm them.
Add Built-In Seating
I built a bench along one side of my deck, and it’s become everyone’s favorite spot. It doubles as storage for pool floats and towels, which keeps the deck clutter-free. If you’re short on space, a built-in bench is a great way to maximize functionality.
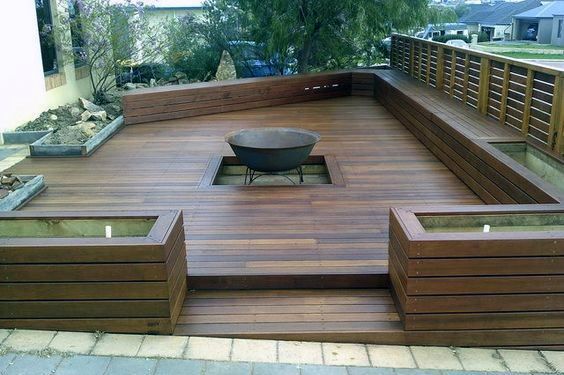
Create a Multi-Level Design
If you have the space and budget, a multi-level deck can add depth and interest. I’ve seen designs with an upper level for lounging, a mid-level for a hot tub, and a lower level for pool access. It creates a seamless flow and makes your backyard feel luxurious.
Maintaining Your Wood Deck
A wood deck around a pool takes a beating from water, sun, and foot traffic, so maintenance is key. Here’s how I keep mine looking great.
For cedar or pine decks, clean the surface regularly with a mild detergent and a soft brush to remove dirt and algae. I sweep mine weekly and give it a deep clean every spring. Apply a waterproof sealant every year to protect against rot and UV damage. If you notice splinters or cracks, sand them down and reseal the area.
For hardwoods like Ipe, maintenance is easier. A light power washing once a year is usually enough, though I like to apply a UV-protective oil to keep the wood’s rich color. Composite decking is the lowest maintenance option—just wash it with soapy water and a brush as needed.
Check your deck for loose screws or boards every few months, especially after heavy use. I had a board pop up after a particularly rowdy pool party, and tightening it was an easy fix. Also, keep an eye on railings and gates to ensure they’re secure.
Budgeting for Your Pool Deck Project
Building a pool deck can be a big investment, but there are ways to keep costs down. When I built mine, lumber prices were sky-high, so I had to get creative. Here’s what I learned about budgeting.
First, shop around for materials. I found a local lumberyard that offered better prices than big-box stores, and they even threw in free delivery. If you’re using composite decking, look for sales or bulk discounts. For my deck, I saved money by doing the work myself, but if you’re hiring a contractor, get multiple quotes to compare prices.
Plan for hidden costs like permits, rentals, and tools. I spent about $300 on a concrete mixer rental and another $200 on a good jigsaw, but those investments saved me time and hassle. If you’re on a tight budget, consider a smaller deck or simpler design, like a side deck instead of a full surround.
My 18×16-foot deck cost about $3,500 in materials, including cedar decking, concrete footings, and sealant. If you go with pressure-treated pine, you could cut that to around $2,500. Hardwoods or composite decking might push costs closer to $5,000 or more, depending on the size.
Common Mistakes to Avoid
I made a few rookie mistakes when building my first deck, and I want to save you the trouble. Here are some pitfalls to watch out for.
First, don’t skip the permit process. I thought I could fly under the radar, but my neighbor reported me, and I had to redo part of my deck to meet code. Save yourself the headache and check with your local building department.
Second, don’t underestimate drainage. Water pooling under your deck can lead to rot and mold. I made sure my gravel base sloped slightly away from the pool to keep water from collecting.
Finally, don’t skimp on quality. Cheap lumber might save you money upfront, but it’ll cost you in maintenance and replacements. Invest in good materials and tools, and your deck will last longer and look better.
Conclusion: Your Backyard Oasis Awaits
Building an above ground pool with a wood deck has been one of the best projects I’ve ever taken on. It’s transformed my backyard into a place where my family spends countless hours swimming, laughing, and making memories. There’s something so satisfying about stepping onto a deck you built with your own hands, knowing it’s both beautiful and functional. Whether you’re a woodworking pro or a beginner, this project is within reach if you plan carefully, choose the right materials, and take your time.
I hope this guide has given you the confidence to start your own pool deck project. Picture yourself sipping a cold drink on your deck, watching the kids splash in the pool, or hosting a summer barbecue that everyone talks about for years. That’s the magic of an above ground pool with a wood deck. So grab your tools, sketch out your dream design, and get ready to create a backyard oasis you’ll love for years to come.
Frequently Asked Questions
How Much Does It Cost to Build an Above Ground Pool Deck?
The cost depends on the size, materials, and whether you do it yourself or hire a contractor. For my 18×16-foot cedar deck, I spent about $3,500 on materials. Pressure-treated pine could bring that down to $2,500, while hardwoods or composite decking might cost $5,000 or more. Don’t forget to factor in permits, tools, and rentals.
What’s the Best Wood for a Pool Deck?
It depends on your budget and maintenance preferences. Cedar is my favorite for its natural beauty and rot resistance, but it needs yearly sealing. Pressure-treated pine is cheaper but requires more upkeep. Hardwoods like Ipe are incredibly durable and low-maintenance but expensive. Composite decking is a great low-maintenance option if you don’t mind the higher upfront cost.
How Long Does It Take to Build a Pool Deck?
For a DIYer like me, building a 18×16-foot deck took about two weeks, working weekends and evenings. Prep work, like leveling the ground and pouring footings, took the most time. If you’re hiring a professional, it could take less than a week, depending on the complexity of the design.
Do I Need a Permit for an Above Ground Pool Deck?
Most likely, yes. I needed a permit for my deck, and the inspector checked things like railing height and footing depth. Check with your local building department to confirm the requirements in your area. It’s better to get the permit upfront than to face fines or redo work later.
How Do I Maintain a Wood Pool Deck?
For wood decks, sweep regularly and clean with a mild detergent to remove dirt and algae. Apply a waterproof sealant every year or two to protect against water and UV damage. For hardwoods, a yearly power wash and optional oiling are usually enough. Composite decking just needs occasional washing with soapy water.
Can I Build a Pool Deck on a Sloped Yard?
Yes, but it takes extra planning. I’ve seen decks built on slopes by digging out a flat area or using longer posts to level the deck. Work with the natural slope to create a multi-level design, or consult a landscape designer to ensure stability and proper drainage.