Best Way to Remove Flaking Paint (and Stop It From Coming Back)
Flaking paint almost always comes down to one of two things: moisture getting behind the paint film, or the paint never bonding to the surface in the first place because of poor prep. Before you scrape a single flake, check the age of the house. If it was built before 1978, have the paint tested for lead before doing any dry sanding or heat-gun work, since both can release lead dust or fumes from old paint layers.
Hey there, fellow DIYers, Md Meraj here. Paint doesn’t just fail randomly. Flaking is the paint film‘s way of telling you something underneath went wrong, usually moisture working its way through a wall or trim board and pushing the paint off from behind. Fix the cause first, or you’ll be back here again next season. Here’s how to remove what’s already flaking, pick the right tool for the substrate you’re working on, and stop it from happening again.
What Causes Flaking Paint
BEST FOR MULTI-LAYER PAINT ON WOOD
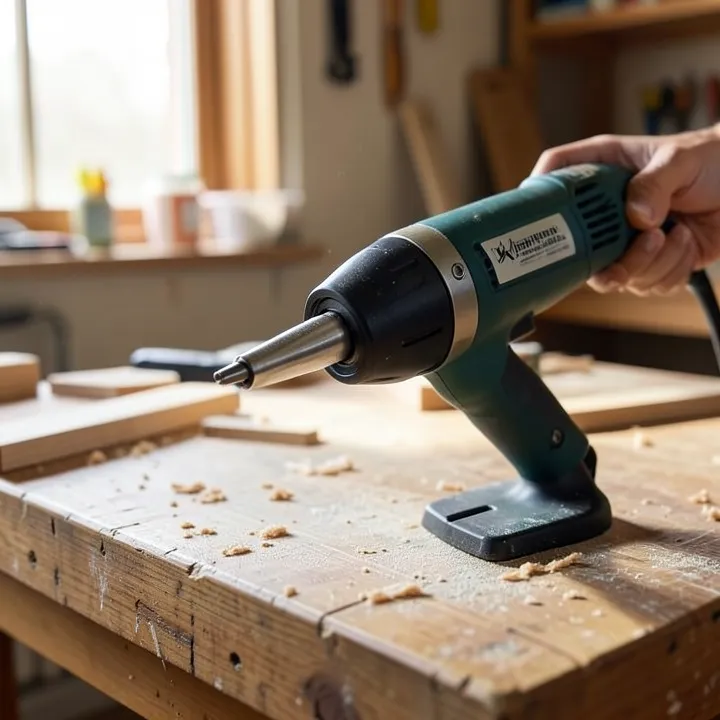 |
Wagner FURNO 300 Heat Gun – $25.99 Dual-temperature heat gun that softens built-up paint layers on solid wood trim and siding so they lift off in strips instead of dust.
|
- Moisture behind the paint: the most common cause on exterior wood trim and interior bathrooms. Water gets in through a gap, a leak, or high humidity, and pushes the paint film off the wood as it tries to escape.
- Poor surface prep: paint applied over dust, grease, or a glossy old finish without sanding or priming never fully bonds, so it lifts in sheets rather than wearing evenly.
- Cheap or old paint: low-quality paint has less flexible binder and cracks and flakes sooner, especially outdoors where it’s cycling through heat and cold.
- Temperature swings: wood and paint expand and contract at different rates. Repeated freeze-thaw or hot-cold cycles stress the bond until it fails.
Choosing the Right Removal Tool
The right tool depends on how much paint you’re removing and what’s underneath it, not just personal preference.
- Scrapers and putty knives: the right call for paint that’s already loose and flaking. A stiff 2-3 inch scraper pulls it off fast without damaging sound paint nearby.
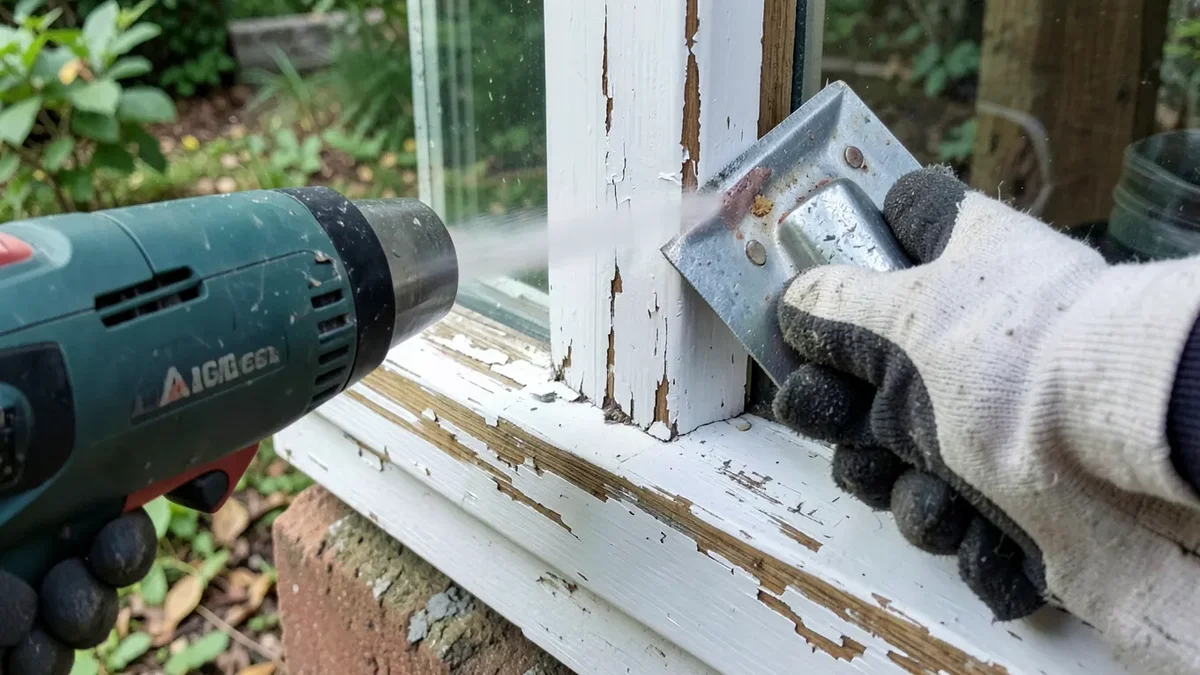
- Heat guns: best for multiple built-up layers of old paint on solid wood trim, siding, or doors. A heat gun softens paint so it lifts in long strips instead of dust. Keep it moving and never linger on one spot. Scorching wood or melting vinyl trim happens fast if you don’t.
- Chemical strippers: the better choice for detailed millwork, carved trim, or anywhere a heat gun’s flat nozzle can’t reach into corners and profiles. Slower, but gentler on the substrate.
- Sanding equipment: for feathering edges after scraping and for final smoothing, not for stripping large painted areas outright (that’s what generates the most dust, which matters a lot if lead paint is a possibility).
Step-by-Step Paint Removal
- Prep the area. Lay a drop cloth to catch paint chips (required if there’s any chance of lead paint, so it doesn’t spread into soil or carpet), and mask off anything you’re not stripping.
- Remove the loose paint. Work a scraper under the flaking edges at a low angle. If it’s stubborn or there are several layers, a heat gun on a low-to-medium setting held a few inches away softens it enough to lift with the scraper right behind the heat.
- Sand for smoothness. Once the loose paint is gone, sand the edges where old paint meets bare wood so the transition is smooth, not a visible ridge under the new coat.
- Clean the surface. Wipe down all dust with a tack cloth or damp rag. Paint applied over sanding dust is exactly the poor-prep problem that caused flaking in the first place.
Safety Measures
- Protective gear: gloves, safety glasses, and an N95 or better respirator any time you’re sanding or heat-stripping. A standard dust mask does not filter fine paint dust.
- Ventilation: open windows and run a fan exhausting outward when using chemical strippers or a heat gun indoors. Solvent fumes and heated paint fumes both build up fast in a closed room.
- Handling chemicals safely: keep chemical strippers off skin, work in a ventilated space, and dispose of soaked rags and scraped paint chips per your local hazardous waste guidelines, especially if lead is a possibility.
Choosing Paint That Won’t Flake Again
A quality 100% acrylic exterior paint flexes with temperature swings far better than a cheap contractor-grade paint, which matters most anywhere the surface sees direct sun and weather. Just as important: use a bonding primer on bare or previously glossy wood before the topcoat. Primer is what actually creates the surface for the paint to grip, and skipping it is the single most common reason a fresh paint job flakes again within a year or two.
Maintenance Tips to Prevent It Coming Back
- Walk the exterior once or twice a year and catch small cracks or blisters before they turn into large flaking sections
- Fix the actual moisture source (gutters, caulking gaps, sprinkler overspray) before repainting over a moisture-related failure, or it will flake again in the same spot
- Touch up small chips as soon as you spot them. Bare wood exposed to weather deteriorates fast, and a five-minute touch-up now beats a full strip-and-repaint later
Frequently Asked Questions
What is the best tool to remove flaking paint?
A stiff scraper handles paint that’s already loose. For multiple built-up layers on solid wood, a heat gun lifts it in strips faster than scraping alone; for detailed trim, a chemical stripper works into corners a heat gun can’t reach.
How do I prevent paint from flaking again?
Fix the moisture source that likely caused it, prime bare wood with a bonding primer before repainting, and use a quality 100% acrylic paint rather than a cheap contractor-grade product.
Can I remove flaking paint without chemicals?
Yes. A scraper alone handles most loose flaking paint, and a heat gun handles built-up layers without any chemical stripper at all.
Is sanding necessary after removing flaking paint?
Yes, at least around the edges. Sanding feathers the transition between bare wood and remaining old paint so the new coat doesn’t show a visible ridge.
Sponsored / affiliate links. As an Amazon Associate I earn from qualifying purchases. I may earn additional commission from eligible campaigns.
 PINTAR Skin Tone Acrylic Paint Pens, 20 Pack Medium 5.0mm Tip — Opaque Multi‑Surface Paint Markers for Portraits, Rock Painting, Wood, Glass, Leather, Shoes, Canvas
 Vinyl Siding Removal Tool with Extra Long Handle- Steel Blade Vinyl Non-Slip Grip Handle for Installation and Removal Tool Avoid Damaging Vinyl Siding Tool (2)