Can Cherry Tomatoes Be Canned? Yes, Here Is How To Do It
It’s that wonderful time of year again when gardens burst with tiny, juicy cherry tomatoes. They are so good straight off the vine! But what happens when your plants give you more than you can eat right away?
Do you let them go to waste? The thought can be painful for any gardener.
This is where canning comes in. It’s a fantastic way to save all those delicious little gems. But can you actually can cherry tomatoes?
The answer is a resounding yes! It takes a bit of know-how, but it’s totally doable. We’ll walk through how to do it so you can enjoy that fresh taste anytime.
Canning cherry tomatoes is a great way to preserve their fresh flavor and nutrients. You can preserve them whole or halved, and the process involves either water bath canning or pressure canning, depending on your chosen method and preference for acidity. Proper preparation and sterilization are key to safe, delicious results.
What Is Canning Cherry Tomatoes?
Canning cherry tomatoes is the process of preserving them using heat and jars. The heat kills any mold or bacteria. It also creates a vacuum seal when the jars cool down.
This seal keeps the tomatoes fresh for a long time. Think months, or even a year or more!
You can do this with whole cherry tomatoes. Or, you can cut them in half. It really depends on how you plan to use them later.
Smaller tomatoes are perfect for whole canning. Larger ones might do better if halved.
The main goal is to lock in the flavor and nutrition. It stops them from spoiling. This way, you have tomatoes for salads, sauces, or snacks when they are not in season.
It’s a smart way to use up a big harvest.
Why Canning Cherry Tomatoes Works
Canning works because heat destroys spoilage organisms. This includes bacteria and yeasts. It also stops enzymes that can make food go bad.
When you seal the jars tightly, you create an airtight environment. This prevents new germs from getting in.
The heat also causes the air inside the jar to expand. As the jar cools, this air shrinks. This creates a strong vacuum.
This vacuum pulls the lid down tightly. It creates that satisfying pop sound you hear. This pop means you have a good seal.
Cherry tomatoes are acidic. This is good for canning. Most fruits and many vegetables are acidic.
Acidity helps make the canning process safer. It also helps keep the food tasting fresh. For low-acid foods, you often need a pressure canner.
But for tomatoes, a water bath canner often works well.
My Cherry Tomato Canning Adventure
I remember one summer vividly. My small backyard patch was overflowing. Cherry tomatoes were everywhere!
Red, yellow, orange, they tumbled out of baskets. I ate them by the handful. I made salads.
I added them to pasta. But still, there were so many more.
I felt a pang of worry. I hate seeing food go to waste. Especially something I grew myself!
So, I decided to try canning them. I had canned larger tomatoes before. But cherry tomatoes felt different.
They are so small and delicate.
My first attempt was a bit clumsy. I worried they would all turn to mush. I was using a water bath canner.
I chose to can them whole. I packed them into jars. I added some water and a little salt.
I put the lids on. Then I lowered them into the boiling water.
When they came out, I peeked. They looked… okay. A little soft, maybe.
But still intact! I waited for that magical pop. And yes, they sealed!
The real test was later. I opened a jar a few weeks later for a quick pasta dish. The flavor was surprisingly bright and fresh.
It was a huge relief and a success!
Cherry Tomato Canning Essentials
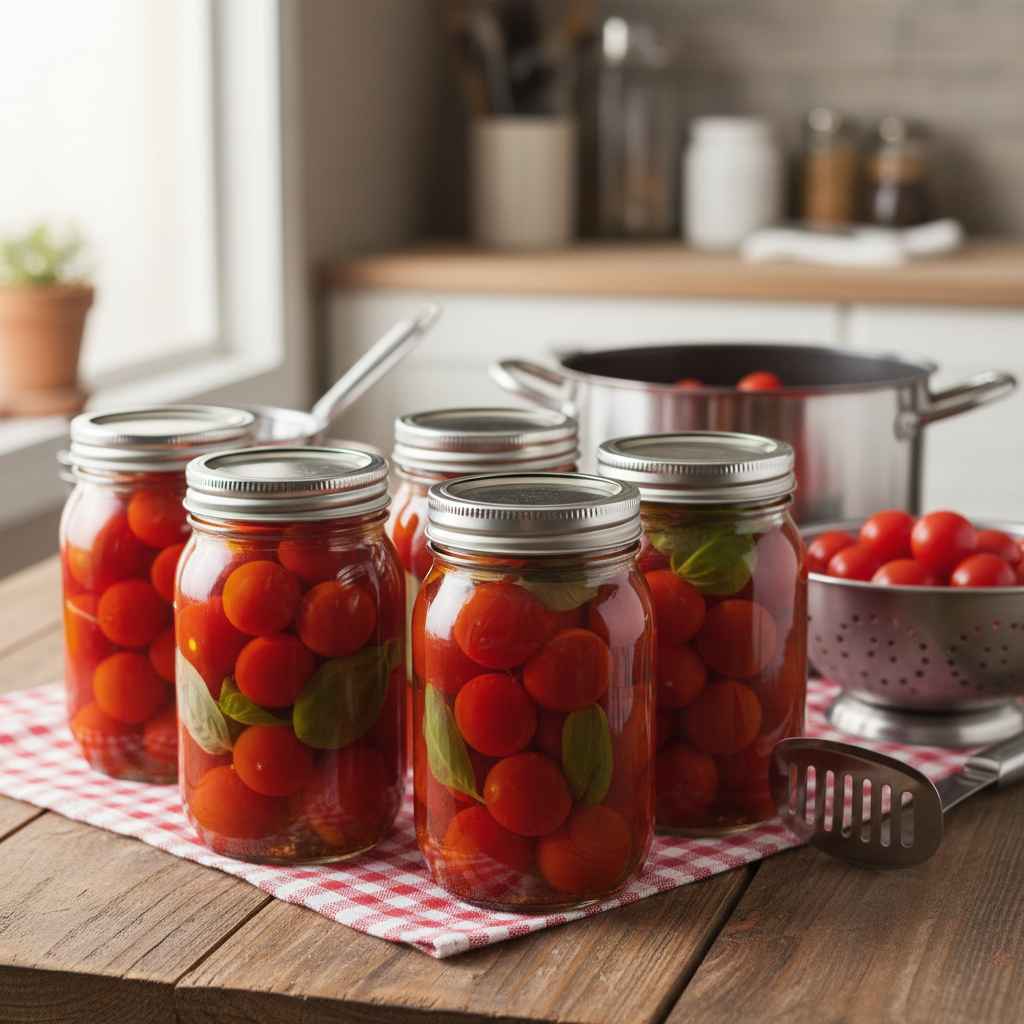
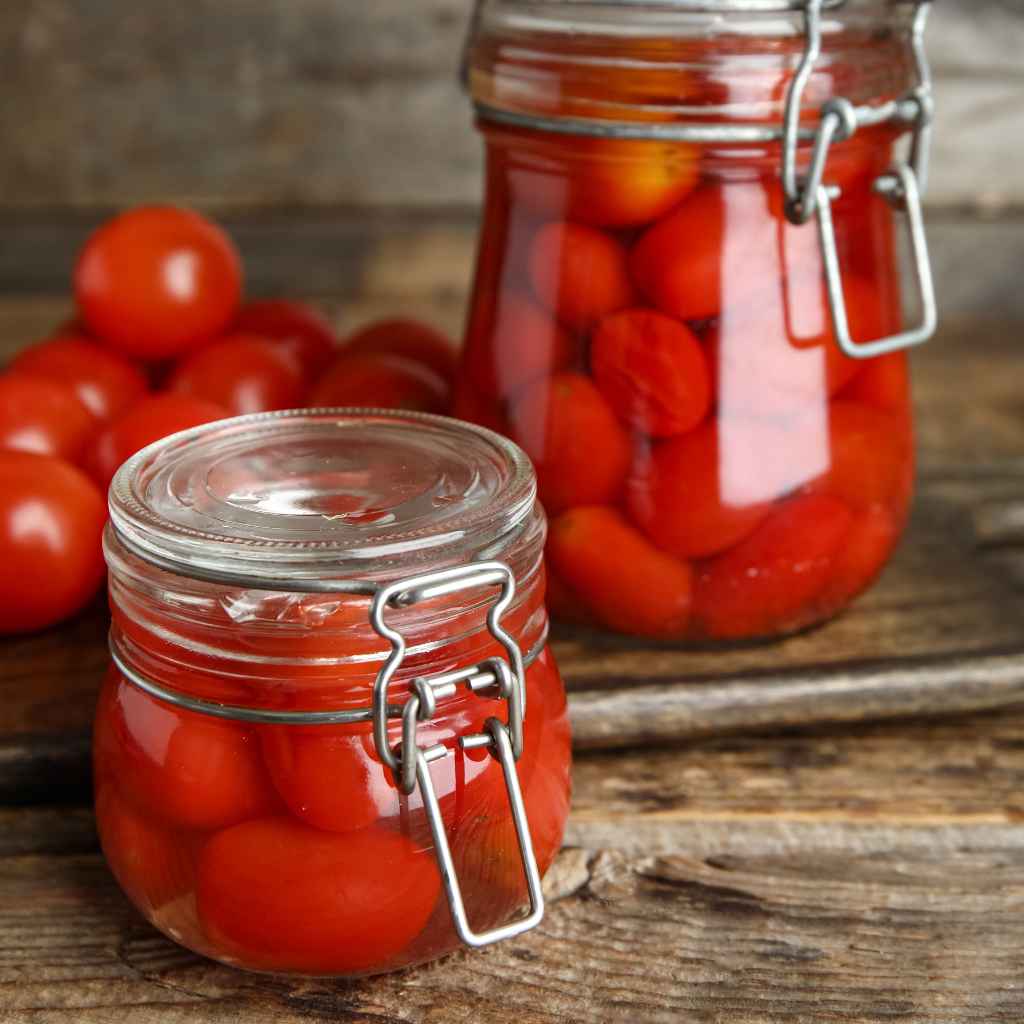
Jars: You need canning jars. Mason jars are common. Use new lids.
Make sure the rims are clean.
Water Bath Canner: This is a big pot with a rack. It holds jars. It keeps water boiling.
Tools: A jar lifter is helpful. It grabs hot jars. A funnel makes filling easy.
Ingredients: Fresh cherry tomatoes are key. Add salt or herbs if you like.
Preparing Your Cherry Tomatoes for Canning
Getting your cherry tomatoes ready is important. First, pick the best ones. Use only firm, ripe tomatoes.
No soft spots or bruises. Wash them very well under cool water. Remove any stems.
You have two main choices: whole or halved. For whole tomatoes, just prick each one a few times with a clean needle. This stops them from bursting in the jar.
For halved tomatoes, just cut them in half. It’s that simple.
Some people like to add a little something extra. You can add a pinch of salt. Or a sprig of fresh basil or dill.
Some folks even add a small piece of garlic. These add flavor. Make sure to stick to canning recipes for safety.
Don’t add too much of anything that might change the acidity.
Choosing Your Canning Method: Water Bath vs. Pressure Canning
There are two main ways to can. Water bath canning and pressure canning. For most tomatoes, including cherry tomatoes, water bath canning is fine.
This is because tomatoes are naturally acidic.
Water Bath Canning
This is the simpler method. You put prepared jars into a large pot of boiling water. The jars are covered completely by water.
They stay in the boiling water for a set time. This heat processing is what preserves the food.
Pressure Canning
Pressure canning uses a special pot. It can reach higher temperatures than boiling water. This is needed for low-acid foods like vegetables and meats.
While tomatoes are acidic, if you add a lot of other low-acid ingredients, you might need a pressure canner. But for plain cherry tomatoes, water bath is usually the go-to.
Always follow a tested recipe. Reputable sources include the National Center for Home Food Preservation (NCHFP). They have safe canning instructions.
These guide you on processing times and methods.
Water Bath Canning: A Quick Look
- Fill Jars: Pack tomatoes into clean jars.
- Add Liquid: Cover with boiling water, juice, or broth.
- Remove Air Bubbles: Use a non-metallic tool.
- Wipe Rims: Clean jar rims for a good seal.
- Add Lids: Screw on bands fingertip tight.
- Process: Submerge jars in boiling water.
- Cool: Let jars cool undisturbed for 12-24 hours.
Step-by-Step: Water Bath Canning Cherry Tomatoes
Let’s walk through canning cherry tomatoes using the water bath method. This is what most home cooks will use. It’s straightforward and effective for these small fruits.
1. Gather Your Supplies
You’ll need clean canning jars. Use new lids and bands. Make sure your water bath canner is ready.
Have your jar lifter, funnel, and ladle handy. You’ll also need your prepared cherry tomatoes and a way to make boiling water or hot liquid.
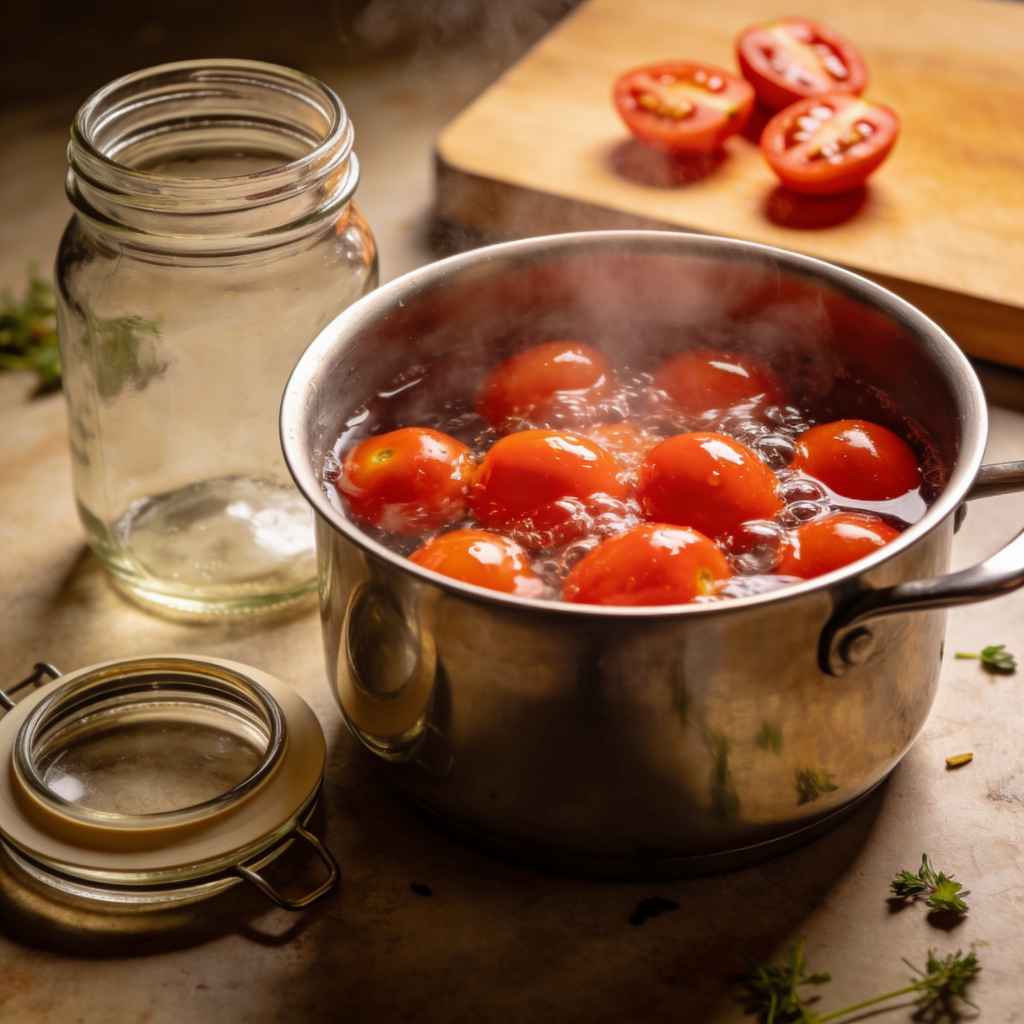
2. Sterilize Your Jars and Lids
Wash your jars in hot, soapy water. Rinse them well. You can sterilize them by boiling them in the canner for 10 minutes.
Or, run them through the dishwasher’s sanitize cycle. Keep them hot until you are ready to fill them. Lids usually just need to be washed and kept in warm water.
Check the manufacturer’s instructions for your specific lids.
3. Prepare the Tomatoes
As we discussed, wash and remove stems. Prick whole tomatoes or halve them. You can add a pinch of salt (about 1/2 teaspoon per pint jar) if you like.
Some recipes allow for adding bottled lemon juice or citric acid to ensure enough acidity for safe water bath canning. This is a good idea if your tomatoes aren’t very tart. About 1 tablespoon of bottled lemon juice per pint is often recommended.
4. Pack the Jars
Place the prepared cherry tomatoes into the hot jars. You can pack them fairly snugly. But don’t mash them.
Leave about 1/2 inch of headspace at the top. Headspace is the space between the top of the food and the rim of the jar.
5. Add Hot Liquid
Pour hot boiling water or hot tomato juice over the tomatoes. Make sure to cover them. Leave that 1/2 inch of headspace.
If you are adding lemon juice, add it before the hot liquid. Or, if using a recipe that calls for a specific brine, use that.
6. Remove Air Bubbles and Adjust Headspace
Slide a non-metallic tool (like a plastic spatula or chopstick) around the inside of the jar. This releases trapped air bubbles. Add more hot liquid if needed to maintain the 1/2 inch headspace.
7. Wipe Jar Rims and Apply Lids
Wipe the rims of the jars with a clean, damp cloth. This removes any food particles. Food on the rim can prevent a good seal.
Place a new, flat lid onto each jar. Screw on a band until it is fingertip tight. This means tight enough that it won’t leak, but not so tight that air can’t escape during processing.
8. Process in the Water Bath Canner
Place the filled jars onto the rack in your canner. Make sure the water is boiling. The water level should be at least 1 inch above the tops of the jars.
Cover the canner. Bring the water back to a rolling boil. Start timing your processing period once the water is boiling vigorously.
Processing times vary by altitude and jar size. For pints of cherry tomatoes, a common processing time is 15 minutes for altitudes up to 1,000 feet. You’ll need to adjust this for higher altitudes.
Consult a reliable canning guide for exact times.
9. Cool and Check Seals
After the processing time is up, turn off the heat. Let the jars sit in the hot water for another 5 minutes. This helps prevent siphoning (liquid loss from jars).
Then, carefully remove the jars from the canner using your jar lifter. Place them upright on a towel-lined counter. Leave them undisturbed for 12 to 24 hours.
Do not retighten bands.
You will hear popping sounds as the jars seal. After 12-24 hours, check the seals. Press the center of each lid.
If it doesn’t flex up and down, it’s sealed. If a lid flexes, that jar is not sealed. You can refrigerate it and use it within a few days, or reprocess it with a new lid within 24 hours.
Quick Check: Headspace Matters
What is Headspace? The empty space between the food and the top of the jar.
Why is it Important? Too little headspace can cause food to boil out. Too much headspace can prevent a good vacuum seal.
Recommended for Tomatoes: 1/2 inch for most water bath canning recipes.
Canning Halved Cherry Tomatoes
Canning halved cherry tomatoes follows the same basic steps. The main difference is that you cut them. This can make them pack a bit more densely into the jar.
Some people find halved tomatoes easier to use in recipes later because they break down more easily.
When packing halved tomatoes, try to arrange them nicely. You can place them cut-side down in layers. Make sure to still leave that 1/2 inch of headspace.
The pricking step is not needed for halved tomatoes.
The processing time might be slightly different depending on the recipe. Always refer to a tested recipe for exact times. But generally, the process is very similar to canning whole cherry tomatoes.
The goal is still to achieve a safe, vacuum-sealed jar.
When to Consider Pressure Canning Cherry Tomatoes
While water bath canning is generally safe for plain cherry tomatoes, there are times when pressure canning might be considered. This is usually when you are adding other ingredients that are lower in acid.
For example, if you are making a chunky salsa with tomatoes and onions, peppers, and garlic, you might want to use a pressure canner. This is because the added vegetables can lower the overall acidity of the mixture. Or, if you are adding them to a recipe that already calls for pressure canning.
However, if you are simply canning cherry tomatoes to use as a base for other dishes, or to add whole to recipes, water bath canning is usually sufficient and simpler. Always err on the side of caution. If in doubt, consult a trusted canning resource or use a recipe specifically designed for your canning method.
Real-World Scenarios for Canned Cherry Tomatoes
Once you have your beautiful jars of canned cherry tomatoes, what can you do with them? They are incredibly versatile. They can bring a burst of fresh flavor to many dishes, even in the dead of winter.
In the Kitchen: Everyday Uses
Imagine opening a jar for a quick weeknight meal. You can toss them into pasta sauces. Add them to soups or stews.
They are great stirred into scrambled eggs or omelets. A simple tomato bruschetta is easy with canned cherry tomatoes. Just drain them, maybe give them a quick chop, and serve on toasted bread with garlic and basil.
In the Garden: Post-Harvest Saving
Canning is perfect for those late-season harvests. When the weather starts to turn, you can still preserve the bounty. It’s a way to extend the growing season.
You save money too, by not buying out-of-season produce.
In the Pantry: Stocking Up
Having a pantry stocked with home-canned goods is rewarding. You know exactly what went into them. No weird preservatives or extra sugars.
It’s a source of pride and security.
Flavor Boosters for Your Canned Tomatoes
- Herbs: Add fresh basil, oregano, thyme, or rosemary before processing.
- Garlic: A clove or two per jar can add a nice kick.
- Onions: Small pieces of onion can be added, but be mindful of acidity.
- Spices: A pinch of red pepper flakes adds a little heat.
- Vinegar/Lemon Juice: Crucial for safe water bath canning if acidity is low.
What Canned Cherry Tomatoes Mean for You
Having canned cherry tomatoes means you have access to a key ingredient year-round. It means more control over your food. You can enjoy the taste of summer whenever you want.
When It’s Normal to Can:
It’s normal to can when you have a surplus harvest. When you want to preserve the flavor of fresh, ripe tomatoes. When you want to reduce food waste.
Or when you want to have a pantry staple on hand.
When to Worry (About Canning, Not the Tomatoes):
You should worry if you are not following tested recipes. If you are skipping steps like sterilization or correct processing times. If you are using jars or lids that are not designed for canning.
Botulism is a serious risk with improperly canned foods. This is why following guidelines is so important.
Simple Checks Before Using:
Before you use any canned food, always check the jar. Look for a lid that is securely sealed. Make sure there is no bulging, leakage, or mold.
When you open the jar, smell the contents. If it smells off, sour, or anything unusual, do not eat it. Discard it safely.
Myth vs. Reality: Canning Cherry Tomatoes
Myth: Canning makes tomatoes mushy and bland.
Reality: While some texture change is normal, properly canned cherry tomatoes retain good flavor. They are softer but still flavorful. Texture depends on the variety and how they were packed.
Myth: You can’t can small tomatoes like cherry tomatoes.
Reality: You absolutely can! They are well-suited for water bath canning, especially when packed whole or halved.
Myth: Any jar will work for canning.
Reality: No. Only use jars specifically designed for home canning. They have tempered glass and rims made for sealing.
Quick Tips for Successful Cherry Tomato Canning
Here are a few handy tips to make your cherry tomato canning experience smoother and more successful. These are simple things that can make a big difference.
Tip 1: Use the Right Tomatoes
Start with the freshest, firmest, ripest tomatoes. Old or bruised tomatoes won’t yield the best results. They can also be more prone to spoilage.
Tip 2: Be Precise with Headspace
As mentioned, 1/2 inch of headspace is crucial for most tomato canning. Measure it to be sure. Don’t guess.
Tip 3: Keep Everything Hot
Keep your jars, lids, and the liquid you add to the jars hot. This prevents thermal shock to the jars. It also helps ensure a good seal.
Tip 4: Don’t Over-Tighten Bands
Fingertip tight is key. If bands are too tight, air can’t escape during processing. This can lead to seal failures.
Tip 5: Follow Tested Recipes Exactly
This cannot be stressed enough. Use recipes from reliable sources. They have been tested for safety.
Don’t invent your own canning recipes, especially when it comes to quantities of acid or processing times.
Tip 6: Store Properly
Store sealed jars in a cool, dark, dry place. Keep them away from extreme temperatures. Check seals periodically.
My Top 3 Canning Mistakes (and How to Avoid Them)
- Mistake: Not pricking whole tomatoes. This can cause them to burst. Solution: Prick each one a few times with a sterile needle.
- Mistake: Using old or damaged lids. This is a common cause of seal failure. Solution: Always use new canning lids for each batch.
- Mistake: Over-filling jars. This leads to food loss during processing and poor seals. Solution: Measure your headspace carefully (1/2 inch!).
Frequently Asked Questions About Canning Cherry Tomatoes
Here are some common questions people have when they think about canning cherry tomatoes. I hope these clear things up for you!
Can I can cherry tomatoes with the skins on?
Yes, you can can cherry tomatoes with the skins on. For whole tomatoes, it’s recommended to prick the skins a few times. This helps prevent them from bursting during processing.
If you prefer, you can also blanch and peel them first, but it’s not strictly necessary for canning.
Do I need to add acid to my cherry tomatoes when canning?
While cherry tomatoes are acidic, it’s often recommended to add a bit of bottled lemon juice or citric acid to ensure they meet the minimum acidity level for safe water bath canning. A common guideline is 1 tablespoon of bottled lemon juice per pint jar. Always check a tested recipe for specific amounts.
How long will canned cherry tomatoes last?
When canned properly and stored in a cool, dark, dry place, home-canned cherry tomatoes can last for at least 12 months. They are usually safe to eat after that, but their quality (flavor and texture) may decline over time. It’s best to consume them within a year or two for optimal taste.
What is the best way to preserve cherry tomatoes if I don’t want to can them?
If canning isn’t for you, other great ways to preserve cherry tomatoes include freezing them (whole or chopped), dehydrating them in a dehydrator or oven, or making sun-dried tomatoes. Each method offers a slightly different texture and flavor profile.
My cherry tomatoes look like they lost their shape after canning. Is that normal?
Yes, it’s quite normal for canned cherry tomatoes, especially if canned whole, to soften and lose some of their original shape. The heat process naturally softens the fruit. They might appear more collapsed or pulpy than fresh ones, but their flavor should still be excellent.
Can I can cherry tomatoes in their own juice?
Yes, you can use their own juice, or add a bit of strained tomato juice if you have extra. Some recipes might call for a light brine (water and salt) or a bit of tomato paste mixed with water. Always follow a tested recipe to ensure the right balance of acidity and safe processing.
Final Thoughts on Canning Cherry Tomatoes
Canning cherry tomatoes is a rewarding process. It lets you capture the vibrant taste of summer. You can enjoy them all year long.
It takes a little effort and care. But the payoff is huge.
With the right steps and tested recipes, you can successfully preserve your harvest. Think of those delicious jars waiting in your pantry. They are ready for your next meal.
Happy canning!