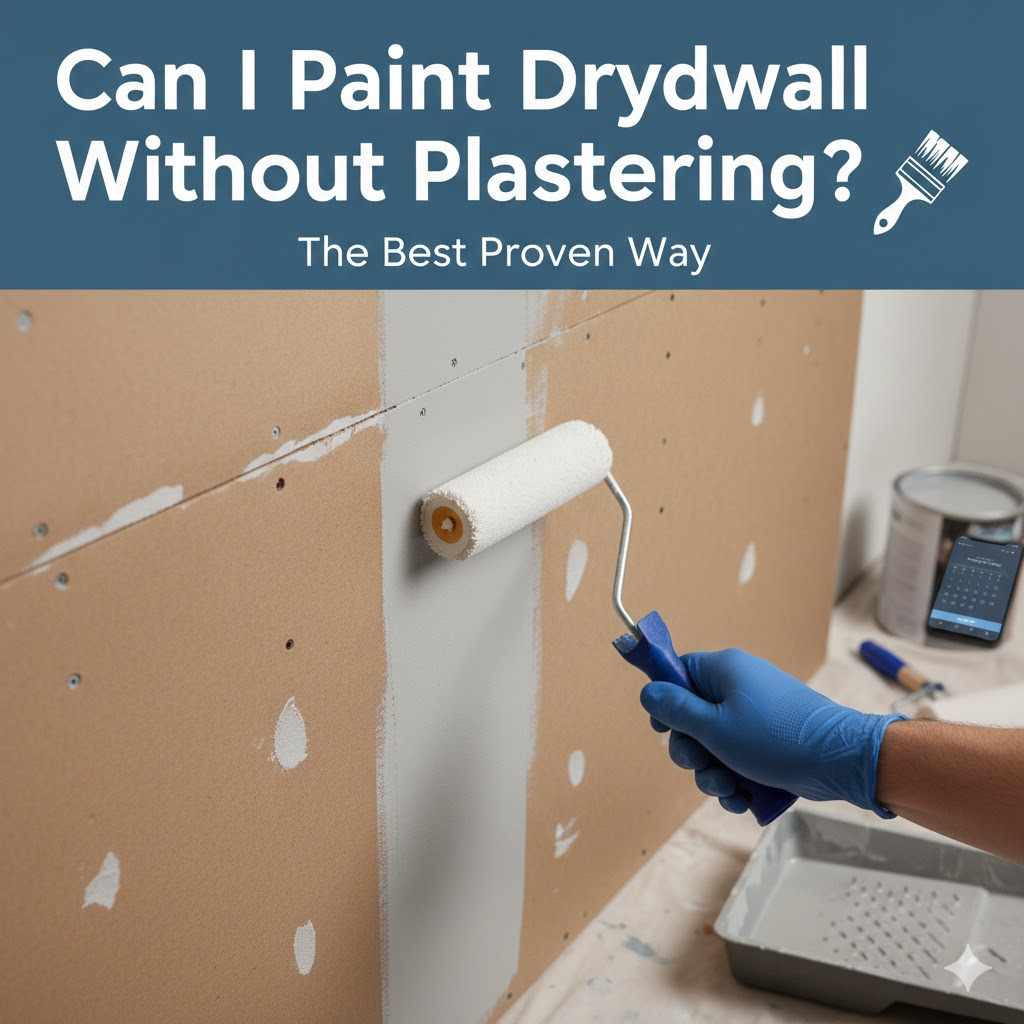
Can I Paint Drywall Without Plastering The Best Proven Way
Yes, you can absolutely paint drywall without plastering it first, as long as the surface is smooth and properly prepared. For new drywall, this means taping, mudding, and sanding the seams and screw holes. For existing walls, it involves cleaning, filling any small holes or dents with joint compound, sanding smooth, and applying a quality drywall primer.
Hello there, fellow creator! I’m Md Meraj, and in my workshop, I’ve seen countless homeowners feel a little stuck when it comes to finishing drywall. You’ve hung the sheets, and now you’re staring at a plain, gray wall. The big question pops up: do you really need to go through the whole process of plastering before you can add some color?
It’s a common worry, and you’re not alone in asking. The thought of applying a full skim coat of plaster can feel daunting, expensive, and messy. But I’ve got great news for you. For most situations, you can get a beautiful, professional-looking paint job without it. You just need to know the right steps for preparation. In this guide, I’ll walk you through everything, making it simple and clear. Let’s turn that plain drywall into a perfectly painted wall you can be proud of!
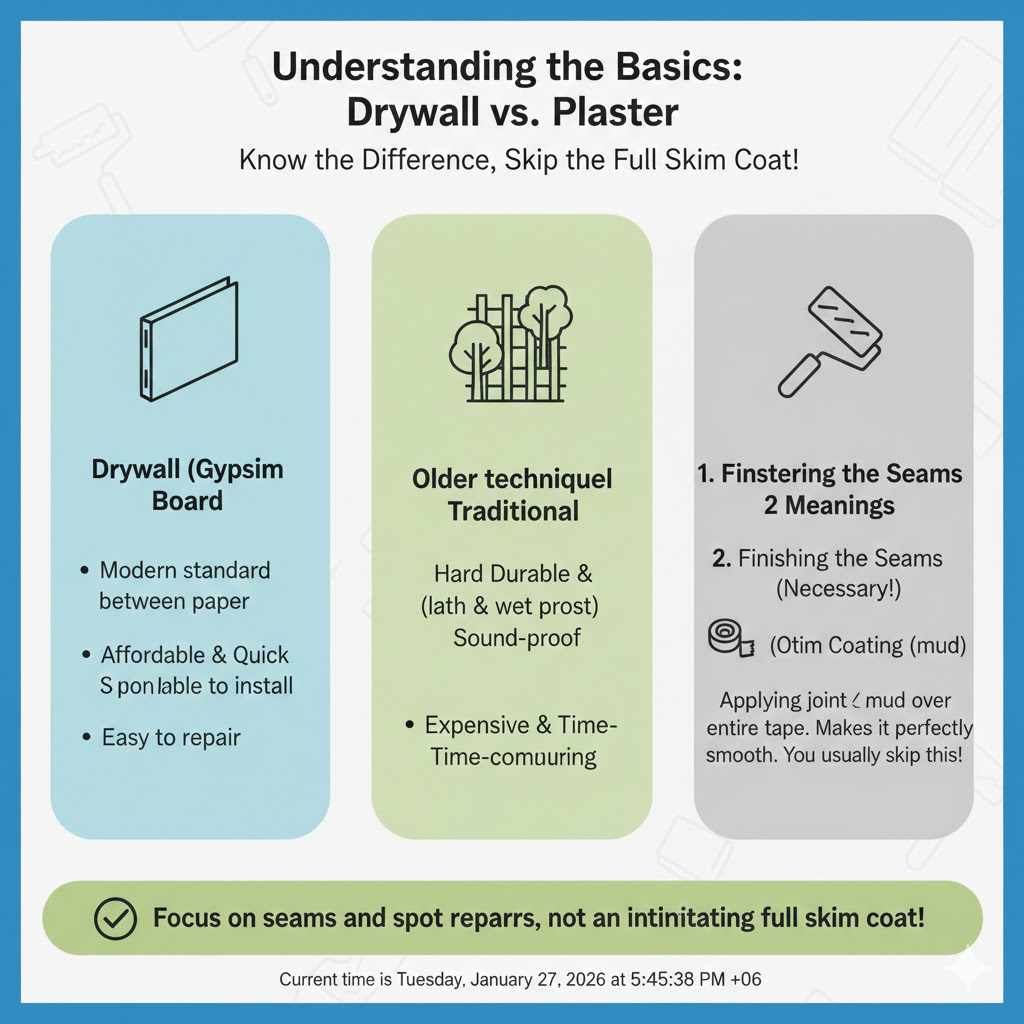
Understanding the Basics: Drywall vs. Plaster
Before we grab our rollers, let’s clear up a common point of confusion. What’s the real difference between drywall and plaster? Knowing this helps you understand why you often don’t need a full plaster coat.
Drywall, also known as gypsum board or sheetrock, is the modern standard for interior walls. It’s a panel made of gypsum (a soft mineral) pressed between two thick sheets of paper. It’s popular because it’s affordable, quick to install, and relatively easy to repair.
Plaster is a much older technique. It involves applying a wet paste-like material over a backing called lath (historically wood strips, now often a metal mesh). It creates a very hard, durable, and sound-proof wall, but it is also more expensive, time-consuming, and requires a lot of skill to apply correctly.
When people talk about “plastering drywall,” they usually mean one of two things:
- Finishing the seams: This is the process of applying joint compound (often called “mud”) over the tape that covers the seams between drywall sheets. This is a necessary step.
- Skim coating: This is applying a very thin layer of joint compound over the entire surface of the drywall to make it perfectly smooth. This is what you can often skip!
Our goal today is to show you how to get a fantastic finish by focusing on proper seam finishing and spot repairs, not a full, intimidating skim coat.
When Can You Paint Drywall Without a Full Plaster Skim Coat?
So, when is it okay to skip the full skim coat and head straight for the primer and paint? It depends on the condition and “finish level” of your drywall. In the construction world, drywall finishing is graded on a scale from Level 0 to Level 5. This tells you how smooth and ready-for-paint the surface is.
Understanding Drywall Finish Levels
Here’s a simple breakdown to help you see where your project fits. Most homes have a Level 4 finish, which is perfect for painting without extra plastering.
| Finish Level | Description | Ready to Paint? |
|---|---|---|
| Level 0 | Drywall is simply hung on the studs. No taping, no finishing. | No. Requires full finishing. |
| Level 1 | Tape is set in joint compound over seams. No sanding. | No. Common in attics or service areas. |
| Level 2 | A thin coat of joint compound is applied over the tape. Screw heads are covered. | No. Ready for tile, but not paint. |
| Level 3 | A second coat of compound is applied to seams and screws. Light sanding. | No. Good for heavy textures, but not smooth paint. |
| Level 4 | Another coat of compound is applied, and it’s sanded smooth. This is the standard for most residential walls. | Yes! This is the ideal starting point for our method. |
| Level 5 | The highest level. A thin skim coat is applied over the entire surface after Level 4 is complete. | Yes. This provides the most perfect surface possible. |
As you can see, if your drywall is at a Level 4 finish (which is most common for new installations or repaired walls), you are ready to go. You don’t need the extra work of a Level 5 skim coat unless you plan to use a glossy paint, which shows every tiny imperfection.
The Proven Way: Your Step-by-Step Guide to Painting Drywall
Ready to get this done? Here’s our simple, proven process for getting a flawless paint job without the headache of plastering. Follow these steps, and you’ll be admiring your work in no time.
Step 1: Gather Your Tools and Materials
Having everything ready before you start makes the job go much smoother. You don’t want to be running to the store with wet compound on your tools! Here’s what you’ll need:
- Drop cloths or plastic sheeting: To protect your floors and furniture.
- Painter’s tape: For masking off trim, ceilings, and outlets.
- Cleaning supplies: A bucket, mild detergent, a sponge, and clean rags.
- Drywall joint compound: All-purpose or topping compound works well for small repairs.
- Putty knives: A 6-inch knife is great for most patches. A 10 or 12-inch one helps for feathering edges.
- Sandpaper or sanding sponge: Start with 120-grit and have 220-grit for a final smooth finish.
- Safety gear: A dust mask (N95-rated is best), safety glasses, and gloves.
- A shop vacuum with a brush attachment: For cleaning up dust.
- High-quality drywall primer: A PVA (polyvinyl acetate) primer is made specifically for new drywall.
- Interior paint: Your chosen color and finish (e.g., eggshell, satin).
- Painting tools: A paint tray, rollers with appropriate nap (3/8” is good for smooth walls), and an angled brush for cutting in.
Step 2: Inspect and Prepare Your Drywall Surface
Take a slow walk around the room and look closely at your walls. Run your hand over the surface to feel for imperfections. Use a bright light held at an angle to the wall; this will reveal tiny bumps and divots you might otherwise miss. Mark any problem spots lightly with a pencil.
Look for:
- Nail or screw pops: Where the fastener has pushed the drywall paper out.
- Dents, dings, or scratches: From moving furniture or everyday life.
- Small holes: From old picture hangers or screws.
- Cracks: Usually appearing along seams (hairline cracks are common).
- Rough or uneven patches: Leftover bits of joint compound or debris.
This inspection is your roadmap. It tells you exactly where you need to focus your attention before the primer ever comes out.
Step 3: Clean the Walls Thoroughly
Never paint a dirty wall! Dust, grime, and oils can prevent your primer and paint from sticking properly, leading to peeling down the road. This step is non-negotiable.
- Fill a bucket with warm water and a few drops of mild dish soap.
- Use a large sponge, lightly damp (not soaking wet), to wipe down the entire wall surface from top to bottom.
- Fill a second bucket with clean water and use a clean rag to rinse the wall, removing any soap residue.
- Let the wall dry completely. You can speed this up by opening a window or using a fan.
Step 4: Make Your Minor Repairs (This Replaces Plastering!)
This is where the magic happens. Instead of skim coating the entire wall, we are just going to fix the small problem areas we identified. This is much faster and easier.
For Nail Pops:
- Drive a new drywall screw about 1.5 inches above or below the popped one to re-secure the drywall to the stud.
- Sink the new screw head just below the paper surface without tearing it.
- Remove the old, popped screw.
- Apply a small amount of joint compound over both screw heads with your 6-inch putty knife, making it smooth and flush with the wall.
For Small Holes and Dents:
- Use the corner of your putty knife to clean out any loose debris from the hole or dent.
- Scoop a small amount of joint compound onto your knife.
- Press the compound firmly into the hole, slightly overfilling it.
- Scrape the knife flat against the wall to remove the excess, leaving a smooth patch.
For best results, apply two or three thin coats rather than one thick one. Let each coat dry completely (check the manufacturer’s instructions, usually a few hours) before applying the next. This prevents cracking and shrinking.
Step 5: Sand Everything Smooth
Once your repairs are fully dry, it’s time to create that seamless finish. The key here is to sand lightly—you only want to smooth the compound, not damage the surrounding drywall paper.
- Put on your dust mask and safety glasses. Drywall dust is very fine and not good to breathe. According to the Occupational Safety and Health Administration (OSHA), it’s important to control this dust.
- Wrap 120-grit sandpaper around a sanding block or use a sanding sponge.
- Gently sand the patched areas using light, circular motions. Your goal is to make the patch feel completely flush with the wall. You shouldn’t be able to feel an edge.
- Run your hand over the area. If it feels smooth, you’re good. If not, sand a little more.
- Once all patches are smooth, use a clean, dry cloth or the brush attachment on your shop vac to wipe all the sanding dust off the walls. Don’t skip this! Dust will ruin your paint finish.
Step 6: Prime the Entire Wall
I cannot stress this enough: always prime new or patched drywall. Primer does three critical jobs:
-
- It seals the surface. Drywall paper and joint compound absorb paint differently. Primer creates a uniform base so your paint looks even, with no dull or blotchy spots.
– It improves adhesion. Primer gives the paint something to grab onto, ensuring a long-lasting, durable finish.
– It hides stains and repairs. It blocks out the color of the joint compound, so you don’t see your patches through the final paint color.
Apply one full coat of a good-quality PVA drywall primer across the entire wall using a roller for the large areas and a brush for the corners and edges. Let it dry completely according to the directions on the can.
Step 7: It’s Finally Time to Paint!
You’ve done all the hard work, and now comes the rewarding part. Your wall is clean, smooth, and primed—a perfect canvas.
- Cut in the edges. Use your angled brush to paint a 2-3 inch border along the ceiling, corners, and baseboards.
- Roll the main surface. Load your roller with paint, but don’t overload it. Roll the paint onto the wall in a large “W” or “M” shape, then fill it in without lifting the roller. This ensures even coverage.
- Maintain a wet edge. Overlap your previous strokes slightly to avoid creating visible roller marks.
- Apply a second coat. Let the first coat dry completely (check the can for recoat times). A second coat is almost always needed for rich, even color and a professional finish.
Once your second coat is dry, carefully remove the painter’s tape, clean up your tools, and step back to admire your beautiful new wall!
Common Problems and Quick Fixes
Even with the best preparation, you might run into a small issue. Here’s a handy table for quick solutions.
| Problem | Cause | Quick Fix |
|---|---|---|
| Roller marks or lap lines | Applying too much pressure, using a dry roller, or not maintaining a wet edge. | Let the paint dry completely. Lightly sand the area with 220-grit sandpaper, wipe away the dust, and apply another thin coat of paint. |
| Peeling paint | Painting on a dirty, dusty, or unprimed surface. | Scrape and sand away all loose paint. Clean the area, patch if needed, prime the bare spot, and repaint. |
| Blotchy or uneven finish (“flashing”) | Skipping the primer. Joint compound and drywall paper absorbed the paint differently. | Apply another coat of paint. If it’s still blotchy, you may need to apply a coat of primer over the paint and then repaint. |
| Paint bubbles or blisters | Moisture or dirt trapped under the paint film. | Scrape off the blister, sand the area smooth, clean it, prime it, and then repaint just that spot. |
Frequently Asked Questions (FAQ)
1. What happens if I don’t use primer on new drywall?
If you skip primer, your paint will absorb unevenly into the drywall paper and the joint compound. This results in a blotchy, unprofessional finish called “flashing,” where some spots look dull and others look shiny. It also takes more coats of paint to get decent coverage, costing you more time and money.
2. Can I use spackle instead of joint compound for repairs?
Yes, for very small nail holes or tiny dings, spackle is fine. It dries faster than joint compound. However, for anything larger than a pea, or for filling seams, joint compound is better because it shrinks less, sands more easily, and creates a stronger, smoother patch that blends better with the drywall surface.
3. How can I tell when the joint compound is dry enough to sand?
Dry joint compound will look uniform in color—usually a bright white or off-white—with no dark or gray wet spots. It should also feel hard and completely dry to the touch. Drying times vary based on thickness, humidity, and airflow, so always check the product’s instructions. When in doubt, give it a little extra time.
4. What’s the main difference between all-purpose and topping joint compound?
All-purpose joint compound is a good all-in-one product used for taping, filling, and finishing. Topping compound is a lighter-weight mud used only for the final coats. It’s much easier to sand and creates a smoother finish, but it’s not as strong or adhesive as all-purpose. For small DIY repairs, all-purpose is usually all you need.
5. Do I need to sand between coats of paint?
For a standard wall paint job, you typically do not need to sand between coats of paint. The only time you would sand is if you notice imperfections like debris, drips, or heavy roller texture after the first coat has dried. In that case, a very light sanding with 220-grit paper, followed by a wipe-down, will create a smoother base for your final coat.
6. Why is my painted drywall showing imperfections?
Paint, especially with a higher sheen like satin or semi-gloss, will highlight any texture or flaws on the wall. This is usually caused by inadequate sanding of patches, dust left on the wall before painting, or not feathering the edges of your repairs properly. Holding a light at an angle to the wall before you prime can help you spot and fix these areas first.
7. What is the best paint roller for smooth drywall?
For a smooth drywall surface, a roller with a 3/8-inch nap is the perfect choice. This nap length holds a good amount of paint for efficient coverage but is short enough to leave a very smooth, low-texture finish. Avoid using rollers with a thick nap (1/2-inch or more) on smooth walls, as they can create an “orange peel” texture.
Conclusion: A Beautiful Finish is All in the Prep
And there you have it! Painting drywall without going through a full plastering or skim-coating process isn’t just possible—it’s the standard way to get a beautiful finish in most homes. The secret, as we’ve seen, isn’t in adding more layers to the wall, but in carefully preparing the surface you already have.
By taking the time to inspect, clean, patch, and sand those minor imperfections, you create a perfect canvas. When you follow that up with a quality primer, you’re guaranteeing that your final paint color will look smooth, even, and professional. It proves that a little bit of patience and attention to detail goes a long way.
So don’t let the fear of “plastering” hold you back. You have the skills and the knowledge now to tackle this project with confidence. Grab your tools, put on some music, and get ready to transform your space, one perfectly prepared wall at a time. Happy painting!