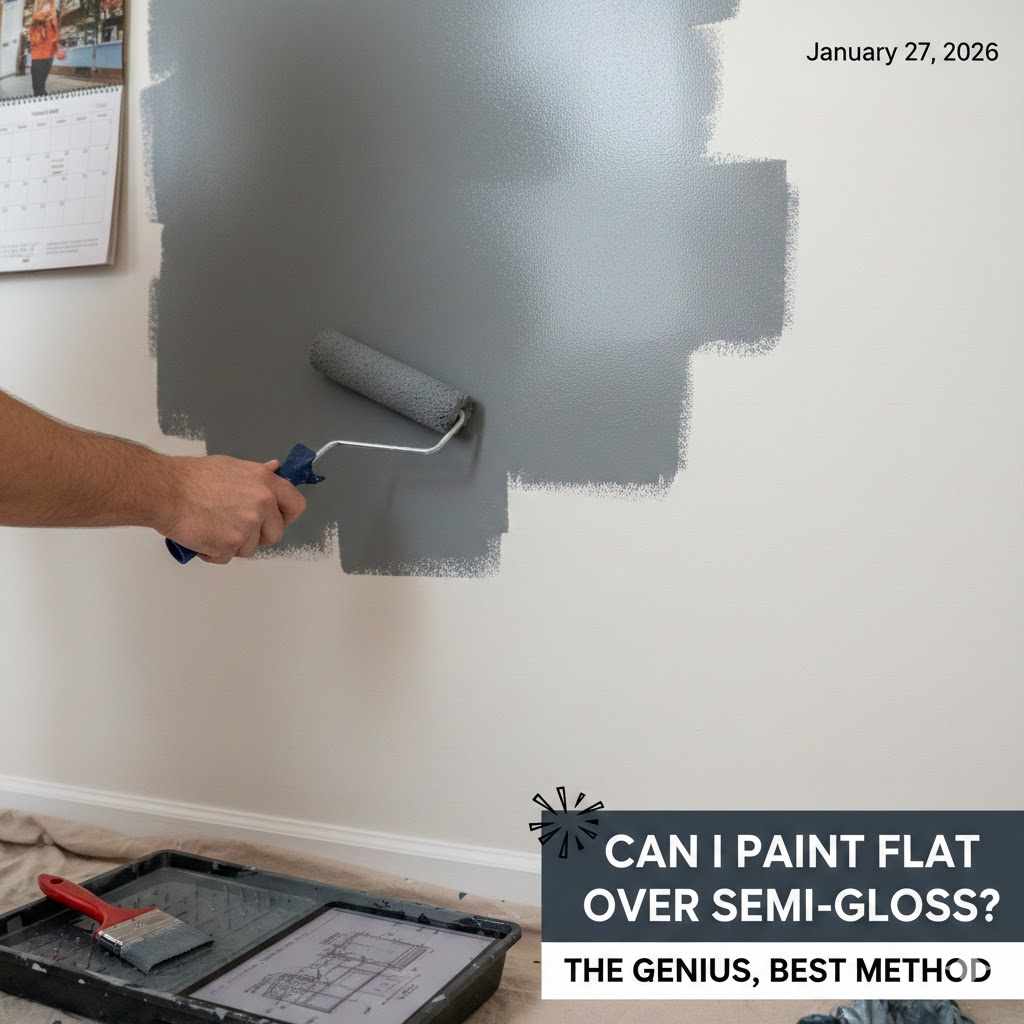
Can I Paint Flat Over Semi Gloss The Genius, Best Method
Yes, you can paint flat over semi-gloss, but you must prepare the surface correctly first. The key is to clean the wall thoroughly, lightly sand (or “scuff”) the shiny surface to give it grip, and apply a quality bonding primer before your final flat coat. This ensures the new paint sticks properly and won’t peel or chip.
Hello there! Md Meraj here, your friendly guide in the world of DIY. Have you ever stared at a shiny, semi-gloss wall and dreamed of covering it with a beautiful, modern flat finish? It’s a common goal, but it often leads to a big headache. Many people try to paint directly over that slick surface, only to watch their hard work bubble, peel, and slide right off. It’s incredibly frustrating!
But don’t worry, you’ve come to the right place. That slick semi-gloss surface isn’t a permanent problem. It just needs a little bit of smart preparation. In this guide, I’m going to show you the genius, best method for this project. It’s a simple, step-by-step process that guarantees a perfect, long-lasting finish. Forget the frustration and get ready to feel proud of your work. Let’s get started!
Why You Can’t Just Paint Flat Over Semi-Gloss
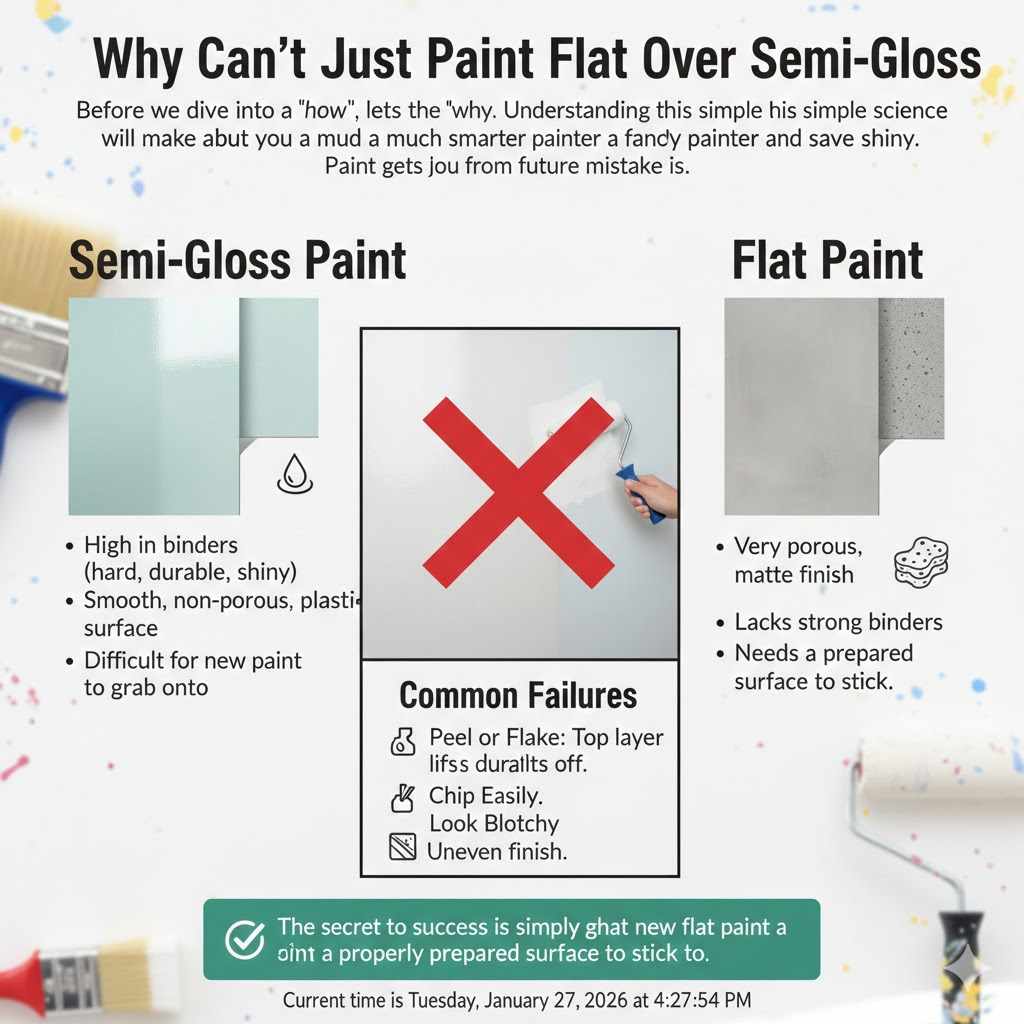
Before we dive into the “how,” let’s talk about the “why.” Understanding this simple science will make you a much smarter painter and save you from future mistakes. Paint gets its finish from its “sheen,” which is just a fancy word for how shiny it is.
Semi-gloss paint has a lot of binders—the ingredients that make paint hard, durable, and shiny. These binders create a smooth, almost plastic-like surface. It’s great for kitchens and bathrooms because it’s easy to wipe clean. But that smooth, non-porous surface is also the problem. New paint has nothing to grab onto. It’s like trying to write on glass with a crayon—it just slides around.
When you apply a coat of flat paint (which has a very porous, matte finish) directly onto a slick semi-gloss surface, the new paint can’t form a strong bond. At first, it might look okay, but over time, it’s likely to:
- Peel or Flake: The slightest bump or scrape can cause the top layer to lift right off.
- Chip Easily: It won’t have the durability you expect from a fresh coat of paint.
- Look Blotchy: The inconsistent adhesion can result in an uneven, unprofessional-looking finish.
The secret to success is simply giving that new flat paint a properly prepared surface to stick to. And that’s exactly what I’m about to show you how to do.
Understanding Paint Sheens: A Quick Guide
To really master your painting projects, it helps to know the language. Choosing the right sheen is just as important as choosing the right color. Here is a simple breakdown of the most common paint sheens, from least shiny to most shiny.
| Sheen Name | Shine Level | Durability | Best For |
|---|---|---|---|
| Flat (or Matte) | No shine | Lowest | Hiding imperfections on walls in low-traffic areas like ceilings and adult bedrooms. |
| Eggshell | Very low shine | Low to Medium | Living rooms, dining rooms, and hallways. Easier to clean than flat. |
| Satin | Soft, velvety shine | Medium | High-traffic areas like kids’ rooms, family rooms, and even kitchens. A great all-around choice. |
| Semi-Gloss | Noticeable shine | High | Trim, doors, cabinets, and bathrooms. Very durable and moisture-resistant. |
| High-Gloss | Very shiny, reflective | Highest | Furniture, doors, and trim for a dramatic, enamel-like look. Shows every flaw. |
As you can see, the higher the shine, the more durable and wipeable the paint is. Our mission is to take a high-durability, shiny surface and make it a perfect canvas for a non-shiny, less durable paint. It’s a bit like taming a wild animal, but with the right steps, it’s completely achievable.
The Genius Method: The Three Golden Rules for Success
Okay, let’s get to the heart of it. Forget any complicated advice you’ve heard. The absolute best method for painting flat over semi-gloss comes down to three simple, golden rules. Think of them as your recipe for success: Clean, Scuff, and Prime. If you follow these three steps without compromise, I guarantee your paint job will look amazing and last for years.
- Clean It: You can’t paint over dirt, grease, or grime. Walls, especially in kitchens and bathrooms, build up a thin layer of residue over time. Paint can’t stick to grease. A thorough cleaning ensures you’re starting with a pure surface, ready to be prepped.
- Scuff It: This is the most important step! We need to knock down that slick, shiny surface of the semi-gloss paint. Scuff sanding with a fine-grit sandpaper “dulls” the finish and creates thousands of microscopic scratches. These tiny grooves give the new primer something to grip onto.
- Prime It: Primer is the magic bridge between the old surface and the new paint. A good “bonding” primer is specially designed to stick to tough, glossy surfaces. It grabs onto the scuffed semi-gloss and creates a perfect, uniform, porous base for your new flat paint to adhere to beautifully.
Don’t be tempted to skip any of these. Doing all three ensures the strongest possible bond and a flawless, professional finish. Now, let’s walk through how to do each one perfectly.
Step-by-Step Guide: How to Paint Flat Over Semi-Gloss
Ready to transform that shiny wall? Let’s roll up our sleeves and get this done the right way. Follow these steps exactly, and you’ll be admiring your work in no time.
Gather Your Tools and Materials
Having everything on hand before you start makes the whole process smoother. You don’t want to be running to the store with a half-sanded wall. Here’s what you’ll need.
- Cleaning Supplies: A good degreasing cleaner like Trisodium Phosphate (TSP) or a TSP substitute, a bucket, sponges, and clean rags.
- Safety Gear: Gloves, safety glasses, and a dust mask (especially for sanding).
- Prep Supplies: Painter’s tape, drop cloths or plastic sheeting to protect your floors and furniture.
- Sanding Supplies: A medium-grit sanding sponge or 120- to 150-grit sandpaper.
- Painting Supplies: A high-quality bonding primer, your chosen flat latex paint, a paint tray, a 2-inch angled brush for cutting in, and a 9-inch roller with a 3/8-inch nap cover.
Here’s a quick look at why some of these specific items are so important:
| Item | Why It’s a Must-Have |
|---|---|
| TSP or Degreaser | Regular soap won’t cut through years of kitchen grease or bathroom residue. A degreaser ensures the wall is truly clean. |
| 120-150 Grit Sandpaper | This grit is fine enough to create “tooth” without gouging the wall or creating deep scratches that show through the paint. |
| Bonding Primer | This isn’t just regular primer. It’s formulated with special adhesives to stick to glossy, non-porous surfaces. It’s non-negotiable for this project. |
| Quality Roller Cover | A cheap roller cover can shed fibers into your paint, leaving you with a fuzzy wall. Spend a few extra dollars for a good one. |
Step 1: Prep Your Space
A little prep work saves a lot of cleanup later. Take 20-30 minutes to set up your work area properly.
- Clear the Room: Move as much furniture as you can out of the room. Cover any remaining large items with plastic sheeting.
- Protect the Floor: Lay down drop cloths across the entire floor, right up to the baseboards.
- Tape Everything Off: Apply painter’s tape along the top edge of your baseboards, around window and door frames, and along the ceiling line. Press the edge down firmly to prevent paint from bleeding underneath. For tips on getting a perfect edge, you can check out guides from major paint brands like Sherwin-Williams.
- Ensure Good Ventilation: Open a window or door to keep fresh air circulating while you work.
Step 2: Clean the Surface Thoroughly
Now we begin our “Clean, Scuff, Prime” mantra. Do not skip this! A clean wall is a happy wall.
- Mix Your Cleaner: Follow the directions on your TSP or degreasing cleaner to mix it with warm water in your bucket.
- Wash the Walls: Dip your sponge in the cleaning solution, wring it out so it’s not dripping, and wipe down the walls in sections. Work from the bottom up to prevent streaks from running down the wall.
- Rinse Well: After washing a section, go over it again with a second sponge or rag dipped in clean water. This removes any cleaning residue that could interfere with paint adhesion.
- Let It Dry Completely: The wall must be 100% dry before you move on to sanding. This can take an hour or two, depending on the humidity in your home.
A quick but important safety note: If you live in a home built before 1978, your walls might have lead-based paint. Sanding this can be hazardous. Please read the EPA’s guidelines on lead safety before starting any sanding.
Step 3: Scuff Sanding (The Secret Sauce)
This is where the magic happens. Scuff sanding dulls the semi-gloss shine and gives the primer something to cling to.
- Put On Your Safety Gear: Wear your dust mask and safety glasses. Paint dust is not something you want to breathe in.
- Sand Lightly: Take your 120- or 150-grit sandpaper or sanding sponge and lightly rub it across the entire surface of the wall. You don’t need to press hard! Your goal is not to remove the paint, but simply to knock off the shine. The surface should go from glossy to dull or matte.
- Work in Circles: Use a consistent, circular motion to ensure you scuff every square inch of the surface. Pay special attention to corners and edges.
- Wipe Away the Dust: This is crucial! After sanding, the wall will be covered in fine dust. Use a damp cloth or a tack cloth to wipe down the entire wall and remove every bit of dust. If you leave dust behind, the primer will stick to the dust instead of the wall. Let the wall dry completely once more.
Step 4: Apply a Quality Primer
Your wall is now clean, dull, and ready for its new best friend: a coat of bonding primer. This step ensures that your final flat paint color goes on smoothly and stays put for good.
- Stir Your Primer: Open your can of bonding primer and stir it thoroughly with a paint stick. Don’t shake it, as this can create air bubbles.
- Cut In the Edges: Dip your 2-inch angled brush into the primer. Use it to paint a 2-3 inch wide strip along the ceiling line, around the corners, and along your taped-off trim. This process is called “cutting in.”
- Roll the Primer On: Pour some primer into your paint tray. Lightly load your roller, making sure it’s evenly coated but not dripping. Roll the primer onto the wall in a large “W” or “M” shape, then go back and fill it in with straight, even strokes. This helps avoid roller marks.
- Check for Even Coverage: Work in sections, making sure to slightly overlap your last stroke for a seamless coat. One even coat of primer is usually enough.
- Let It Dry: This is a waiting game, but it’s important. Check the instructions on the primer can for the recommended drying time before you can apply a top coat. Don’t rush it!
Step 5: Paint with Your Flat Finish
The moment you’ve been waiting for! All your careful prep work is about to pay off. The primed surface is now the perfect canvas for your new flat paint.
- Stir Your Paint: Just like with the primer, stir your flat paint well before you begin.
- Cut In Again: Using a clean angled brush, cut in with your flat paint, painting right over the primer lines you made earlier.
- Roll On the First Coat: Load up a clean roller and apply your first coat of flat paint using the same “W” pattern technique. Keep a wet edge by overlapping your strokes.
- Let the First Coat Dry: Flat paint can feel dry to the touch quickly, but check the can for the recommended “recoat time.” It’s usually a few hours. Letting it dry properly is key for a good second coat.
- Apply the Second Coat: A second coat is almost always needed for a rich, uniform color and a truly professional finish. Repeat the cutting in and rolling process one more time.
- Remove the Tape and Clean Up: While the second coat is still slightly wet, carefully peel off your painter’s tape at a 45-degree angle. This gives you the crispest line. Let your walls cure for a few days before putting furniture back against them.
And that’s it! Step back and admire your beautiful new flat-finish walls. You did it the right way, and the result is a durable, professional-looking paint job you can be proud of.
Common Mistakes to Avoid
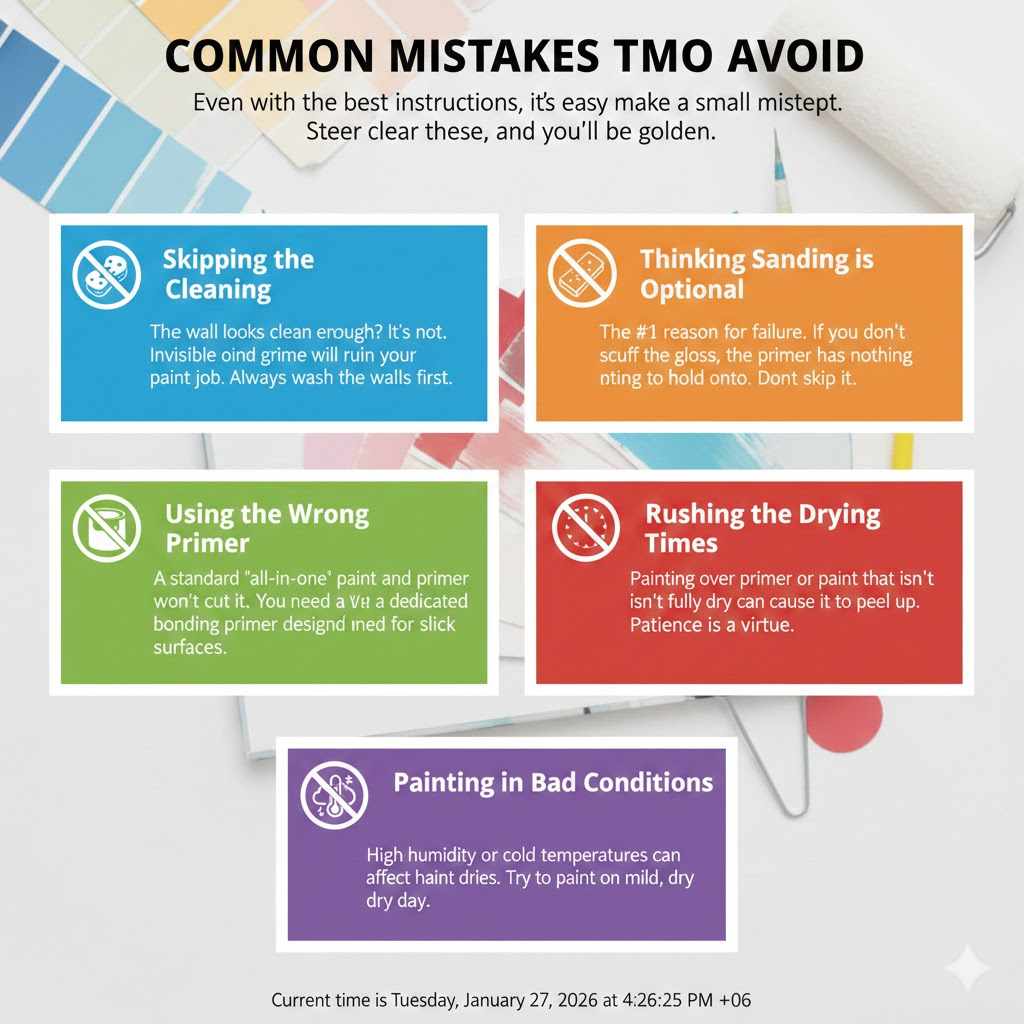
Even with the best instructions, it’s easy to make a small misstep. Here are a few common mistakes I see people make. Steer clear of these, and you’ll be golden.
- Skipping the Cleaning: “The wall looks clean enough.” It’s not. Invisible oils and grime will ruin your paint job. Always wash the walls first.
- Thinking Sanding is Optional: This is the #1 reason for failure. If you don’t scuff the gloss, the primer has nothing to hold onto. It doesn’t take long, so don’t skip it.
- Using the Wrong Primer: A standard “all-in-one” paint and primer won’t cut it here. You need a dedicated bonding primer designed for slick surfaces.
- Rushing the Drying Times: Painting over primer or paint that isn’t fully dry can cause it to peel up with your roller. Patience is a virtue in painting.
- Painting in Bad Conditions: Very high humidity or cold temperatures can affect how paint dries and cures. Try to paint on a mild, dry day.
FAQs: Your Top Questions Answered
You probably still have a few questions. That’s great! It means you’re thinking like a pro. Here are answers to some of the most common questions I get about this project.
Do I really have to sand the semi-gloss paint?
Yes, you really do. While it might seem like a lot of work, it’s the most critical step for long-term success. Sanding is what creates the mechanical bond that allows the primer to grip the wall. Without it, you are risking a peeling paint job down the road.
Can I use a liquid deglosser or liquid sandpaper instead of sanding?
You can, but I recommend traditional sanding for beginners. Liquid deglossers are chemicals that soften the old paint surface to help the new paint adhere. They can be effective but are often smelly and require good ventilation. For a foolproof result that you can see and feel, light sanding is the most reliable method.
What is the best primer to use for painting over semi-gloss?
Look for a product specifically labeled as a “bonding primer” or “adhesion primer.” These are often water-based (acrylic) or shellac-based primers. Well-known products like Zinsser B-I-N Shellac-Base Primer or INSL-X STIX Waterborne Bonding Primer are excellent choices that are famous for sticking to just about anything.
How long should I wait between coats of paint?
Always check the paint can! Every paint formula is a little different. As a general rule, you should wait 2 to 4 hours between latex paint coats. If you try to apply a second coat too soon, you might pull up some of the still-wet first coat with your roller, leaving a messy finish.
Can I use a “paint and primer in one” product to save time?
I strongly advise against it for this specific job. “Paint and primer in one” products are great for painting over a similar, already-primed surface. They are not formulated with the powerful adhesion properties needed to properly bond to a slick, semi-gloss finish. For this task, a separate, dedicated bonding primer is the only way to guarantee a good result.
Why does my new flat paint look streaky or blotchy?
This is usually caused by one of three things: not using primer, applying the paint too thinly, or not waiting long enough between coats. Using a primer gives you a uniform base, which prevents the top coat from looking blotchy. Applying two confident coats usually solves any streakiness caused by application.
What should I do with my leftover paint and supplies?
Properly seal any leftover paint cans by wiping the rim clean and hammering the lid down securely. Store them in a cool, dry place away from freezing temperatures. For used rollers and brushes, if you used latex paint, you can clean them thoroughly with soap and water. Never pour leftover paint down the drain. Contact your local waste management facility to find out about household hazardous waste disposal days.
Conclusion: Enjoy Your Beautiful New Walls
There you have it—the complete guide to painting flat over semi-gloss without fear. By now, you should see that it isn’t about some secret, complicated trick. It’s about following a simple, proven process: Clean, Scuff, and Prime.
You took the time to learn the right way to do it, and that’s what sets a great DIYer apart. Instead of fighting with peeling paint and feeling frustrated, you can now stand back and enjoy a room that looks fresh, modern, and professionally done. You’ve successfully updated your space, learned a valuable new skill, and added value to your home with your own two hands.
So, go ahead and tackle that shiny wall with confidence. You’ve got the knowledge and the method to get it done right. Happy painting!