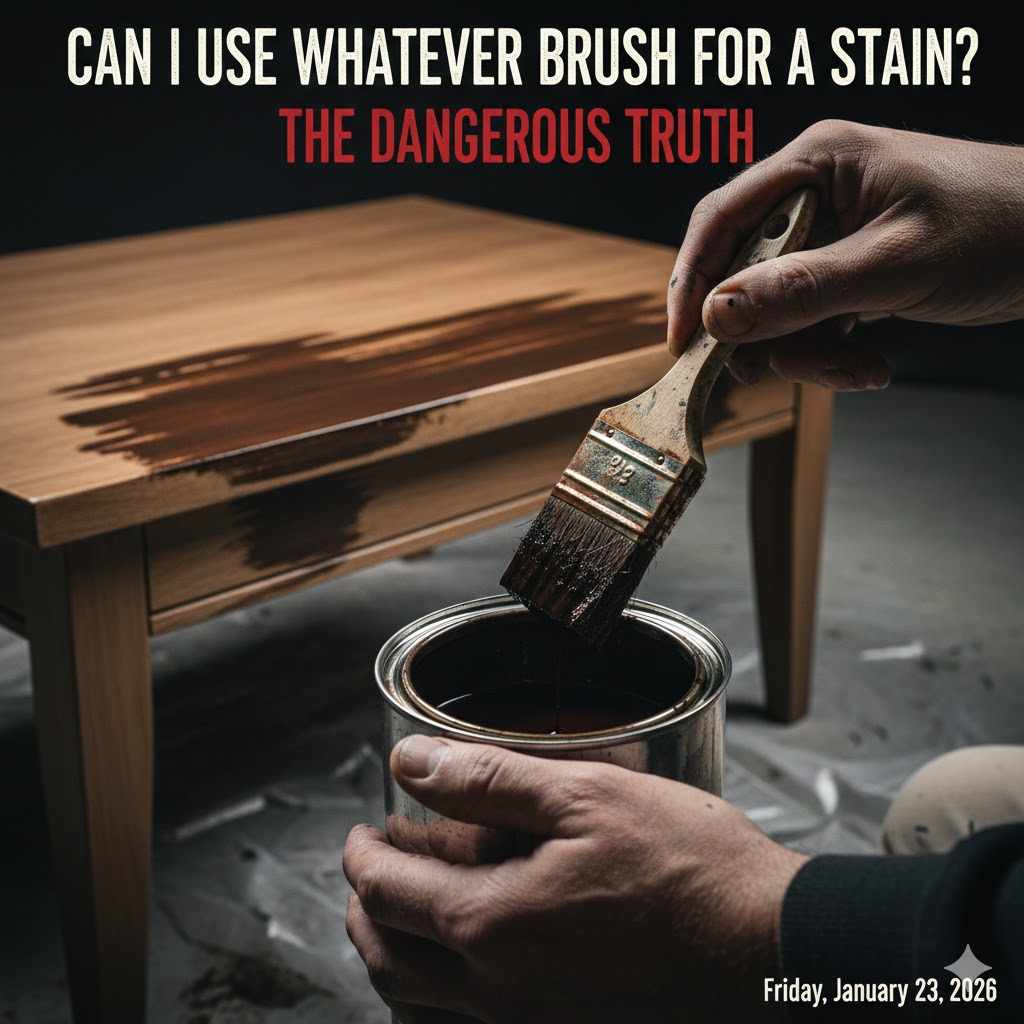
Can I Use Whatever Brush For A Stain? The Dangerous Truth
Using any brush for stain is a common mistake that can ruin your project. For oil-based stains, you must use a natural bristle brush. For water-based stains, always use a synthetic (nylon or polyester) brush. Using the wrong brush will lead to a streaky, blotchy finish, shed bristles, and wasted time and money.
Hello there, fellow woodworkers and DIY friends! It’s Md Meraj, back in the workshop with you. Today, we’re tackling a question I hear all the time: “Can I just grab any old paintbrush for my staining project?” You’ve spent hours sanding a beautiful piece of furniture, you’re excited to add some color, and that dusty brush in the garage looks tempting. I get it. But stopping for a moment to choose the right applicator is one of the most important steps. The “dangerous truth” isn’t about a safety risk, but about the danger of ruining your hard work. Let’s walk through why the right brush matters and how to get that perfect, professional-looking finish you deserve.
The “Dangerous Truth” of Using the Wrong Brush
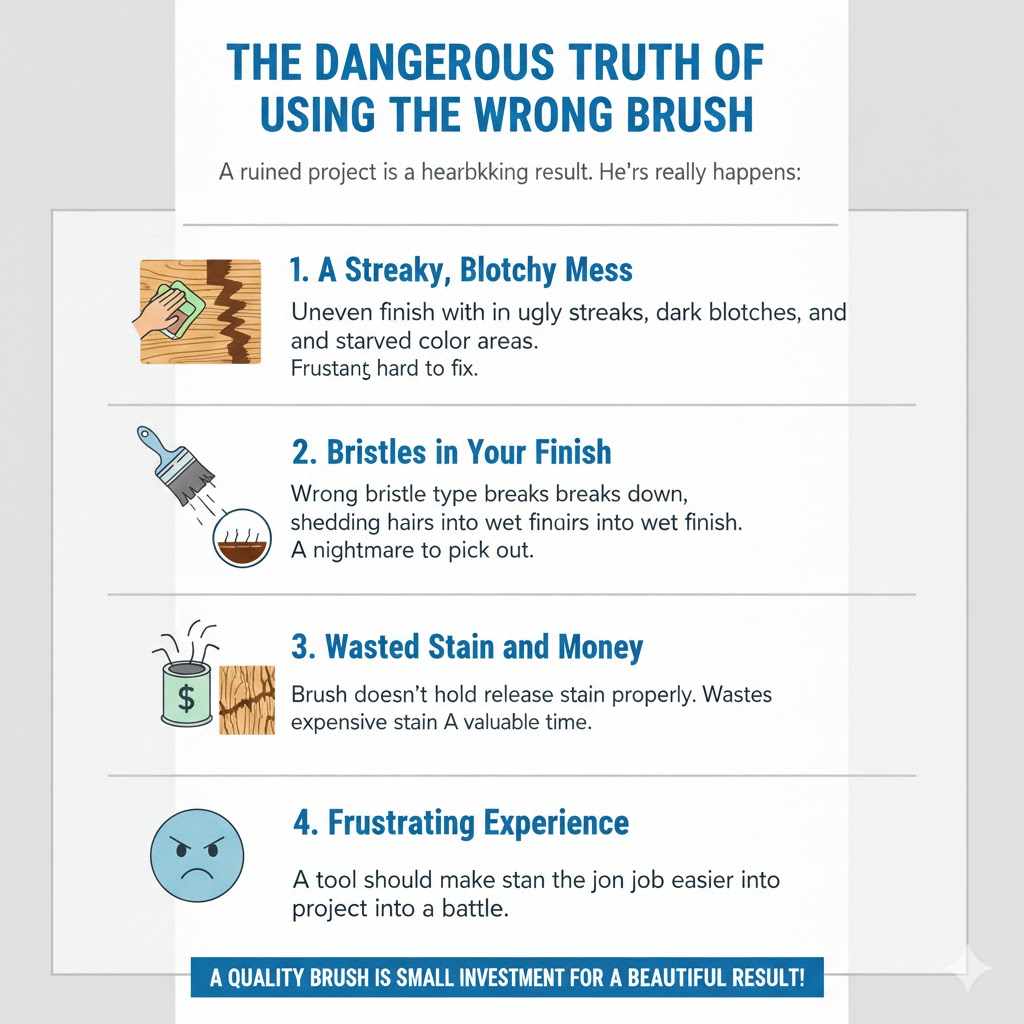
When I say “dangerous,” I’m not talking about workshop accidents. I’m talking about the danger of a ruined project. After you’ve poured your time, effort, and money into preparing a piece of wood, the last thing you want is a terrible finish. Using the wrong brush is one of the fastest ways to get a heartbreaking result. Here’s what really happens:
- A Streaky, Blotchy Mess: The number one sign of the wrong brush is an uneven finish. The stain won’t go on smoothly. You’ll see ugly streaks, dark blotches, and areas that look starved for color. It’s frustrating and nearly impossible to fix without starting over.
- Bristles in Your Finish: Have you ever seen tiny hairs permanently sealed into a finished piece? It’s often because the wrong type of bristle was used. Some brushes break down when exposed to the chemicals in certain stains, shedding their bristles right into your wet finish. Picking them out is a nightmare.
- Wasted Stain and Money: The wrong brush doesn’t hold or release stain properly. It might soak up way too much stain that never makes it to the wood, or it might not pick up enough, forcing you to constantly re-dip and overwork the area. You end up wasting expensive stain and your valuable time.
- A Frustrating Experience: A tool should make your job easier, not harder. Fighting with the wrong brush turns a rewarding project into a battle. It can be so discouraging that it makes you want to give up on woodworking altogether, and we can’t have that!
The good news is that all of this is 100% avoidable. A little knowledge goes a long way, and a quality brush is a small investment that pays off with a beautiful, professional-looking result.
Understanding Your Stain: The First Step to a Perfect Finish
Before you can even think about a brush, you need to know what kind of stain you’re working with. Stains are not all created equal. They have different bases—oil, water, or gel—and each one behaves differently. Knowing your stain is the first step to choosing the right tool for the job.
Oil-Based Stains
These are the classic, traditional stains that many woodworkers love. They are made with a petroleum distillate base and pigments. They penetrate deep into the wood grain, which is great for enhancing the natural beauty of the wood. They also have a long “open time,” which means they dry slowly. This gives you more time to work, apply the stain, and wipe off the excess without it getting sticky.
- Pros: Deep penetration, rich color, forgiving with a long drying time.
- Cons: Strong fumes (requires good ventilation), cleanup requires mineral spirits or paint thinner.
Water-Based Stains
A more modern option, water-based stains have become very popular. They use water as the carrier for the color pigments. They have very little odor, dry quickly, and clean up easily with just soap and water. However, that fast drying time can be a challenge on large projects. Water-based products can also sometimes raise the wood grain, making the surface feel a little rough. This is easily fixed with a light sanding before your final topcoat.
- Pros: Low odor, fast drying, easy cleanup, wide range of colors.
- Cons: Can dry too quickly, may raise the wood grain.
Gel Stains
Gel stains are different. They have a thick, pudding-like consistency. Instead of soaking deep into the wood like liquid stains, they sit more on the surface. This is a huge advantage for woods that tend to get blotchy, like pine or cherry. Their thick formula means they don’t run or drip, making them fantastic for vertical surfaces like cabinet doors or table legs.
- Pros: Prevents blotching, no drips or runs, great for vertical surfaces.
- Cons: Doesn’t penetrate deeply, application is more about wiping it on than brushing.
To make it even simpler, here is a quick comparison table:
| Stain Type | Base | Drying Time | Cleanup | Best For |
|---|---|---|---|---|
| Oil-Based | Oil/Petroleum Distillate | Slow (6-24 hours) | Mineral Spirits | Enhancing wood grain, providing rich color. |
| Water-Based | Water | Fast (1-2 hours) | Soap and Water | Projects needing a quick turnaround, low odor environments. |
| Gel Stain | Oil or Water | Slow to Fast (Varies) | Mineral Spirits or Water | Blotch-prone woods (pine, cherry), vertical surfaces. |
Choosing Your Weapon: A Guide to Stain Brushes
Now that you know your stain, let’s talk brushes. Walking into the paint aisle can be overwhelming. There are dozens of brushes, and they all look pretty similar at first glance. But the secret is in the bristles. There are two main types you need to know about: natural and synthetic.
Natural Bristle Brushes
These are often called “China bristle” brushes and are made from animal hair, usually from hogs. The bristles are naturally soft and have a unique characteristic called “flagging,” which means they have split ends. These split ends are fantastic for holding more product and releasing it smoothly and evenly. This is the brush you want for oil-based products.
Warning: Never use a natural bristle brush with water-based products. The bristles will act like your own hair, absorbing water, becoming limp and floppy, and losing their shape. It makes a smooth application impossible.
Synthetic Bristle Brushes
Synthetic brushes are made from man-made filaments like nylon and polyester, or a blend of the two. They are designed to be stiffer and more durable than natural bristles. Most importantly, they do not absorb water, so they maintain their shape and stiffness when used with water-based stains and finishes. They are engineered for a smooth, streak-free finish. These are your go-to for any water-based product.
Foam Brushes
Ah, the cheap and cheerful foam brush. These are basically a wedge of foam glued to a wooden stick. They are very inexpensive and disposable, which is their main appeal. They can be useful for very small craft projects, touch-ups, or for applying stain to test pieces. However, for any serious project, I recommend staying away from them. They are notorious for tearing, leaving little bits of foam in your finish, and creating air bubbles that can mar the surface.
The Perfect Match: Pairing Your Stain with the Right Brush
Okay, let’s put it all together. This is the most important takeaway of this entire article. Matching your brush to your stain is non-negotiable for a good result. It’s a simple rule that makes all the difference.
Here is a simple cheat sheet to print out and keep in your workshop:
| Stain Type | ✅ Recommended Brush | 🤔 Why It Works | ❌ Brush to Avoid |
|---|---|---|---|
| Oil-Based Stain | Natural Bristle (China Bristle) | Natural bristles hold and release the thicker oil stain evenly without getting damaged by the solvents. | Synthetic Bristle (it will work, but isn’t ideal) and Foam Brushes (they fall apart). |
| Water-Based Stain | Synthetic Bristle (Nylon/Polyester) | Synthetic bristles do not absorb water, so they stay stiff and apply a smooth, streak-free finish. | Natural Bristle (it will go limp and become useless). |
| Gel Stain | Lint-Free Rag or Foam Brush | Gel stain is typically wiped on, not brushed on. A foam brush can help apply it to detailed areas, but a rag is often best for application and wiping off. | Expensive Natural or Synthetic brushes (it’s not necessary and can be difficult to clean). |
Step-by-Step Guide: How to Apply Stain Like a Pro (With a Brush)
You’ve got your stain, you’ve got the perfect brush—now it’s time for the fun part! Applying stain isn’t hard, but following a few key steps will ensure a flawless finish.
- Wood Preparation is Everything: You cannot get a good finish on poorly prepared wood. This means sanding. Start with a medium grit sandpaper (like 120-grit) and finish with a fine grit (like 220-grit). Always sand with the grain. After sanding, wipe the surface with a tack cloth or a rag lightly dampened with mineral spirits (for oil-based stain) or water (for water-based stain) to remove all dust. For more on proper wood prep, the U.S. Forest Service offers excellent literature on wood finishing fundamentals.
- Set Up Your Space: Work in a well-ventilated area, especially with oil-based products. Lay down drop cloths to protect your floor. Good lighting is also key, as it helps you see if your application is even.
- Stir Your Stain Thoroughly: The color pigments in stain can settle at the bottom of the can. Never shake the can! Shaking creates tiny air bubbles that will end up on your project. Instead, open the can and stir it gently but thoroughly with a stir stick for a few minutes, scraping the bottom as you go.
- Load Your Brush Correctly: Don’t dunk the whole brush in the can. Dip just the tip of the bristles—about one-third of their length—into the stain. Tap the brush gently against the inside of the can to remove any excess. Don’t scrape it along the rim.
- Apply the Stain: Working in manageable sections, apply the stain to the wood using long, smooth, even strokes. Always brush in the direction of the wood grain. This helps the stain penetrate evenly and looks much more natural.
- Wipe Off the Excess Stain: This is the most critical step that beginners often miss. Stain is meant to color the wood, not sit on top of it like paint. Let the stain sit for the time recommended on the can (usually 5-15 minutes). Then, take a clean, lint-free cloth and wipe off all the excess stain, again, moving in the direction of the grain. The color left behind is what has soaked into the wood fibers.
- Let It Dry Completely: Check the can for the recommended drying time before you consider a second coat or applying a protective topcoat. Rushing this step can lead to a gummy, sticky mess.
- Apply a Second Coat (If Desired): If you want a deeper, richer color, you can apply a second coat. Simply repeat the process of applying and wiping off the excess. Be aware that the wood will not absorb as much stain on the second coat.
Cleaning and Caring For Your Brushes
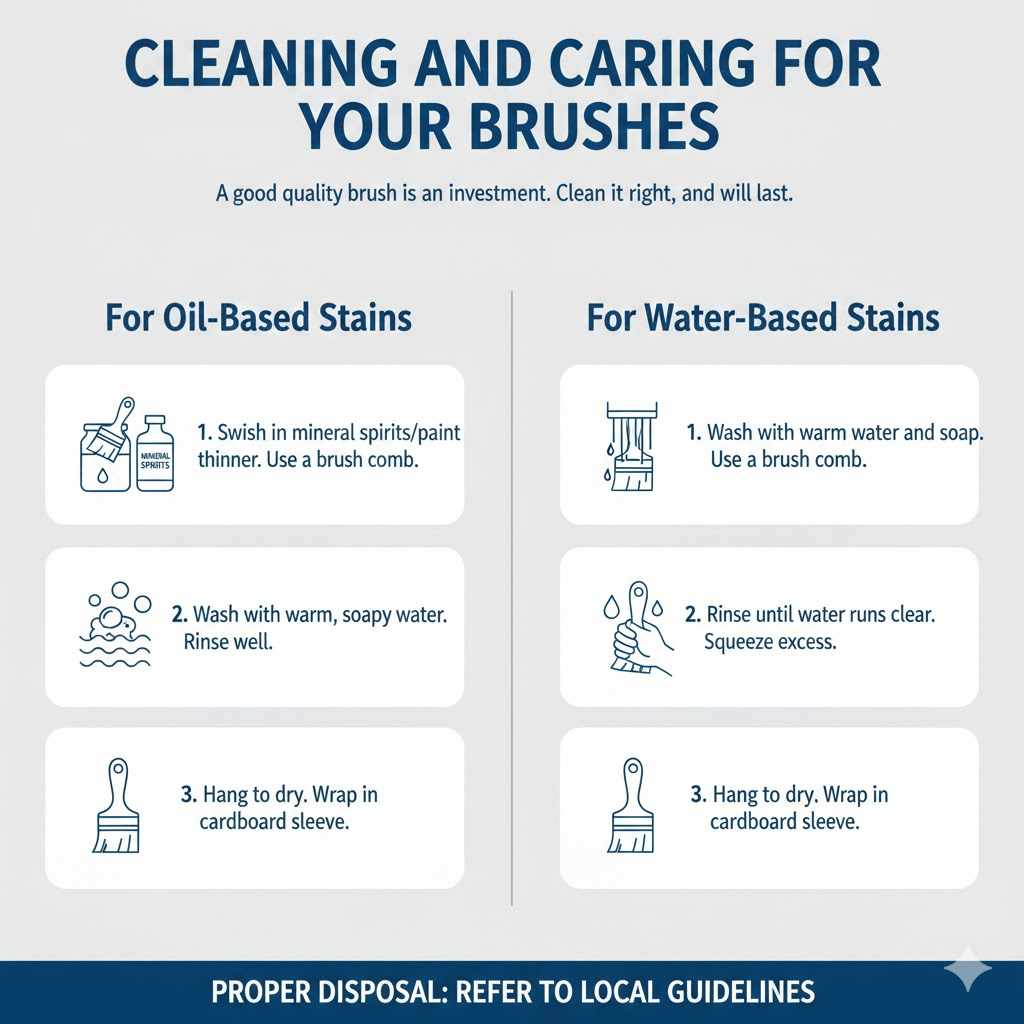
A good quality brush is an investment. If you take care of it, it will last you for many projects to come. Cleaning your brush immediately after you’re done is the key.
- For Oil-Based Stains: You will need mineral spirits or paint thinner. Pour some into a clean container and swish the brush around to dissolve the stain. Use a brush comb to work the solvent through the bristles. Repeat with fresh solvent until the brush is clean. Squeeze out the excess, wash with warm, soapy water, rinse well, and hang it to dry.
- For Water-Based Stains: This is much easier! Just wash your brush thoroughly with warm water and soap. Again, a brush comb helps get all the pigment out from the base of the bristles. Rinse until the water runs clear, squeeze out the excess, and hang to dry. Proper disposal of cleaning materials is also important; refer to local guidelines or the EPA’s recommendations for household hazardous waste.
Once dry, wrap your clean brushes back in the cardboard sleeve they came in. This helps them keep their shape.
Frequently Asked Questions (FAQ)
1. Can I use a cheap dollar store brush for staining?
I strongly advise against it. While tempting for the price, these brushes have poor quality bristles that fall out easily, leaving them stuck in your finish. They also apply stain unevenly, leading to a blotchy result. Investing just a few more dollars in a quality brush will save you a huge headache.
2. What happens if I use a synthetic brush with oil-based stain?
It will work, but it’s not ideal. A good quality synthetic brush is durable enough to handle the solvents in oil-based stain. However, it won’t hold and release the stain as smoothly as a natural bristle brush designed for that purpose. You might find you have to work harder to get an even coat.
3. How do I fix a blotchy stain job?
It can be tough, but not always impossible. If the stain is still wet, you can sometimes even it out by applying more stain to the lighter areas and quickly wiping everything down again. If it’s dry, you may need to sand the piece back down to the bare wood and start over. Using a pre-stain wood conditioner before staining can help prevent blotching on woods like pine.
4. Is a foam brush ever a good choice for staining?
Yes, for specific situations. They are decent for applying gel stain, testing stain colors on a piece of scrap wood, or for very small craft projects where a perfect finish isn’t critical. But for any piece of furniture or cabinetry, a proper bristle brush is always better.
5. How many coats of stain should I apply?
Usually, one coat is enough. The first coat provides the vast majority of the color. A second coat will deepen the color slightly, but the wood won’t absorb much more. Unlike paint, you don’t build up coats of stain for durability—that’s what the protective topcoat (like polyurethane) is for.
6. Do I need to sand between coats of stain?
No, you do not need to sand between coats of stain. Stain soaks into the wood fibers rather than forming a film on top. Sanding would simply remove some of the color you just applied. You should, however, do a very light sanding after your topcoat has dried and before applying the next topcoat.
7. Can I reuse a brush that has dried stain on it?
It’s not recommended. Once stain has dried and hardened in the bristles, the brush is effectively ruined. The bristles will be stiff and unable to apply a smooth finish. It’s nearly impossible to fully clean a brush at this point, so it’s best to start fresh. This is why cleaning your brushes immediately is so important!
Conclusion: The Right Tool for a Beautiful Result
So, can you use whatever brush you want for a stain? The clear answer is no. That simple choice—matching a natural bristle brush to oil-based stain and a synthetic brush to water-based stain—is the secret ingredient for a smooth, even, professional-looking finish. It’s a small detail that makes a world of difference.
Think of your brush not as a disposable applicator, but as a critical woodworking tool, just like your saw or sander. Investing in a couple of good quality brushes and taking care of them will make every staining project more enjoyable and the results far more rewarding. You’ve already put in the hard work to prepare your piece; don’t let the final step be the one that lets you down. Now you have the knowledge to finish strong. Happy woodworking!