Can You Drill Into Tempered Glass: Pro Tips
Yes, you can drill into tempered glass, but it requires specialized techniques and tools to avoid shattering. Proper preparation, slow speeds, and gentle pressure are crucial. This guide details the safest and most effective methods for drilling holes in tempered glass projects.
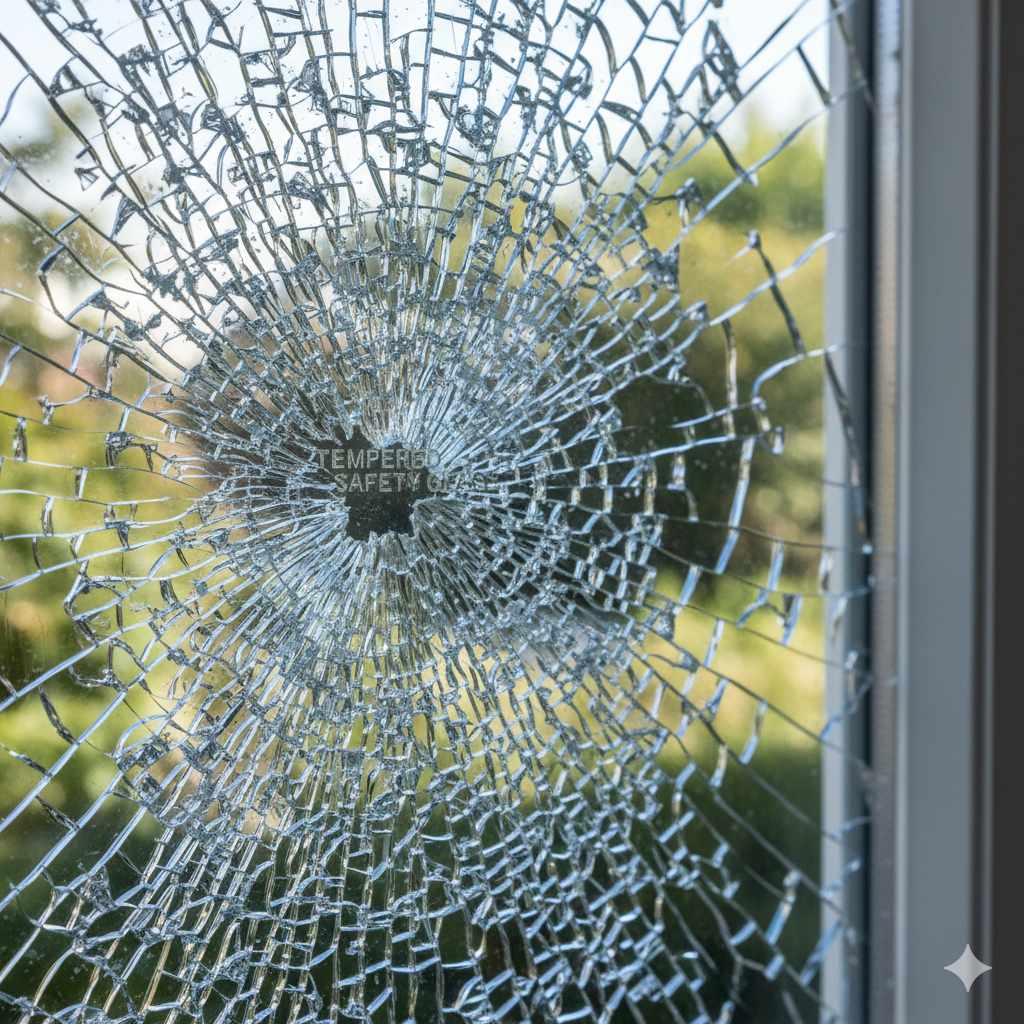
Ever found yourself needing to add a small hole to a piece of tempered glass for a project, only to freeze up, worried about it instantly cracking? You’re not alone! Tempered glass, also known as toughened glass, is super strong, but it’s also brittle in a very specific way. Unlike regular glass, it’s treated to be much stronger, making it a popular choice for tabletops, shower doors, and car windows. But when it comes to making modifications like drilling a hole, it’s a different ballgame.
The good news is, with the right knowledge and a careful hand, it’s definitely possible to drill into tempered glass without turning it into a pile of dangerous shards. We’re going to walk through exactly how to do it safely and successfully, so you can feel confident tackling your next glass project. Get ready to learn the pro tips!
Why Tempered Glass is Different
Tempered glass is a bit of a paradox. It’s incredibly strong against impacts and stresses that would normally break regular glass. This toughness comes from a special heating and rapid cooling process, called quenching, during its manufacturing. This process creates internal stresses within the glass that make it shatter into small, relatively harmless pebble-like pieces when it does break, rather than sharp shards. This safety feature makes it ideal for many applications, but it also means it’s incredibly difficult to cut or drill after it’s been tempered. Trying to drill it like you would wood or even regular glass can cause these internal stresses to release violently.
Think of it like a tightly wound spring. Regular glass is like a loose coil, easier to bend and break. Tempered glass is a tightly wound spring. It can withstand a lot of force before it snaps, but when it does, that stored energy releases all at once. This is why standard drilling methods—which involve friction, heat, and pressure—are a recipe for disaster with tempered glass.
The Risk of Shattering
When you try to drill into tempered glass with a standard drill bit and wrong technique, two main things happen: First, the heat generated by friction can cause uneven expansion and contraction in the glass, leading to cracks. Second, any direct pressure applied can easily exceed the glass’s breaking point, triggering that rapid, explosive shattering. Because the glass is already under significant internal stress, even a small imperfection or too much force can be the breaking point. It’s not about the sharpness of your tool as much as it is about managing the heat and stress.
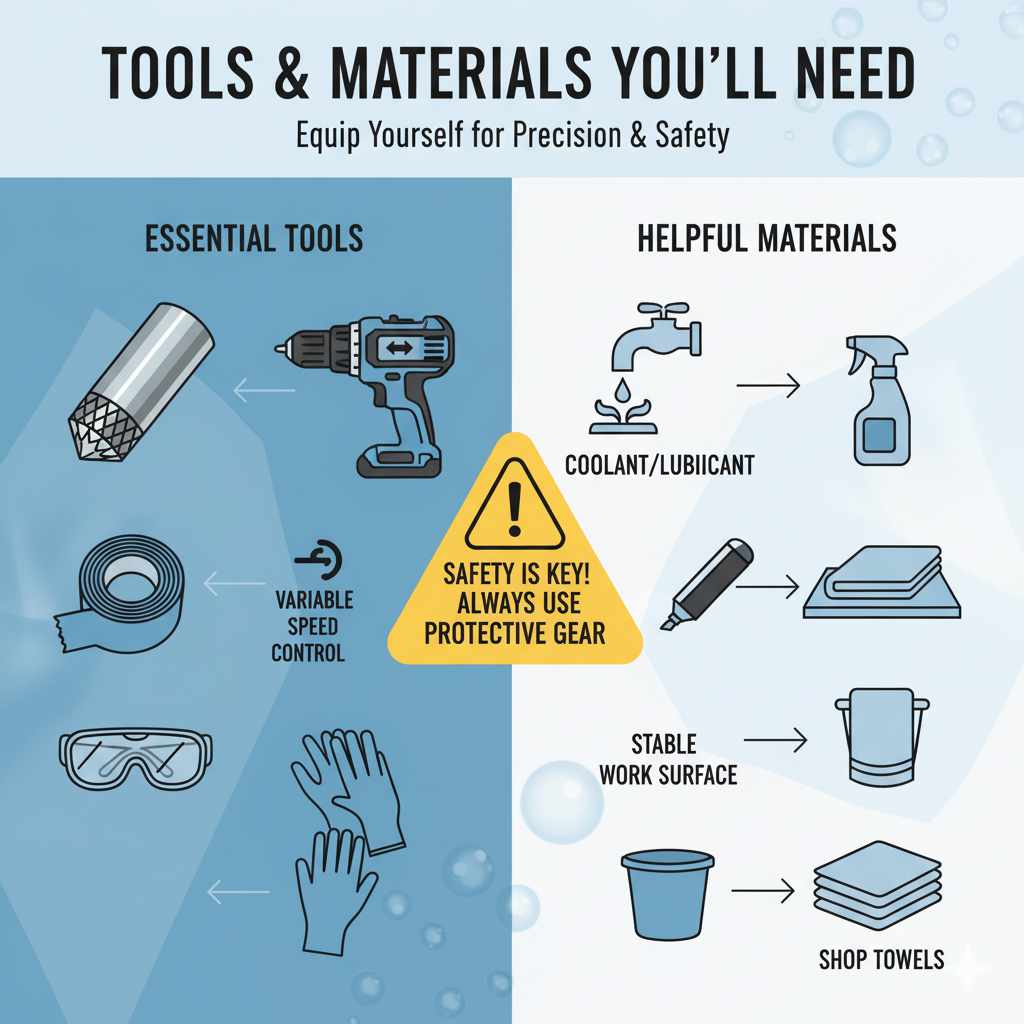
Tools and Materials You’ll Need
Gathering the right tools and materials before you start is half the battle won. For drilling tempered glass, you’ll need precision and patience, not brute force. Here’s a breakdown of what you should have on hand:
- Diamond-Tipped Drill Bits: These are non-negotiable. Standard drill bits (like those for wood or metal) will simply not work and will likely break or cause the glass to shatter. Diamond bits have synthetic diamonds bonded to them, which are hard enough to grind through glass.
- Drill or Rotary Tool: A power drill is essential, but for smaller or more precise holes, a Dremel or similar rotary tool can also work. It’s important to have good control over the speed.
- Variable Speed Control: This is critical. You need a drill that allows you to go very slow. High speeds generate too much heat and vibration. Some dedicated glass drilling kits come with specialized, low-speed drills, but most standard variable-speed drills will suffice if they can maintain very low RPMs.
- Coolant/Lubricant: Water is your best friend here. It keeps friction heat down. Some people use specialized glass drilling lubricants, but plain water usually does the trick for DIY projects. Kerosene or a mix of water and a few drops of dish soap can also work.
- Masking Tape or Painter’s Tape: This helps prevent the drill bit from wandering when you start the hole and can offer a tiny bit of extra surface protection.
- Safety Glasses: Absolute must. When glass breaks, it can send shards flying. Always protect your eyes.
- Gloves: Thin, flexible gloves can help with grip and provide a minor layer of protection.
- A Stable Work Surface: You need a surface that won’t move. Placing a towel or some soft material underneath the glass can help absorb vibrations and prevent scratches if something goes wrong.
- Marker: To mark your drilling spot.
- Small Container or Spray Bottle: To keep water on hand for cooling.
- Shop Towels or Rags: For cleanup and managing water.
Step-by-Step Guide to Drilling Tempered Glass
Now that you’ve got your gear, let’s get to the actual process. Remember, patience is key. This isn’t a race!
Step 1: Prepare Your Workspace and Glass
Find a sturdy, flat surface. Lay down a thick towel or a piece of firm cushioning material to absorb vibrations and support the glass. Clean the area of the glass where you plan to drill thoroughly. Any dirt, dust, or debris can get ground into the glass and cause issues. Place your piece of tempered glass on the cushioned surface, ensuring it is stable and won’t move around during drilling. You might want to secure it gently with clamps, but be very careful not to apply too much pressure to the glass itself.
Step 2: Mark Your Drilling Spot
Carefully mark the exact spot where you want to drill your hole. Use a marker that is easy to see on the glass. For extra precision and to prevent the drill bit from “walking” or slipping when you first start, apply a piece of masking tape or painter’s tape over the marked spot. You can then re-mark the center of your desired hole on the tape. This tape acts as a guide and can help reduce minor chipping around the entry point.
Step 3: Set Up Your Drill
Insert your diamond-tipped drill bit into your drill. Ensure it’s securely fastened. Now, the most crucial setting: adjust your drill’s speed. You want the slowest possible speed your drill can achieve. For most drills, this means setting it to the lowest number on the speed dial, often labeled “1” or a very low RPM. If your drill has a trigger for variable speed, press it very gently to maintain a slow, consistent rotation. High speed is the enemy of tempered glass.
Step 4: Begin Drilling with Coolant
This is where the water comes in. You need to keep the drilling area constantly lubricated and cooled. The easiest way to do this is to create a small dam around the drill spot. You can use plumber’s putty or even a thick ring of tape to create a boundary. Fill this “pool” with water. As you drill, the water will help carry away glass dust and, more importantly, dissipate the heat generated by the diamond bit grinding against the glass. Alternatively, you can use a spray bottle to constantly mist the area with water.
Start the drill slowly. Apply very light, consistent pressure. Don’t force the drill bit. Let the diamond bit do the work of grinding away the glass. You’ll see a fine dust mixed with water start to form. If you’re not using a water dam, continually add water to the drilling site. Periodically, you might want to lift the drill bit slightly to let more coolant flow into the hole and clear out debris, then continue drilling. Be patient; this process can take time, especially for thicker glass.
Step 5: Maintain Consistent Pressure and Speed
As you continue to drill, it’s vital to keep your pressure light and your speed slow and steady. Avoid any sudden jerky movements or changes in speed. The goal is a smooth, controlled grinding action. Too much pressure will cause the glass to heat up unevenly and can lead to cracks or shattering. Too much speed will cause excessive heat and vibration. Think of yourself as gently sculpting the glass, not forcing your way through it.
Step 6: Approaching the Other Side
As you get close to breaking through to the other side of the glass, you need to be extra careful. The risk of chipping or cracking is highest here. Reduce your pressure even further – use just the weight of the drill, if that. Continue to ensure the area is well-lubricated. It’s also a good idea to place a piece of wood or a thicker piece of tape on the exit side of the glass if possible to help support it and minimize blowout or chipping. Once the bit pierces through, stop immediately and slowly retract the bit.
Step 7: Clean Up and Inspection
Once the hole is drilled, turn off your drill and carefully remove the bit. Turn the glass over and gently clean away all the water, glass dust, and tape residue. Inspect the hole for any signs of stress, cracks, or significant chipping. A minor amount of chipping is sometimes unavoidable, but large cracks indicate the process was not successful. Clean the entire piece of glass thoroughly to remove any remaining residue.
Alternative Methods for Drilling Glass
While the diamond drill bit method is the most common for DIYers, there are other specialized techniques used in professional settings, and some variations you might consider for specific situations.
Water-Jet Cutting
This is a highly specialized industrial process, not something typically done at home. A high-pressure stream of water, often mixed with an abrasive substance like sand, is used to cut through materials. It’s incredibly precise and can cut complex shapes, but requires extremely expensive equipment and expertise. It’s mentioned here for completeness, as it’s a way glass can be cut without direct impact.
Laser Cutting
Lasers can also be used to cut glass. Similar to water-jet cutting, this is a high-tech industrial process. Lasers can create very clean edges, but the intense heat can also cause stress in the glass, requiring precise control and often cooling.
Using a Glass Drilling Kit
Specialized glass drilling kits are available online and at some specialty hardware stores. These kits often include a selection of diamond-tipped bits in various sizes, a guide to keep the drill bit perpendicular, and sometimes even a specialized low-speed drill. Using a kit designed for glass can simplify the process and increase your chances of a successful outcome. The guide piece helps ensure you drill straight, which is crucial.
Using a Hole Saw for Larger Holes
For larger diameter holes, a diamond-tipped hole saw is the tool of choice. These look like a small cylinder with diamond grit along the cutting edge. They are used in a similar way to drill bits, with slow speed and constant lubrication. For very large holes, it’s advisable to start with a smaller pilot hole using a standard diamond bit to guide the hole saw.
Safety Precautions You Can’t Ignore
Working with glass, especially tempered glass, demands a strong focus on safety. Even when done correctly, there’s always a risk, so never cut corners on protection.
- Eye Protection: Always wear safety glasses that wrap around your eyes or a full face shield. Glass shards can be unpredictable.
- Hand Protection: Wear sturdy gloves. While they won’t stop a sharp shard from cutting deeply, they protect against minor nicks and provide better grip.
- Clothing: Wear long sleeves and long pants made of durable fabric. Avoid loose clothing that could get caught.
- Work Area: Ensure your workspace is clean, well-lit, and free of trip hazards. Keep pets and children away from the area while you are working and during cleanup.
- Handling Broken Glass: If, despite your best efforts, glass breaks, don’t try to pick up shards with your bare hands. Use a dustpan and brush, and consider vacuuming the area afterward. Dispose of broken glass safely in a sturdy container.
- Ventilation: While not a major concern with water lubrication, if you use any specialized lubricants, ensure good ventilation.
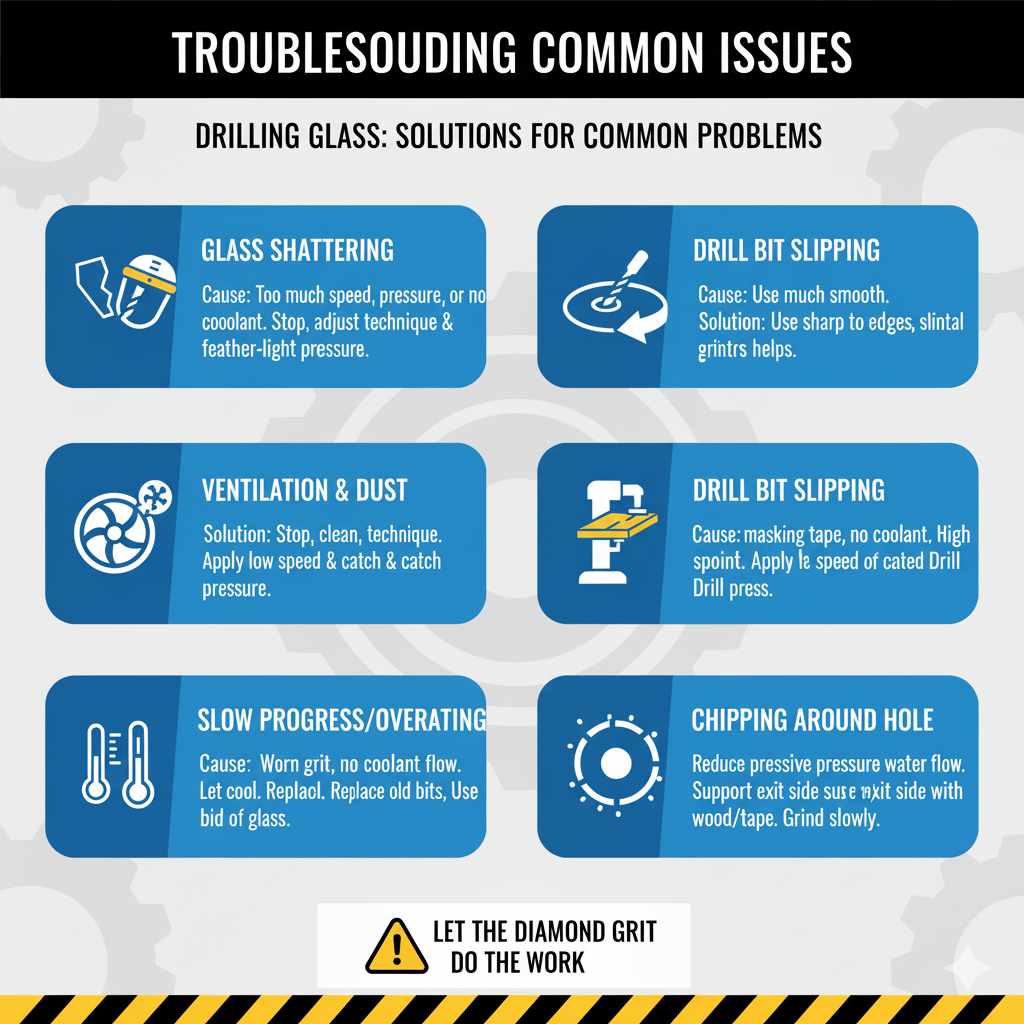
Troubleshooting Common Issues
Even with the best preparation, sometimes things don’t go perfectly. Here are a few common issues and how to address them:
Glass Shattering During Drilling
Cause: Too much speed, too much pressure, not enough coolant, or starting the drill bit too aggressively. Tempered glass is already under stress, and these factors can trigger it to break catastrophically.
Solution: If it happens, stop immediately. Clean up carefully and discard the broken glass. Assess if the piece was flawed to begin with or if a technique adjustment is needed for your next attempt. Ensure your speed is as low as possible and pressure is feather-light.
Drill Bit Slipping on the Surface
Cause: The surface of the glass is too smooth, and the bit has nothing to grip. This is more common when starting the hole.
Solution: Ensure you’ve used masking tape at the start point. A little extra friction from the tape can greatly help. Applying slightly more pressure only at the very start, just enough to let the diamond grit catch, can also help, but be ready to ease off immediately. A drill press with a stable guide can also prevent slipping.
Slow Progress or Overheating
Cause: The diamond grit on the bit might be wearing down, or you’re not using enough coolant, or the drill speed is still too high.
Solution: Ensure a constant flow of water. If progress is extremely slow and you can feel the glass getting hot, stop and let it cool completely. If you’re using an older diamond bit, it might be time to replace it. Ensure the bit is designed for glass and that you’re pushing no harder than the weight of the drill itself.
Chipping Around the Hole (Entry or Exit)
Cause: This is often due to excessive pressure as the bit enters or exits the glass, combined with insufficient support on the exit side.
Solution: As mentioned, once you feel or see the bit about to break through, drastically reduce pressure. Support the exit side with a piece of wood or tape. Going slowly and letting the diamond bit grind rather than cut is key.
When Not to Drill Tempered Glass
Knowing your limits is as important as knowing your tools. There are certain situations where drilling tempered glass is simply not advisable for a DIYer:
- Structural Components: Never attempt to drill tempered glass that is a critical structural component, like load-bearing panes or automotive glass, unless you are a certified professional with specialized equipment. The integrity of the glass is paramount for safety.
- Deep or Complex Holes: If you need to drill multiple holes, very large holes, or holes in intricate patterns, the risk of failure increases significantly. It’s best left to professionals who can perform precise cutting like CNC machining or water-jet cutting.
- Very Thick or Large Panes: Handling, stabilizing, and drilling very large or thick pieces of tempered glass can be challenging and increase the risk of accidents.
- Lack of Proper Tools or Confidence: If you don’t have a variable-speed drill, diamond bits, and aren’t comfortable with precise, slow work, it’s safer to reconsider your project or seek professional help. A botched attempt can be dangerous and costly.
For most small-to-medium sized holes required for hardware, decorative elements, or simple projects, the diamond-tipped bit method is feasible. However, always err on the side of caution. If in doubt, consult a glass specialist.