Target Wood Filler: Which Brand to Buy (Minwax, DAP, Varathane & Gorilla Compared)
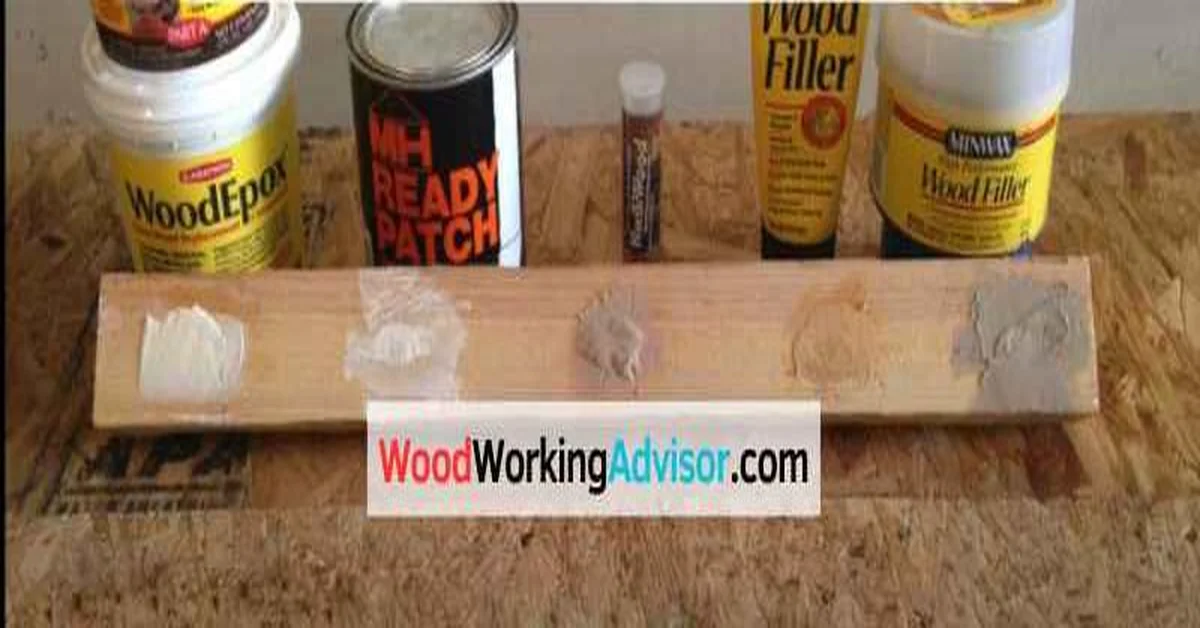
Target doesn’t make its own wood filler – “Target wood filler” means the wood filler brands Target actually stocks: Minwax, DAP, Varathane (Rust-Oleum), and Gorilla. All four fill cracks and holes, sand smooth, and take stain or paint, but they’re not interchangeable, so which one to grab depends on the repair.
If you’ve searched for “Target wood filler” expecting one specific product, that’s a reasonable assumption – but it’s not how Target’s shelves actually work. Like most big-box retailers, Target carries several established wood filler brands side by side rather than a house-brand filler. This guide covers what’s actually in that aisle, how to pick between them, and how to apply whichever one you land on for a smooth, paintable, or stainable repair.
Which Wood Filler Brands Does Target Actually Sell?
Best Wood Filler Pick
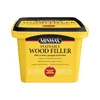
Minwax Stainable Wood Filler (16 oz) – $11.98
One of the actual name-brand fillers sold in Target’s wood-repair aisle – a solvent-based formula that sands smooth and takes stain evenly, matching the stain-compatibility guidance below.
- Best for: Interior furniture repairs that will be stained to match
- Why we picked it: Widely available, sands and stains predictably, dries fast
- Main drawback: Solvent smell during application – use in a ventilated space
Compare more wood filler brands sold at Target
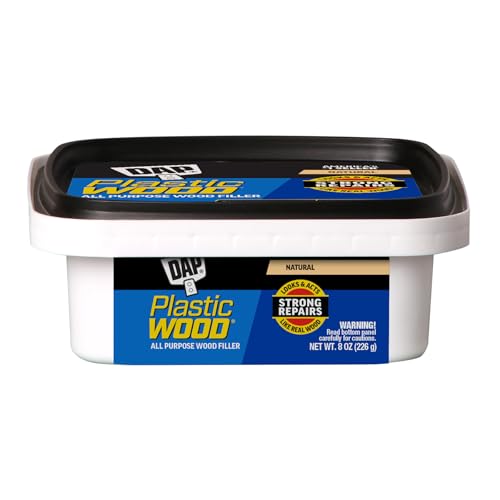
 Option 1 DAP Plastic Wood-X DryDex Filler (16 oz) – $9.93
|
 Option 2 Varathane Golden Oak Wood Filler – $9.97
|
 Option 3 Gorilla All Purpose Wood Filler (16 oz Tub) – $9.39
|
As an Amazon Associate we earn from qualifying purchases.
Target’s wood-repair aisle (in-store or online) rotates a handful of the same well-known brands other hardware retailers carry – it’s not a proprietary Target product. Here’s how the main ones compare:
Brand-By-Brand Comparison
| Brand | Base | Best For |
|---|---|---|
| Minwax Stainable | Solvent-based | Repairs that will be stained to match surrounding wood |
| DAP Plastic Wood-X | Two-part, DryDex | Larger holes and gouges needing real structural fill |
| Varathane | Solvent-based, pre-tinted | Small holes on a specific, common wood tone (oak, walnut, etc.) |
| Gorilla All Purpose | Water-based | Low-odor indoor repairs, easy water cleanup |
None of these is objectively “the” wood filler – the right pick depends on the size of the repair, whether you’re staining or painting over it, and how much odor/VOC exposure you want during application.
Essential For Wood Repair
Whichever brand you pick, wood filler serves the same core repair needs:
- Filling cracks and holes
- Repairing split wood
- Restoring damaged furniture
Good wood filler blends well with different wood types, dries quickly, and sands smoothly.
Types Of Wood Fillers
Choosing the right wood filler can impact your project’s success. Different types serve various needs. Understanding these types helps in making an informed choice.
Water-based Vs. Solvent-based
Wood fillers mainly fall into two categories: water-based and solvent-based. Each type has unique properties.
| Feature | Water-Based Fillers | Solvent-Based Fillers |
|---|---|---|
| Drying Time | Quick drying | Slower drying |
| Cleanup | Easy with water | Requires solvents |
| Odor | Low odor | Stronger odor |
| Durability | Less durable | More durable |
Water-based fillers are ideal for indoor projects. They are easy to apply and clean up. Solvent-based fillers work well outdoors. They offer better durability and resistance.
Choosing The Right Type For Your Project
Select the correct wood filler based on your project needs. Consider the following factors:
- Location: Indoor or outdoor use?
- Surface Type: Smooth or rough wood?
- Finish: Will it be painted or stained?
- Drying Time: How fast do you need it to dry?
For quick repairs, use a water-based filler. For long-lasting fixes, solvent-based is better. Always match the filler to your project’s specific requirements.
Preparation For Application
Proper preparation is key for successful use of Wood Filler. Taking time to prepare the surface ensures better adhesion and a smooth finish. Follow these steps to get the best results.
Surface Cleaning Essentials
Cleaning the surface is crucial before applying wood filler. Dirt, dust, and grease can affect adhesion. Here are some tips:
- Remove Dust: Use a dry cloth or a vacuum.
- Wipe with a Damp Cloth: This helps remove any remaining dirt.
- Dry Completely: Allow the surface to air dry fully.
For stubborn stains, consider using a mild cleaner. Make sure to rinse thoroughly. Let everything dry before moving on.
Sanding Techniques For Better Adhesion
Sanding prepares the wood surface for the filler. It creates a rough texture that improves adhesion. Here’s how to sand properly:
- Choose the Right Sandpaper: Start with 80-grit sandpaper.
- Sand in the Direction of the Grain: This prevents damage.
- Check for Smoothness: Your fingers should feel an even surface.
After sanding, clean the surface again. This removes any dust from the sanding process. Follow these steps to ensure a solid foundation for your Wood Filler.
Application Methods
Applying Wood Filler requires the right techniques. Proper application ensures a smooth finish. Understanding methods helps achieve better results. Here, we explore tools and a step-by-step process.
Tools For Applying Wood Filler
Using the right tools makes application easier. Here are the essential tools:
- Putty Knife: Ideal for spreading filler.
- Sanding Block: Helps smooth the surface after drying.
- Paintbrush: Useful for small, detailed areas.
- Rag: Cleans excess filler from surfaces.
Step-by-step Filling Process
Follow these steps for a successful application:
- Clean the Area: Remove dust and debris.
- Prepare the Filler: Stir the wood filler well.
- Apply the Filler: Use a putty knife to press it in.
- Level the Filler: Smooth it flush with the wood surface.
- Allow to Dry: Follow the manufacturer’s drying time.
- Sand Smooth: Use a sanding block for an even finish.
- Clean Up: Wipe off any excess with a rag.
These steps ensure effective use of Wood Filler. Each step enhances the overall finish.
Drying And Curing Time
Understanding the drying and curing time of Wood Filler is crucial for successful projects. This product needs time to set properly. Knowing the right timing helps achieve a smooth and durable finish.
Factors Affecting Drying Time
Several factors can influence how quickly Wood Filler dries:
- Humidity: High humidity slows down drying.
- Temperature: Warmer temperatures speed up the process.
- Thickness: Thicker applications take longer to dry.
- Airflow: Good airflow helps moisture escape faster.
| Factor | Effect on Drying Time |
|---|---|
| Humidity | Increases drying time |
| Temperature | Decreases drying time |
| Thickness | Increases drying time |
| Airflow | Decreases drying time |
How To Speed Up The Process
Want to reduce drying time? Here are some effective tips:
- Increase Temperature: Use a heater or work in a warm area.
- Enhance Airflow: Use fans to circulate air.
- Apply Thin Layers: Keep applications thin for quicker drying.
- Choose Low Humidity Days: Work on dry days for faster results.
Following these tips can significantly reduce the waiting time for Wood Filler to dry. This makes your project more efficient and enjoyable.
Sanding For A Smooth Finish
Sanding is crucial for achieving a flawless finish with Wood Filler. Proper sanding removes imperfections and prepares the surface for painting or staining. Follow these tips for the best results.
Choosing The Correct Sandpaper Grit
Selecting the right sandpaper grit is key. Different grits serve different purposes:
| Grit Level | Purpose |
|---|---|
| 60-80 | Remove excess filler and rough spots |
| 120-150 | Smooth the surface |
| 220+ | Final sanding for a polished finish |
Techniques For Even Sanding
Use these techniques for an even sanding process:
- Start with a lower grit for excess material.
- Progress to higher grits for smoothness.
- Sand in the direction of the grain.
- Use a sanding block for flat surfaces.
- Check your progress often.
Remember to wear a mask to avoid inhaling dust. Take your time for the best outcome.
Staining And Painting Over Wood Filler
Understanding how to stain and paint over wood filler can enhance your projects. Proper techniques lead to a smooth and professional finish. Wood Filler is a versatile option for many woodworking needs.
Stain Compatibility With Wood Filler
Not all wood fillers work well with stains. Wood Filler is designed to accept stains effectively. Here are some key points:
- Choose a stain that matches your wood type.
- Test the stain on a small area first.
- Use water-based stains for best results.
Staining over wood filler can change its color. Always select a stain that complements the wood filler shade.
Painting Tips For A Seamless Look
Painting over wood filler requires careful attention. Follow these tips for a flawless finish:
- Sand the filled area smoothly.
- Apply a primer before painting.
- Use a high-quality paint for durability.
- Choose a brush or roller based on surface size.
Always allow adequate drying time. This ensures a strong bond between the paint and the wood filler.
Check for any imperfections after the first coat. Sand or touch up areas as needed before applying a second coat.
Troubleshooting Common Issues
Wood Filler is a reliable choice for many projects. Yet, users may face some issues. Below are solutions for common problems like cracking, shrinkage, and adhesion.
Cracking And Shrinkage Solutions
Cracking and shrinkage can happen with wood filler. Here are some tips to fix these issues:
- Use thin layers: Apply the filler in thin layers. This prevents cracking.
- Moisture control: Ensure the area is dry. Moisture can cause shrinkage.
- Choose the right filler: Some fillers are more flexible. This helps reduce cracking.
Here’s a quick comparison of fillers:
| Filler Type | Flexibility | Best Use |
|---|---|---|
| Water-Based | Medium | Indoor projects |
| Solvent-Based | High | Outdoor projects |
Adhesion Problems And Fixes
Poor adhesion is another common issue. Here are some effective fixes:
- Clean the surface: Remove dust and debris. A clean surface helps adhesion.
- Sand the area: Lightly sand the wood before applying filler. This creates a better bond.
- Use a primer: A primer can enhance adhesion. Apply it before the filler.
- Check temperature: Ensure the temperature is ideal. Cold temperatures can affect adhesion.
These steps will help ensure strong adhesion for your wood filler.
Maintenance And Repairs
Keeping your wood surfaces in great shape requires regular attention. Using Wood Filler is a fantastic start. Proper maintenance ensures the durability and appearance of your filled areas. Regular checks help you catch problems early. This section covers long-term care and how to address future damage.
Long-term Care For Filled Wood
Maintaining filled wood areas helps preserve their look. Follow these tips for long-term care:
- Clean Regularly: Use a soft cloth and mild soap.
- Avoid Moisture: Keep filled areas dry. Use coasters on surfaces.
- Inspect Periodically: Check for cracks or signs of wear.
- Reapply Finish: Apply a protective finish every few years.
This care extends the life of your wood filler. Regular attention makes a big difference.
How To Address Future Damage
Even with care, damage can happen. Here’s how to manage it:
- Assess the Damage: Look closely at the area. Identify cracks or chips.
- Clean the Area: Remove dust and debris. Use a vacuum or damp cloth.
- Apply Wood Filler: Fill the damaged area. Smooth it out carefully.
- Sand Smooth: Once dry, sand the filled area until it’s even.
- Refinish the Surface: Apply a matching finish to blend it in.
Following these steps keeps your wood looking fresh. Quick repairs prevent bigger issues later.
Eco-friendly And Health Considerations
Choosing the right wood filler can affect your health and the environment. Many traditional fillers contain harmful chemicals. Opting for eco-friendly options helps protect both. Understanding low-VOC (Volatile Organic Compounds) products is crucial for safe use.
Selecting Low-VOC Wood Fillers
Low-VOC wood fillers are safer for indoor use. They emit fewer harmful fumes. Here are some tips for selecting them:
- Check the label for low-VOC certification.
- Look for fillers made from natural ingredients.
- Research brands known for eco-friendly practices.
- Read customer reviews for safety feedback.
Some popular low-VOC wood fillers include:
| Brand | Type | VOC Level |
|---|---|---|
| Elmer’s Carpenter’s Wood Filler | Water-Based | Low |
| Minwax Wood Filler | Solvent-Based | Medium |
| Bondo Home Solutions | Two-Part Epoxy | Low |
Safety Tips For Indoor Use
Using wood fillers indoors requires special care. Follow these safety tips:
- Ventilate the area well. Open windows and doors.
- Wear gloves to protect your skin.
- Use a mask to avoid inhaling fumes.
- Keep children and pets away from the area.
- Store products in a cool, dry place.
Staying safe while using wood fillers makes your project enjoyable. Choose eco-friendly options for a healthier environment.
Advanced Techniques For Professionals
Wood Filler offers advanced methods for professionals. These techniques ensure flawless results and efficient application. Mastering these strategies can elevate your woodworking projects significantly.
Color-matching And Custom Mixes
Achieving the perfect color match is crucial for any project. Here are some steps to create custom mixes:
- Identify the wood type and grain.
- Choose a base filler color close to the wood.
- Add pigment gradually until the desired shade is achieved.
Using a color wheel can help in selecting complementary shades. Test the mix on a scrap piece before applying it to the project. This ensures the final look matches your vision.
Innovative Application Strategies
Efficient application can save time and improve results. Here are some strategies:
- Use a putty knife for even spreading.
- Apply multiple thin layers instead of one thick layer.
- Sand between layers for a smooth finish.
Consider using a caulking gun for precise application in tight spots. A small artist brush can also help fill tiny cracks. Always work in a well-lit area to see imperfections easily.
| Technique | Benefits |
|---|---|
| Color-Matching | Ensures seamless blending with the wood. |
| Thin Layers | Reduces drying time and minimizes cracks. |
| Precision Tools | Allows for detailed work in hard-to-reach areas. |
Conclusion: Achieving Flawless Finishes
Wood Filler plays a crucial role in creating smooth surfaces. This product fills gaps, cracks, and imperfections. The right application leads to stunning results. Mastering this skill enhances your woodworking projects.
Summarizing Key Takeaways
Here are the main points to remember:
- Easy Application: Apply with a putty knife for best results.
- Quick Drying: Dries fast, allowing for quicker sanding.
- Sanding Smooth: Sand after drying for a flawless finish.
- Paintable: Can be painted or stained to match your project.
Encouragement For Perfecting Your Skill
Practice makes perfect. Start with small projects to build confidence. Here are some tips:
- Use a clean, dry surface for better adhesion.
- Apply multiple thin layers if needed.
- Sand lightly between layers for a smoother finish.
- Experiment with different tools for application.
Every step brings you closer to perfection. Enjoy the process and watch your skills grow!
Frequently Asked Questions
What Is Wood Filler Used For?
Wood Filler is designed to repair and fill imperfections in wood surfaces. It’s ideal for fixing cracks, holes, and scratches, providing a smooth finish. This product is perfect for both indoor and outdoor projects, ensuring durability and a seamless appearance on furniture and fixtures.
How Do I Apply Wood Filler?
To apply Wood Filler, start by cleaning the surface thoroughly. Use a putty knife to scoop the filler and press it into the damaged area. Smooth it out, allow it to dry, and sand it for a polished finish.
Always follow the manufacturer’s instructions for best results.
Can I Paint Over Wood Filler?
Yes, you can paint over Wood Filler once it’s fully dry. It accepts paint and stain well, ensuring a uniform look. For the best results, sand the filled area before painting. This will create a smooth surface that blends seamlessly with the surrounding wood.
How Long Does Wood Filler Take To Dry?
Wood Filler typically dries within 30 to 60 minutes, depending on the thickness applied and environmental conditions. However, for heavier applications, it’s best to wait a few hours before sanding or painting. Always check the product label for specific drying times and recommendations.
Does Target Sell Its Own Brand Of Wood Filler?
No. Target doesn’t manufacture a house-brand wood filler. Its wood-repair aisle stocks established brands like Minwax, DAP, Varathane, and Gorilla, the same brands sold at most hardware and home-improvement retailers. “Target wood filler” simply means whichever of these brands is currently in stock at Target.
Conclusion
Choosing the right wood filler can make a significant difference in your projects. Whichever Target-shelf brand you pick – Minwax, DAP, Varathane, or Gorilla – match it to the repair size and finish method above rather than assuming any one product is the default. Invest a few extra minutes matching filler to project, and you’ll get a lasting, polished result.
Sponsored / affiliate links. As an Amazon Associate I earn from qualifying purchases. I may earn additional commission from eligible campaigns.